Configuring Reverse Proxy using Ansible roles on local host and on Aws


What is Ansible? Ansible is an open-source software provisioning, configuration management, and application-deployment tool enabling infrastructure as code.[2] It runs on many Unix-like systems, and can configure both Unix-like systems as well as Microsoft Windows. It includes its own declarative language to describe system configuration. Ansible was written by Michael DeHaan and acquired by Red Hat in 2015. Ansible is agentless, temporarily connecting remotely via SSH or Windows Remote Management (allowing remote PowerShell execution) to do its tasks.
Ansible roles-: Roles provide a framework for fully independent, or interdependent collections of variables, tasks, files, templates, and modules. In Ansible, the role is the primary mechanism for breaking a playbook into multiple files. This simplifies writing complex playbooks, and it makes them easier to reuse. The breaking of playbook allows you to logically break the playbook into reusable components. Each role is basically limited to a particular functionality or desired output, with all the necessary steps to provide that result either within that role itself or in other roles listed as dependencies. Roles are not playbooks. Roles are small functionality which can be independently used but have to be used within playbooks. There is no way to directly execute a role. Roles have no explicit setting for which host the role will apply to. Top-level playbooks are the bridge holding the hosts from your inventory file to roles that should be applied to those hosts.
Ansible Configuration File:-
How to create Roles?
For creating roles, We run the following command:- ansible-galaxy role init
This will create a Role in the same folder but if you want to store your Roles in a different location than /etc/ansible/roles/ , set the roles_path configuration option so Ansible can find your roles.
webserver role created.jpg
If you want to see the directory structure of the role:-
tree
tree.jpg
Now to change directory to vars and create main.yml where you can write all the variables:-
main created.jpg main.yml:-
vars file for webserver
packages:
    - httpd
    - php
Now change directory to the files , this directory contains the files which we want to use or transfer.
index.jpg index.php:-
Now change directory to tasks , this file contains the main file but without tasks.
task main yml.jpg main.yml
tasks file for webserver
name: Installing Packages package:
    name: '{{ item }}'
    state: present
loop: '{{ package_names }}'
name: Starting webserver service:
    name: httpd
    state: started
name: Copying copy:
    src: 'home.php'
    dest: '/var/www/html/home.php'
So we have finally configured Web server . Now we create a role for Configuring Load-Balancer:-
loadbalancer role.jpg
The configuration of Load-Balancer is almost same as the Web-Server.
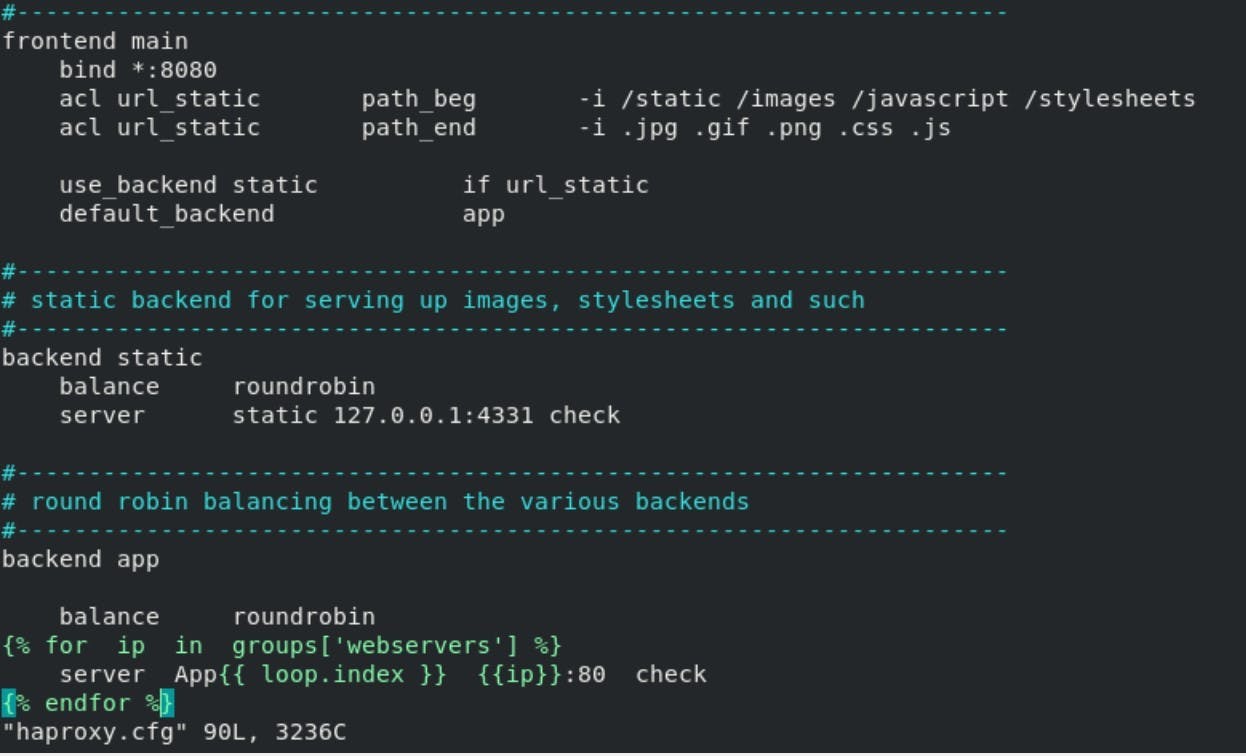
First of all, change directory to templates and take the normal haproxy.cfg file and by using jinja templating edit it so that it automatically add IP's of webservers to the file:-
templates.jpg haproxy.cfg:-
haproxycfg.jpg
#------------------------------------------------------------------ backend app
balance roundrobin
{% for ip in groups['webservers'] %} server App{{ loop.index }} {{ip}}:80 check {% endfor %}
Change directory to tasks and create main.yml :-
task main yml lb.jpg main.yml
tasks file for loadbalancer
name: installing Haproxy package:
    name: haproxy
    state: present
name: Starting Haproxy
    name: haproxy
    state: started
name: Uploading configuration file for Haproxy template:
    src: "haproxy.cfg.j2"
    dest: "/etc/haproxy/haproxy.cfg"
So our Load-balancer role is successfully configured, now it's time to combine both the roles:-
To combine both roles we have to create a yml file which can run both roles. mainrole.yml
hosts: load_balancer roles:
- role: loadbalancerhosts: webservers roles:
- role: webserver
ansible main.jpg
Now we run the Playbook by using:-
ansible-playbook mainrole.yml
webserver configured.jpg load balancer configured.jpg
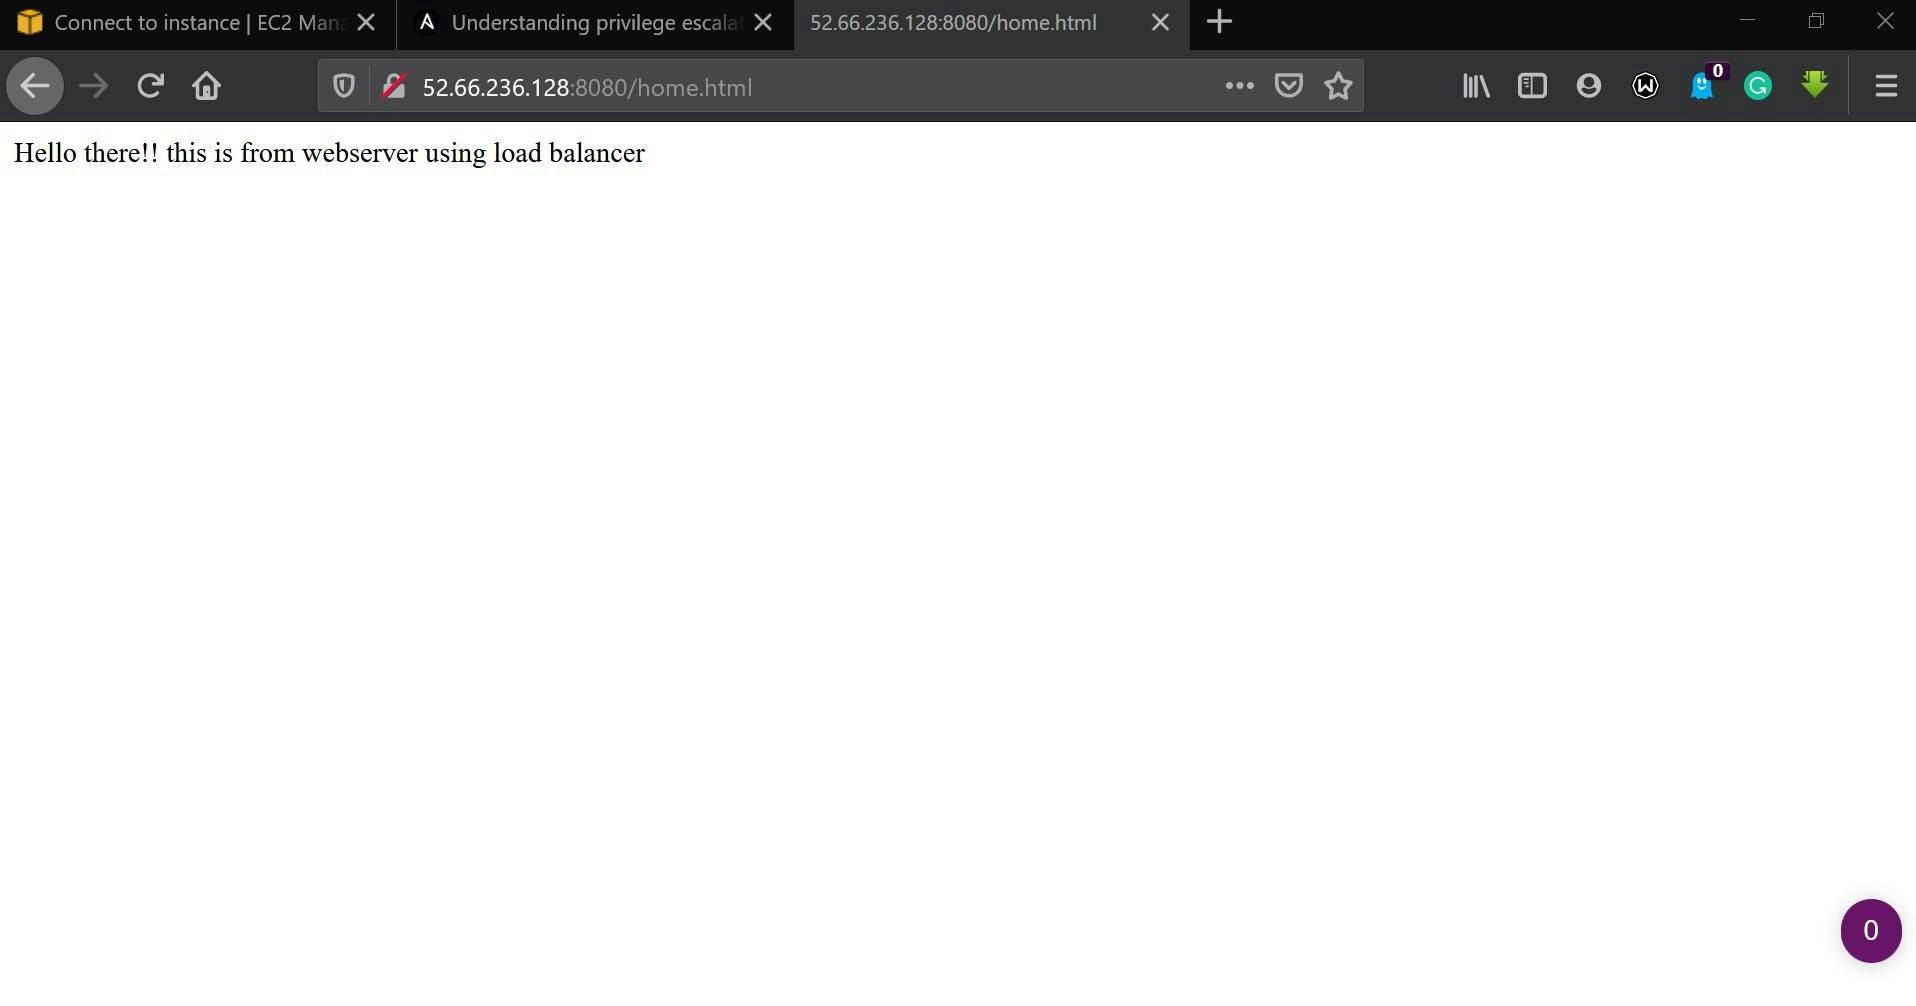
Now search the IP address of the load-balancer machine in Browser to check if the Webserver and Load Balancer working properly or not.
webbrowser.jpg
Now as you can see the Webserver and Load Balancer working properly means our task is successful.
Configuring haproxy on aws Ansible Inventory file:-
[webservers] 52.66.251.239 ansible_user=ec2-user ansible_ssh_private_key_file=/root/Aws/master.pem ansible_connection=ssh
[load_balancer] 52.66.236.128 ansible_user=ec2-user ansible_ssh_private_key_file=/root/Aws/balancer.pem ansible_connection=ssh
AWS instances by default login as ec2-user by which we cannot download HAproxy so first we have to escalate the privileges to root user.
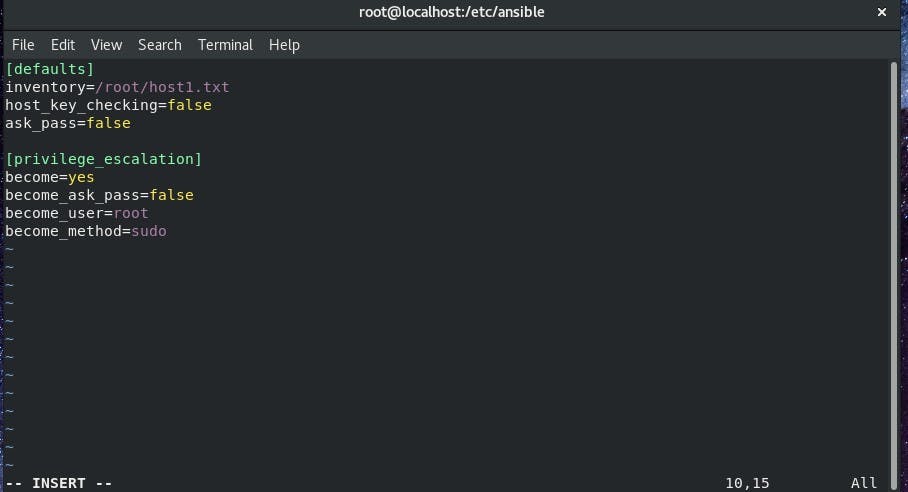
To escalate the privileges we have to edit ansible.cfg ansible.cfg file :-
[defaults] inventory=/root/Ansible/ip.txt host_key_checking = false ask_pass = false
[privilege_escalation] become=yes become_ask_pass=false become_user=root become_method=sudo
Changes in haproxy.cfg file
which we upload from controller node:-
 fg file.jpg Now, we write a code in Ansible to configure HAproxy and Webservers.
haproxy.yml file:-
fg file.jpg Now, we write a code in Ansible to configure HAproxy and Webservers.
haproxy.yml file:-
hosts: load_balancer
tasks:
    - name: Downloading Haproxy
      package:
              name: "haproxy"
              state: present

    - name: Copying Haproxy configuration files
      template:
              src: "haproxy.cfg"
              dest: /etc/haproxy/
      notify:
              - Restarting Load Balancer

    - name: Starting Haproxy
      service:
              name: haproxy
              state: started
handlers:
    - name: Restarting Load Balancer
      service:
              name: haproxy
              state: restarted
hosts: webservers
tasks:
    - name: Installing httpd
      package:
              name: "httpd"
              state: present

    - name: Copying HTML files
      copy:
              src: "/root/Ansible/home.html"
              dest: /var/www/html/
      notify:
              - Restarting httpd

    - name: Starting httpd
      service:
              name: httpd
              state: started
handlers:
    - name: Restarting httpd
      service:
              name: "httpd"
              state: restarted
Now run the program:-

As you can see the program ran successfully, now its time to check the changes by entering the IP address of the reverse proxy server in the webserver.