
Embedded AI Learning Diary1: How to Deploy the AI Model on the Embedded Platform?


This series of articles teach you step-by-step, how to deploy the AI model on the embedded platform, and port it to the RT-Thread opensource operating system!
Development Environment:
The development process is based on the STM32H743ZI-Nucleo board and the STM32CubeMX.AI tool is used as it supports automatically generating various embedded projects (including but not limited to MDK, STM32CubeIDE, etc.) based on a trained AI Model (Keras/TF-Lite only). The tool is easy to get started and is suitable for embedded AI start-up development.
1. Preparation
1.1 Install Development Environment
The operating system I use is Ubuntu 18.04. This tutorial also applies to Windows environments, with exactly the same experimental steps. The following development tools are used in this experiment:
- STM32CubeMx
- STM32CubeIDE
- STM32CubeProgrammer
The STM32Cube may cause the following errors in the ubuntu environment:
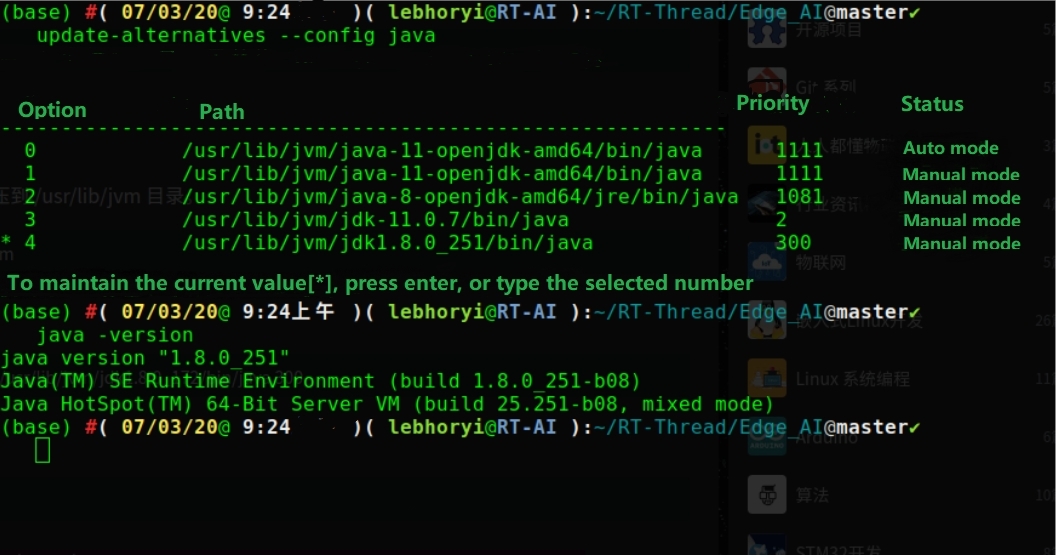
After installation, When running the executable files under the ‘bin’ folder in the terminal, an error is reported: the main class “com.st.app.Main” cannot be found or loaded, so you need to change Ubuntu’s default Open-JDK into Oracle JDK, as shown below:
1# sudo tar zxvf jdk-8u172-linux-x64.tar.gz -C /usr/lib/jvm
2# sudo update-alternatives — install /usr/bin/java java /usr/lib/jvm/jdk1.8.0_172/bin/java 300
3# sudo update-alternatives — config java
4# java -version
1.2 Build a Minimalist Neural Network on the PC Side
Start by cloning the following open source repositories to the local: Github: github.com/Lebhoryi/Edge_AI/tree/master/Pro..
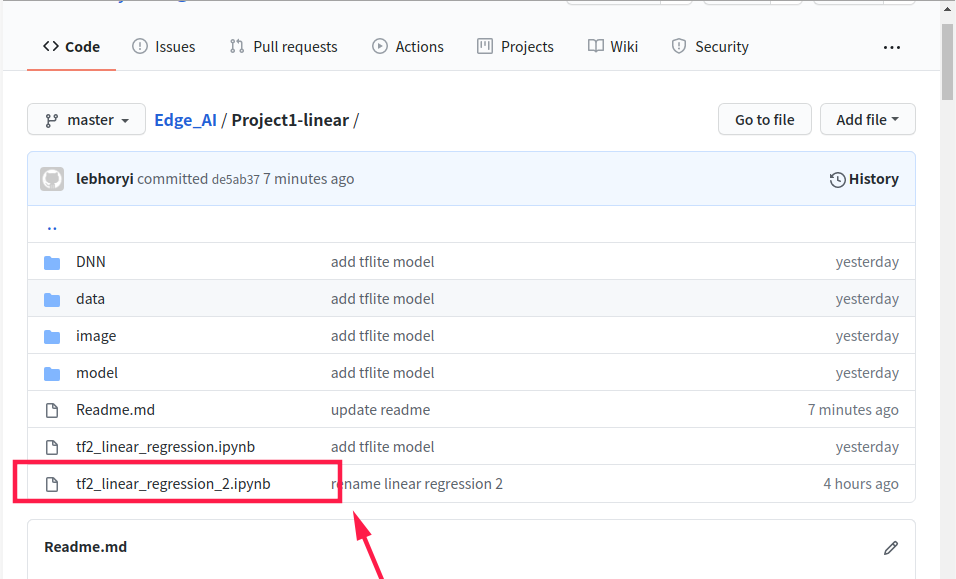
In this experiment, I chose the simplest Linear Regression Tensor Flow2 Demo as an example, and the model-related source file specifications are as follows:
tf2_linear_regression.ipynbcontains three different ways to construct the networktf2_Linear Regressions 'Extended.ipynbcontains different ways to train models
Note that there are 3 ways to build the model:
- Sequence
- Functional API
- Subclasses
When you import the AI model into CubeMx, you will encounter the following errors if you use the network model generated in the latter two ways:
1INVALID MODEL: Couldn't load Keras model /home/lebhoryi/RT-Thread/Edge_AI/Project1/keras_model.h5,
2error: Unknown layer: Functional
The temporary solution is to build a neural network in the form of a Sequence, and the trained AI Model is saved as Keras format, with a suffix of .h5, such as keras_model.h5.
The sample model I have saved, you can directly download the model for experiments, Here’s the download address.
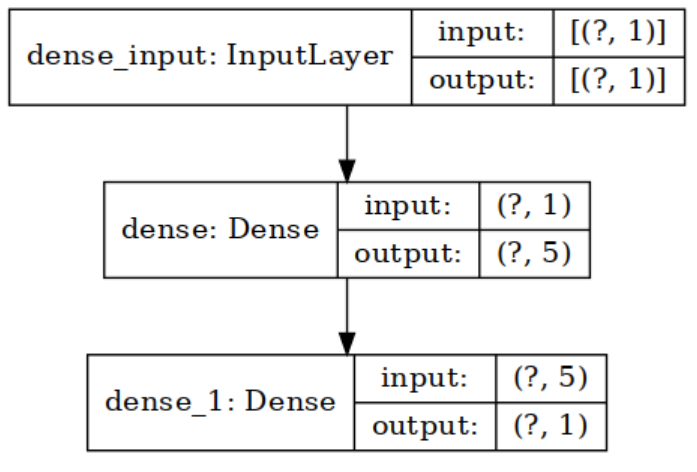
The neural network model structure trained in this example is as follows:
2.Generate Project by CubeMX AI
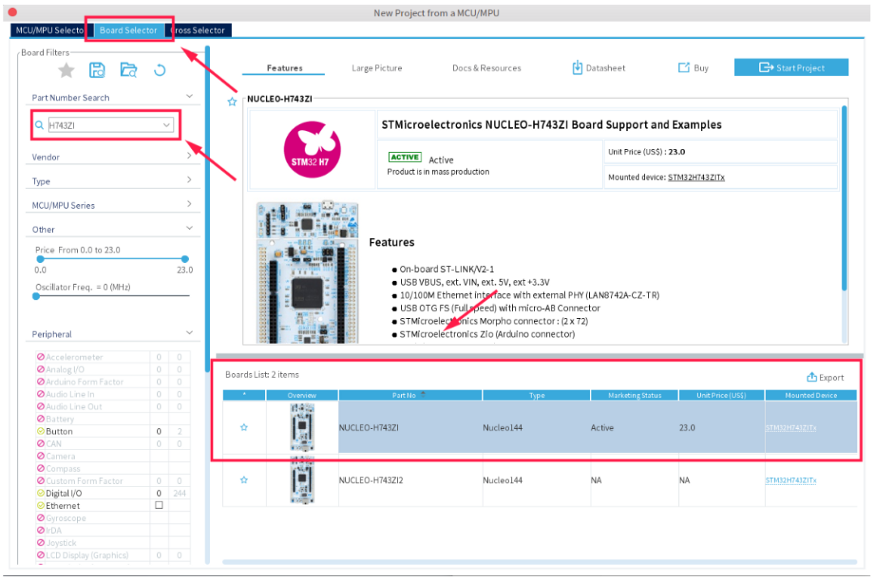
Select the STM32H743ZI Nucleo development board in CubeMX, where there are no restrictions on board models.
2.1 Open CubeMX

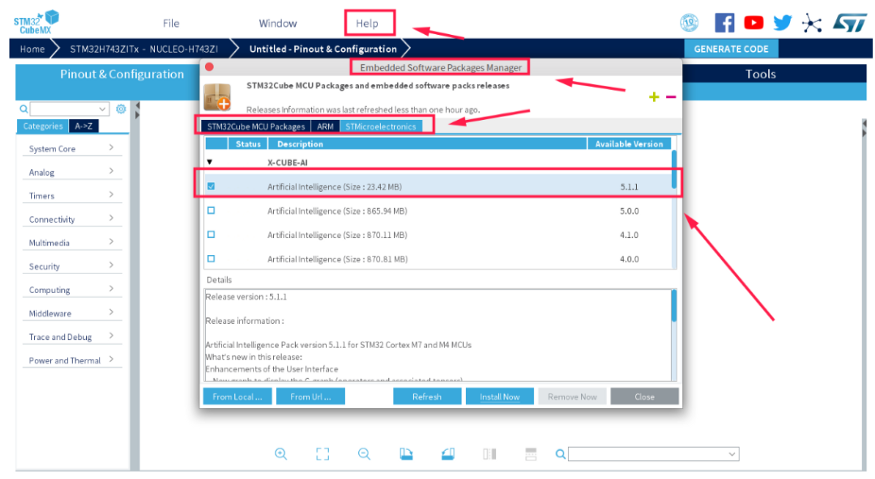
2.2 Install CUBE-AI Software Package
Open Help in the menu bar, select Embedded Software Packages Manager, and then select the latest version of the X-CUBE-AI plug-in in the STMicroelectronicSTs column, and click Close in the lower right corner after installation.
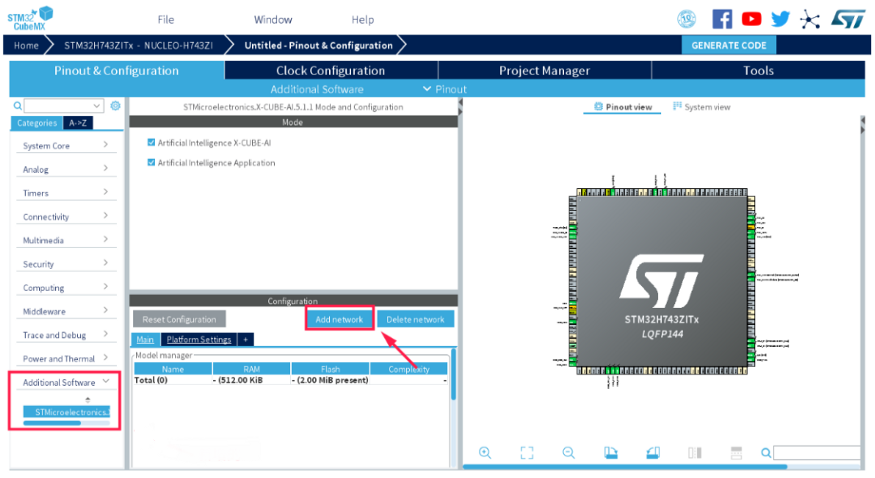
Import X-CUBE-AI plug-in in your project:
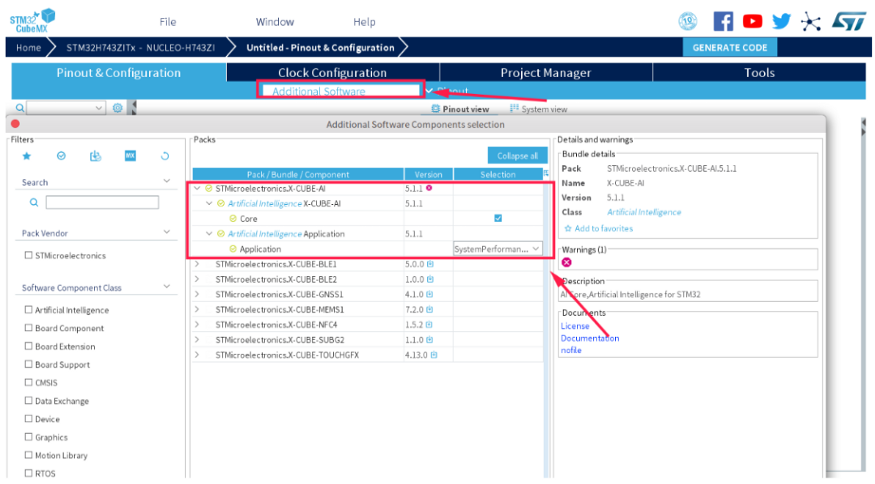
The following interface appears:
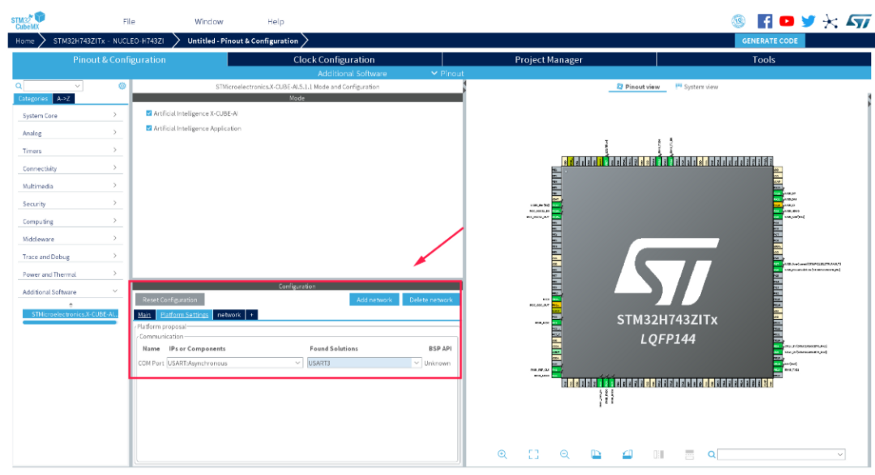
Next, select the serial port for communication, and here we select serial 3 because this serial port is used as the virtual serial port of the ST link.
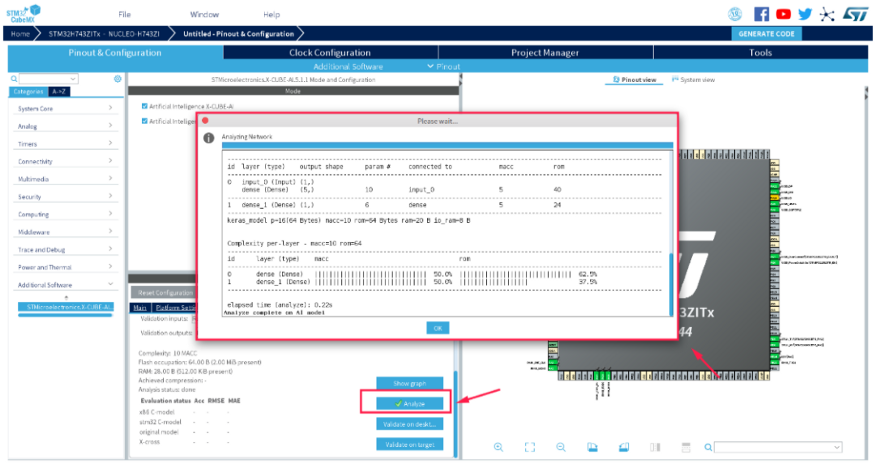
2.3 Import AI Model to Project

Before burning the AI model to the development board, you need to analyze the Model to see if it can be converted to the embedded project properly, and the model we use in this experiment is simple and can be analyzed more quickly, with the results as follows:
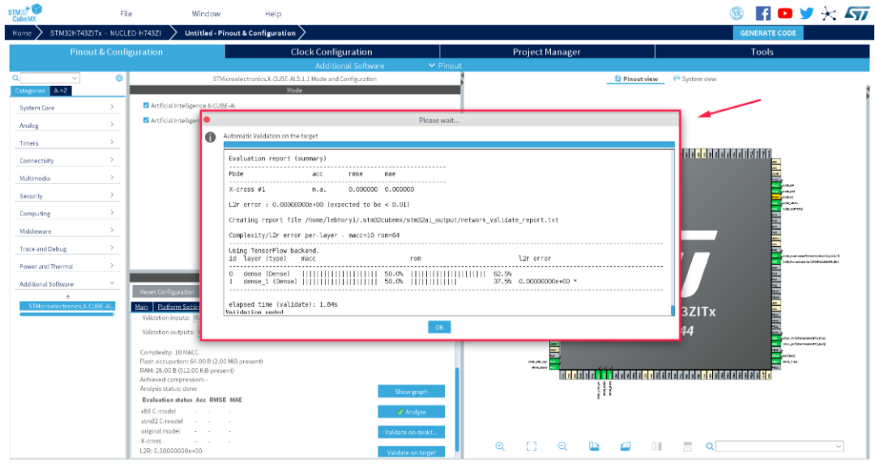
Next, we’ll validate the converted embedded project on the board, in which the CubeMX AI tool automatically generates the embedded project based on the AI model you imported, and burns the compiled executable file into the board and verifies the running results through STlink’s virtual serial port. Since Ubuntu does not support MDK, so I have to choose to automatically generate the STM32CubeIDE project here.

The validated result is shown as follows:
2.4 Generate Project
We just verified the project results in the previous step, now we are going to generate project source code, as shown in the following image:

The generated Project folder tree looks like this:
1(base) #( 07/03/20@10:51 am )( lebhoryi@RT-AI ):~/RT-Thread/Edge_AI@master✗✗✗
 2   tree -L 2 ./Project1
 3./Project1
 4├── DNN  # CubeMX Generate Project Path
 5│   ├── DNN.ioc  # CubeMX file
 6│   ├── Drivers
 7│   ├── Inc
 8│   ├── Middlewares
 9│   ├── network_generate_report.txt
10│   ├── Src
11│   ├── Startup
12│   ├── STM32CubeIDE
13│   ├── STM32H743ZITX_FLASH.ld
14│   └── STM32H743ZITX_RAM.ld
15├── image  # Related picture save folder
16│   ├── mymodel1.png   # model
17│   └── STM32H743.jpg  # H743
18├── model  # model Save path
19│   └── keras_model.h5
20├── Readme.md
21├── tf2_linear_regression.ipynb
22└── tf2_ Regressions_Extended.ipynb
At this point, we are finishing most of the works, the rest we need to do is debugging.
3. Code Debugging
Get to know STM32CubeIDE, please refer to Here.
3.1 Import Project
Select the File option →import:
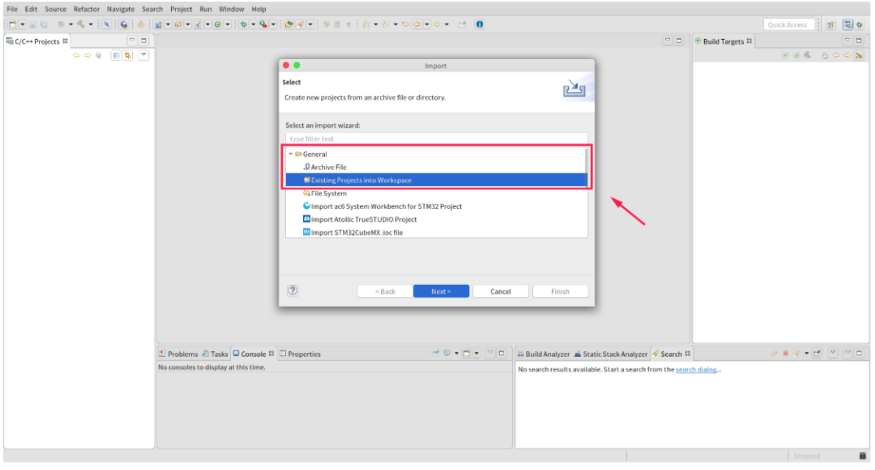
Select the path of the previous export project:

The interface for a successful import looks like this:
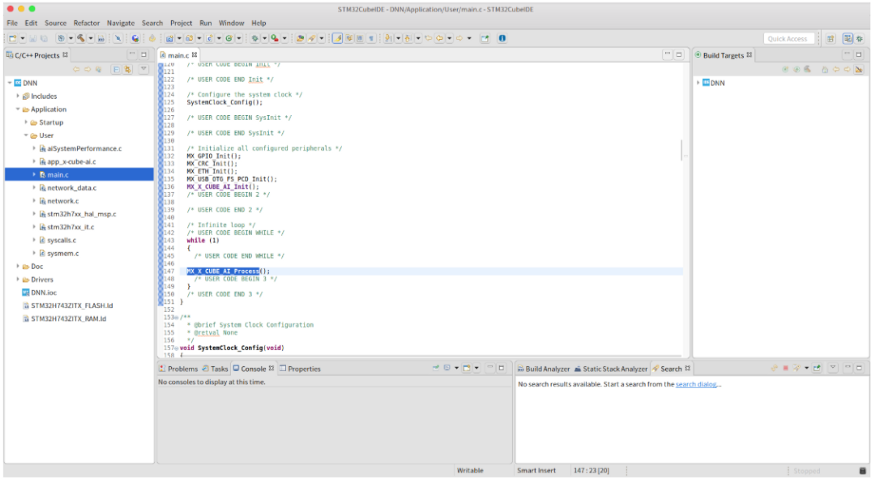
We can then use the STM32Cube IDE to debug the generated project.
3.2 Generate bin File
The corresponding bin file is automatically generated during compilation, which can be burned to the board later by the stm32cubeProgramer tool.

3.3 Burn .bin File
Open STM32CubeProgramming, click connect in the upper right corner, then select Open file and select the .bin file we want to open.

The dialogue for successful burning:

3.4 Others
In the ubuntu system, we can use the serial tool cutecom to view the running results of the final program, as follows:
Before using the cutecom connection serial port, remember to disconnect the STM32Programer and the development board, otherwise there will be an error when opening the serial-port.

RT-Thread Contact Info: