


Forwarded from CNX-Software.com.
This article describes how to “port” RT-Thread Nano to the RISC-V architecture, using the Eclipse IDE, GCC toolchain, and a basic project for the Gigadevice GD32V103 MCU.
RT-Thread was born in 2006, it is an open-source, neutral, and community-based real-time operating system (RTOS). RT-Thread has a Standard version and Nano version.
- For resource-constrained microcontroller (MCU) systems, the NANO kernel version that requires only 3KB Flash and 1.2KB RAM memory resources can be tailored with easy-to-use tools;
- For resource-rich IoT devices, RT-Thread can use the on-line software package management tool, together with system configuration tools, to achieve intuitive and rapid modular cutting, seamlessly import rich software packages, thus achieving complex functions like Android's graphical interface and touch sliding effects, smart voice interaction effects, and so on.
The main steps for porting Nano are as follows:
- Prepare a basic Eclipse project and get the RT-Thread Nano source code.
- Add the RT-Thread Nano source code to the base project and add the corresponding header path.
- Modify Nano, mainly for the interrupt, clock, memory, and application, to achieve porting.
- Finally, configure the Nano OS for your application. Nano is customizable and can be tailored to the system via rtconfig.h file.
Preparations
Download RT-Thread Nano source code :
Create a basic bare-metal project in Eclipse such as a blinking LED sample code.
Prepare a basic project
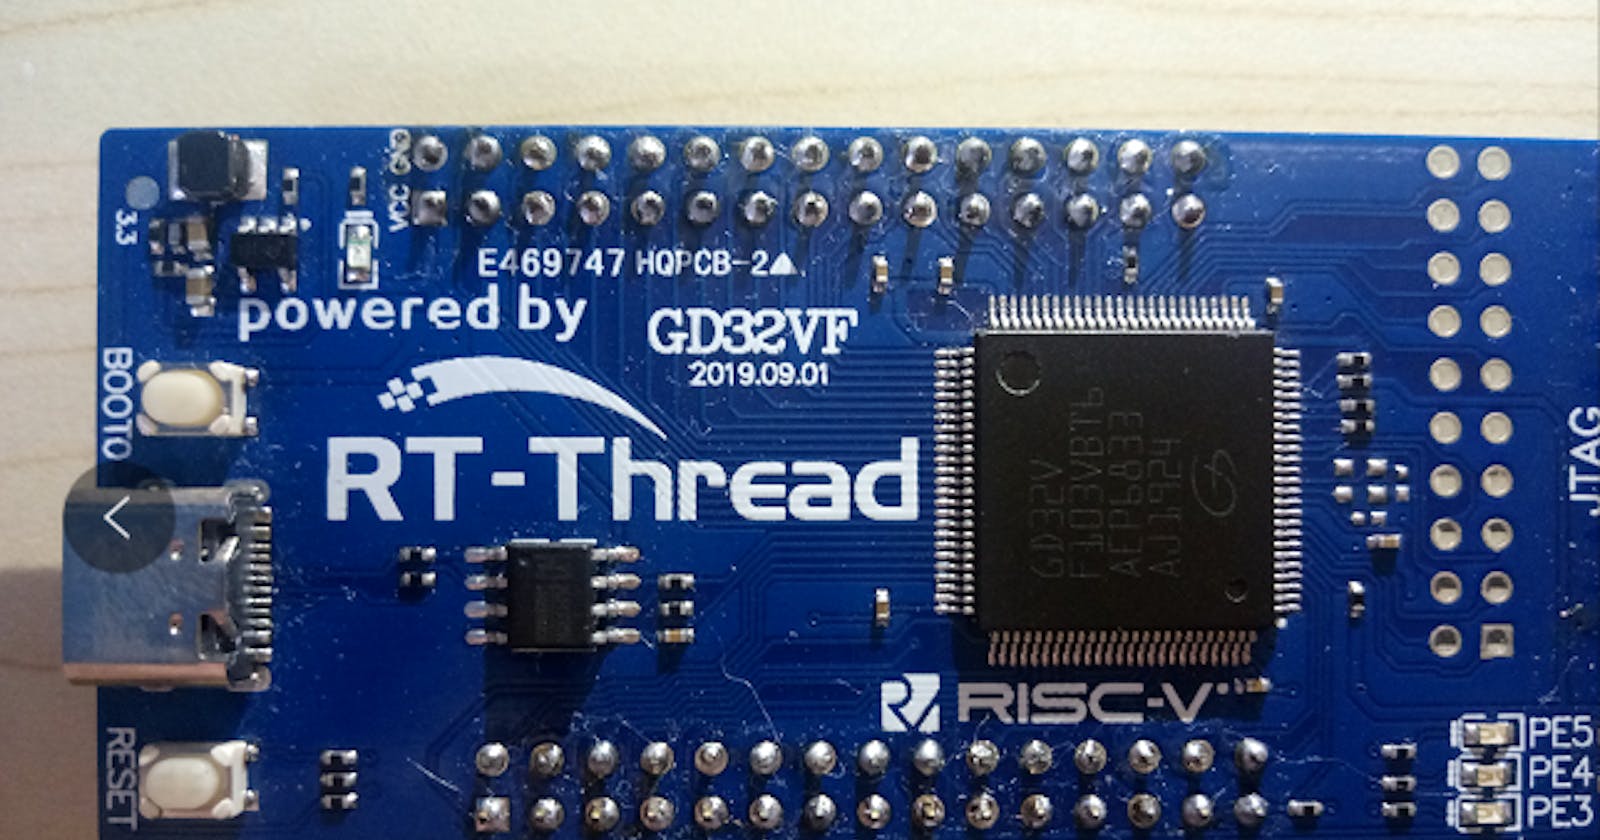
Before we can port the RT-Thread Nano, we need to create a working bare metal project. As a sample, this article uses the blinking LED program based on GD32V103. The main routine of the program is as follows:
int main(void)
{
    gd_eval_led_init(LED1);

    while (1)
    {
        gd_eval_led_on(LED1);
        delay_1ms(1000);
        gd_eval_led_off(LED1);
        delay_1ms(1000);
    }
}
In our program, the system initialization and blinking LED function are mainly done, and once the downloader is compiled, you can see that the LED on the development board is flashing. You can complete a similar bare-metal project using the chip you need.
Add RT-Thread Nano to project
Add Nano source file
Create a new rtthread folder under the Eclipse project and add the following folders and files to the folder:
include, libcpu, and src folders from the Nano source code. Note that libcpu retains only files related to the chip architecture, such as bumblebee and common used in the sample.
Configuration files in rtthread-nano/bsp: board.c and rtconfig.h.

Reopen the Eclipse workspace, import the project, and rtthread folder is loaded into the project:
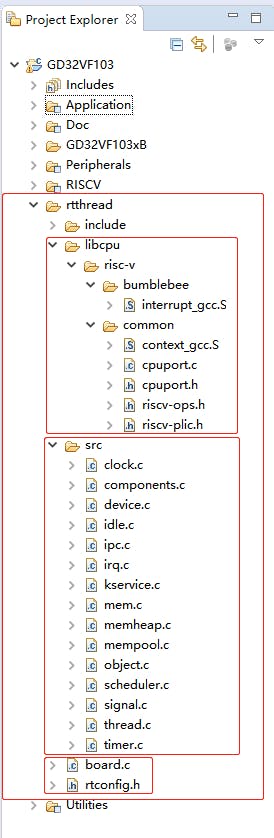
The RISC-V chip kernel code: context_gcc.s and cpuport.c
Kernel files include: clock.c, components.c, device.c, idle.c, ipc.c, irq.c, kservice.c, mem.c, object.c, scheduler.c, thread.c, timer.c
Board configuration code and profiles: board.c, rtconfig.h
Add a header file path
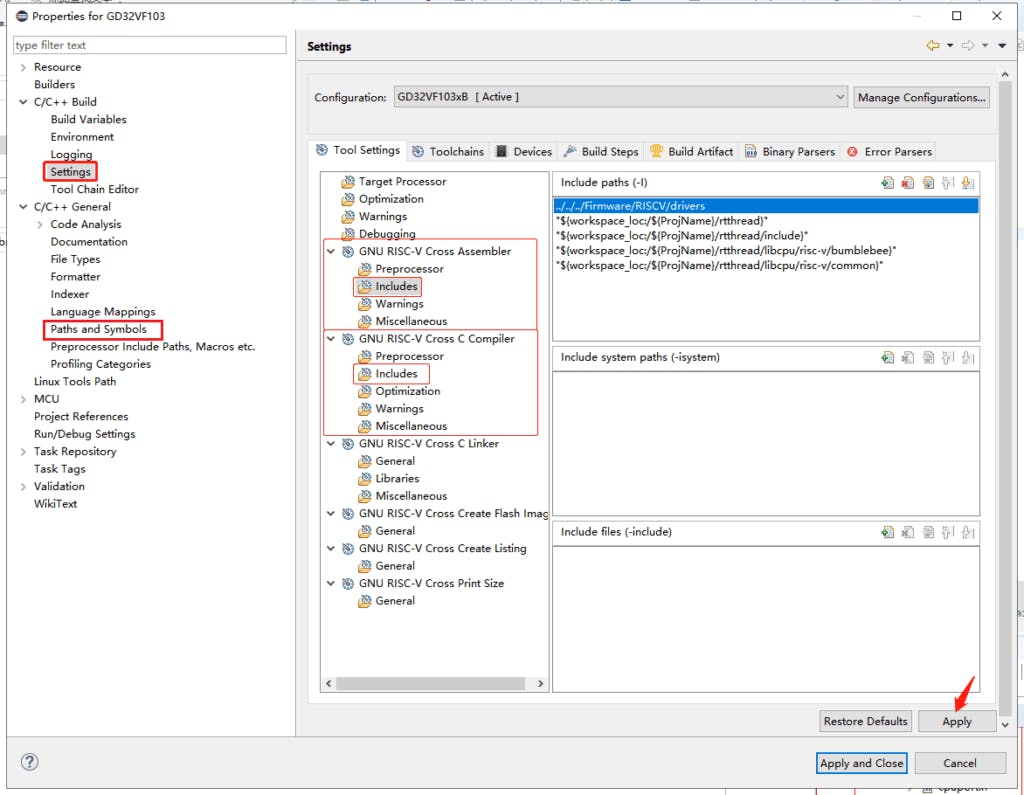
Right-click on the project, click Properties into the interface shown in the image below, click C/C++ Build -> Settings, respectively add the assembler and C header path: add the path to the location of the rtconfig.h header file, add the header file path under the include folder. Then click C/C++ General -> Path and Symbols, add the corresponding header file, and finally click on the Apply button.
Fit RT-Thread Nano
Modify start.S
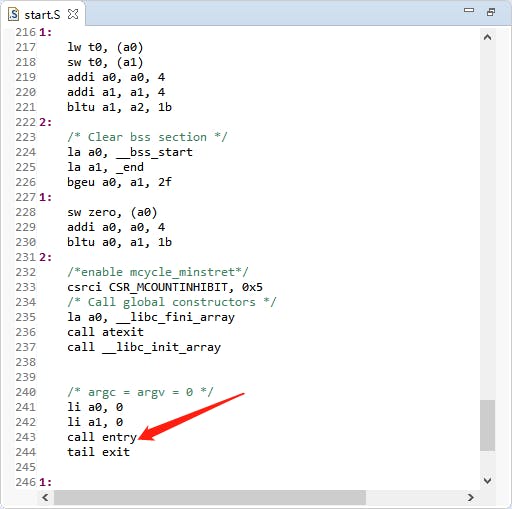
Modify the startup file to implement the code to boot RT-Thread using the entry() function called by the startup function rt_thread_startup (). The startup file start.S needs to be modified so that it jumps to the entry() function to execute at startup, rather than jump to main(), thus booting RT-Thread.
/* How RT-Thread starts under GCC*/
int entry(void){
    rtthread_startup();
    return 0;
}
Interrupts and exception handling
RT-Thread provides an interrupt management interface when the system does not implement such function, and the physical interrupt is associated with the user’s interrupt service routine. The interrupt management interface is used to manage the interrupt so that the corresponding interrupt can be triggered and the interrupt service routine is executed when the interrupt occurs.
The GD32VF103 chip in this routine provides an interrupt vector in the startup file, and the user can implement the corresponding IRQ directly using the function provided by the interrupt vector. When an interrupt is triggered, the processor directly determines which interrupt source is triggered and then jumps directly to the appropriate fixed location for processing, eliminating the need to implement interrupt management on its own.
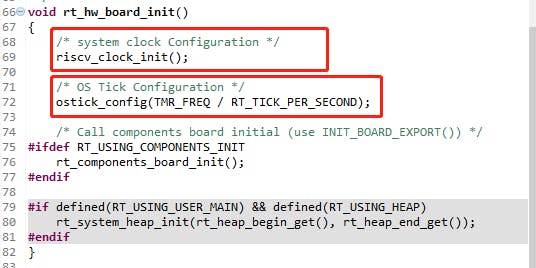
System Clock Configuration
The System Clock Configuration (which provides a working clock for the MCU core and peripherals) and OS Tick Configuration (a heartbeat for the operating system) is required in board.c file.
The configuration sample is shown in the following image with riscv_clock_init() configuring the system clock, and ostick_config() the system tick.
riscv_clock_init() configures the system clock as shown below:
void riscv_clock_init(void)
{
    SystemInit();

    /* ECLIC init */
    eclic_init(ECLIC_NUM_INTERRUPTS);
    eclic_mode_enable();
    set_csr(mstatus, MSTATUS_MIE);
}
OS Tick is implemented using a hardware timer, requiring the user to implement the interrupt service routine eclic_mtip_handler() of the hardware timer in board.c, and call RT-Thread rt_tick_increase().
/* This is the timer interrupt service routine. */
void eclic_mtip_handler(void)
{
    /* clear value */
    *(rt_uint64_t *)(TMR_CTRL_ADDR + TMR_MTIME) = 0;

    /* enter interrupt */
    rt_interrupt_enter();
    /* tick increase */
    rt_tick_increase();

    /* leave interrupt */
    rt_interrupt_leave();
}
Because the eclic_mtip_handler() interrupt service routine is reimplemented by the user in board.c and call an OS/system tick, the pre-defined eclic_mtip_handler needs to be removed to avoid duplicate definitions at compile time. If the project compiles successfully with no errors, then no further modifications are required.
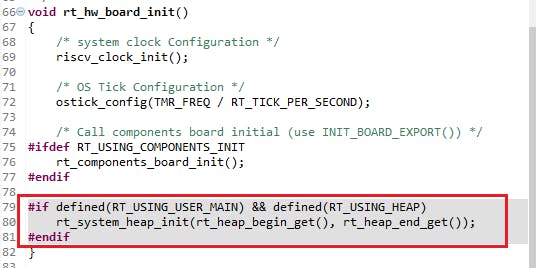
Memory heap initialization
The initialization of the system memory heap is done in the rt_hw_board_init() function found in board.c. Whether the memory heap function is used depends on whether the macro RT_USING_HEAP is enabled, and RT-Thread Nano does not enable the memory heap function by default. This keeps a smaller size without opening up space for the memory heap.
Enabling the system heap allows you to use dynamic memory functions such as the API that uses rt_malloc, rt_free, and various other functions to dynamically create objects. If you need to use the system memory heap functionality, you can turn on the macro definition of RT_USING_HEAP, where the memory heap initialization function rt_system_heap_init() will be called, as follows:
Initializing the memory heap requires the heap’s start and end addresses. The size of the array can be changed manually, as follows:
#if defined(RT_USING_USER_MAIN) && defined(RT_USING_HEAP)
#define RT_HEAP_SIZE 1024
static uint32_t rt_heap[RT_HEAP_SIZE];  // heap default size: 4K(1024 * 4)
RT_WEAK void *rt_heap_begin_get(void)
{
    return rt_heap;
}

RT_WEAK void *rt_heap_end_get(void)
{
    return rt_heap + RT_HEAP_SIZE;
}
#endif
Note: When the heap dynamic memory function is turned on, the heap default value is small and needs to be changed when used, otherwise there may be a failure to request memory or create threads, here is the modification method:
You can directly modify the size of the RT_HEAP_SIZE defined in the array, at least more than the sum of each dynamically requested memory size, but less than the total chip RAM size.
Write your first application
Once the RT-Thread Nano is ported to RISC-V, you can start writing your first application code. At this point, the main() function is transformed into a thread in the RT-Thread operating system, and our on-board blinking LED sample can run on RISC-V systems after some modifications:
- First, add RT-Thread’s related header file <rtthread.h> at the top of the file
- Implement the blinking LED code in the main() function (i.e. in the main thread) to initialize the LED pin and turn on/off the LED in a loop.
- Replace the delay function with the delay function provided by RT-Thread: rt_thread_mdelay(). This function causes the system to schedule and switch to another thread to run.
#include <rtthread.h>

int main(void)
{
    gd_eval_led_init(LED1);

    while (1)
    {
        gd_eval_led_on(LED1);
        rt_thread_mdelay(500);
        gd_eval_led_off(LED1);
        rt_thread_mdelay(500);
    }
}
After the compiled code is downloaded to the chip, you should see the RT-Thread-based program running and the LED blinking. Note: When RT-Thread is added, the main() function in the bare metal automatically becomes the entry function of the main thread in the RT-Thread system. Because threads should not always monopolize the CPU, when using while(1) in main() you should add rt_thread_mdelay() function to your code to give CPU time to other threads.
Differences from bare-metal blinking LED sample code
- The delay function is different. RT-Thread provides rt_thread_mdelay() function used for both scheduling and delays. When the function is called in a given thread, the scheduler will switch to another thread. In contrast, the bare-metal’s delay function is running on the CPU all the time.
- The initialization of the system clock is different. After RT-Thread Nano is ported to your target (RISC-V in our example), there is no need to configure the system in main() (e.g. HAL initialization, clock initialization, etc.) because the RT-Thread is already ready to configure the system clock when the system starts. This is explained in the previous section, “System Clock Configuration”
Configure RT-Thread Nano
You can configure the corresponding functionality as you need to turn the macro definition in rtconfig.h file on or off as follows:
...

// <h>IPC(Inter-process communication) Configuration
// <c1>Using Semaphore
//  <i>Using Semaphore
#define RT_USING_SEMAPHORE
// </c>
// <c1>Using Mutex
//  <i>Using Mutex
//#define RT_USING_MUTEX                 // Opening this macro enables the use of Mutex
// </c>
// <c1>Using Event
//  <i>Using Event
//#define RT_USING_EVENT                 // Opening this macro enables the use of Event set
// </c>
// <c1>Using MailBox
//  <i>Using MailBox
//#define RT_USING_MAILBOX              //Opening this macro enables the use of Mailbox
// </c>
// <c1>Using Message Queue
//  <i>Using Message Queue
//#define RT_USING_MESSAGEQUEUE          //  Opening this macro enables the use of Message Queue
// </c>
// </h>

// <h>Memory Management Configuration
// <c1>Using Memory Pool Management
//  <i>Using Memory Pool Management
//#define RT_USING_MEMPOOL              //  Opening this macro enables the use of Memory Pool
RT-Thread Nano does not enable the macro RT_USING_HEAP by default, so only the static creation of tasks and semaphores is supported. To create objects dynamically, you need to turn on the RT_USING_HEAP macro definition in rtconfig.h file.
RT-Thread Contact Info: