How to Integrate a DialogFlow Bot Into Your Website


We have talked a lot about chatbots for customer support in our previous pieces . And a scalable, efficient, and cost-effective human+bot hybrid system has always been our philosophy.
In the past few months, we have released a lot of helpful bots to help you accelerate your customer support efforts. In this piece, I am going to walk you through steps to integrate your own Dialogflow custom bot in Kommunicate .
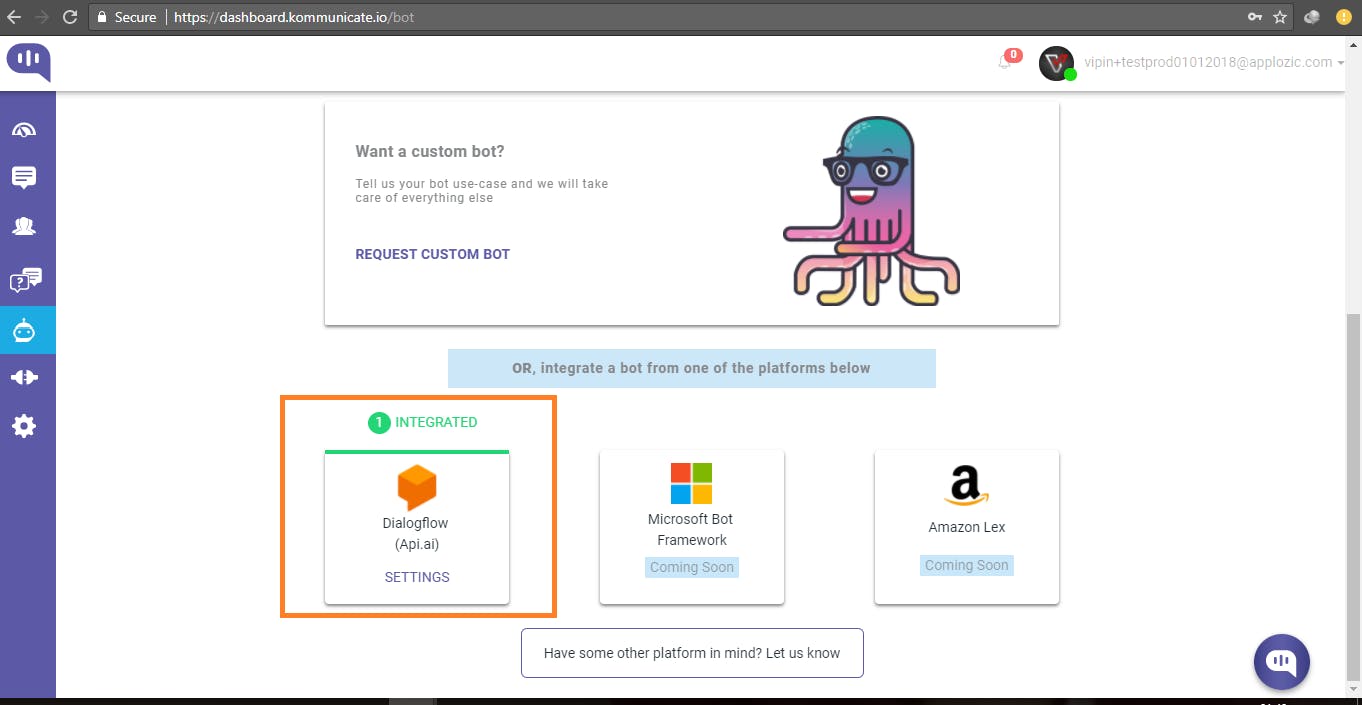
Step 1: Login to Your Kommunicate Dashboard
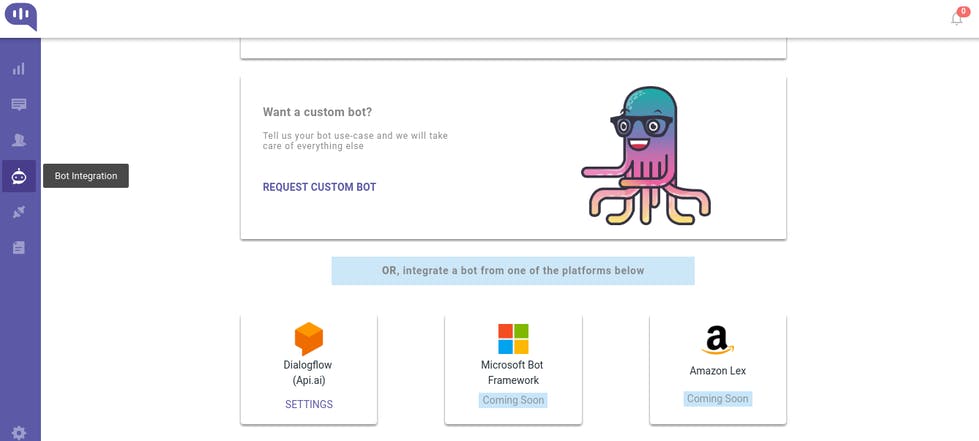
Login to your Kommunicate dashboard and navigate to the Bot section. If you do not have an account, you can create one here. Locate the Dialogflow section and click on Settings.
Step 2: Get Your Dialogeflow Tokens
After clicking on the setting, one popup box will open. You will be asked for Client and Developer access tokens.
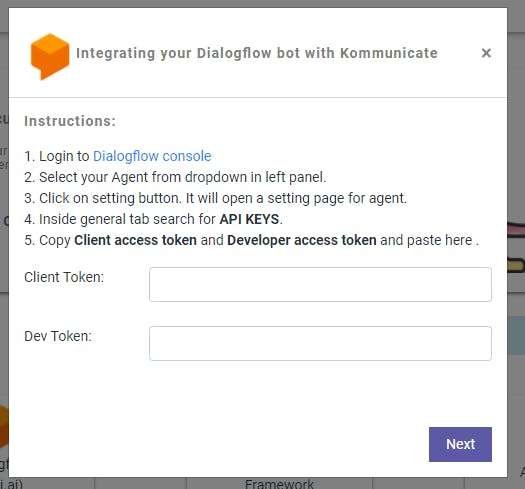
You can get these tokens by logging into your Dialogflow console.
Click on the Settings Icon and scroll down to locate Client access token and Developer access token.
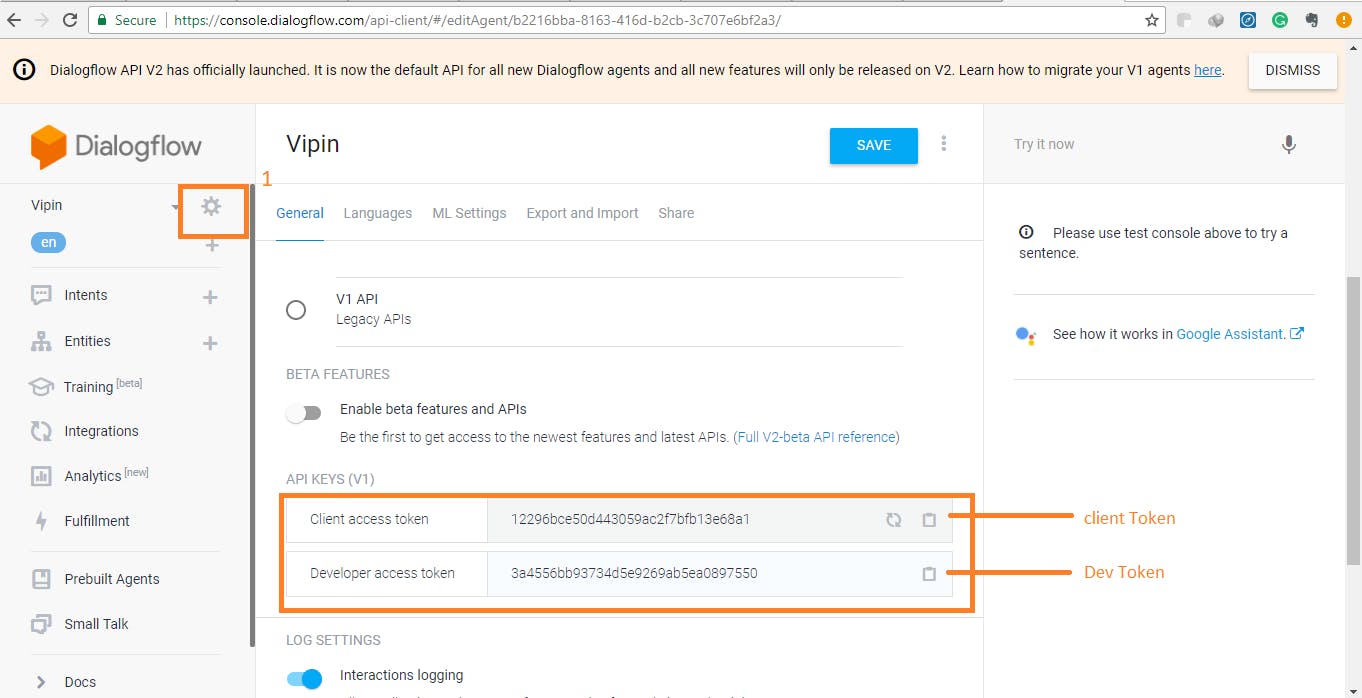
Copy and paste these tokens into the Dialogflow popup box in Kommunicate dashboard and click Next.
Step 3: Integrate and Setup Your Bot Profile
In the bot profile section, you will be able to give your bot a name. This name will be visible to your customer whenever the bot interacts with them.
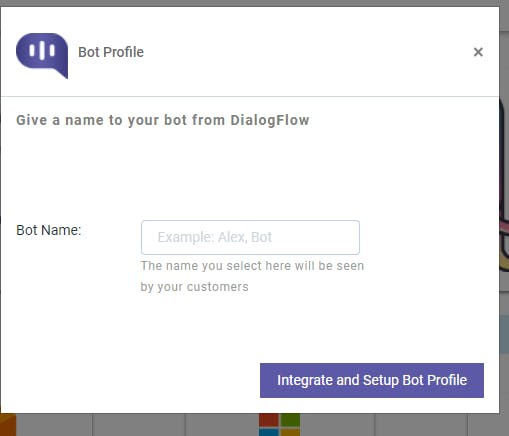
To complete the setup, click on Integrate and setup Bot Profile. You can check your newly created bot in two places:
Dashboard →Bot Integration → Integrated Bots: You can check all your integrated bots here.
Dashboard → Bot Integration: your Dialogflow icon should be green with the number of bots are you have successfully integrated.
Step 4: Using Bots in Chat Beacon
To use the bot in customer conversation, you need to pass additional parameters in your original Kommunicate plugin code.
Navigate to Dashboard →Settings. Click on Install under the Configuration section.
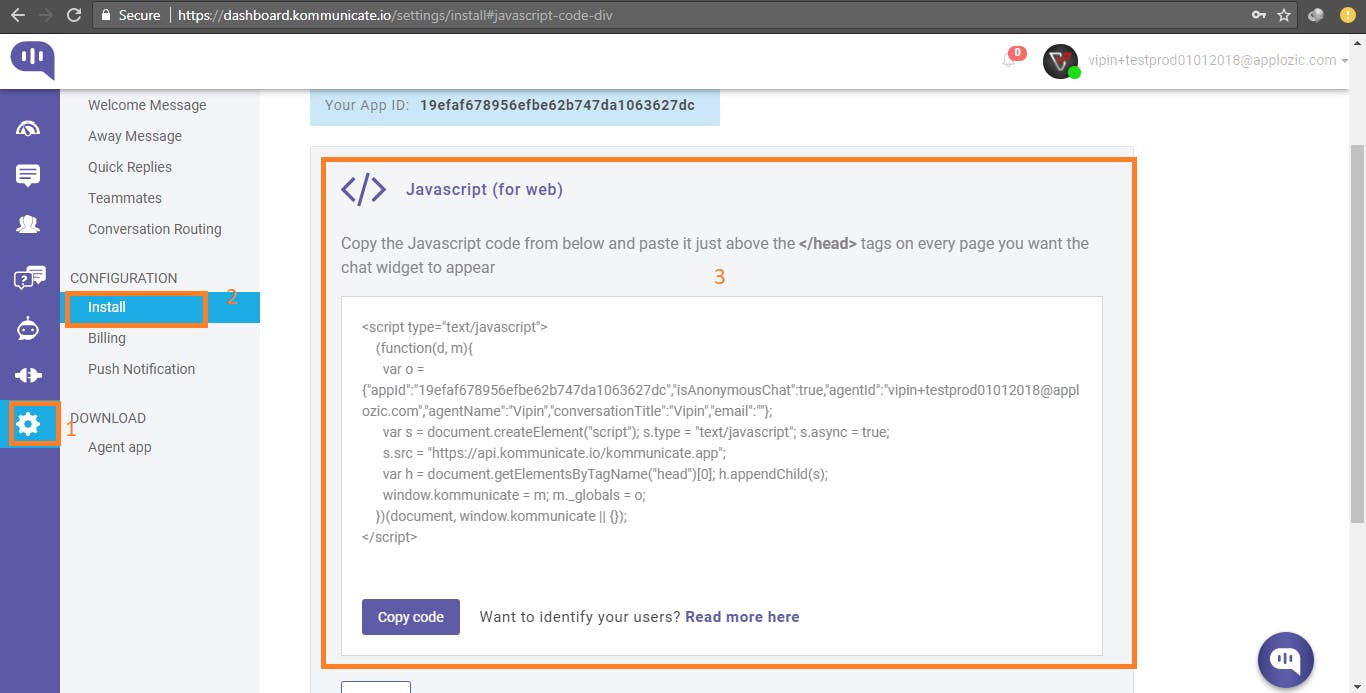
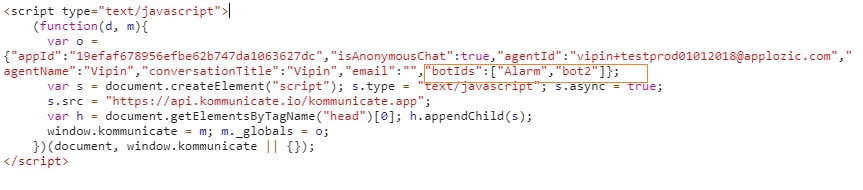
Copy the JavaScript code to be added either in your website or your application. Before pasting, you can add botIds parameter to integrate your bot in the chat. In this parameter, you can pass one or more botIds depending upon your requirement. See the example:
More information on bot integration can be found here .
In these few simple steps, you can integrate bot using Dialogflow in Kommunicate and automate mundane so that your agents can concentrate on what only human can do.
Related Reads: