

How to remotely connect heroku clearMysql db to your local phpmyadmin database client


First, I want to believe that you have apache server like xampp or lammp installed in your system because this is what we are going to use to serve our local database with.
Secondly, you also have an IDE- notepad++, notepad, visual studio code, sublime text, etc
Finally, you already have an app deployed on heroku or you know how to do so.
Install CLEARMYSQL db extension first,
Go to your heroku dashboard, click on the app you deployed [ app name] , then click on resources navigate to Add-ons then enter the "ClearDB MySQL"
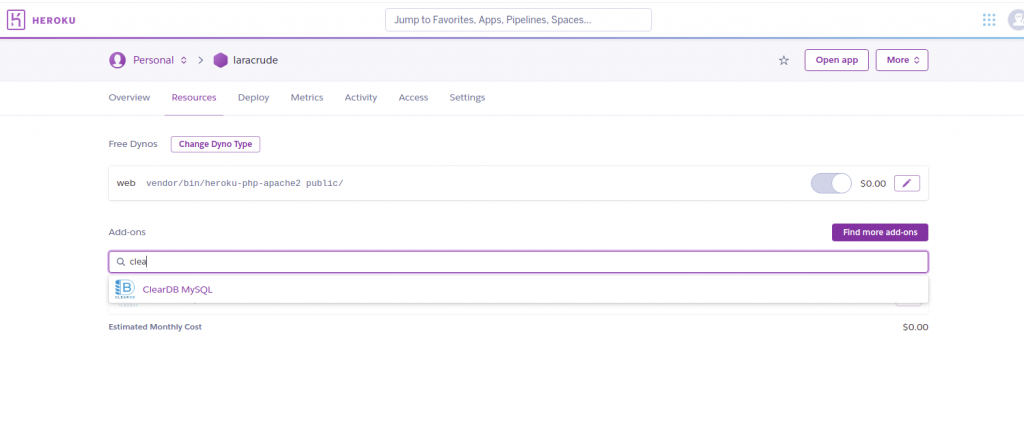
Next, install clearDB MYsql by clicking on the “submit form” . Boom! it’s installed for that app!
GET YOUR CLEARDB Mysql CREDENTIALS
So for us to successfully connect heroku CLEARDBMysql remotely with phpmyadmin, you will definitely require the following db creadentials;
Host Name, Username, & Password,
To get those, on your heroku dashboard, navigate to settings , next, click on reveal configs, it should look like the screenshot below,
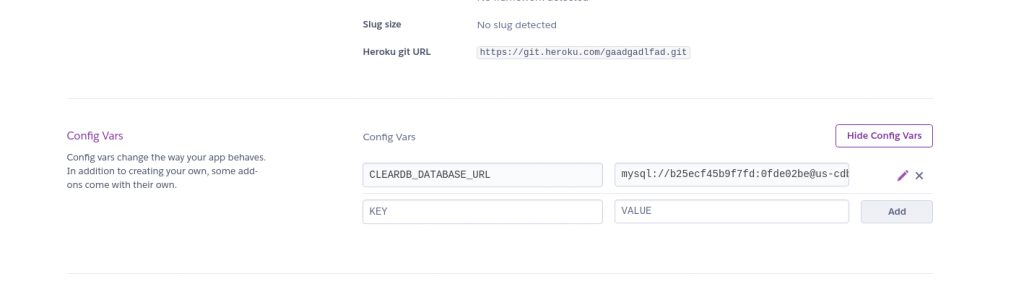
The above is the configuration details for the CLEARMysql DB that contains our Host Name, Username, & Password, which we'll be using to connect to local phpmyadmin database client
Next, tap on the “pen-like” ICON to your right to expand fully the ClearMysql db credentials and copy the the values.
The values from your own end should look like this:
mysql://a25eyf45q9f3fd:0fde0ibe@us-cdbr-eas..
Hope your values looks like the above? lol
So in the above db url, we can extract the Host Name, Username, & Password, The Host name is the value after "@ " in the db url above. In my case for example, it is :
us-cdbr-east-03.cleardb.com
Lastly, for your db password, it is the value before “” in the db url above In my case(from the above db URL), it is:
So here is quick view how the db crendentials are psoitioned in the url:
mysql://USERNAME:PASSWORD@HOST NAME/heroku_0ea3b7c78778916?reconnect=true
USE EXTRACTED DB CONFIGURATIONS VALUES TO SETUP OUR LOCAL PHPMYADMIN
To begin configuring our phpmyadmin database serve, cd into /etc/phpMyAdmin/config.inc.php sometimes, for linux, config.inc.php file MAY BE found in this path /opt/lampp/phpmyadmin (I found mine here!)
Next, we'll open config.inc.php file with an IDE/code editor or anyone you like ! ( I'm using sublime text 3... Did I disappoint you ? ..lol)**
Server Configuration
/**
 Servers configuration
 */

 $i = 0;
 /**
 * First server
*/
  **
$i++;

/* Authentication type */

$cfg['Servers'][$i]['auth_type'] = 'config';
$cfg['Servers'][$i]['user'] = 'root';
$cfg['Servers'][$i]['password'] = '';

/* Server parameters */
//$cfg['Servers'][$i]['host'] = 'localhost'

$cfg['Servers'][$i]['compress'] = false;
$cfg['Servers'][$i]['AllowNoPassword'] = true;
So the above snippet should not overwhelm you. It’s just the default xampp configuration for server setup for database with phpmyadmin. We are going to be using the above snippet inside our config.inc.php file as a blueprint (copy) of how we are going to add the configuration details for ClearMysql DB. Next, lets copy that snippet again like below and make the following edits,
    /*
     * First server (default localhost configuration details)
    */

    $i++;

    /* Authentication type */

    $cfg['Servers'][$i]['auth_type'] = 'config';
    $cfg['Servers'][$i]['user'] = 'root';
    $cfg['Servers'][$i]['password'] = '';

    /* Server parameters */


    $cfg['Servers'][$i]['compress'] = false;
    $cfg['Servers'][$i]['AllowNoPassword'] = true;

     /**
     * Second server
    */

    $i++;

    /* Authentication type */

    $cfg['Servers'][$i]['auth_type'] = 'config';

    $cfg['Servers'][$i]['user'] = 'b48cd67720b5e3';

    $cfg['Servers'][$i]['password'] = 'a730633c';

    /* Server parameters */
    //$cfg['Servers'][$i]['host'] = 'localhost'

    $cfg['Servers'][$i]['host'] = 'us-cdbr-east-03.cleardb.com';
    $cfg['Servers'][$i]['compress'] = false;
    $cfg['Servers'][$i]['AllowNoPassword'] = false;


    /**
     * Third server
    */

    $i++;

    /* Authentication type */

    $cfg['Servers'][$i]['auth_type'] = 'config';

    $cfg['Servers'][$i]['user'] = "";//enter your heroku 2nd ClearMysql db app user name

    $cfg['Servers'][$i]['password'] = '';//enter your heroku 2nd app cClearMysql db password

    /* Server parameters */
    //$cfg['Servers'][$i]['host'] = 'localhost'

    $cfg['Servers'][$i]['host'] = "";// enter heroku second app ClearMysql db host name
    $cfg['Servers'][$i]['compress'] = false;
    $cfg['Servers'][$i]['AllowNoPassword'] = false;
Once again, take note of the variable increment $i++ as this will tell phpmyadmin database client the number of database we are going to have.
OPEN PHPYMADIMN TO SEE YOUR CONNECTED REMOTE DATABASE
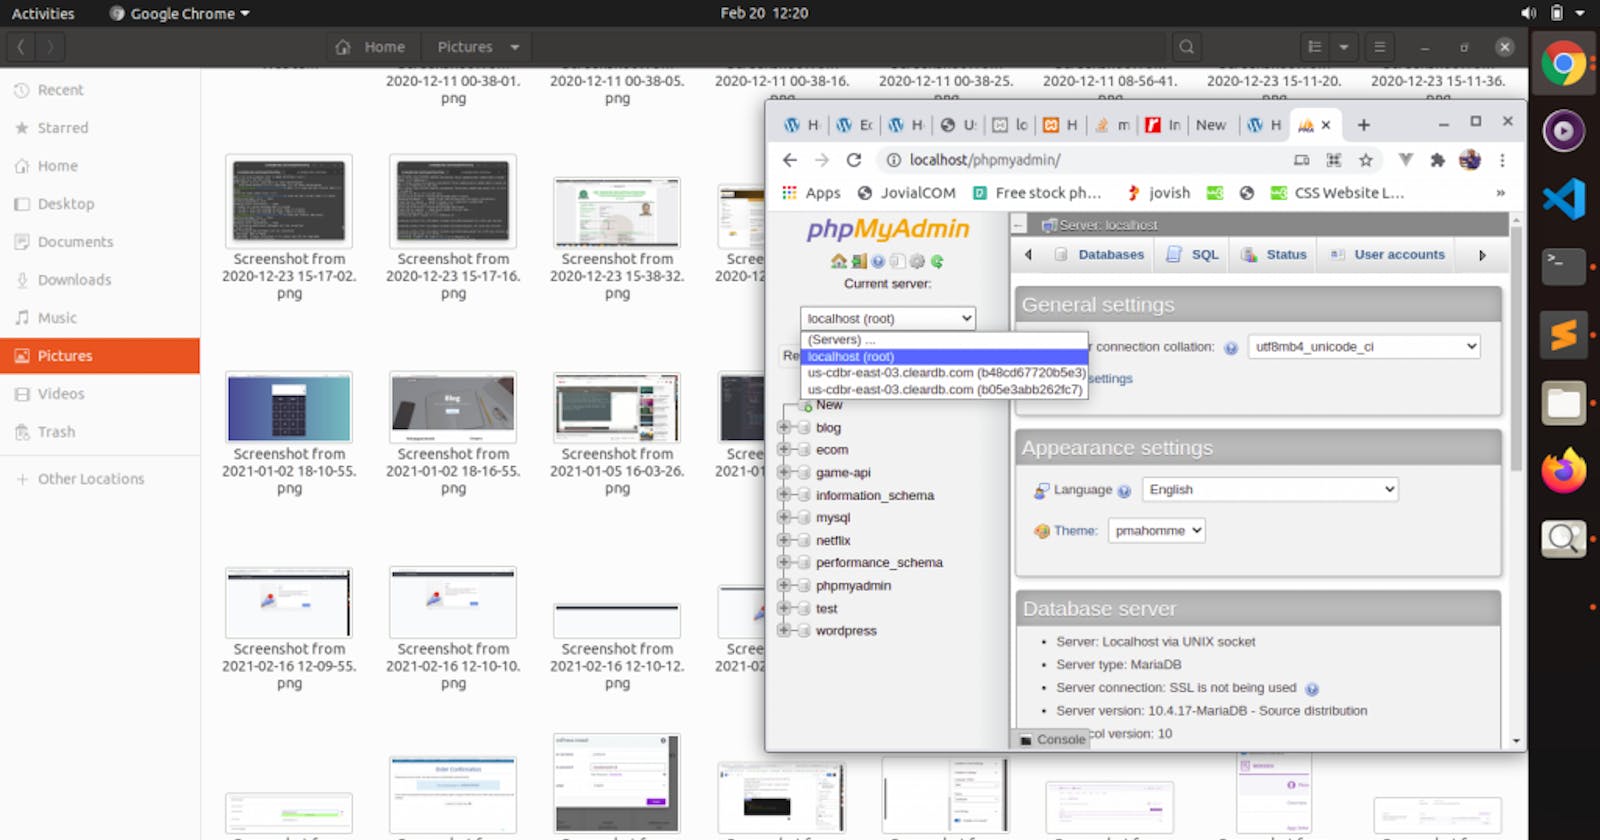
To open phpmyadminclient in your favorite browser( like internet explorer…lol), type localhost/phpmyadmin
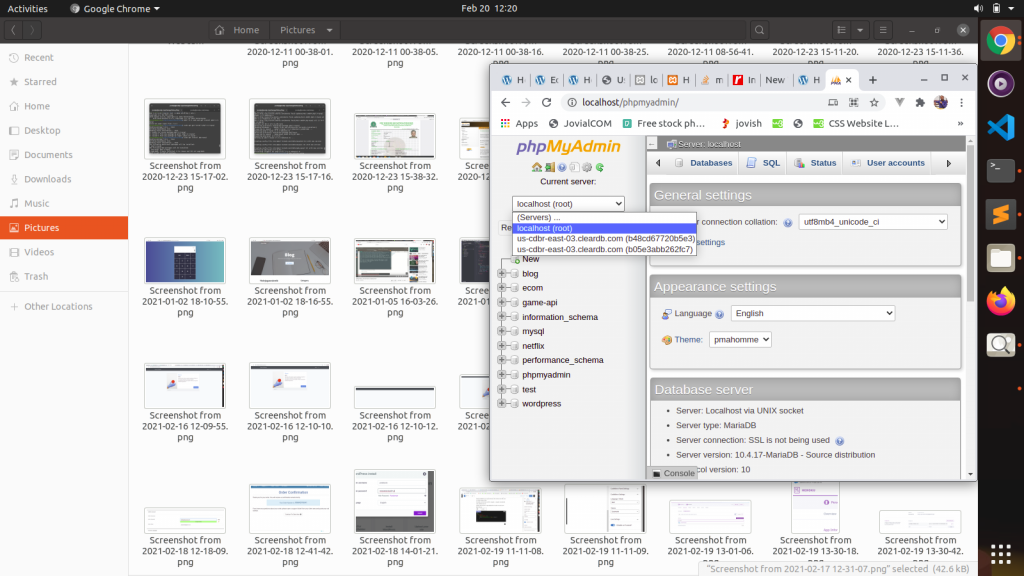
Next, select the remote hostname from the drop down, it will automatically reveal your tables for that database.
Pheeeeeeeeeeew…!!! That’s it…I hope it helps.
Please feel free to ask your questions in the comment section or reach out to me via on twitter
I love you!!!
Thank you.
Originally published at https://jovialcorec.000webhostapp.com.