

Raspberry PI 3B(32 bites) Board BSP(Board Support Package) Execution Instruction.


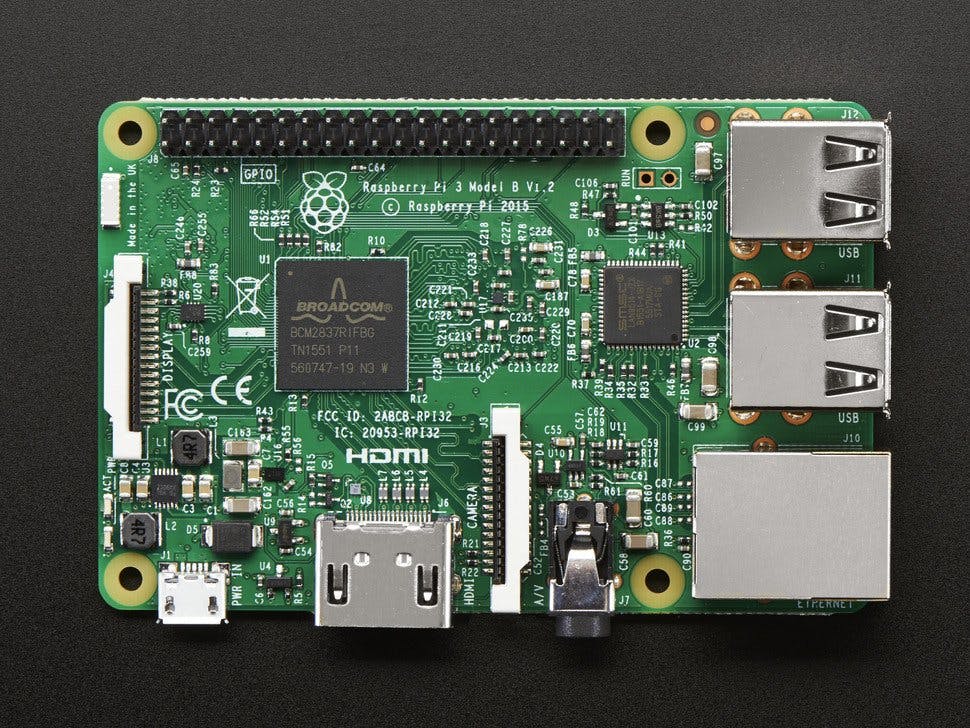
1. Hardware Features of Raspberry Pi 3B
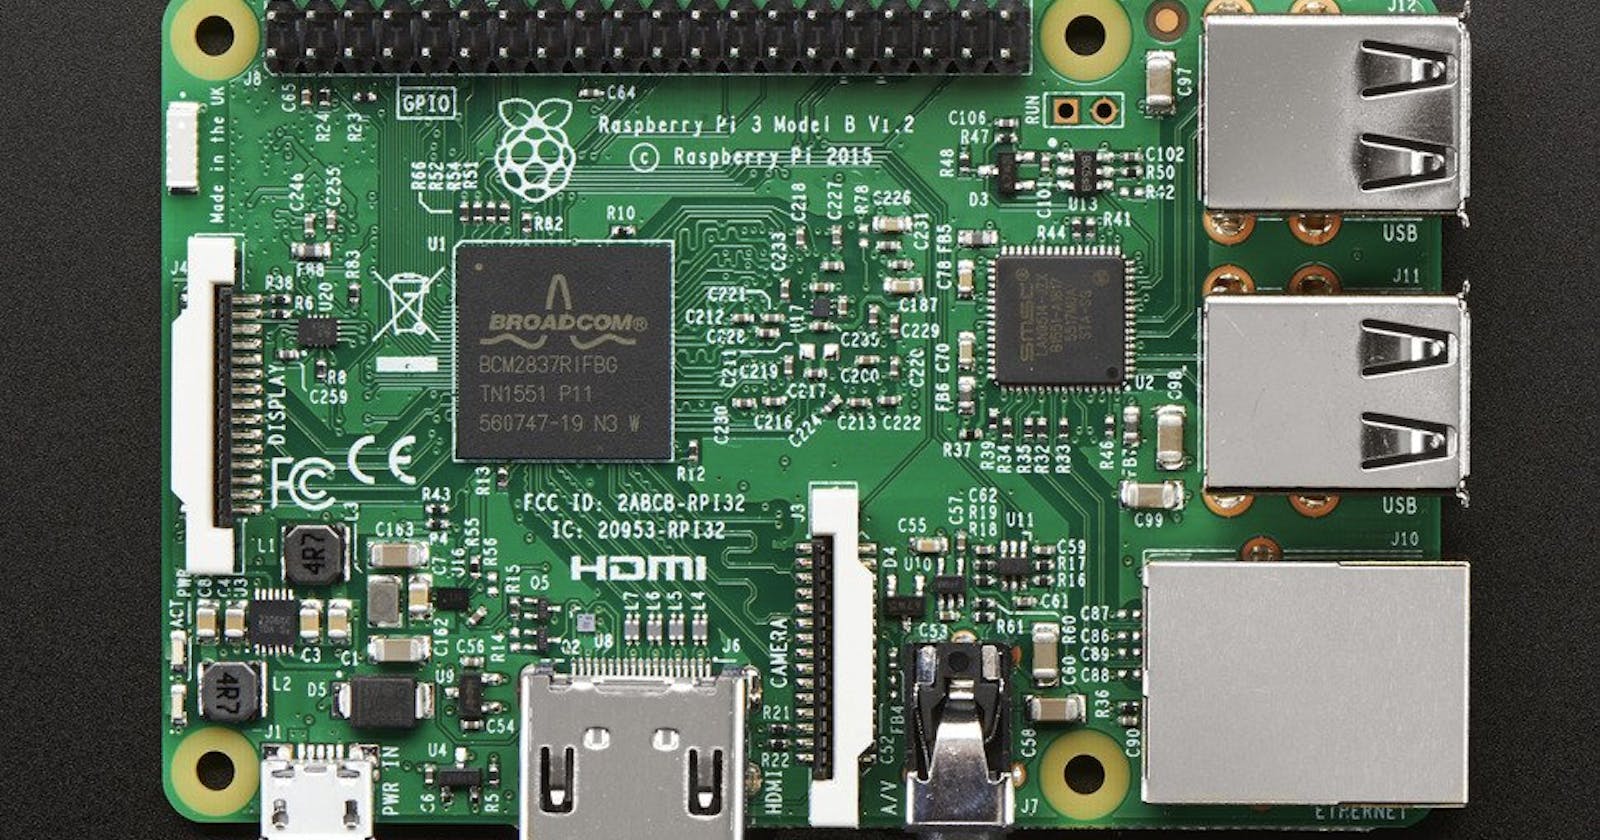
The description of functional pins is as shown as follow:

2. Compiling
The env tool is recommended for compiling in Windows environments.
The cross-compiler gcc-arm-none-eabi-4_8-2014q1_linux is recommended in Linux environment. If you don’t have compiling tool, please uncompress the downloaded package like this:
tar vxf gcc-arm-none-eabi-4_8-2014q1_linux.tar.bz2
In Linux environment, you need to modify the settings of the compiler directory, and modify the actual directory of the compiling tool in bsp/raspi3-32/rtconfig. py, remember to add the suffix /bin here.
EXEC_PATH = r'/opt/gcc-arm-none-eabi-4_8-2014q1_gri/bin'
Enter the rt-thread/bsp/raspi3-32 directory and run the following command to compile this BSP:
scons
If everything goes well, a new 'rtthread.elf' and 'kernel7.img' file will be generated. ‘kernel7.img' is what we need to put into the root directory of the Raspberry PI 3B SD card.
2.1 eclipse compiling environment
Step 1: Install the eclipse plugin 'cdt'.
Step 2: Open eclipse cdt and set workspace, and set the workspace to 'rt-thread/bsp/raspberry-pi/raspi3-32'.
Step 3: Import the project by selecting 'General->Existing Projects into Workspace' and then 'Browse ...'. Noted that the compiling only supports scons now.
3. Run
3.1 Prepare the Raspbian SD card
Download the raspbian image, for example, "2018-06-27-raspbian-stretch-lite.zip". Unpack it.
Burn the SD card on Windows
On Windows, download the burning tool " etcher.io ", run it and choose the unpacked image "2018-06-27-raspbian-stretch-lite.img".
When the burning process is completed, put "kernel8.img" into the boot partition to replace the file wit the same name.
Burn the SD card on Linux
Prepare an empty SD card, plug it in the computer and then execute the command below:
"sudo dd if=2018-06-27-raspbian-stretch-lite.img of=/dev/xxx bs=32M conv=fsync"
Note that the device file "/dev/xxx" should be replaced with the real SD card.
3.2 Prepare the serial port wire
The BSP uses GPIO 14 & GPIO 15 of raspi 3 as the communication ports, as shown in the following image:
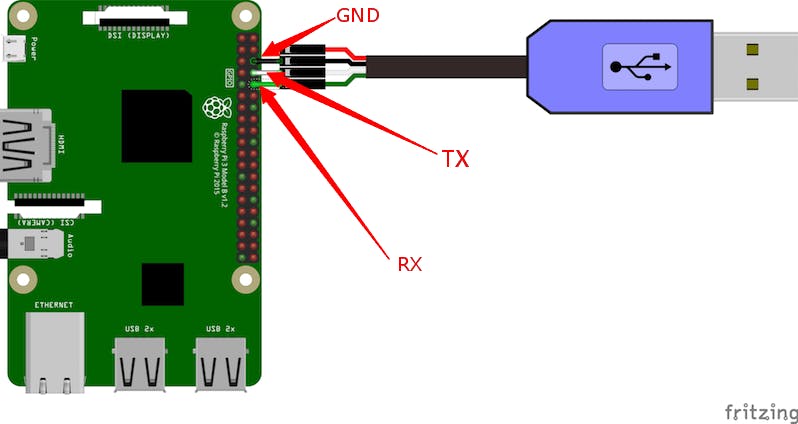
The serial port parameters: 115200 8N1, hardware and software flow control is off.
4. Result
Insert the burned SD card into Raspberry Pi, power up, the output information on the serial port should be like this:
heap: 0x0005d784 - 0x0045d784

 \ | /
- RT -     Thread Operating System
 / | \     4.0.2 build Jan  9 2020
 2006 - 2019 Copyright by rt-thread team
[I/I2C] I2C bus [i2c0] registered
[I/I2C] I2C bus [i2c1] registered
[I/SDIO] SD card capacity 15558144 KB.
found part[0], begin: 1048576, size: 63.0MB
found part[1], begin: 67108864, size: 14.793GB
file system initialization done!
boot cpu:3
msh />cpu = 0x00000003
cpu 3 startup.
start OK: CPU 3
boot cpu:2
cpu = 0x00000002
cpu 2 startup.
start OK: CPU 2
boot cpu:1
cpu = 0x00000001
cpu 1 startup.
start OK: CPU 1
Hello RT-Thread!

msh />
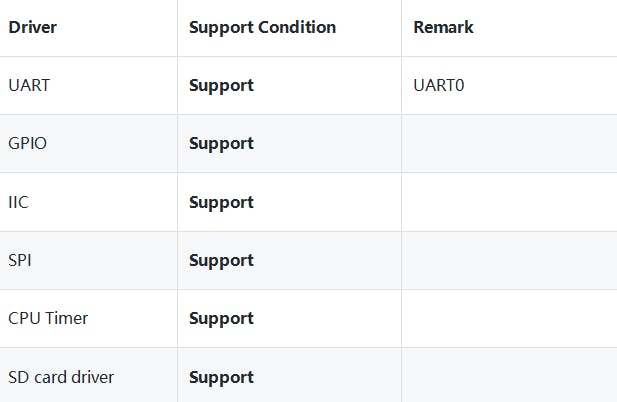
5. Support Condition
RT-Thread Contact Info: Website | Github | Twitter | Facebook | Youtube