


Why would you want a small personal server ?
Having a personal server can be useful for many reason. One of them, of course, would be to host your projects online and therefor allow you to share those with your friends or your professors in a more convenient way. It might also be a good way to learn you first interaction with a distant server and and start to deal with system administration and domain name.
1. Own your domain
Having a personal server is much more useful if you own a domain name. It will allow you to ping, host and access your server without having to remember the IP
👉 Note: The domain is only a convenient thing you can pass this step if you are ok with only working with an IP address
Choose a domain name and a provider
The domain name you will choose will be the one you will share with every one so choose wisely. As it is a personal server that I want to configure I have chosen my full name as a domain name.
The risks for me to have someone with the same domain was pretty low but if it is not your case you will hate to check if you domain is available. To do so you will have to choose your domain provider knowing that according to the small experience I have, they all have the approximately the same features and my choice was more a choice by default than a very educated one.
Here is a list of some domain provider that I've used and I can recommend:
For mine thibault-lepez.fr I used Google domain. Here is a screenshot of the research on Google domain for a domain name
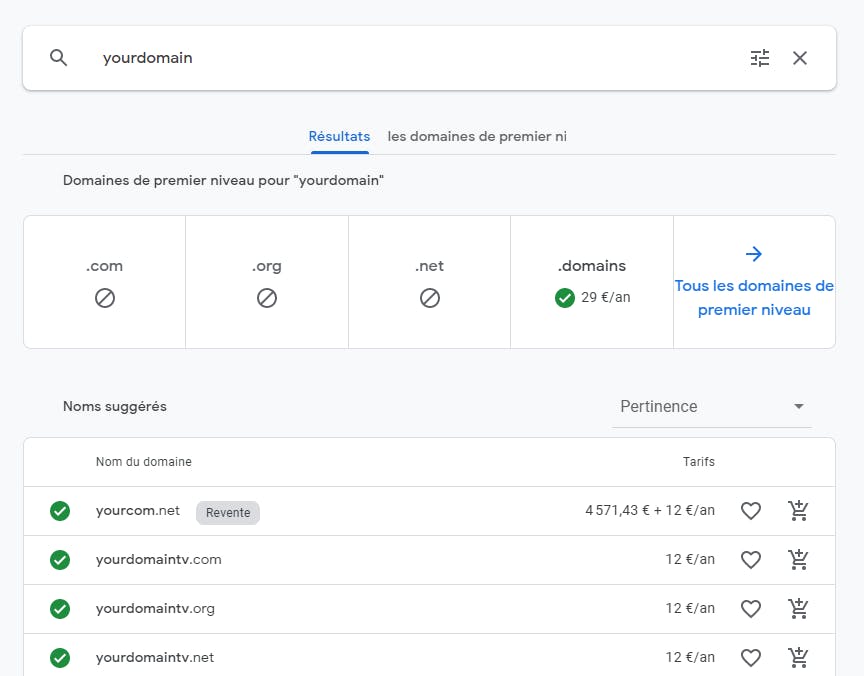
You will find which domain are available for you and at which price. The price of your domain depend of the extension of this domain, a .com domain is more expensive than a .fr domain for example. The screenshot come from google domain but it is a very similar way to find a domain for all the providers I've given you
👉 Note: If you plan to use your domain in web application, or application on general you may want to avoid "-" inside your domain as it may not be supported in certain language and can conflict. This is why I also bought thibaultlepez.fr domain
2. Own a VPS
What is a VPS, and why a VPS ?
A VPS (Virtual Private Server) is a virtual machine (usually a Linux instance) hosted as a server and accessible via SSH. There is a lot of possibility when looking for a server but the VPS is, according to me, the most versatile server type. Even if a VPS is a little bit less friendly to handle It will allow you to do almost everything and that is its main advantage.
As a VPS (or a dedicated server, the VPS is just less expensive) is simply a virtual machine hosted on a server you will be able to do everything that you are able to do on your computer.
Choose your VPS provider
I have experienced some VPS provider and the one I'm the most comfortable with is Scaleway. You can obviously use another provider but I found that Scaleway has the best value for the money, you can find a small VPS for only 3€ by month.
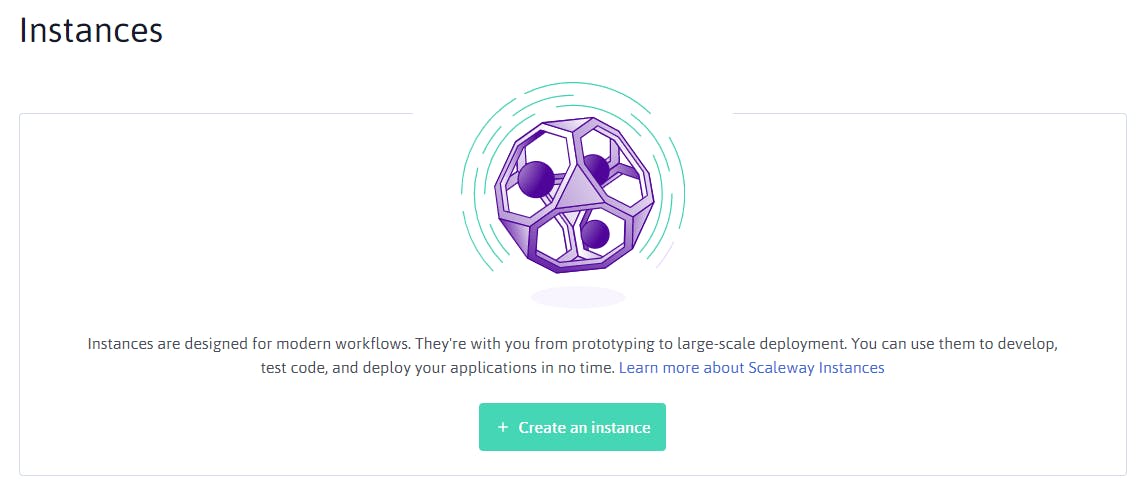
Create your instance
Once that you have created you account, find where the instance creation is, it varies according to the provider you've chosen.
On Scaleway it looks like this:
Choose your operating system
Then you will be prompted to set up you instance, this is the most important part as it will influence your experience with your server
Those are the choice available on Scaleway:
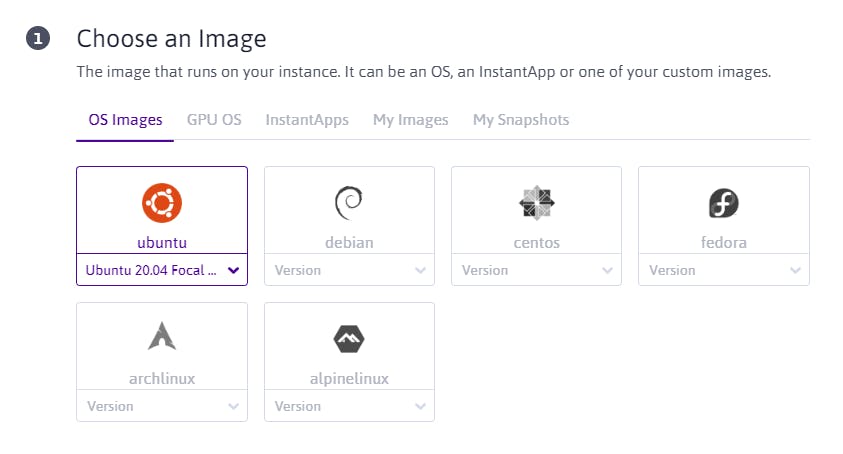
I think they will be enough for the majority but if you are missing one it may be available with another provider
I'll choose an Ubuntu 20.04 OS as I'm familiar with the OS and I know I will be able to run my future project on an Ubuntu distribution.
🔥 It important to know that it is the server version of the OS so no UI is available.
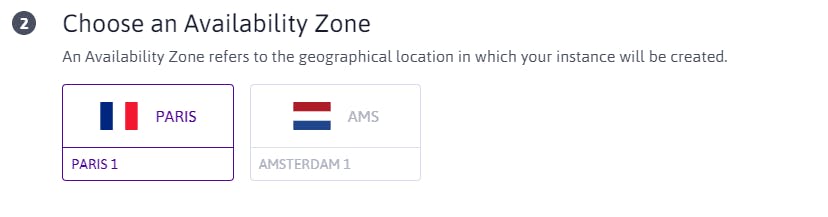
Choose the country where your server will be located
When choosing the location of your server you will have to choose the closest location to your users not you. If your userbase will be located in France but you live in Spain, it's still better to have your server in France as it will improve the user experience (and that's what you want 😉). Of course if it's only for personal use take a location close to yours
Choose the power of your instance
Here is a fundament part of the instance creation. You will be prompted to choose the power allocated to your virtual machine. This imply the size of the storage, the number of core of the CPU, the size of the RAM and the bandwidth
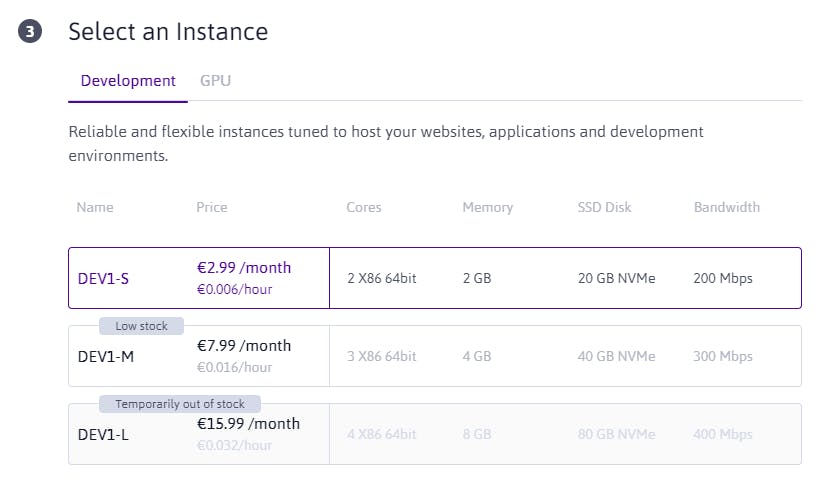
Scaleway provide "development" instances with the strict minimum needed, As for now I do not need a lot of horsepower the DEV1-S will be sufficient.
👉 Note: Scaleway automatically scale up your server if you happened to need more power, even if it's a good thing for availability it might be arch for your wallet 😅
Finalizing the install
After setting up all those important things they will ask you to give your instance a name and to give your payment method and then you are the happy owner of a VPS instance 🎉
3. Connecting to your instance
Most provider will give you an IP address an root identifier and a password that you will have to change when you connect for the first time.
But Scaleway uses SSH keys to connect to your instance
Create and use SSH keys
Check if you have already a key
The easiest way to find out if you already have some SSH keys on your computer is to look on your personal folder
On Windows
ls C:/Users/yourname # with powershell

dir C:/Users/yourname #with cmd
On Linux/MacOS
ls -la ~
If you see a .ssh folder then you probably wont need to create new SSH keys
Generate your key
The command on all OS to generate SSH keys is:
ssh-keygen -t rsa -b 4096 -C "yourmail@mail.com"
-tstands for the type of encryption here RSA-bfor the size in bit of the key-Cis a comment but it's a common usage to assign your mail to the key
ssh-keygen will then ask you for some parameter, I always choose the default setup as it is easier to deal with after. But feel free to change as you please it has nearly no impact on the following
You should see a trace as follow:
PS C:\Users\thiba> ssh-keygen -t rsa -b 4096 -C "yourmail@mail.com"
Generating public/private rsa key pair.
Enter file in which to save the key (C:\Users\thiba/.ssh/id_rsa):
Created directory 'C:\Users\thiba/.ssh'.
Enter passphrase (empty for no passphrase):
Enter same passphrase again:
Your identification has been saved in C:\Users\thiba/.ssh/id_rsa.
Your public key has been saved in C:\Users\thiba/.ssh/id_rsa.pub.
The key fingerprint is:
SHA256:f9y38HBad5tkZiIekbjYMTm8r2rY28mifRfYVOdDotE yourmail@mail.com
The key's randomart image is:
+---[RSA 4096]----+
|           .     |
|          . E o  |
|   +=      + *   |
|. .           o  |
|.oo +   S+ . . . |
|.o.= + o..+. ..  |
|o.. . = . .aao...|
| <===B.*..o.  =..|
|... *.=+=o     o |
+----[SHA256]-----+
😜 Obviously I've changed the data in the trace but still you should have something very similar
Find your public key
Now just output your SSH key with the following command:
cat .ssh/id_rsa.pub
Save the output of this command to your clipboard and go to the Scaleway website
Add the SSH key to your account
Under account/credentials you should find where to add your key
You will be prompted the key you've just copy in your clipboard and you will have to find a name to represent the key. I usually give the name of the OS and the Brand of the Computer I'm on as a name.
You should end up with something like that:

Connect to your instance
If you have correctly added the key to your Scaleway account you will only have to use the command:
ssh root@XXX.XXX.XXX.XXX
While replacing XXX.XXX.XXX.XXX with your IP given by Scaleway
Now you should be connected without any password
🚨 Watch out you are connected as root and this might be dangerous if you are not very comfortable with your OS
4. Adding a non root user
As I mentioned before you only have a root user and this is something you want to avoid. So to prevent using a root user you will create a non root user when logged in your VPS with ssh
Creating a new user
The command to add a user in linux is:
adduser username
You will then be prompted a password and some other information, the trace should look like this:
root@thibaultlepez-server:~# adduser thibault
Adding user `thibault' ...
Adding new group `thibault' (1001) ...
Adding new user `thibault' (1001) with group `thibault' ...
Creating home directory `/home/thibault' ...
Copying files from `/etc/skel' ...
New password:
Retype new password:
passwd: password updated successfully
Changing the user information for thibault
Enter the new value, or press ENTER for the default
        Full Name []: Thibault LEPEZ
        Room Number []:
        Work Phone []:
        Home Phone []:
        Other []:
Is the information correct? [Y/n] Y
And that's it your account is good to go 🎉
Adding sudo command and user to sudoer group
You have you account and everything seams to work fine, BUT let say you want to upgrade your system but you are connected with your new account, you will have a permission denial ! To avoid that we will make sure that at least your user has access to the sudo command, because it's soooo difficult to change user with su root every time you want to make a command that need root
To do so you just need to run this command as root:
adduer username sudo
You should have the following trace:
adduser username sudo
Adding user `username' to group `sudo' ...
Adding user username to group sudo
Done.
Now the effect will be active at the next connection of your user
5. Linking your domain to your server
Now that you have a working account on your VPS and a domain name, you just need to link both of them and you will be able to connect to ssh yourname@yourdomain.com
To process go back to your domain provider website. Here you will have to find the DNS settings, more precisely the custom resource records
Here you will have to create a new A record
The full creation of the record should be like this:
| Name | Type | TTL | Data |
| @ | A | 1h | your IP Address |
- the
@represent your naked domain (no subdomain), but you might want to make only a subdomain point to your IP, replace@with any word Ais the type of record, the A stand for a classic address pointing1hfor the TTL(Time To Live) is just a default value for cached time in the DNS (I honestly do not know exactly how those this works)your IP addressenter the address you want you domain to point to
Now everything should be ready for your usage, bravo 👏
