


If you've been having some trouble figuring out or you want to learn how to easily upload files to Cloudinary and use them, look no further! This article will help you figure out how to upload and use your image files uploaded to Cloudinary using client-side JavaScript.
Prerequisites
This article will help you build a simple gallery, using images uploaded to the Cloudinary server. To build this, you need to clearly understand
- HTML
- CSS
- JS
If you're confident in those 3, then let's get started! 😎
Setup
Create a new folder name called 'Gallery' in any directory and single files for HTML, CSS, and JS scripts respectively. I'm using xampp to test this locally, so I'll be creating these files in a Gallery folder in the htdocs folder. It's not required you install xampp, feel free to use any server of your choice.
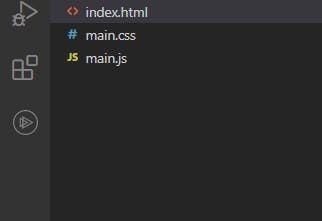
Open VSCode and open the Gallery folder from VSCode. Once you're done, it should look like this.
Next, go register for an account on Cloudinary for free.
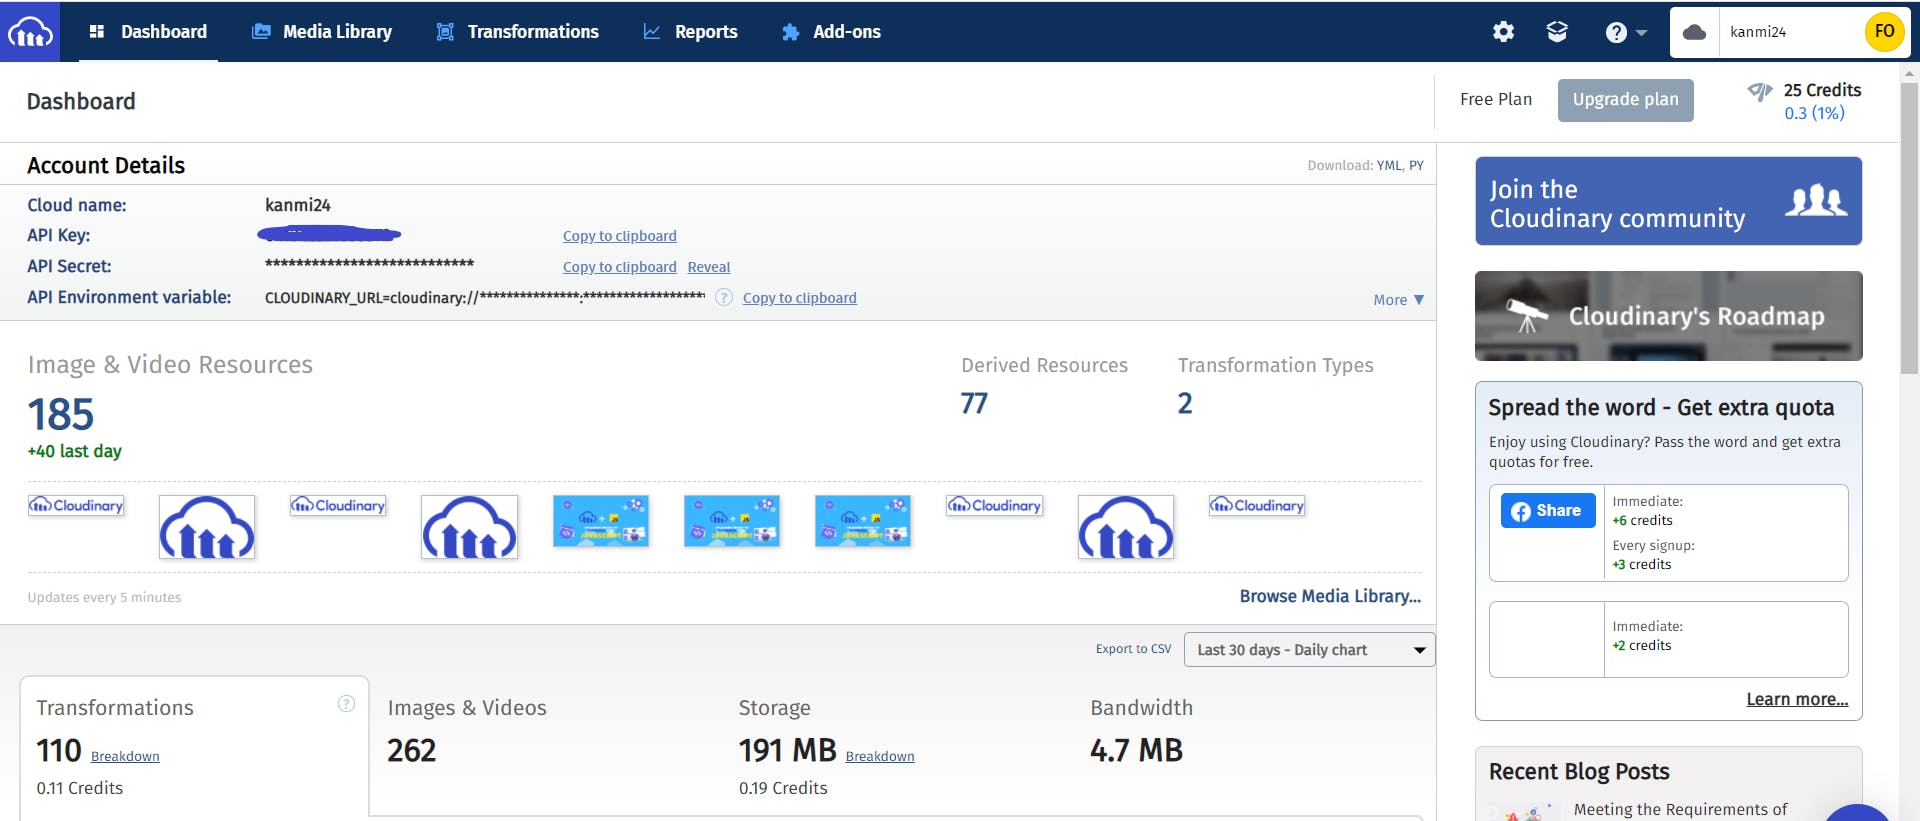
Once you're done, you'll be redirected to their dashboard, which should look like this
Uploading to Cloudinary
There are actually two ways you can upload to Cloudinary via client-side js code, which we will be exploring below
Method 1: Form element with Fetch/Ajax
Step 1: Create a section tag that you would use to contain your image files and a form tag with input type file for upload to Cloudinary.
Step 2: Create buttons for your "next" (next image) and "previous" (previous image) functionality. Once you're done, embed them all in an article tag container.
<h1 id="app-title">Gallery</h1>
<article class="image-container">
<button id="previous" onclick="prevImage()"><</button>
<section class="image-section">
</section>
<button id="next" onclick="nextImage()">></button>
<form method="POST">
<input type="file" multiple accept="image/*" id="upload">
<label id="upload-label" for="upload">Upload</label>
</form>
<p id="error">Not more than 5MB</p>
</article>
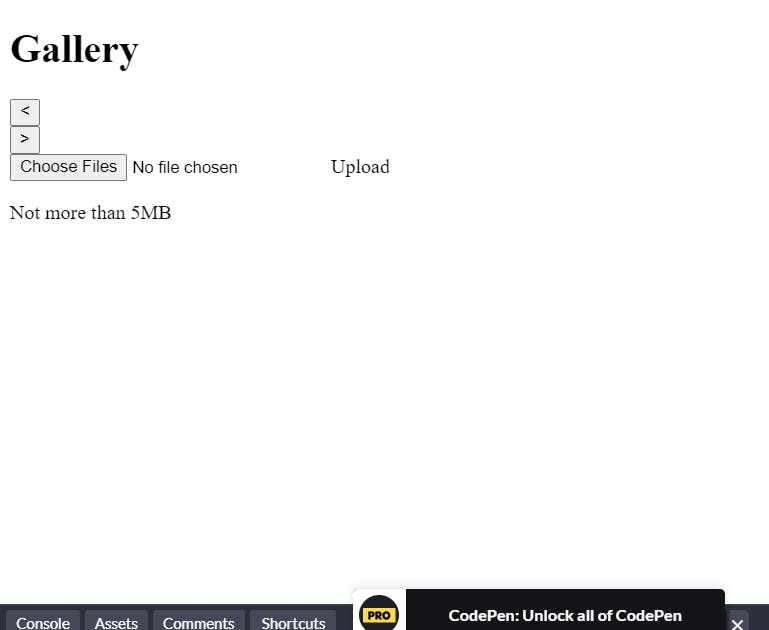
Your page should look like this once you're done.
Step 3: For your upload to work, you need two things:
- your upload preset and
- username
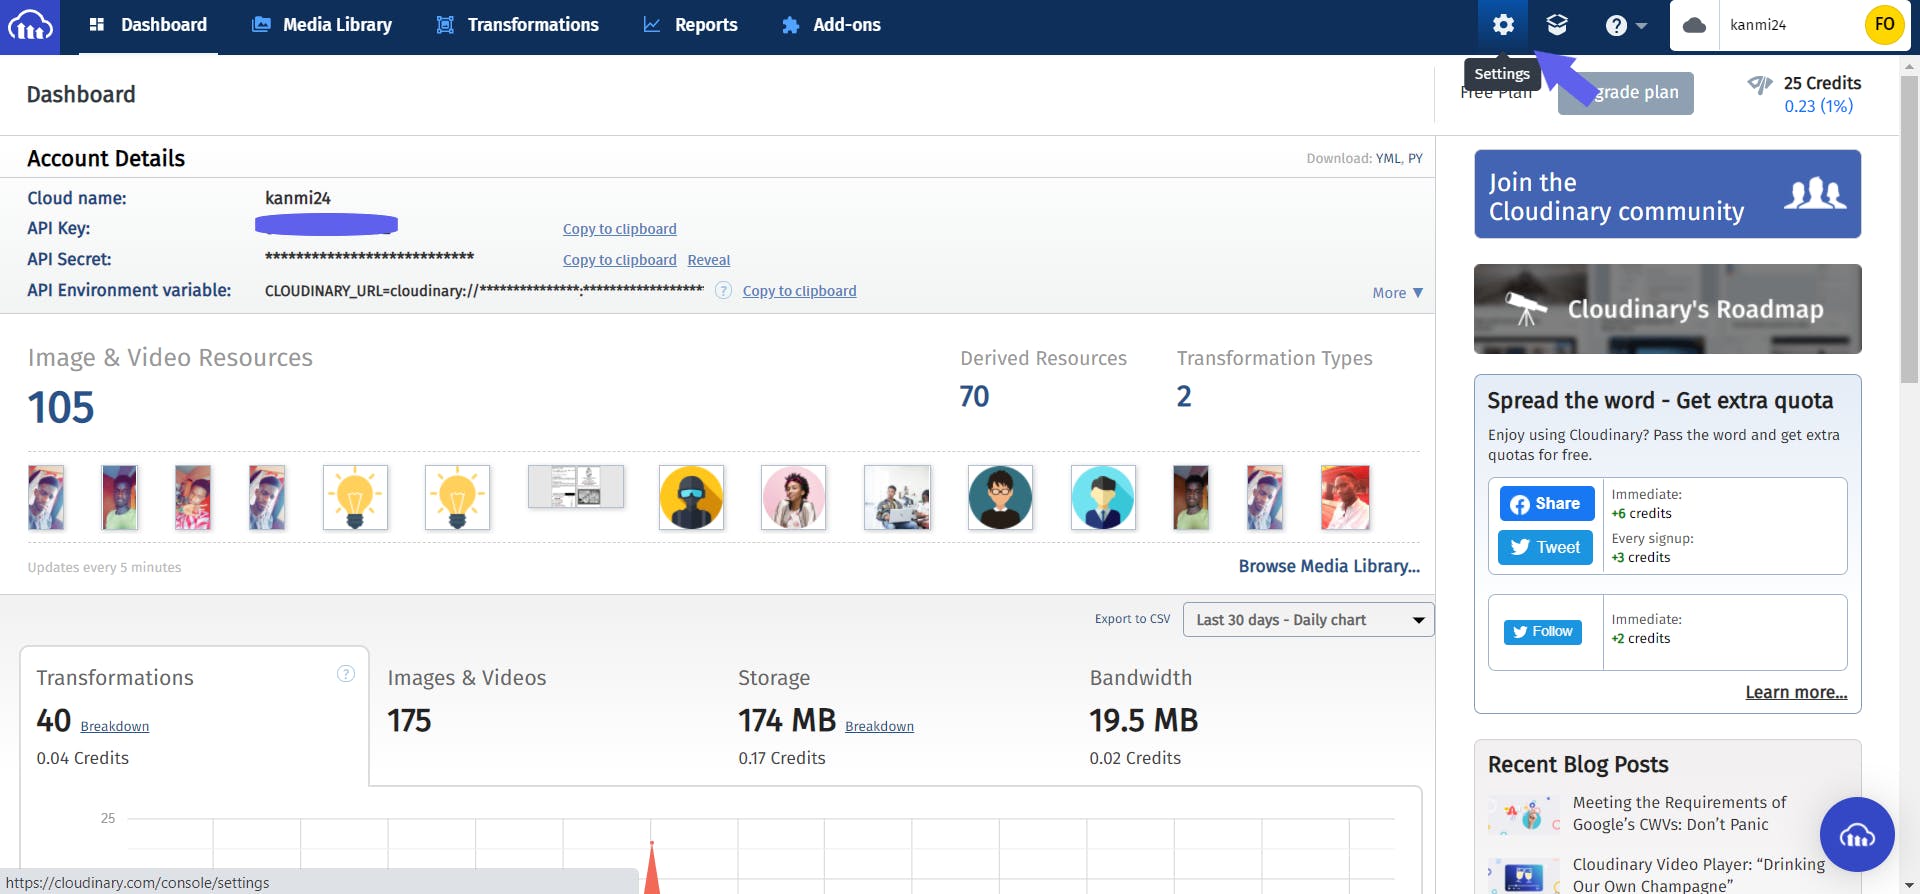
On the dashboard console, click on the Settings icon at the top right corner.
Then, click on the Upload panel beside Accounts and scroll down to click the Add upload preset link.
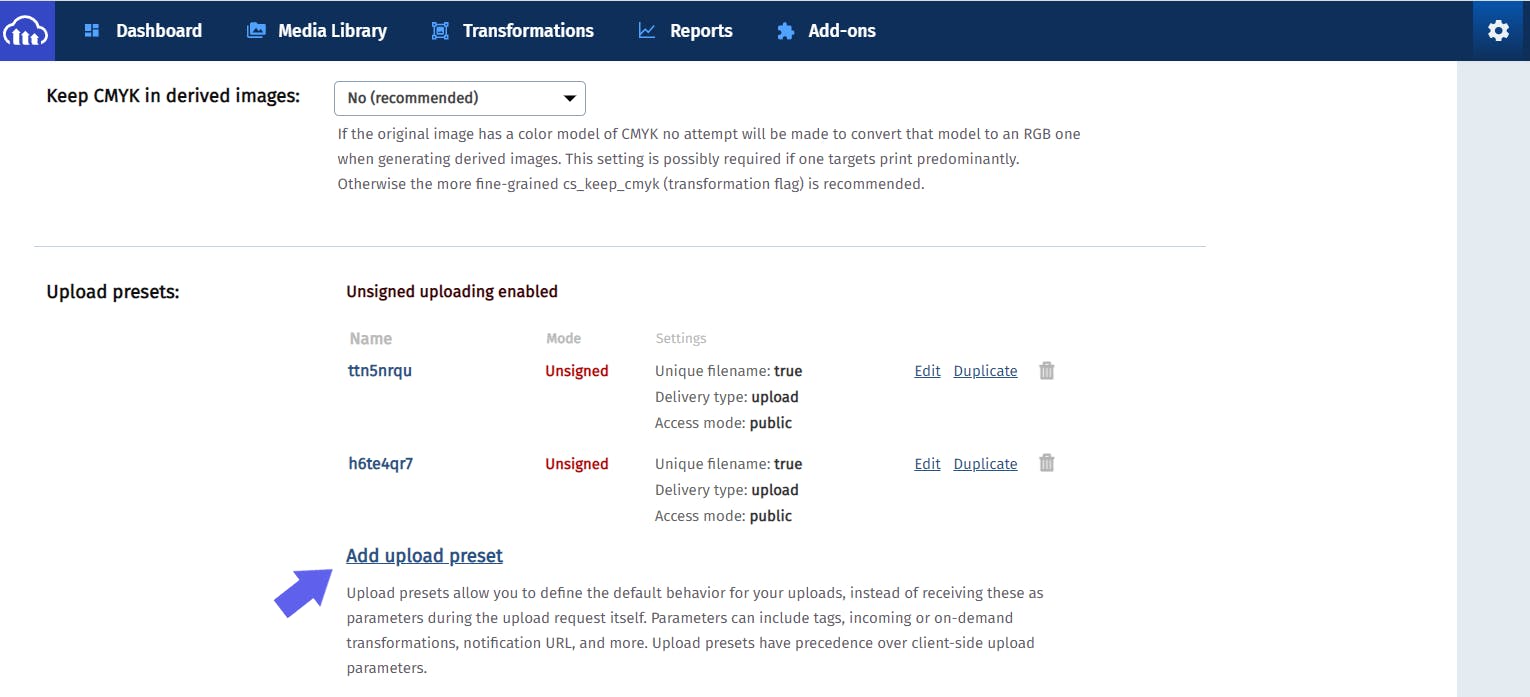
Set the Signing mode to Unsigned before saving.
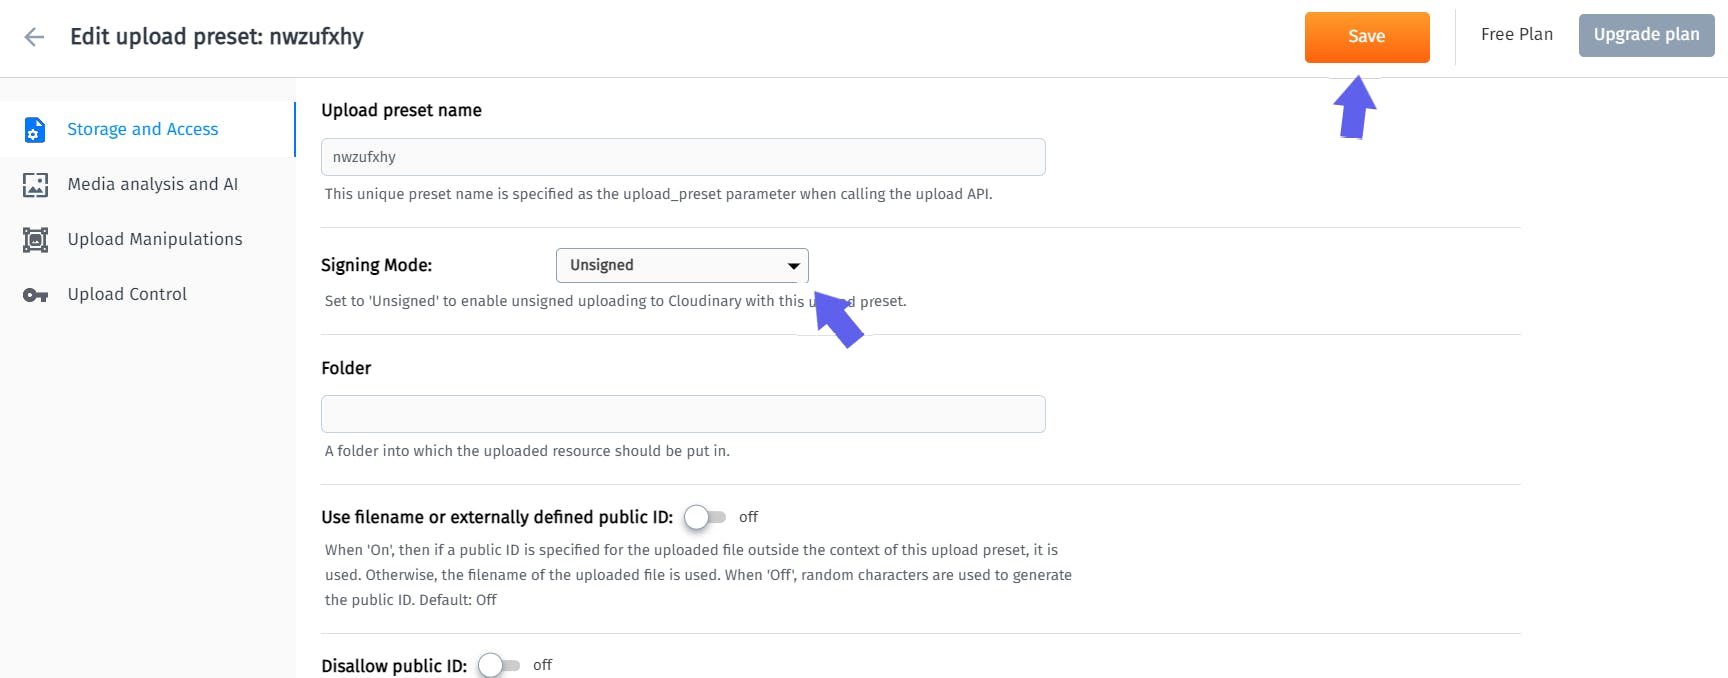
Once you're done, copy the upload preset name on your clipboard.
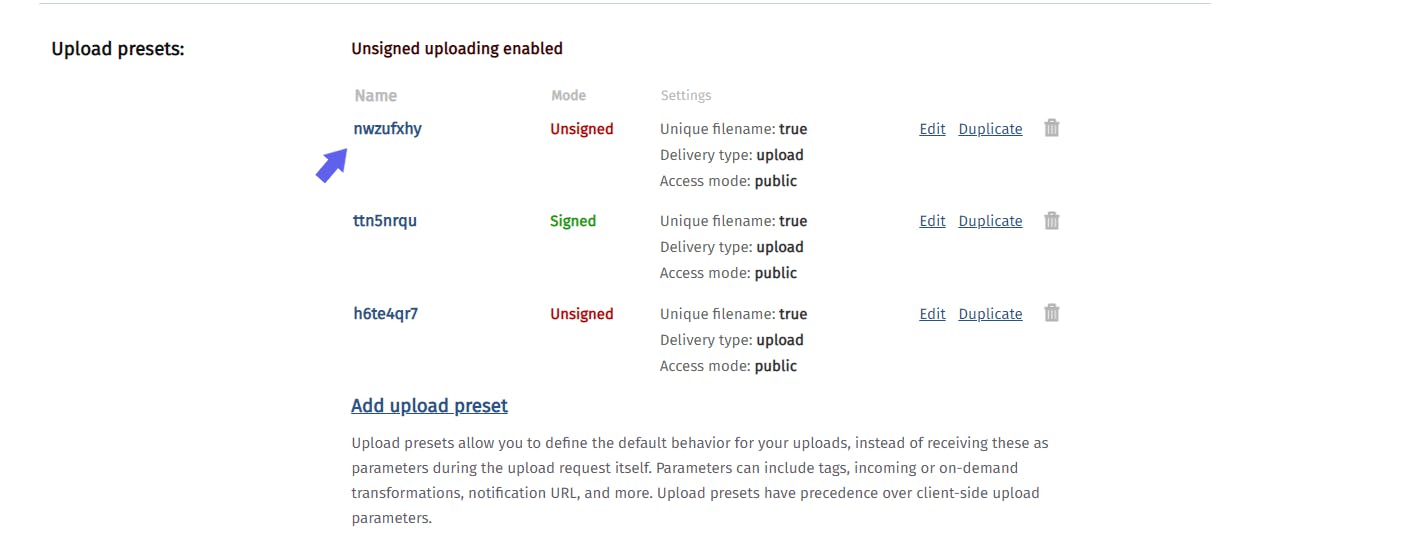
Step 4: In your JS file, create a constant with the name CLOUDINARY_PRESET and save your preset there.
Step 5: Now, to the meat of the matter, let's learn how to upload our images via a fetch method/using Ajax to Cloudinary.
Using Fetch
const CLOUDINARY_PRESET = 'nwzufxhy';
const fileId = document.querySelector('#upload');
const errorP = document.querySelector('#error');

function uploadFile(file) {
    let url = 'https://api.cloudinary.com/v1_1/kanmi24/upload';
    let formData = new FormData();

    formData.append('file', file);
    formData.append('upload_preset', CLOUDINARY_PRESET);

    if (file.size > 5000000) {
        errorP.textContent = "File cannot be more than 5 MB";
        return;
    }
    errorP.textContent = "Please wait...";
    fetch(url, {
            method: 'POST',
            body: formData
        })
        .then((e) => {
            let res = e.json();
            return res;
        })
        .then((e) => {
            errorP.textContent = "Upload Successful!";
            setTimeout(() => {
                errorP.textContent = "File cannot be more than 5 MB";
            }, 4000);
            addImage(e.secure_url);
        })
        .catch((error) => {
            errorP.textContent = "Oops! Something went wrong, please try again.";
        })
}
Note: Make sure you replace 'kanmi24' in the url variable & 'nwzufxhy' with your cloud name and upload preset respectively.
Create a uploadFile function that accepts the file object through a parameter. The code above uses Fetch API which is a web API that provides an interface for accessing and manipulating requests and responses, to upload your images.
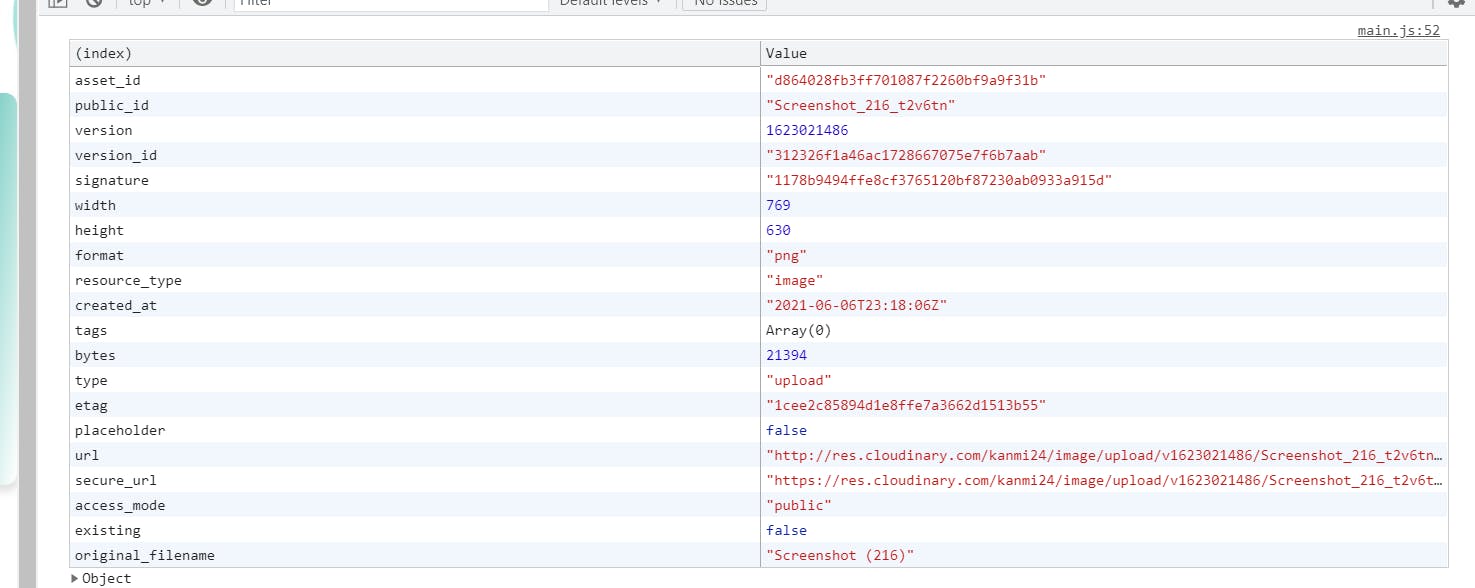
Note: The response object e returns a promise, which is why another .then() method is added to the chain that allows me obtain the url I need.
Without calling any object property, it returns this object info to the console when I upload an image:
 If you'd prefer using a more traditional method like AJAX maybe because you want to account for older browsers or you'd like to monitor the file's progress while uploading, check out the next section below.
With AJAX (Asynchronous JavaScript)
function uploadFile(file) {
    let url = 'https://api.cloudinary.com/v1_1/kanmi24/upload';

    let xhr = new XMLHttpRequest()
    let formData = new FormData()
    xhr.open('POST', url, true);
    formData.append('upload_preset', CLOUDINARY_PRESET);

    xhr.addEventListener('readystatechange', function (e) {
        if (xhr.readyState == 4 && xhr.status == 200) {
            let imageURLRes = JSON.parse(e.target.response);
            let imageURL = imageURLRes.secure_url;
            console.log(imageURL);
        } else if (xhr.readyState == 4 && xhr.status != 200) {
            console.log(e);
        }
    })

    formData.append('file', file)
    xhr.send(formData)
}
This code would log out the image url which you can save on your server. Make sure your Cloudinary preset variable is passed to the formData object through its append method to avoid upload errors. If you'd like a refresher on AJAX, check out this site
Method 2: Using Cloudinary Widget
In your HTML file, add this script just above the body tag.
    <script src='https://upload-widget.cloudinary.com/global/all.js' type='text/javascript'></script>

    <script type="text/javascript">
        let myWidget = cloudinary.createUploadWidget({
            cloudName: 'kanmi24',
            uploadPreset: 'nwzufxhy'
        }, (error, result) => {
            if (!error && result && result.event === "success") {
                console.log('Done! Here is the image info: ', result.info);
            }
        })

        document.getElementById("upload-label").addEventListener("click", function () {
            myWidget.open();
        }, false);
    </script>
Once you're done, your HTML code should look like this
<!DOCTYPE html>
<html>

<head>
    <meta charset='utf-8'>
    <meta http-equiv='X-UA-Compatible' content='IE=edge'>
    <title>Gallery</title>
    <meta name='viewport' content='width=device-width, initial-scale=1'>
    <link rel='stylesheet' type='text/css' media='screen' href='main.css'>
</head>

<body>
    <main>
        <article class="image-container">
            <section id="image-section">

            </section>

            <section class="button-section">
                <button onclick="prevImage()">Previous</button>
                <button onclick="nextImage()">Next</button>
            </section>

            <button id="upload-label">Upload</button>

            <p id="error">Not more than 5MB</p>
        </article>
    </main>

    <script src="https://upload-widget.cloudinary.com/global/all.js" type="text/javascript"></script>

    <script type="text/javascript">
        let myWidget = cloudinary.createUploadWidget({
            cloudName: 'kanmi24', // your username
            uploadPreset: 'nwzufxhy' //your upload preset
        }, (error, result) => {
            if (!error && result && result.event === "success") {
                console.log('Done! Here is the image info: ', result.info);
            }
        })

        document.getElementById('upload-label').addEventListener("click", function () {
            myWidget.open();
        }, false);
    </script>
</body>

</html>
Once it's clicked, a small widget would pop up for you to upload your images.
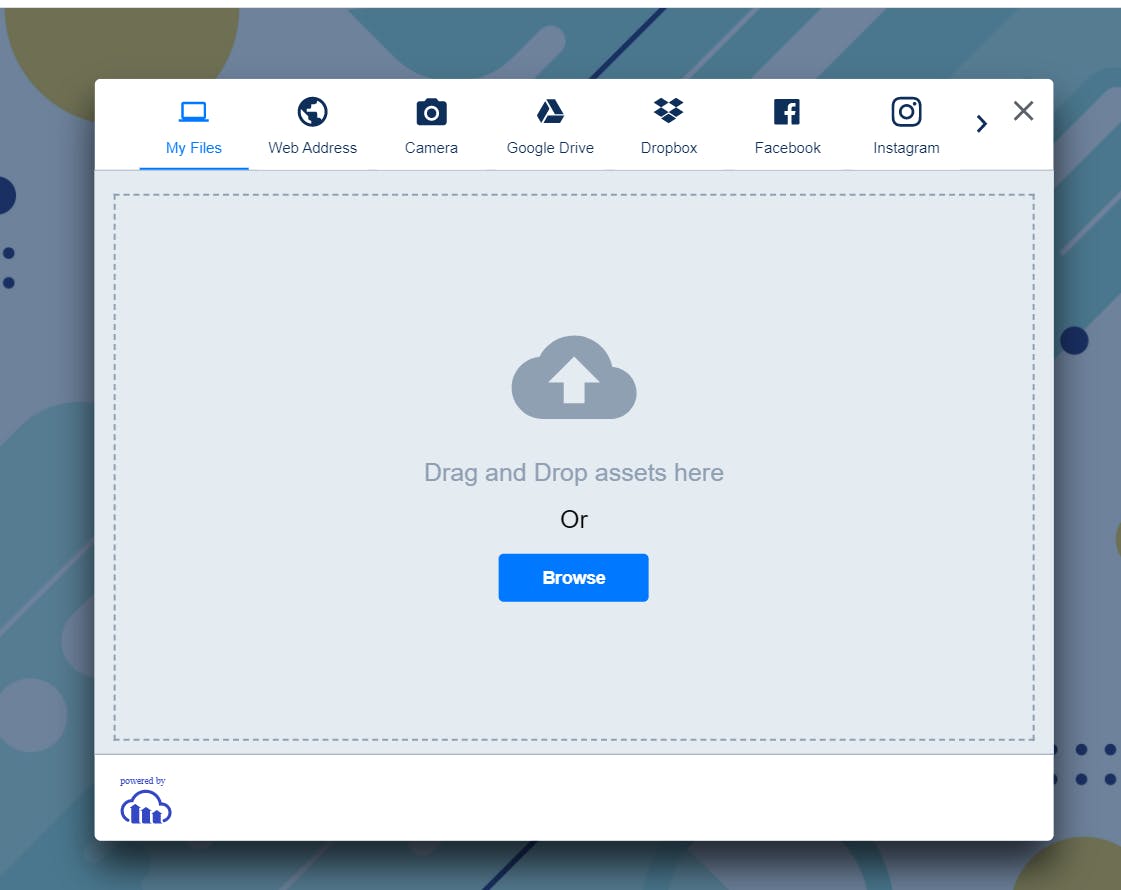 In this method, you add Cloudinary's upload widget remote js file (via the script tag) to call the createUploadWidget method to initialize the widget. Then, call the widget's open method bound to the upload-label id to open the widget.
We won't need the external main.js file anymore, since we are using the widget in this method.
In this method, you add Cloudinary's upload widget remote js file (via the script tag) to call the createUploadWidget method to initialize the widget. Then, call the widget's open method bound to the upload-label id to open the widget.
We won't need the external main.js file anymore, since we are using the widget in this method.
You can use any method you feel like using, but I'll be using fetch for this article because it saves time & less code. 😄
Another thing to add is the add image functionality
function addImage(url) {
    let newImg = document.createElement('img');
    let newURL = document.createAttribute('src');
    let newClass = document.createAttribute('class');

    if (allImgsSection.children.length == 1) {
        newClass.value = 'blur-2';
    } else if (allImgsSection.children.length > 1) {
        newClass.value = 'blur-2 hidden';
    } else {
        newClass.value = 'show-image';
    }
    newURL.value = url;
    newImg.setAttributeNode(newURL);
    newImg.setAttributeNode(newClass);
    newImg.addEventListener('click', () => {
        displayImgs.classList.toggle('hide');
        let tempEle = newImg.cloneNode();
        tempEle.classList.toggle('view');
        displayImgs.appendChild(tempEle);
        closeButton.classList.remove('hide');
    })
    allImgsSection.appendChild(newImg);
}
The function above creates a new image element with its attributes to house the images we uploaded and it appends it to the image section html element on the DOM.
Adding CSS
Obviously, we can't just leave our gallery just the way it is, let's add some CSS styles to make it look pretty! 🤩
* {
    margin: 0;
    padding: 0;
    box-sizing: border-box;
    font-family: 'Poppins', 'Courier', sans-serif;
}

body {
    background: url("./imgs/5291450.jpg");
    width: 100%;
    height: auto;
    background-position: center;
    background-size: cover;
    background-repeat: no-repeat;
}

main {
    width: 100%;
    height: 100vh;
    display: flex;
    align-items: center;
    flex-wrap: wrap;
    justify-content: center;
}

#app-title {
    display: inline-block;
    width: 100%;
    text-align: center;
    height: auto;
    font-size: 2rem;
    position: relative;
    top: 3rem;
    background: linear-gradient(124deg, #f1c853, #b55389);
    background-clip: text;
    -webkit-background-clip: text;
    font-weight: bolder;
    cursor: pointer;
    transition: all 0.5s ease;
    -webkit-text-fill-color: transparent;
    animation: hue 10s infinite linear;
}

#upload {
    display: none;
}

#upload-label {
    display: flex;
    justify-content: center;
    align-items: center;
    width: 7rem;
    height: 2rem;
    border-radius: 7rem;
    font-size: 1.1rem;
    margin-top: 2rem;
    box-shadow: 5px 6px 13px #e1d9d9;
    color: white;
    background: linear-gradient(to bottom right, gold, rgb(165 55 165));
    transition: all 0.3s ease-in-out;
    cursor: pointer;
}

#upload-label:hover {
    filter: brightness(120%);
}

form {
    display: flex;
    justify-content: center;
    align-items: center;
    width: 100%;
}

.image-container {
    display: flex;
    position: relative;
    flex-wrap: wrap;
    justify-content: center;
    align-items: center;
    height: 31rem;
    min-width: 11rem;
    max-width: 34rem;
}

.image-section {
    width: 100%;
    margin-bottom: 1rem;
    display: grid;
    grid-template-columns: minmax(auto, 3.8rem) minmax(auto, 16rem) minmax(auto, 3.8rem);
    justify-content: center;
    justify-items: center;
    align-items: center;
    min-height: 22rem;
    position: relative;
    transition: all 0.5s ease-in;
}

img {
    width: 5rem;
    height: auto;
    transition: all 0.5s ease;
}

/* Image transitions */

.blur-1,
.blur-2 {
    position: relative;
    filter: blur(2px);
    width: 4rem;
    height: auto;
    transition: all 0.5s ease;
}

.blur-1 {
    order: 1;
}

.show-image {
    position: relative;
    width: 10rem;
    height: auto;
    order: 2;
    grid-column-start: 2;
    grid-column-end: 3;
    transition: all 0.5s ease;
}
...
View full CSS code here. Your gallery should look like this when you're done.

These same steps can be done to upload videos, you may just need to change what the input file is accepting in Step 2 of Method 1 & create video tags for them once uploaded instead of images in the add image functionality section.
And voila! Well done! You just made your own gallery using just Cloudinary with HTML, CSS, JS! If you would like to continue and add some more functionalities, read on to the next section.
Optional
If you would like to add more features to your program, keep reading on cause we're in for an awesome ride! 🚗💨
Adding Extra functionalities
View all Images
Let's add a button that we would use to view all our images uploaded and a section to store them in.
<article class="display-all-imgs hide">
<p id="total-imgs"><span id="imgs-number">0</span> total images</p>
</article>
<main>
<h1 id="app-title">Gallery</h1>
<article class="image-container">
<button id="previous" onclick="prevImage()"><</button>
<section class="image-section">
</section>
<button id="next" onclick="nextImage()">></button>
<form method="POST">
<input type="file" multiple accept="image/*" id="upload">
<label id="upload-label" for="upload">Upload</label>
</form>
<p id="error">Not more than 5MB</p>
<button id="view-all-imgs" onclick="viewImgs()">View All Images</button>
</article>
</main>
Add a paragraph tag that we can manipulate with JS to calculate the number of images you've uploaded so far and make sure you place the section to view all your images above the main tag to cover the whole page.
Add some CSS code
#view-all-imgs {
    font-size: 1.1rem;
    background: -webkit-linear-gradient(318deg, goldenrod, #1e1e98);
    -webkit-background-clip: text;
    font-weight: bold;
    border: none;
    margin: 0.5rem 0rem;
    border-bottom: 1px solid tan;
    cursor: pointer;
    transition: all 0.5s ease;
    -webkit-text-fill-color: transparent;
}

#view-all-imgs:hover {
    border-bottom: 3px solid tan;
    animation: hue 10s infinite linear;
}

#total-imgs {
    display: inline-block;
    grid-area: 1 / 1 / 2 / 6;
    padding-top: 4rem;
}

.display-all-imgs {
    display: grid;
    grid-template-columns: 4rem 4rem 4rem 4rem 4rem;
    grid-template-rows: minmax(4rem, auto);
    background-color: white;
    border-radius: 0.4rem;
    position: absolute;
    justify-content: center;
    justify-items: center;
    width: 100%;
    box-shadow: 1px 3px 6px #9e9e9e3b;
    height: 100vh;
    z-index: 4;
}

#close-button {
    position: absolute;
    font-size: 2.6rem;
    background: none;
    border: none;
    top: 0;
    z-index: 7;
    right: 2rem;
    cursor: pointer;
    color: #ff2323;
}

#close-button:hover {
    color: red;
}

.view {
    position: absolute;
    right: 0;
    left: 0;
    background-color: rgba(0, 0, 0, 0.381);
    height: auto;
    width: 100%;
    z-index: 9;
}

.fullscreen-img {
    position: absolute;
    display: flex;
    justify-content: center;
    align-items: center;
    width: 100%;
    z-index: 7;
    height: 100vh;
    background-color: rgba(0, 0, 0, 0.517);
}

.small-img {
    width: 100%;
    height: auto;
}

.hide {
    display: none;
}
@keyframes hue {
    from {
        -webkit-filter: hue-rotate(0deg);
    }

    to {
        -webkit-filter: hue-rotate(-360deg);
    }
}
Add this function to your JS file to view the number of images present.
function viewImgs() {
    allImgs = document.querySelectorAll('.image-section img');
    galleryView = document.querySelector(".display-all-imgs");
    if (galleryView.children[1] == null || galleryView.children[1].getAttribute("src") != allImgs[0].getAttribute("src") || galleryView.children.length - 1 != allImgs.length) {
        let imageNum = document.querySelector("#imgs-number");
        imageNum.textContent = allImgs.length;
        closeButton.classList.remove('hide');
        galleryView.classList.toggle('hide');

        allImgs.forEach(ele => {
            let tempClone = ele.cloneNode();
            tempClone.setAttribute("class", "small-img")
            galleryView.appendChild(tempClone);
        });
    } else {
        closeButton.classList.remove('hide');
        galleryView.classList.toggle('hide');
    }
}
You can also add another function that allows the user to view their images in full screen when clicked.

Check out the full code here:
Useful resources:
- Cloudinary upload widget
- Unsigned uploads on Cloudinary
- Uploading with a direct call to the REST API
- Cloudinary Image and Video file upload
Thanks for reading this article! Have a great day ahead! ^_^