


Yesterday we had a brief introduction to the History API, by using the pushState method.
Today we'll be diving more into the History API and see what other elements we can use.
JavaScript Browser API Back and Forward
So instead of refreshing the current URL sometimes, we want to navigate true the history programmatically. The History API has three methods of doing so:
back()Same as clicking the back button in the browserforward()Same as clicking the forward buttongo()We can go to a specific index forward (1) or backward (-1)
In action the back() method looks like this:
window.history.back();
The forward() in turn looks like this:
window.history.forward();
And the go() we can use like this:
window.history.go(-1); // back
window.history.go(1); // forward
window.history.go(0); // refresh
window.history.go(); // refresh
You can determine how many pages are in the history by using the following command:
var numberInHistory = window.history.length;
JavaScript History API replaceState
As we saw we can use pushState to change the current state, we can also use replaceState for this:
history.replaceState({page: 'unicorn'}, 'Unicorn', '/Unicorn');
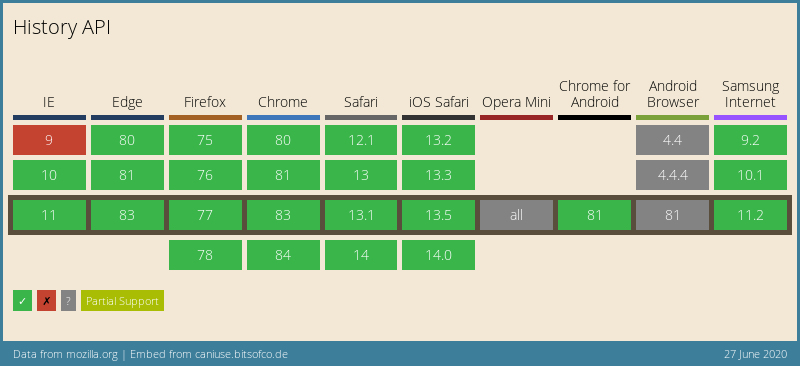
Browser Support
Thank you for reading, and let's connect!
Thank you for reading my blog. Feel free to subscribe to my email newsletter and connect on Facebook or Twitter