
Post hidden from Hashnode
Posts can be hidden from Hashnode network for various reasons. Contact the moderators for more details.


View and Edit Word Documents in Angular Apps: Beginners’ Guide


This blog will explain how to view and edit Word documents with the key features of Syncfusion’s Angular Word Processor component, and the procedure to integrate it into an Angular "Link to Angular Wikipedia page") application.
The Syncfusion Angular Word Processor is also known as document editor. It is a component used to compose, edit, view, and print Word (DOCX, WordML, DOC, RTF, TXT) documents in your Angular applications. It provides all the standard Word processing features, such as:
- Editing text
- Formatting content
- Resizing images and tables
- Finding and replacing text
- Bookmarks
- Tables of contents
- Printing
- Importing and exporting Word documents.
All the user interactions and editing operations run purely on the client side using our own SFDT (Syncfusion document text) file format. This approach provides a very fast editing experience to the end users.
Syncfusion offers two components for the same purpose:
- Document editor provides just the main document view area. Here, the user can compose, view, and edit the Word documents. You may prefer to use this component when you want to design your own UI options for your application.
- Document editor container provides the main document view area along with the built-in toolbar and properties pane.
Features of Word Processor
- Compose Word documents.
- View or edit existing Word documents.
- Print Word documents.
- Find and replace.
- Spell checking.
- Track changes.
- Add, edit, or delete comments.
- Copy and paste content from other applications.
- Protect the entire Word document or a particular range of the document.
- Render right-to-left (RTL).
- View in print layout (page-by-page view) or web layout.
- Customize toolbar and context menu.
- Format text, paragraphs, and tables.
- Style characters and paragraphs. Add custom styles.
- Bullets and numbering.
- Hyperlinks.
- Bookmarks.
- Page setup.
- Headers and footers.
- Footnote and endnote.
- Legacy form fields.
- Tables of contents.
- Page numbers.
| This component requires server-side interaction for these operations:
· Opening Word documents (converting Word to SFDT file format) · Pasting with formatting · Restricting editing · Spell checking
A server-side Web API can be created using ASP.NET MVC and ASP.NET Core. Access the Document Editor Web API service projects from GitHub.
Also, you can directly pull and consume our predefined Word Processor server Docker image from Docker Hub. This server-side Web API project is targeting ASP.NET Core 2.1.
At present, Syncfusion Word Processor performs spell checking for an entire document’s content for only one language at a time. The spell checker identifies the language through the languageID property. Whereas you can add multiple language dictionaries in the server-side Web API. Then, switch the languageID in client-side to different languages.
Host Word Processor Web API from Docker Hub image
The Angular Word Processor component facilitates a predefined Word Processor server Docker image. This image contains all the mandatory web APIs for opening Word documents, pasting with formatting, restricting editing, spell checking, and saving documents. You can pull this Docker image and deploy it directly in your server on the go.
If you want to add new functionality or customize any existing functionalities, create your own Docker file by referencing the existing Word Processor Docker project.
To get started, you should download and install Docker in your environment. Then, perform the following steps in the command prompt:
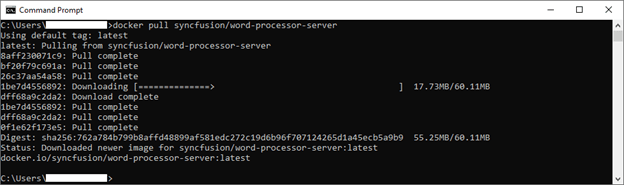
Step 1: First, pull the Word Processor server Docker image from Docker Hub.
| docker pull syncfusion/word-processor-server |
The following screenshot illustrates the command line output of this docker pull command.
Step 2: Then, create the docker-compose.yml file with the following code in your file system.
version: '3.4'

services:
 word-processor-server:
    image: syncfusion/word-processor-server:latest
    environment:
      #Provide your license key for activation
      SYNCFUSION_LICENSE_KEY: LICENSE_KEY

    volumes:
      - C:\Docker\Data:/app/Data
    ports:
    - "6002:80"
All the files present in the folder path (C:\Docker\Data) in the volumes section of the docker-compose.yml file will be copied to the proper folder (/app/Data) of the Docker container. The Word documents copied to the Docker container can be processed using the LoadDocument web API. Please refer to the Word Processor server documentation to configure spell check dictionaries for multiple languages.
Note: Word Processor is a commercial product. It requires a valid license key to use it in a production environment. Please replace LICENSE_KEY with the valid license key in the docker-compose.yml file.
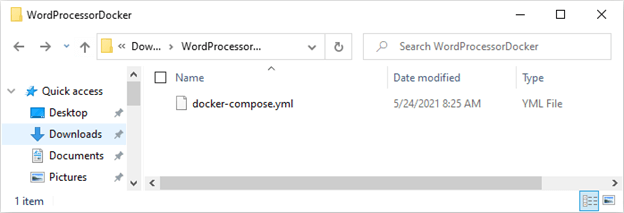
The following screenshot illustrates the folder in your file system containing the docker-compose.yml file.
Step 3: In a terminal tab, navigate to the directory where you’ve placed the docker-compose.yml file. Then, execute the following command.
| docker-compose up |
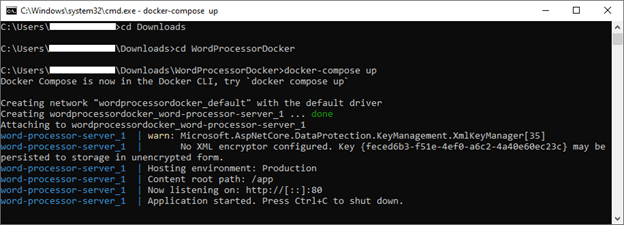
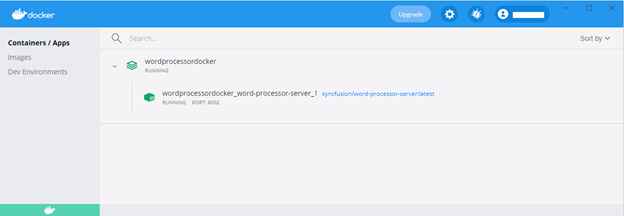
Now, the Word Processor server Docker instance runs successfully in the localhost with the provided port number (localhost:6002). You can see the new Docker container running in your Docker dashboard window.
Refer to the following screenshot.
Open this link in a browser. Then, navigate to the Word Processor web API (localhost:6002/api/documenteditor). You can see the default get method response.
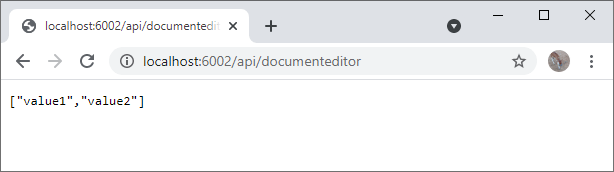
Use this URL (localhost:6002/api/documenteditor) as the service URL in the client-side Word Processor component.
Create new Angular app with Word Processor component
To create an Angular app, please set up your environment with the following prerequisites:
- Node.js
- Angular
- Angular CLI
- Visual Studio Code (or code editor of your choice)
Now, proceed in creating a new Angular app and integrate the Word Processor component using the following steps:
Step 1: First, create a new Angular demo project. Please refer to the documentation for creating a new Angular app in the local machine.
Step 2: After creating a new Angular app, install the Angular document editor NuGet package.
The following command installs Angular document editor and its dependent packages. The — save command instructs the NPM to include the document editor package inside the dependencies section of the package.json file.
| npm install @syncfusion/ej2-angular-documenteditor --save |
Step 3: In the src/app/app.module.ts file, add the import statement for DocumentEditorContainerAllModule from the installed package.
import { BrowserModule } from '@angular/platform-browser';
import { NgModule } from '@angular/core';
import { DocumentEditorContainerAllModule } from '@syncfusion/ej2-angular-documenteditor';
import { AppComponent } from './app.component';

@NgModule({
       declarations: [
       AppComponent
        ],

imports: [
        BrowserModule,
        DocumentEditorContainerAllModule
       ],
       providers: [],
       bootstrap: [AppComponent]
})
export class AppModule { }
Step 4: In the styles.css file, reference the theme-specific CSS files that you prefer for document editor component. Here, we have referenced Material theme CSS files.
@import '../node_modules/@syncfusion/ej2-base/styles/material.css';
@import '../node_modules/@syncfusion/ej2-buttons/styles/material.css';
@import '../node_modules/@syncfusion/ej2-inputs/styles/material.css';
@import '../node_modules/@syncfusion/ej2-popups/styles/material.css';
@import '../node_modules/@syncfusion/ej2-lists/styles/material.css';
@import '../node_modules/@syncfusion/ej2-navigations/styles/material.css';
@import '../node_modules/@syncfusion/ej2-splitbuttons/styles/material.css';
@import '../node_modules/@syncfusion/ej2-dropdowns/styles/material.css';
@import '../node_modules/@syncfusion/ej2-angular-documenteditor/styles/material.css';
Step 5: In the src/app/app.component.html file, add the document editor component by replacing the existing template content with the following script.
<ejs-documenteditorcontainer [serviceUrl]='serviceLink' [enableSpellCheck]=true style="display:block" height="600"></ejs-documenteditorcontainer>
Step 6: In the src/app/app.component.ts file, declare the serviceLink property in the AppComponent class. Then, initialize it with the web API URL inside the constructor. This service URL will be used for the document editor’s server-side dependent functionalities.
Then, the modified src/app/app.component.ts file will be like the following.
import { Component, ViewChild } from '@angular/core';
import { ToolbarService, DocumentEditorContainerComponent } from '@syncfusion/ej2-angular-documenteditor';

@Component({
  selector: 'app-root',
  templateUrl: './app.component.html',
  styleUrls: ['./app.component.css'],
  providers: [ToolbarService]
})
export class AppComponent {
  public serviceLink: string;
  constructor() {
    this.serviceLink = 'http://localhost:6002/api/documenteditor/';
  }
}
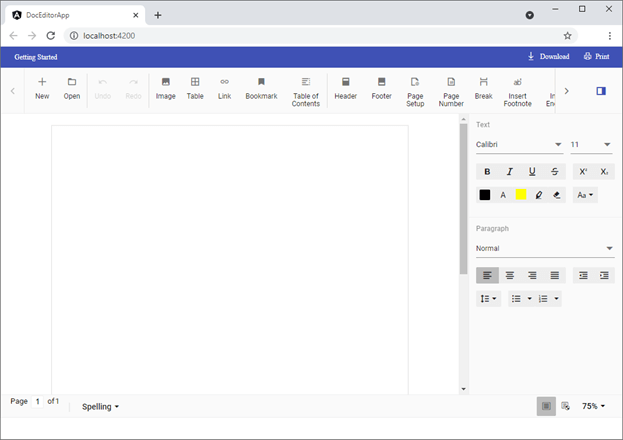
Then, execute the project using the ng server -o command in the terminal window. Now, you will see the browser opens with the Word Processor component.
In the previous output image, the Word Processor is added to the page without a title bar and doesn’t fit the full size of the browser window.
Add title bar for Word Processor
Step 1: Add the following div element as the first line of the src/app/app.component.html file. Then, add the required styles in the src/styles.css file.
<div id="default_title_bar" class="e-de-ctn-title"></div>
Step 2: Then, define the TitleBar class as required or add the title-bar.ts file from GitHub.
Step 3: Now, install the following packages used in the src/app/title-bar.ts file.
npm install @syncfusion/ej2-angular-buttons -save
npm install @syncfusion/ej2-angular-splitbuttons -save
npm install @syncfusion/ej2-angular-navigations -save
Step 4: In the src/app/app.component.html file, add the template reference variable documenteditor_ref . Also, add the created and documentChange event handlers for the document editor component.
<ejs-documenteditorcontainer #documenteditor_ref [serviceUrl]='serviceLink' [enableSpellCheck]=true (created)="onCreate()" (documentChange)="onDocumentChange()" style="display:block" height="600"></ejs-documenteditorcontainer>
Step 5: In the src/app/app.component.ts file, import the TitleBar class and create a new title bar instance. Then, attach it to the HTML div element.
import { TitleBar } from './title-bar';
import { isNullOrUndefined } from '@syncfusion/ej2-base';

export class AppComponent {
  //Gets the DocumentEditorContainerComponent instance from view DOM using a template reference variable 'documenteditor_ref'.
  @ViewChild('documenteditor_ref') public container! : DocumentEditorContainerComponent;
  titleBar: TitleBar;
}

onCreate(): void {
  let titleBarElement: HTMLElement = document.getElementById('default_title_bar');
  this.titleBar = new TitleBar(titleBarElement, this.container.documentEditor, true);
  this.container.documentEditor.documentName = 'Getting Started';
  this.titleBar.updateDocumentTitle();
  //Sets the language id as EN_US (1033) for spellchecker and docker image includes this language dictionary by default.
  //The spellchecker ensures the document content against this language.
  this.container.documentEditor.spellChecker.languageID = 1033;
}

onDocumentChange(): void {
  if (!isNullOrUndefined(this.titleBar)) {
      this.titleBar.updateDocumentTitle();
  }
  this.container.documentEditor.focusIn();
}
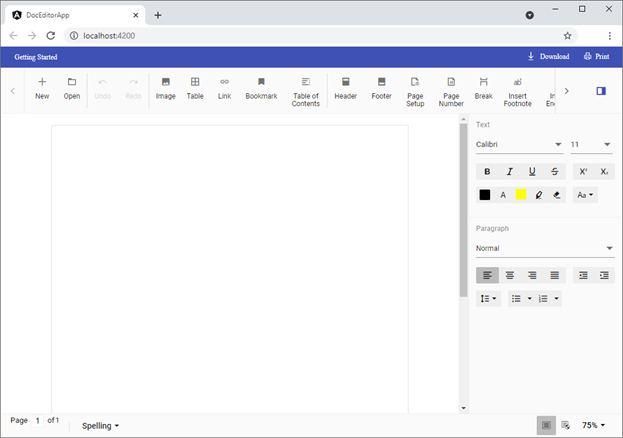
Now, execute the project and you can see the browser opens with a title bar and document editor.
Fit Word Processor to browser window size
In the src/app/app.component.ts file, add logic to resize the document editor with respect to the window’s available size. Then, add an event listener for the browser window resize event.
Refer to the following code example.
onCreate(): void {
  setInterval(()=>{
    this.updateDocumentEditorSize();
  }, 100);
  //Adds event listener for browser window resize event.
  window.addEventListener("resize", this.onWindowResize);
}

onDestroy(): void {
  //Removes event listener for browser window resize event.
  window.removeEventListener("resize", this.onWindowResize);
}

onWindowResize= (): void => {
  //Resizes the document editor component to fit full browser window automatically whenever the browser resized.
  this.updateDocumentEditorSize();
}

updateDocumentEditorSize(): void {
  //Resizes the document editor component to fit full browser window.
  var windowWidth = window.innerWidth;
  //Reducing the size of title bar, to fit Document editor component in remaining height.
  var windowHeight = window.innerHeight - this.titleBar.getHeight();
  this.container.resize(windowWidth, windowHeight);
}
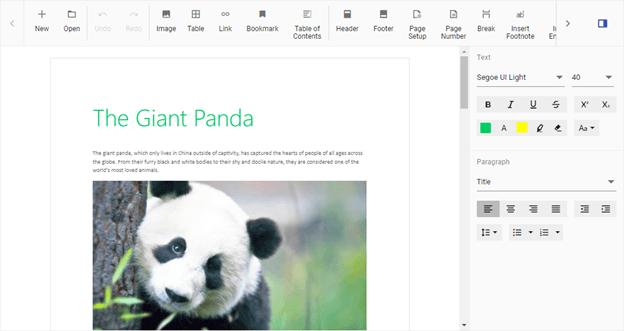
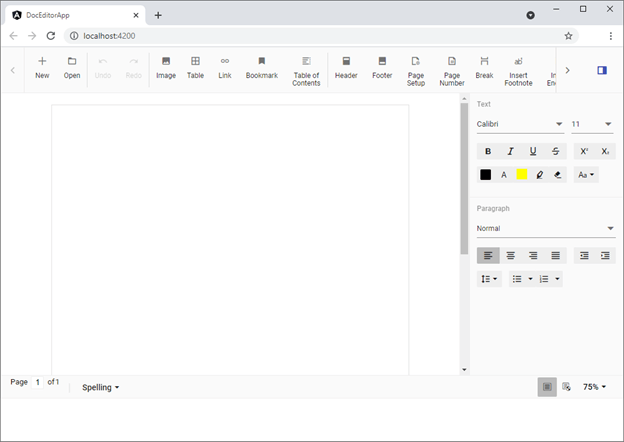
Then, execute the project. Now, you can see the browser opens with a complete Word Processor including title bar, toolbar, properties pane and document editor in full window.
Open a template document in Word Processor
You can open an existing Word document as a initial template using a created event.
In the src/app/app.component.ts file, add the following code to get SFDT for the specified template file. Then, open it in the Angular Word Processor component. The file name specified should be one of the files copied to the Docker container.
//Opens the default template Getting Started.docx from web API.
openTemplate(): void {
  var uploadDocument = new FormData();
  uploadDocument.append('DocumentName', 'Getting Started.docx');
  var loadDocumentUrl = this.serviceLink + 'LoadDocument';
  var httpRequest = new XMLHttpRequest();
  httpRequest.open('POST', loadDocumentUrl, true);
  var dataContext = this;
  httpRequest.onreadystatechange = function () {
    if (httpRequest.readyState === 4) {
      if (httpRequest.status === 200 || httpRequest.status === 304) {
        //Opens the SFDT for the specified file received from the web API.
        dataContext.container.documentEditor.open(httpRequest.responseText);
      }
    }
  };
  //Sends the request with template file name to web API.
  httpRequest.send(uploadDocument);
}
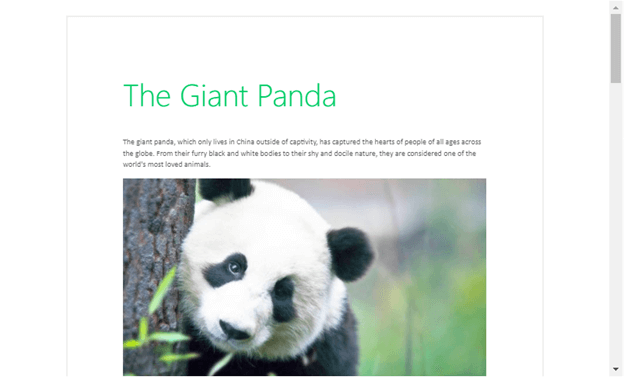
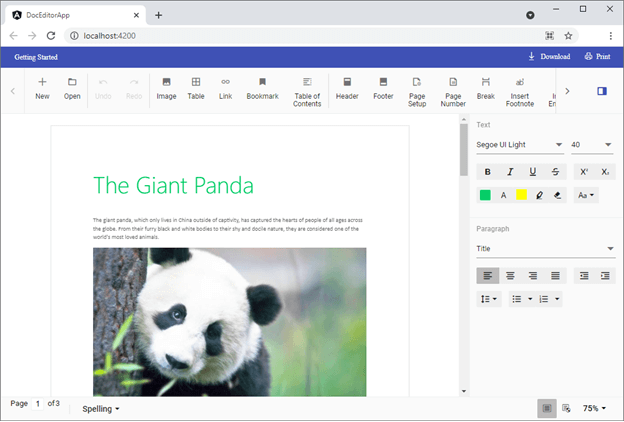
Then, execute the project. Now, you can see the browser opens with a complete Word Processor loaded with a template document.
GitHub repository
For more information, refer to the complete, working view and edit Word documents in Angular example.
Summary
Thank you for taking time to read this blog. We have seen how to set up the Angular Word Processor server-side API using a predefined Docker image and integrate the component into an application. With this, you can easily view and edit a Word documents in your Angular app.
Also, take a moment to peruse the documentation, where you’ll find other features, all with accompanying code examples.
Are you already a Syncfusion user? Then, you can download the product setup here. If you’re not yet a Syncfusion user, you can download a free, 30-day trial here.
If you have any questions about these features, please let us know in the comments below. You can also contact us through our support forum, Direct-Trac, or feedback portal. We are happy to assist you!