


Game dev. The art of writing games. It's a little bit of a childhood dream of mine to write a game. A game, which is enjoyed by many people. A game, which reflects the world of my dreams. I can do whatever I want, and show other people what I think about about, what my 8th grader syndrome made me see and how everyone can be a distinctive hero there. My own little sandbox. I guess, it's this kind of motivation also driving other people into game dev.
However, game dev... there's so much going on, so many things to do and consider. Big dreams are one thing, but where to start is a completely different world. With this article, I want to introduce you to game development. I want to give you a little tour of where to start, how to explore possibilities and revive my journey a little bit at the same time. I will try to construct different games from the ground up while writing this article, so you can experience game-dev live. For now, I am no match for the likes of Casey Muratori, who streams his sessions, which is why I would like to stick to writing for now :) Also, don't expect regular updates, as I have quite a lot on my plate, so I will write whenever I find time. I hope the situation improves in the future, though.
This article was first released for Rust-Lang, which is a low-level alternative for max-perf game dev, however I ported it to meet your web needs!
Content
- Requirements
- What Is A Game?
- What Is Our Game?
- Setting Up The Project
- Hello World!
- Simplified Terminal
- Input, Processing, Output
- Game Logic Time
- How To Distribute The Game?
Requirements
Before you read on, if you plan on playing around with code yourself, please make yourself comfortable with HTML, CSS, JS, SASS and TypeScript. This article series requires you to have basic knowledge of the languages and the necessary tooling set up. I will not explain the finer details to you, if not necessary for game development itself or understanding a complex block of code.
What is a Game?
Ok, with that out of the way, let's start. Game dev. First of all, what we want to do is start simple. What exactly is a game? Taking a look around, there are many types of games. Card games, sports games, table-top games, pen-and-paper games, video games, and many more. They all have in common, that they serve the purpose of entertainment and that they have a set of rules, which define the structure in which the game should be conducted. Usually, it does not matter how complicated the rules are, as long as it's fun, anything can be a game! This realization gives us the freedom to make our dreams come true, or at least find something to do over boredom.
In order to start out developing a game, we need to first settle on a few things:
- What type of game do we want to create?
- How can a player interact?
- What should be the game rules?
- What is the goal?
- Why is it fun?
- What language do we want to use for programming?
- Which platforms do we want to support?
- Which tools do we need?
What is our Game?
Since we want to start at the very beginning, let's start with one of the simplest games we can come up with: a child's game called "Guess the number". It should be a text-only game, because text is very simple to handle. A player should just use the keyboard as input. It's standardized and easy to use from most programming languages. The rules for our first game should be, that a player has to guess a number thought up by the computer. The computer has to tell the player if the number is greater or smaller than the thought-up number. The goal is to guess the correct number. It's fun... well, it's mostly for kids who want to brag about their new-learned math knowledge. For adults, it's fun to show off and play their first self-made game ;)
As for the technical aspects, we want to go with a modern setup. As such, I choose the web as a platform, which is very good for distributing games and make them playable on literally any platform which can run a browser. As for tools, we need an IDE and NodeJS/NPM. For my articles, I will use the JetBrains platform for the IDE and Windows Powershell as shell.
Setting up the project
In order to setup our project, the first thing we do is use npm to create a new template:
PS > mkdir gtn |cd
PS > npm init
Wrote to C:\Users\marco_000\Projects\gtn\package.json:

{
  "name": "gtn",
  "version": "1.0.0",
  "description": "",
  "main": "index.js",
  "scripts": {
    "test": "echo \"Error: no test specified\" && exit 1"
  },
  "keywords": [],
  "author": "",
  "license": "ISC"
}

>
The above info, of course, has to be changed. So let's open the new file and change it to the following config:
{
  "name": "gtn",
  "version": "1.0.0",
  "private": true,
  "description": "",
  "devDependencies": {
    "parcel-bundler": "^1.10.3"
  },
  "scripts": {
    "dev": "parcel index.html",
    "build": "parcel build index.html"
  },
  "browserslist": [
      "last 2 versions"
  ],
  "keywords": [],
  "author": "",
  "license": "ISC"
}
First of all, I added the Parcel bundler. I chose it, because it is so darn simple to use. Just define an entry point and some configs for how things should be built, and Parcel will go figure stuff out on its own. I also told it to only care about the latest two browser versions. I don't expect gamers to use some old outdated browser on their thicc, shiny gaming machines... Last but not least, I added two scripts. The first one builds a development version of the game web app plus runs a development server which supports hot code swapping, the second one just builds the version we would want to upload to our servers.
Since Parcel uses Babel to transform our shiny next-gen code for different browsers, we also have to add a Babel
configuration. Most of the time, Babel is a lot of work, however since we go for a very simple setup, all we need is
the following .babelrc:
{
  "plugins": [
    ["@babel/plugin-transform-runtime", {
      "corejs": 2
    }]
  ]
}
Took me a little googling, however with Parcel, that's all you need and be done with it. Amazing. To finish the
config rage, we also need a typescript config in a tsconfig.json file:
{
  "compilerOptions": {
    "alwaysStrict": true,
    "downlevelIteration": true,
    "forceConsistentCasingInFileNames": true,
    "importHelpers": true,
    "lib": [
      "dom",
      "es2018"
    ],
    "module": "esnext",
    "moduleResolution": "node",
    "outDir": "./dist",
    "removeComments": true,
    "resolveJsonModule": true,
    "sourceMap": true,
    "strict": true,
    "target": "es6"
  }
}
There's quite a bit going on here, however that's mainly enabling strict checks and modern features. Let's take a look at the options:
alwaysStrictstrict mode prevents errors at compile time by disallowing certain unsafe or possibly undefined code situations. It's always a good idea to turn on, especially for legacy ES5 and non-module code.downlevelIterationallows for things like the usage of iterable symbols infor..ofloops.forceConsistentCasingInFileNamesenforces the same casing for a single file, which might safe you on platforms with filename case sensitivity. The IDE does a pretty great job already, though, to get it right!importHelpersis needed for the transformation of certain modern syntax, likeclass extends ...libtells the transpiler what kind of code to expect and which library files to include in the compiled code. I want to use the latest and greatest shiny stuff, so that's what I added.moduletells the transpiler what module system to transform the code into. Esnext means that it will create native JS modules.moduleResolutiondefines how modules can be included in typescript.nodeallows us to just import other modules and libraries and even use stuff from npm, which is a great boon.outDiris the directory where the resulting source code should be saved. Usually, you want to usedistorpublichere, since most people use them and that's where others will look for transpiled sources.removeCommentsspeaks for itself. We don't really need comments since we have a map file in dev anyway and in prod no one would want to debug the code.resolveJsonModuleallows us to justimporta json file and get back an object with all the fields. Convenience.sourceMapenables the creation of a source map, so we can do regular code transformation, but still debug that gibberish.strictenables all strict type checking options, which means safety checks at transpile-time. Big win for bug prevention and basically what makes TypeScript so great!targetis the target JS version we want to transpile to. ES6 aligns with our browser matrix, so we'll go for that.
Hello World
So, what we want to do is make sure that our build pipeline works flawlessly. So let's print the iconic
"Hello World" message to the screen. I want the text to be printed in TS, and I want it to be styled in a separate
CSS file. Let's make it a blue text. So, first of all, let's add an index.html file, which at the same time
serves as entry point for ParcelJS:
<!DOCTYPE html>
<html lang="en">
<head>
    <meta charset="UTF-8">
    <title>Guess The Number</title>
    <link rel="stylesheet" media="screen" href="css/main.css">
    <script type="module" src="src/index.ts" defer></script>
</head>
<body>

</body>
</html>
As you can see, there's some HTML boilerplate, a link to a stylesheet and a script, which is a deferred loaded module. Deferred means that the browser starts downloading the file in the background while it builds the rest of the site. And it's source is a... TS file!?! Yes. Because that's what we want to use and Parcel should just make sure that it works in the browser. Just remember that we write code which is convenient for us developers. We have tools to make it work later on.
Next we have to.... yeah, you guessed it. Let's add a css/main.css file with the simple test-content:
body {
  color: blue;
}
That should take care of the blue color. And finally, the src/index.ts file for some coding action.
It will have the very exciting content of:
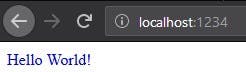
document.querySelector('body').innerHTML = 'Hello World!';
Aaaand... let's build it! It will very likely install some dependencies for you. It does so in one line it updates, that's why you cannot see it in my below output.
PS > npm i .
npm WARN deprecated browserslist@1.7.7: Browserslist 2 could fail on reading Browserslist >3.0 config used in other tools.

> deasync@0.1.13 install C:\Users\marco_000\Projects\gtn\node_modules\deasync
> node ./build.js

`win32-x64-node-10` exists; testing
Binary is fine; exiting

> parcel-bundler@1.10.3 postinstall C:\Users\marco_000\Projects\gtn\node_modules\parcel-bundler
> node -e "console.log('\u001b[35m\u001b[1mLove Parcel? You can now donate to our open collective:\u001b[22m\u001b[39m\n > \u001b[34mopencollective.com/parcel/donate\u001b[0m')"

Love Parcel? You can now donate to our open collective:
 > https://opencollective.com/parcel/donate
npm notice created a lockfile as package-lock.json. You should commit this file.
npm WARN gtn@1.0.0 No description
npm WARN gtn@1.0.0 No repository field.
npm WARN optional SKIPPING OPTIONAL DEPENDENCY: fsevents@1.2.4 (node_modules\fsevents):
npm WARN notsup SKIPPING OPTIONAL DEPENDENCY: Unsupported platform for fsevents@1.2.4: wanted {"os":"darwin","arch":"any"} (current: {"os":"win32","arch":"x64"})

added 736 packages from 575 contributors and audited 7627 packages in 34.29s
found 0 vulnerabilities

PS > npm run dev

> gtn@1.0.0 dev C:\Users\marco_000\Projects\gtn
> parcel index.html

Server running at http://localhost:1234
✨  Built in 35.83s.
Click the link and... we can see the text in blue! Nice! We can work with that <3
Oh, and don't fear the build time. The first build is always very long, but future builds will usually take no more than three seconds, which is ok imho.
Simplified Terminal
Now that we are able to produce some output, it's time to implement some basic stuff we need for our game. This time around, we need to make sure that we have basic text input and output set uhp. In order to mimic a classic terminal, we will setup a textarea as output and add an input field.
You might say "but a terminal is just one big text thingy". Yeah, but under the hood, it is made up of several streams, including the input stream and the output stream. So, in order to keep our logic simple, we will not mangle them in the interface, but get things done instead.
Out HTML body will hence look like this:
<div id="console">
    <textarea id="stdout" placeholder="Output" disabled readonly></textarea>
    <input id="stdin" type="text" placeholder="Input" autofocus>
</div>
Any good terminal also has a little prompt at the beginning of the input line, so let's also add that as a gimmick.
We can just put <span id="prompt">></span> before the input and let CSS do some magic.
As for the styling, I know you all will kill me now, but let's keep it simple and go desktop only. I will even go a step further and say that implementing the mobile part is left as an exercise for the reader (you can ask me about it in the comments, though). This way, we can emulate a good old PC terminal!
We want it to be centered, 800x600 pixels and it should be dark-ish on a bright-ish background. I usually just open up the HTML in a browser at this point and start arranging the CSS. I start with the outer elements, centering everything using flexbox.
body, html {
    align-items: center;
    display: flex;
    height: 100vh;
    justify-content: center;
    width: 100vw;
}

#console {
    height: 600px;
    position: relative;
    width: 800px;
}
Then, I arrange the inner items. I use the fact that absolute positioning is still always relative to the parent with
relative positioning to my advantage here. The input should be 2em high, so I arrange the rest accordingly.
In order to style the input and output more easily, I add a class console-element (mostly so I don't mix in the prompt).
It all results in quite simple CSS:
.console-element {
    box-sizing: border-box;
    margin: 0;
    width: 100%;
}

#prompt {
    bottom: 0;
    font-size: 1.5em;
    left: .5em;
    position: absolute;
}

#stdin {
    height: 2em;
}

#stdout {
    height: calc(600px - 2em);
    resize: none;
}
Once done, it is time to set the font and add some color to the mix. The final CSS then looks like this:
body, html {
    align-items: center;
    background-color: hsl(0, 0%, 95%);
    color: hsl(0, 0%, 15%);
    display: flex;
    font-family: sans-serif;
    font-size: 14px;
    height: 100vh;
    justify-content: center;
    width: 100vw;
}

#console {
    box-shadow: 0 0 15px 3px rgba(0,0,0,0.75);
    height: 600px;
    position: relative;
    width: 800px;
}

.console-element {
    background-color: hsl(0, 0%, 15%);
    border: none;
    box-sizing: border-box;
    color: hsl(0, 0%, 95%);
    margin: 0;
    padding: .5em;
    width: 100%;
}

.console-element:focus {
    /* bad chrome, don't outline */
    outline: none;
}

#prompt {
    bottom: 0;
    color: white;
    font-size: 1.5em;
    left: .5em;
    position: absolute;
}

#stdin {
    height: 2em;
    padding-left: 2em;
}

#stdout {
    border-bottom: 1px inset white;
    cursor: default !important;
    height: calc(600px - 2em);
    resize: none;
}
GUI? DONE! Let's add some code (finally)~
Input, Processing, Output
In your regular console application, execution starts at the top and works its way to the bottom. JavaScript is the same. Except, it's not. In the case of IPO, JS is all async. Most of the APIs do their stuff in the background, so the browser can have better control over rendering and a website feels more responsive. That's what will happening to our application, too. We cannot simply wait until a user inputs something and then continue. JS does that in the background for use, so we will have to create an event-based IPO. Good thing we have have simple elements :)
Let's start even simpler, though. Let's output some hello world to our console on start:
const stdin: HTMLInputElement = document.getElementById('stdin') as HTMLInputElement;
const stdout: HTMLTextAreaElement = document.getElementById('stdout') as HTMLTextAreaElement;
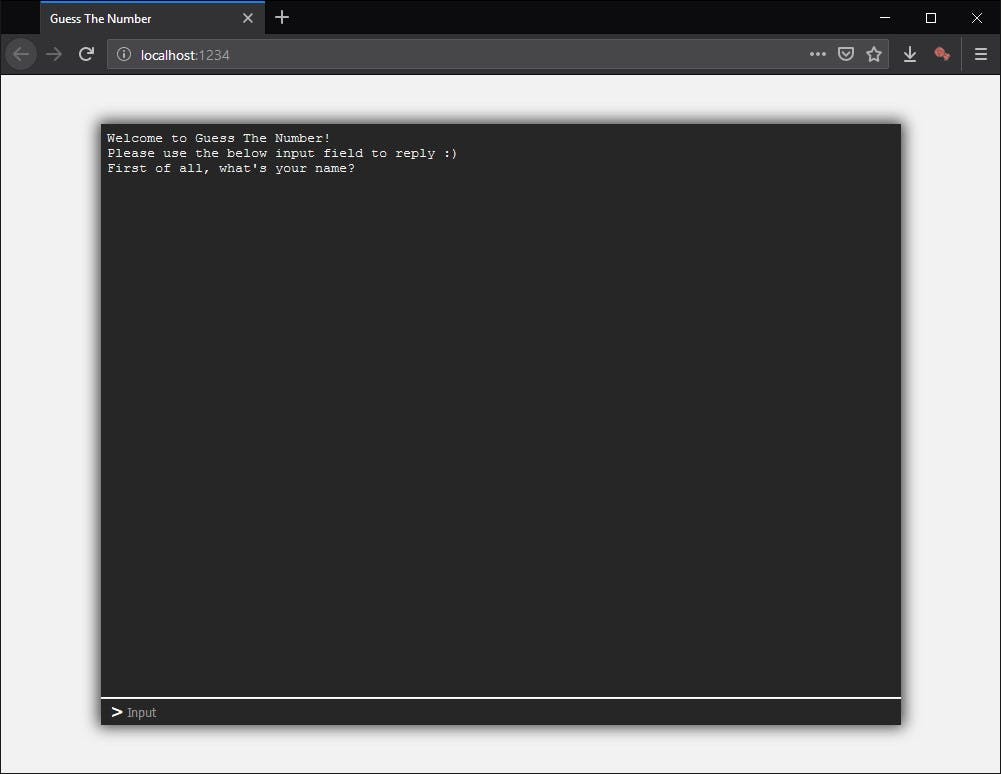
stdout.innerText +=
'Welcome to Guess The Number!\n' +
'Please use the below input field to reply :)\n' +
'First of all, what\'s your name?\n';
And npm run dev. Open the website, take a look at the result. Looks like a game to me 😃
Note: I made the observation, that some browsers need the value field instead. We will abstract that in just a moment
One of the important things I cam to find out is that making certain things re-usable is very important, and abstracting away low-level things can make business-logic clean. So let's abstract our console away so that we can use it just like a regular sync C-like console.
In order to do so, we can make use of async/await. Let's wrap the game logic into async and write a promise-based console API!
class MyConsole {
    // todo
}

const stdin: HTMLInputElement = document.getElementById('stdin') as HTMLInputElement;
const stdout: HTMLTextAreaElement = document.getElementById('stdout') as HTMLTextAreaElement;
const myConsole = new MyConsole(stdin, stdout);

(async () => {
    // let's also directly convert our welcome text to future-API
    myConsole.println('Welcome to Guess The Number!');
    myConsole.println('Please use the below input field to reply :)');
    myConsole.println('First of all, what\'s your name?');
})().catch(myConsole.println);
First of all, let's create the constructor. We can keep the class very modular, if we accept the input and output as parameters.
    constructor(stdin: HTMLInputElement, stdout: HTMLTextAreaElement) {
        this.stdin = stdin;
        this.stdout = stdout;
    }
We already know how to do output, so println() (print line) is rather straight forward!
    /**
     * Write output to console
     */
    print(str: string) {
        // Insert text into textarea
        this.stdout.innerText += str;
        this.stdout.value += str;

        // scroll down to the bottom, so the newest line is always visible
        this.stdout.scrollTop = this.stdout.scrollHeight;
    }

    /**
     * Write a line of text to the console
     */
    println(str: string) {
        this.print(str + '\n');
    }
While we are at it, let's also add a convenience method to clear the whole terminal
    /**
     * Remove all output
     */
    clear() {
        this.stdout.innerText = '';
        this.stdout.value = '';
    }
That was easy, right? Now we can write to the console whatever we want. now, for the hard part. Input. We want to
- Call a method, which returns a Promise
- The Promise should be resolved once input is available
- A standard terminal uses streams, which can also contain old input. We want to emulate that.
Hence, our console class is a real time machine. It has to be able to handle past and future input. At the same time, it is only allowed to return a Promise, and a user of the API should not have to care about it. How do we do that?
We can do that by using a buffer and a drain. The logic is: We store input in a buffer and requests to read in a drain. Buffers will be arrays of string, because they contain the input. Drains will be arrays of (unresolved) Promises, because they contain the read-requests from user-code. Once input is entered, the logic will have to check if there are drains which are waiting for input, and, if not, store the input in the buffer. At the same time, on a read request, the code should check if there already is something in the buffer, else add the Promise to the drain. Sounds complicated? Maybe some code will help! First of all, let's add an event listener for stdin in the constructor:
    constructor(stdin: HTMLInputElement, stdout: HTMLTextAreaElement) {
        this.inputBuffer = [];
        this.inputDrain = [];
        this.stdin = stdin;
        this.stdout = stdout;

        // React to every key-input in the input element
        this.stdin.addEventListener('keydown', eve => {
            // Check if ENTER button was pressed
            if (eve.which !== 13) {
                // If not, there is nothing to process (yet)
                return;
            }

            // Fist, check if someone wants to read
            if (this.inputDrain.length > 0) {
                // If there is a read-request, fulfill it and remove it from the drain array
                this.inputDrain.shift()(this.stdin.value);
            }
            else {
                // If not, write the input line to the buffer
                this.inputBuffer.push(this.stdin.value);
            }

            // Last, but not least, clear the input
            this.stdin.value = '';
            this.stdin.focus();
        });
    }
Then, the counterpart, which is the read method we want to call from the game logic:
    /**
     * Read line from input
     */
    readln(): Promise<string> {
        // First, check if input is already available
        if (this.inputBuffer.length > 0) {
            // If there is an input line, return a fulfilled Promise and remove the line from the buffer array
            return Promise.resolve(this.inputBuffer.shift() as string);
        }

        // If not, return a Promsise, which adds its resolver to the drain array
        return new Promise(resolve => this.inputDrain.push(input => resolve(input)));
    }
Yes, we could have used a library. However, the above implementation is ca. 50 lines of code long, and fulfills all our needs. Do we really need to add baggage we never use with a feature-rich library intended for general use?
Game Logic Time
Did you know? We are at a point, where we can write SYNCHRONOUS input-processing-output. In a loop. We could write any console application as though this would be C code. No problematic JS async thingies forcing us to start event and callback-wars. We just solved a very hard part about gamedev in JS. Getting rid of async, while still taking advantage of it.
So, let's review how we expect guess the number to work
- Computer generates number between 1 and 100
- User has to input a guess
- Computer tells user if their number is right, or greater or smaller
- Either game ends, or go to 2)
That's all. Let's write an algorithm. Do you see the loop in there? 4.->2.? Yep, we will write a loop, all right.
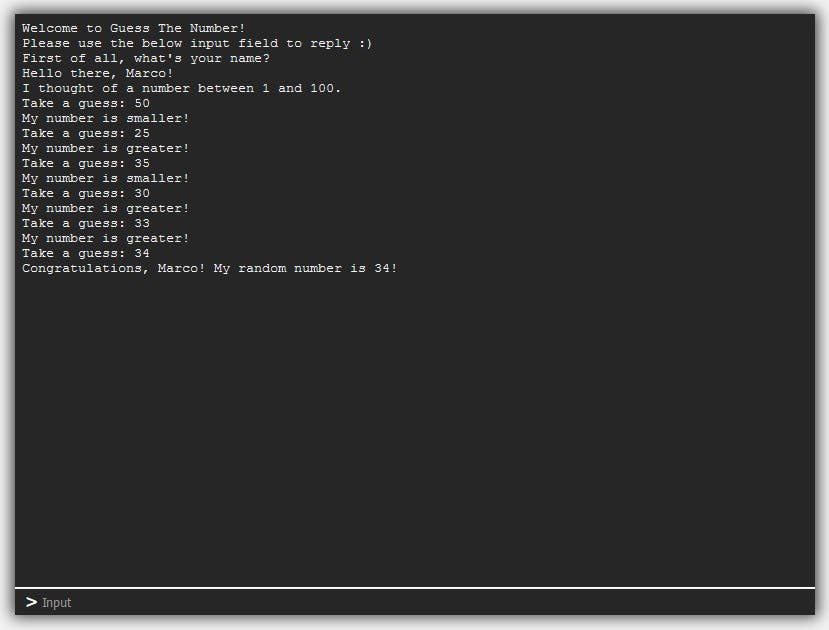
(async () => {
    // Prepare the output
    myConsole.clear();

    // Say welcome
    myConsole.println('Welcome to Guess The Number!');
    myConsole.println('Please use the below input field to reply :)');
    myConsole.println("First of all, what's your name?");

    // Let's store the player name and use our shiny console class. No worries about implementation here.
    const playerName = await myConsole.readln();

    // Say hello - just to check early if the input really works
    myConsole.println(`Hello there, ${playerName}!`);

    // Create random number between 1 and 100, using the remainder-operator
    const number = (Math.random() * 1000 % 100 + 1) |0;

    myConsole.println('I thought of a number between 1 and 100.');

    // Make space for a user guess
    let guess: number;
    // Here's the loop for 2., 3. and 4. - it's an infinite loop with break-criteria in its body
    do {
        myConsole.print('Take a guess: ');
        // Read the guess as user input
        guess = parseInt(await myConsole.readln());
        // Since the user cannot see their number anymore after the input is cleared, let's write it to the output
        myConsole.println(guess.toString());

        // Compare the guess to the random number and give a tip
        myConsole.println(
            guess > number
                ? 'My number is smaller!'
                : guess < number
                   ? 'My number is greater!'
                   : `Congratulations, ${playerName}! My random number is ${number}!`
        );
    } while (guess !== number);

    // disable the input, the game is over!
    stdin.setAttribute('disabled', '');
})().catch(myConsole.println);
Wohaaa, not so fast there! That's really all the code? What's a remainder-operator? Also, how is this code not blocking?
Okey, since the actual game logic is very very simple, now, I went ahead and first delivered some code. Yes, that's the whole game. However, let's walk through it a little bit.
First of all, since we use async-await, every time we await a promise (input), the code execution is paused and the browser can do its thing. That's why this code does not block and a user can do input. Once the player hits [ENTER], execution resumes, because the Promise is resolved. We have an await in the loop, so the code won't block even there.
Last, but not least, about the generation of the random number. To be honest, there are many ways to calculate a random number in a range in JS. However, from my old math days, I remember the modulo operation quite fondly, so that's what I decided to use. Lets say A and B are numbers, for example 5 and 10. If we do A modulo B, then A will be divided by B. Then, everything which would be used for the floating-point part is used as result integer. For 5 modulo 10, 5/10 would be 0 with 5 being the result. It also works with greater As. Let A be 42. 42 modulo 10 means that 4/10 = 4.xxx. We can just calculate 4*10=40 and substract that from A. The result is 2.
So, Math.random() * 1000 generates a random number which can have an integer part greater zero.
Since the integer part might be greater than 100, which is our upper limit, I use the remainder-operator (%), which is nearly
identical to modulo in math, to only get what we have too much. The result can never be >=100 or <0.
That explains Math.random() * 1000 % 100. Next, if we take a look at the range, we see that the result of this operation
is 0..99. In order to fix that, we have to add 1: Math.random() * 1000 % 100 + 1.
Last but not least, the bitwise operation at the end is a simple way to cut off the decimal part, leaving only an integer.
After all, guessing a decimal number is like guess-the-number, but annoying. That's not fun. Games should be fun.
How To Distribute The Game?
After building the code using npm run build, the distributable source is located in the folder /dist.
It contains one html file, one css file, one js file and several map files.
Don't worry about the strange names. Parcel made sure everything works out for you.
Parcel actually did you a little favor, embedding hashes in the name, which forces all browsers to reload changed assets
after uploading a new version. For more complex applications, that might be a problem, but for us, that's perfect and easy.
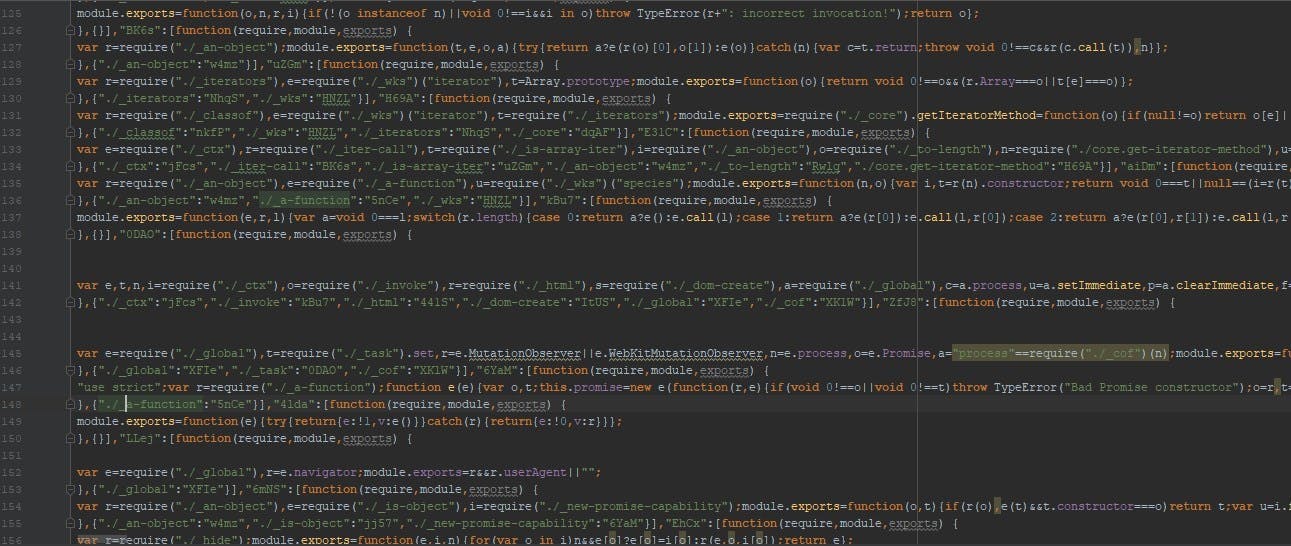
If you open the JS file, you will be greeted by a lot of gibberish. Parcel did a number there and now it does not only contain our code, but also polyfills and other stuff, plus optimization.
The important part is, that you can just upload the contents of the dist folder to your webspace, and people will be
able to navigate to your game. If you want to distribute the files offline, just tell people to double-click index.html
and a browser will show them the web application.
Little fun fact at the end: The resulting code files are 45.7KB in size (not counting map files). The Rust version of this game created an executable with a whopping 74KB... after heavy size optimizations. Does this mean that web applications are smaller? No, I would not say that, however, an executable has a lot of overhead, which is very visible in small applications. If we created a bigger game (like Quake), it's quite likely that the executable would be smaller than the generated web app. Also, let's not forget that we need a JSVM in order to execute the web app, which usually is several MBs in size...
In the next part, we will use this simple game in order to understand more complex games, and then create something a little more practical than just guessing numbers. I really hope you like this article and learned a few things from it. Leave your opinion and any questions below and I will try to answer anything which comes up 🙃
Unbezahlte Werbung durch Nennung und Verlinkung von Personen, Organisationen oder Unternehmen.