

How to Implement Autoscaling in AWS: A Step-by-Step Guide
Autoscaling Your AWS Infrastructure for High Availability


In the previous blog, we saw the load balancer service, its type, and its practical implementation on the AWS cloud. The link is below.
https://hashnode.com/post/clf2jqoix000g09mh7sbwbc4l
So, some common challenges can be faced with load balancers in AWS: One of them is scaling.
Scaling: Load balancers can be a bottleneck when scaling up or down the number of instances behind them. Proper planning and configuration are required to ensure that the load balancer can handle the expected traffic volume.
Why Auto-Scaling?
In Load Balancer in AWS, its types, and practical implementation blog, we saw three web servers responsible for hosting a single website, which is managed by a single load balancer.
Suppose, if our website is a type of e-commerce website like Flipkart or Snapdeal and on some festivals or on-sale seasons there are lots of visitors who will visit our website for shopping.
If we have fixed numbers of Web-servers or a single web server then that server is not able to handle such type of heavy traffic, then there will be chances of a crash of the website due to heavy traffic and our website will be down.
So, to avoid such type situation we need extra web servers to handle such type of traffic and once the traffic goes down, we have to remove that extra web server from our infrastructure to better utilization of our resources and to save extra charges that we have to pay for web-servers
There are two ways to handle such type of situations
Without the Auto-scaling: - Here we have to add and configure the web servers manually, this is not a recommended way because with manual intervention there will be a chance of getting errors.
With Auto-scaling: - Here the web servers are added, configured, and removed automatically based on defined parameters.
Here, we understand the limitation of the Load-balancer, so we understood that along with the load balancer, we need auto-scaling.
Hence, Auto-Scaling is recommended here.
This also provides the feature of auto-healing, which means if the issue is not with load or, unfortunately, if the instance failed for any other reason, it will automatically remove that failed instance and add a new instance with the same configuration within a fraction of a second.
How do we apply Auto-Scaling?
We have set the condition on a CPU threshold value
There are different mechanisms but one of the most usually is through the CPU utilization
A new instance will be created if the CPU threshold value is more than 80% of any existing servers.
And, if the CPU threshold value is less than 30% then the newly created instance will be removed.
We have to add such type of condition while the configuration of the Autoscaling group
Benefits and Features
Fault Tolerance: - Detect when the instance is unhealthy, terminate it, and launch an instance to replace the old one.
Availability: - Ensure that the application always has the right amount of capacity to handle the current traffic demand.
Cost Management: - Save money by dynamically launching instances when they are needed and terminating them when they aren't.
Pre-requisite to creating the Auto-scaling
Create the Load-Balancer: - This is used to manage the incoming traffic which is coming from the web.
With the load balancer, we have to add an auto-scaling service.
Kindly go through the below link to know more about load-balancer
Define the Launch Template: - It contains the details about the launch instance which is like below
Which Amazon Machine Image?Which Instance Type?Which Volume?Security Group?Key Pairs?Which package needs to install? | Which are the web files?Define the Auto-scaling
Once the Launch Template is defined, we have to configure when the auto scaling will apply for that we have to know the below parameters
To which load balancer this newly created instance will be attached?
How many instances need to be launched (Minimum & Maximum)?
How to scale up and scale down the instances?
Which name needs to be given for instance?
Need to send the notifications when launching and removing instances
Practical Implementation of Auto-scaling
Step 1: - Create the load balancer
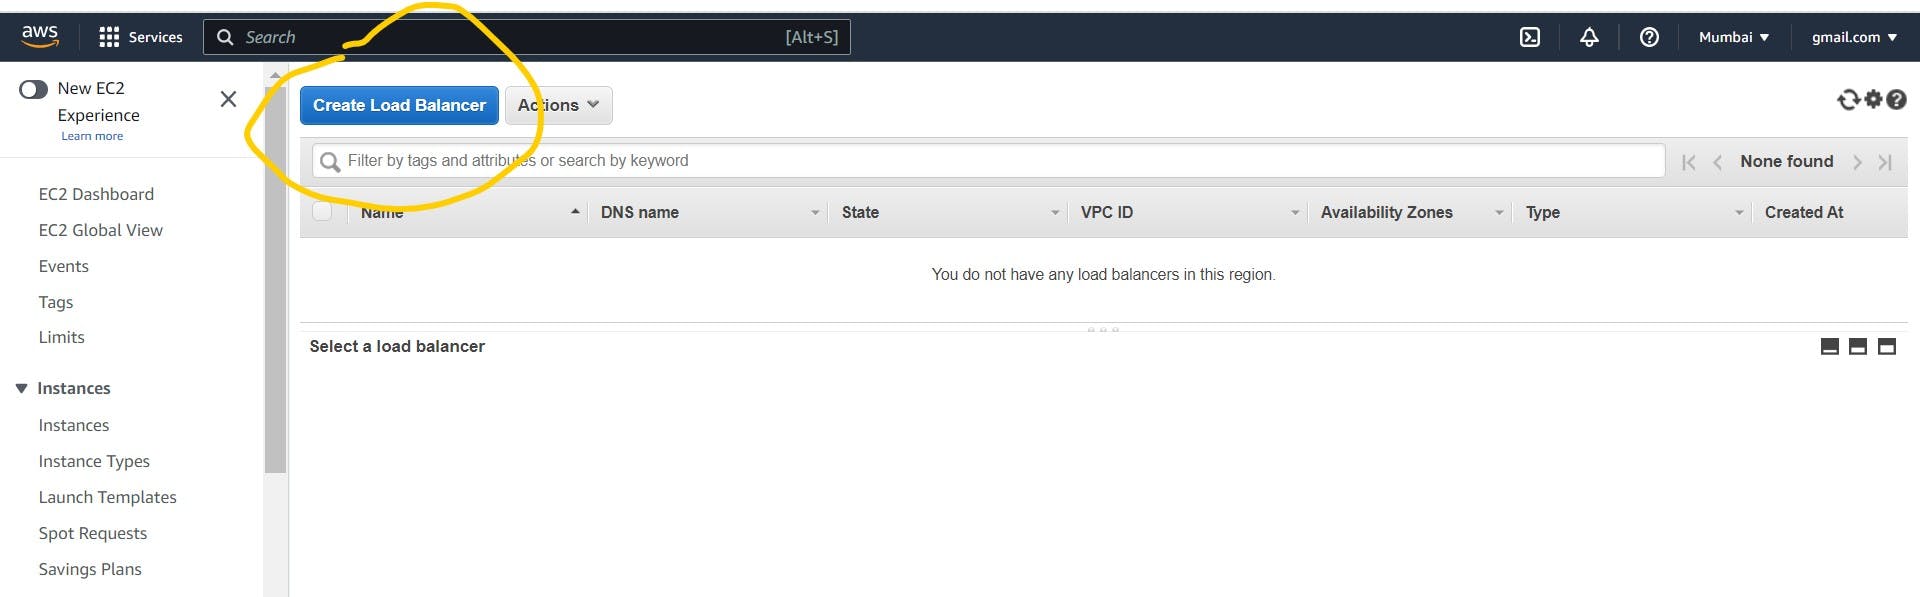
Go to EC2 dashboard
Click on Load balancer
Click on create Load balancer
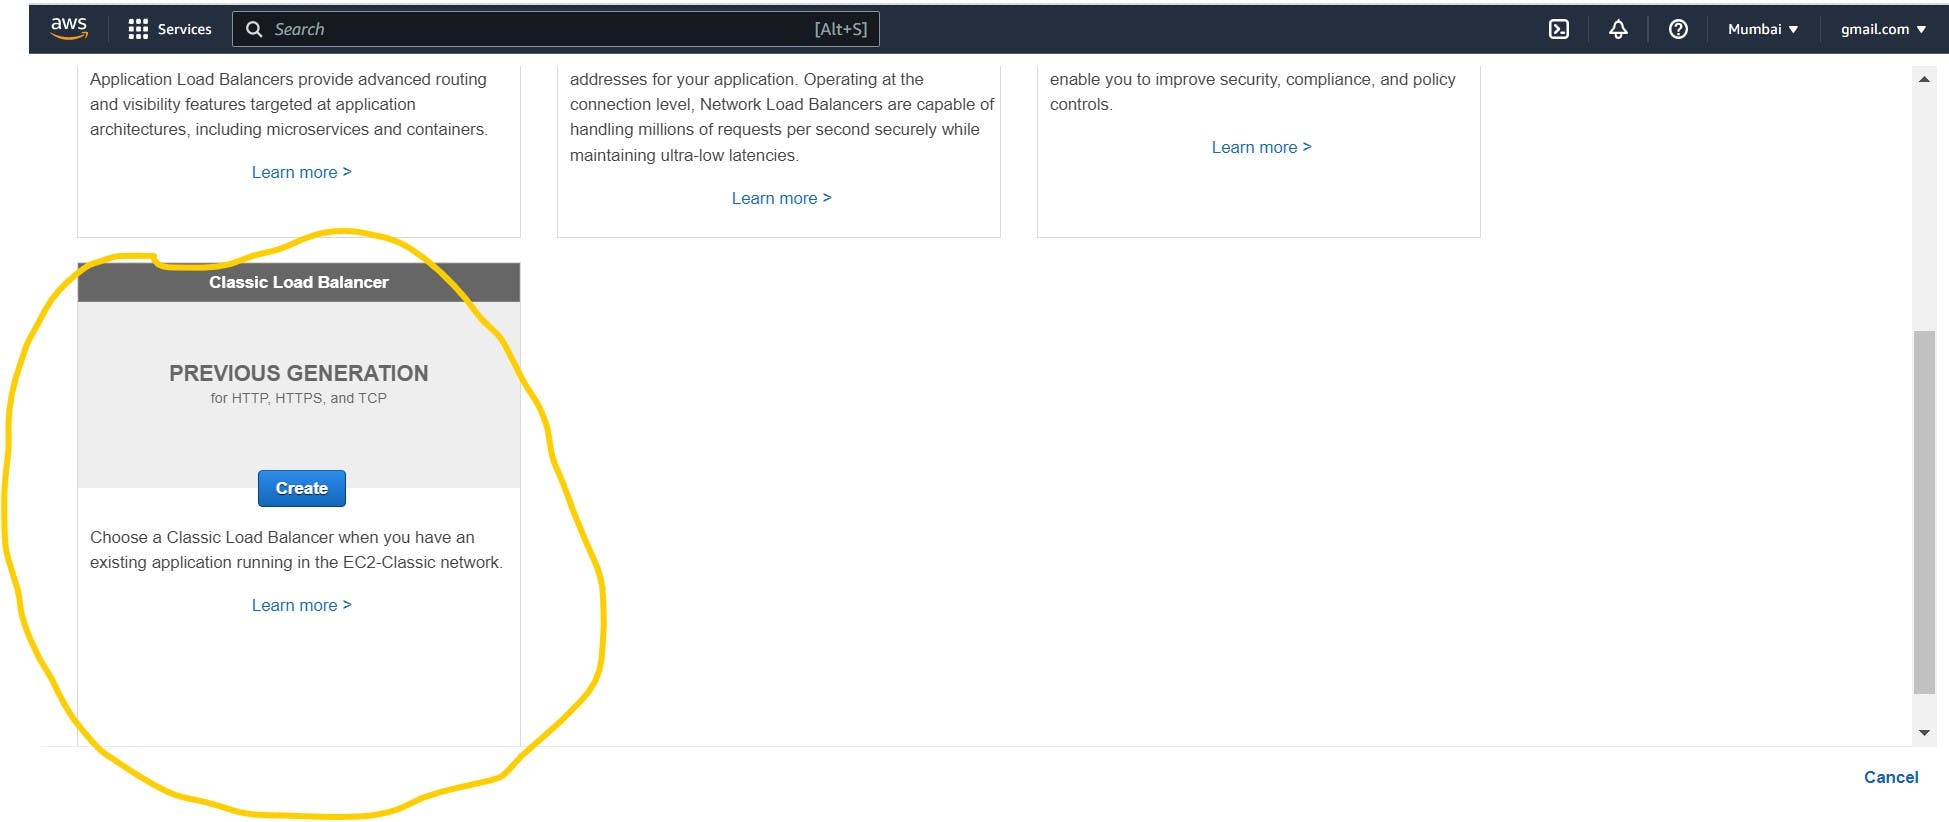
- Choose a classic load balancer
Give a name to load balancer
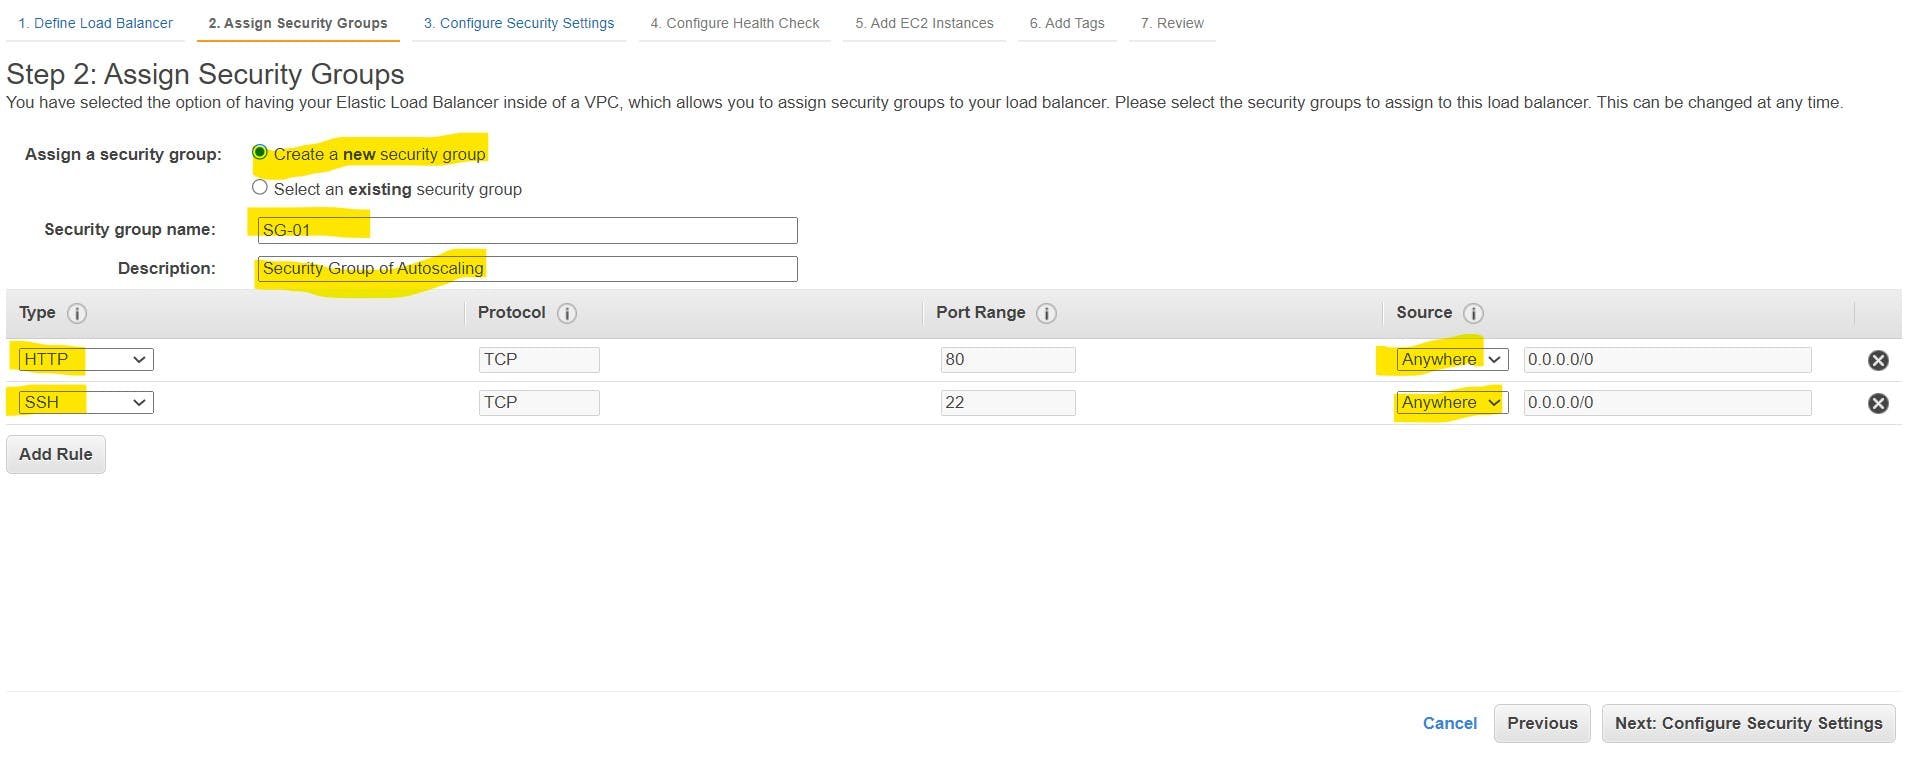
Create a new security group if you have already a security group then add the existing one.
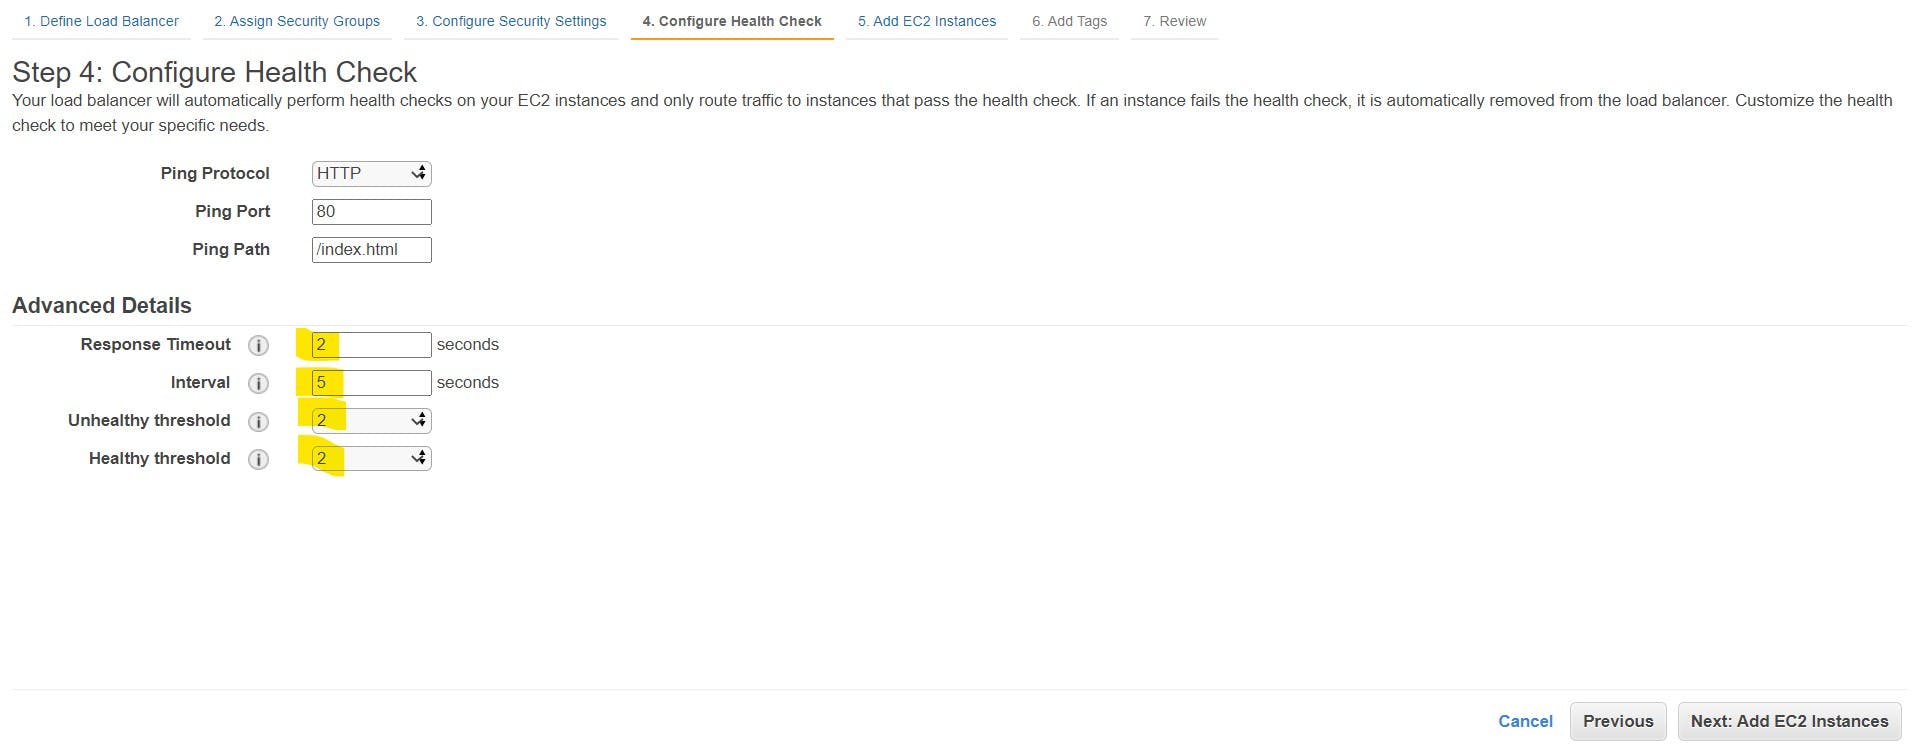
Configure Health Check
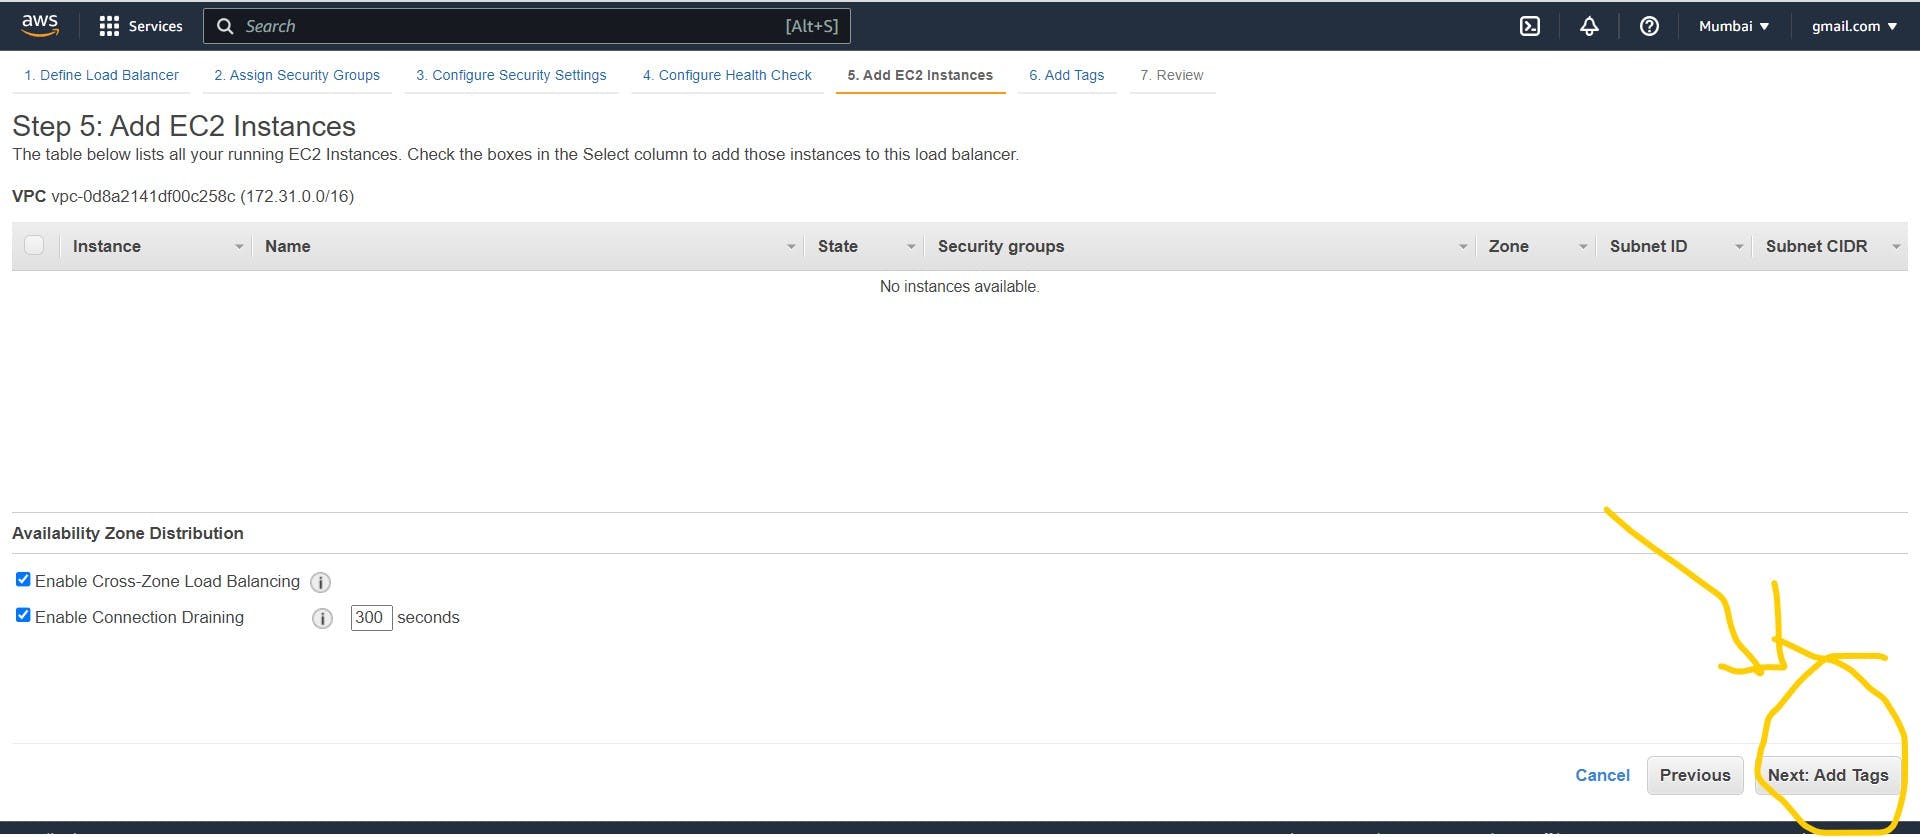
Add EC2 instance
Here don't add any instances, till now we have not created any instances just ignore it and click on next.
(We will create the instance using AutoScaling)
Add tags
Apply tags to your resources to help organize and identify them.

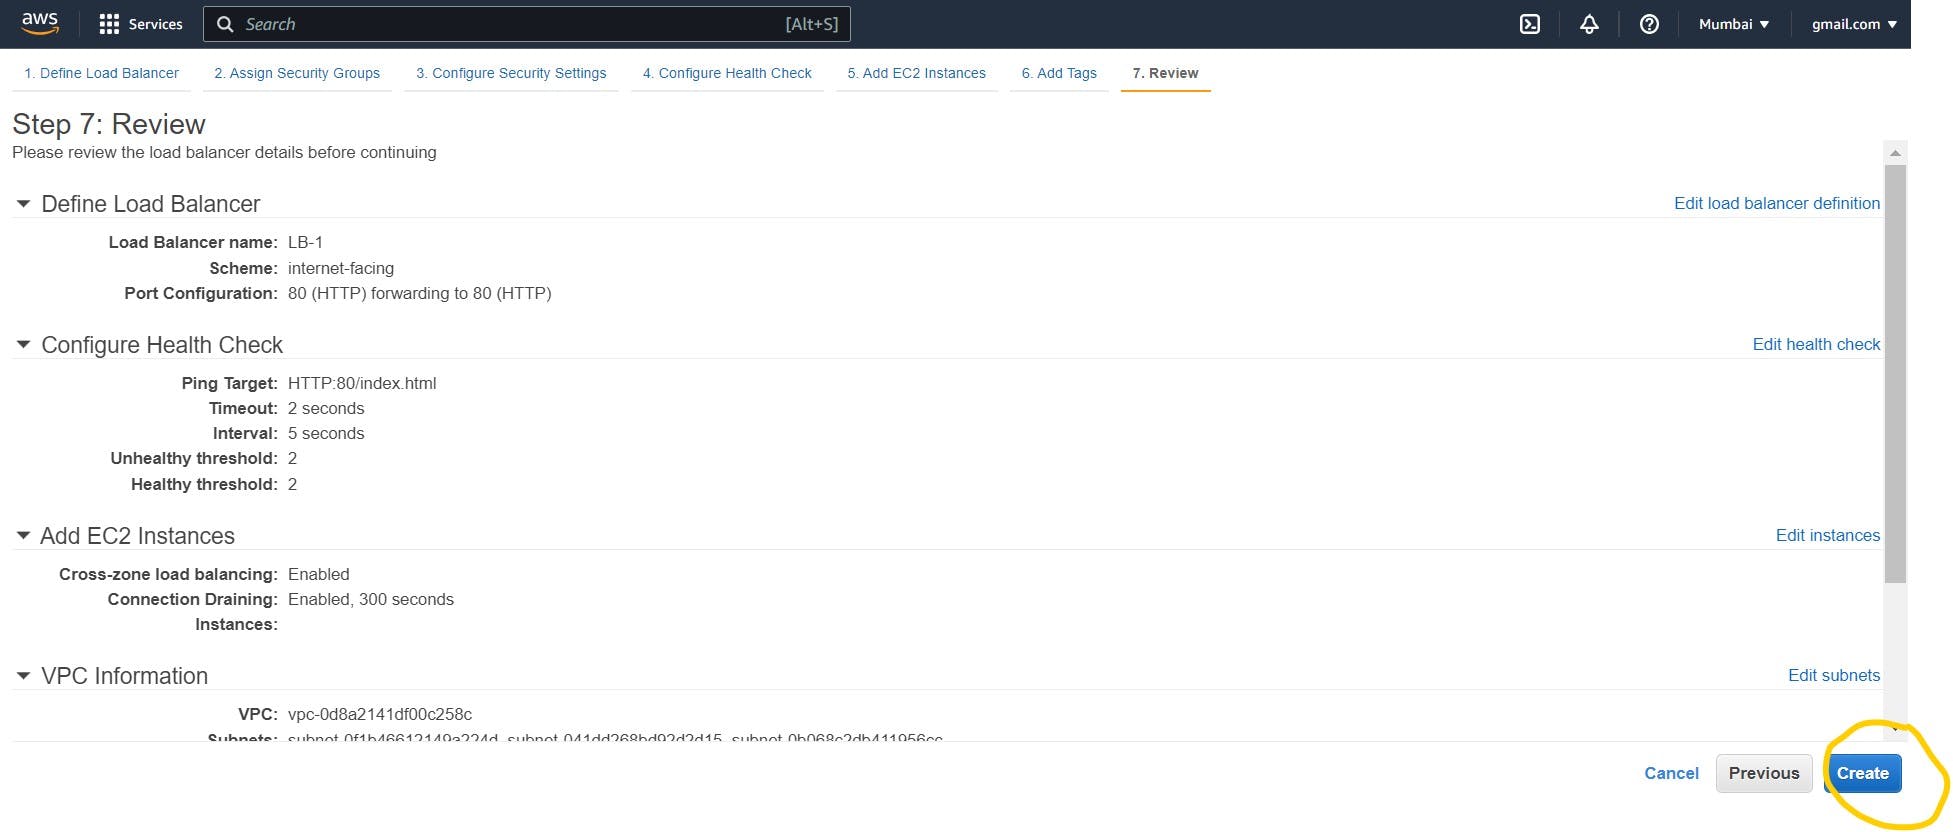
Review and create the Load balancer
Here if you have to change or modify something on the load balancer you do it from here.
For more information about the load balancer and its implementation kindly go through the below link
https://hashnode.com/post/clf2jqoix000g09mh7sbwbc4l
Step 2: - Define a Launch Template
Here we have to pre-define the web server configuration, So whenever the web server is created using autoscaling it will launch using a pre-defined template
Go to the Launch Template
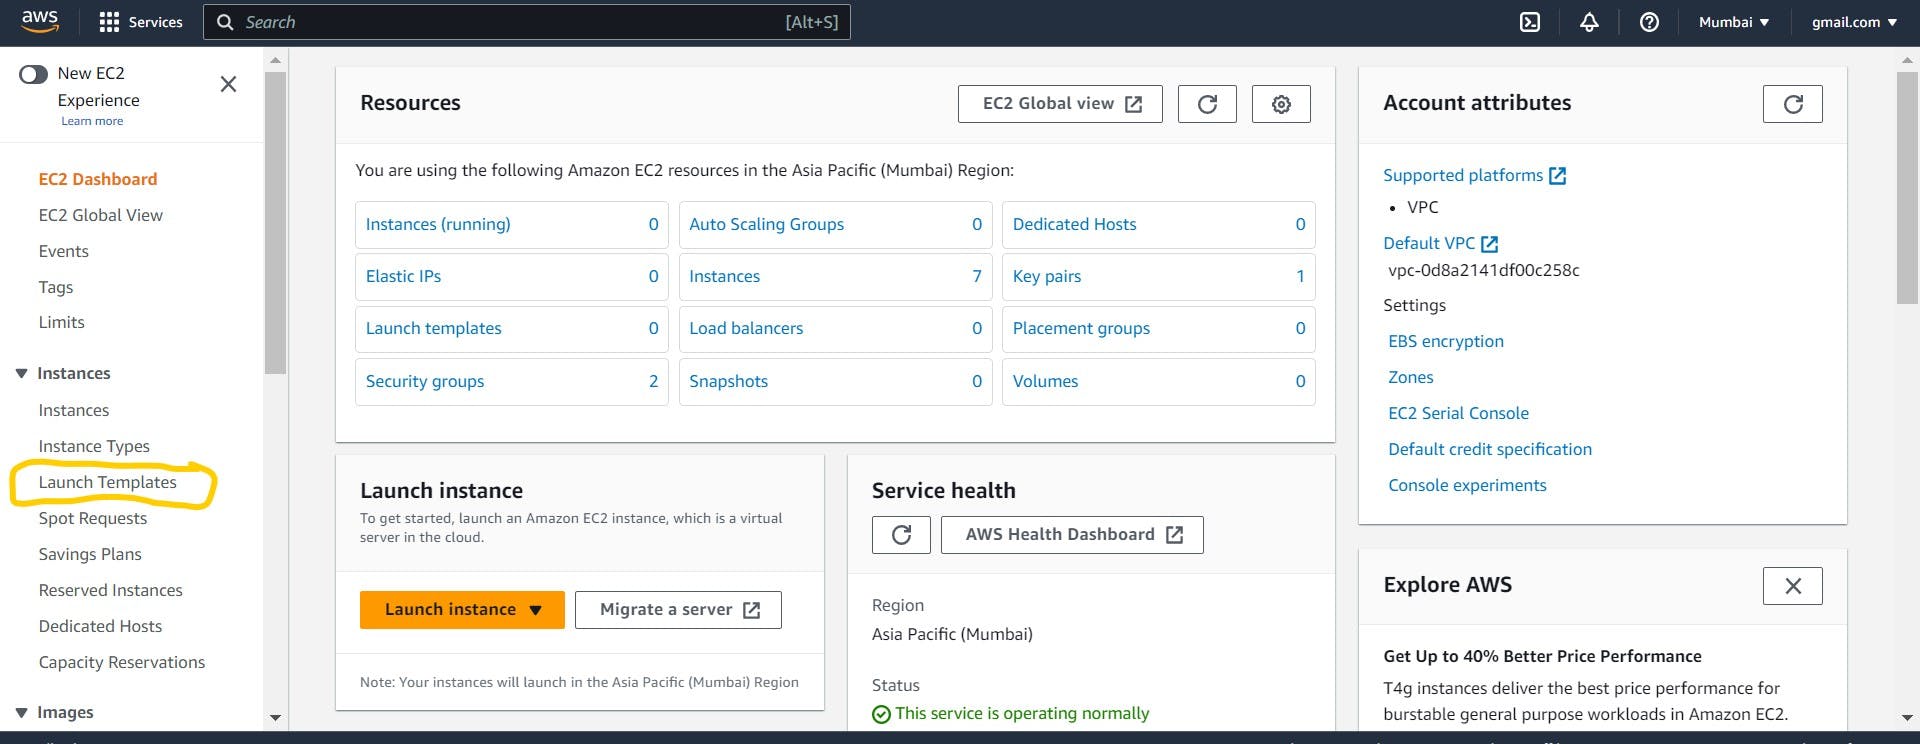
Click on create launch template
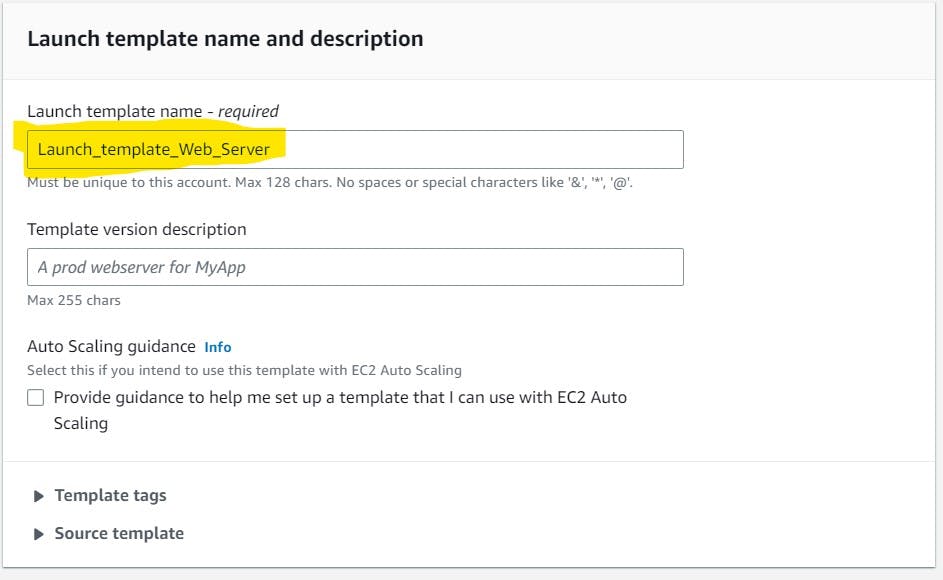
Give Launch Template Name
Choose AMI
Click on Quick start
Select Amazon Linux
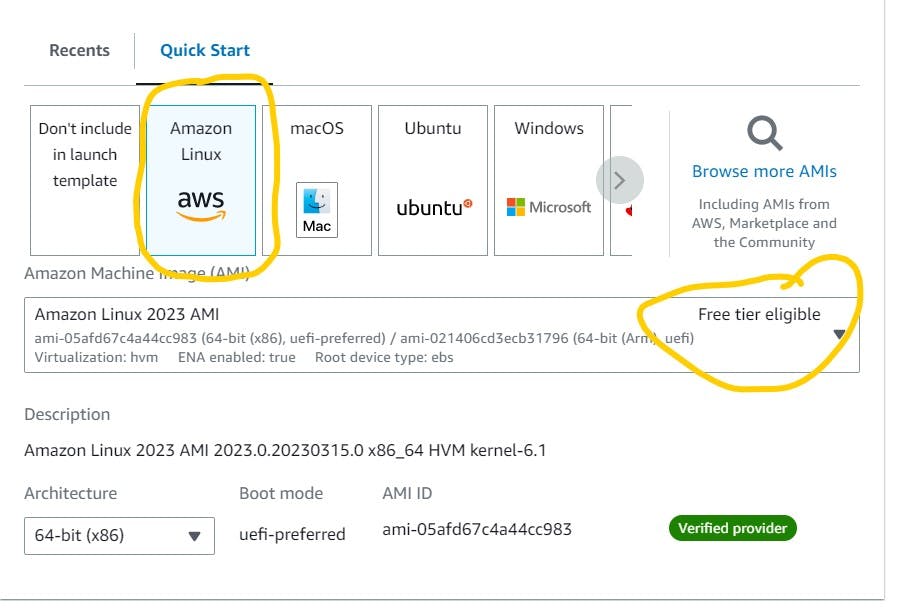
Choose instance type and Key pair
Choose instance type which is free tier eligible.
Create new key pair or use existing key pair (here I used my existing key pair).

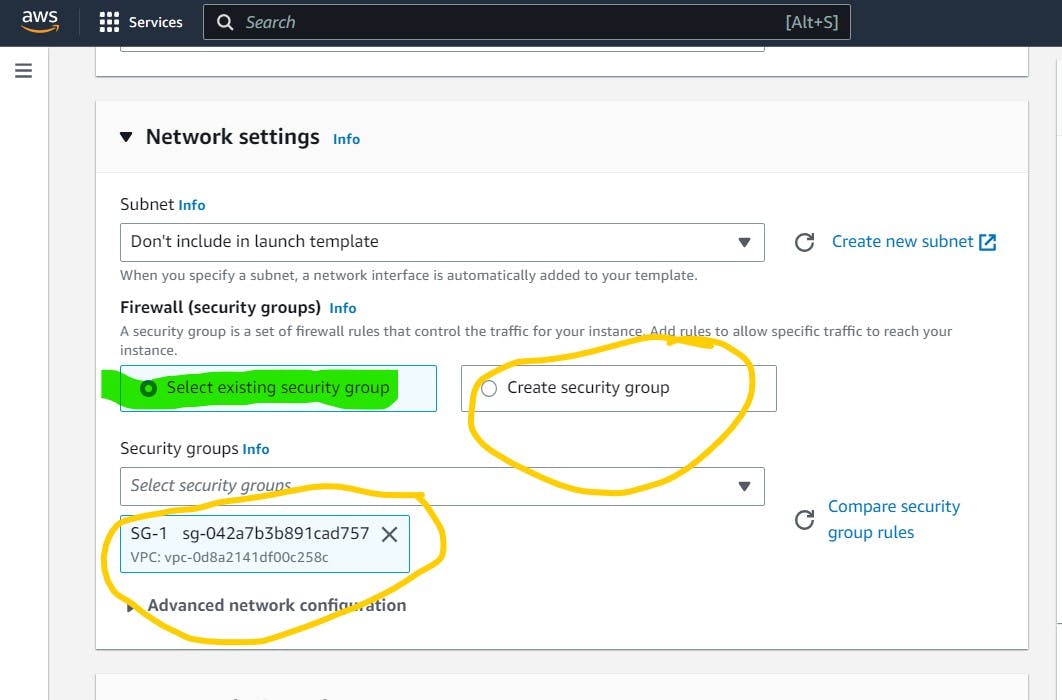
Security Group
Create a new Security group or use the existing Security Group (Here I choose the existing SG which I created during Load balancer creation)
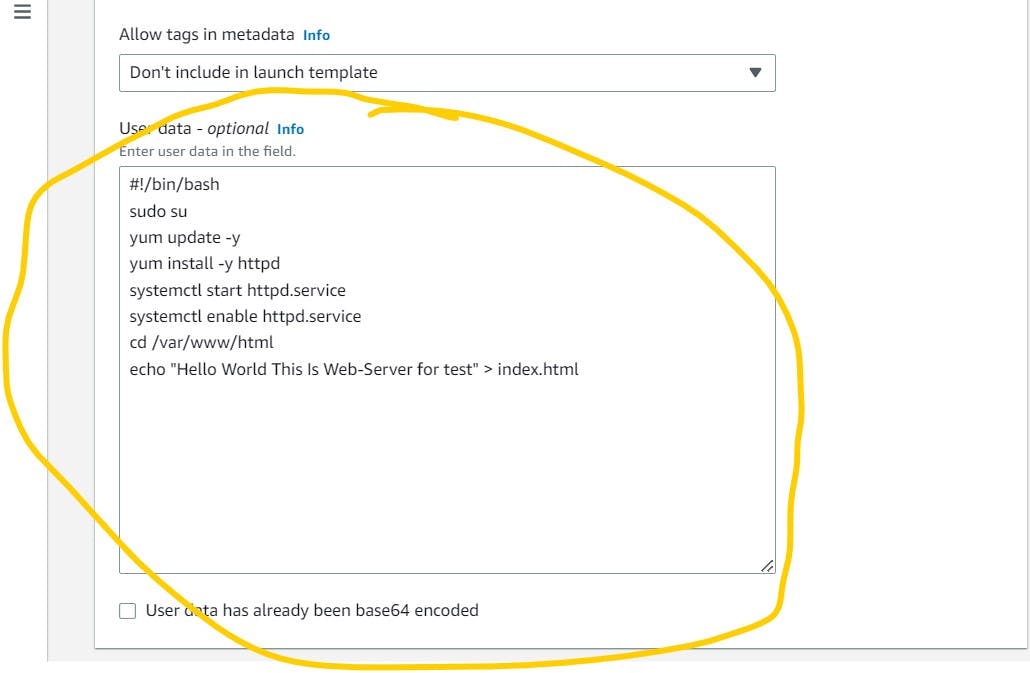
Advance Details
Write here the post-installation script for the Apache server in the user data section.
Once everything is done from the above steps, then click on Create Launch Template
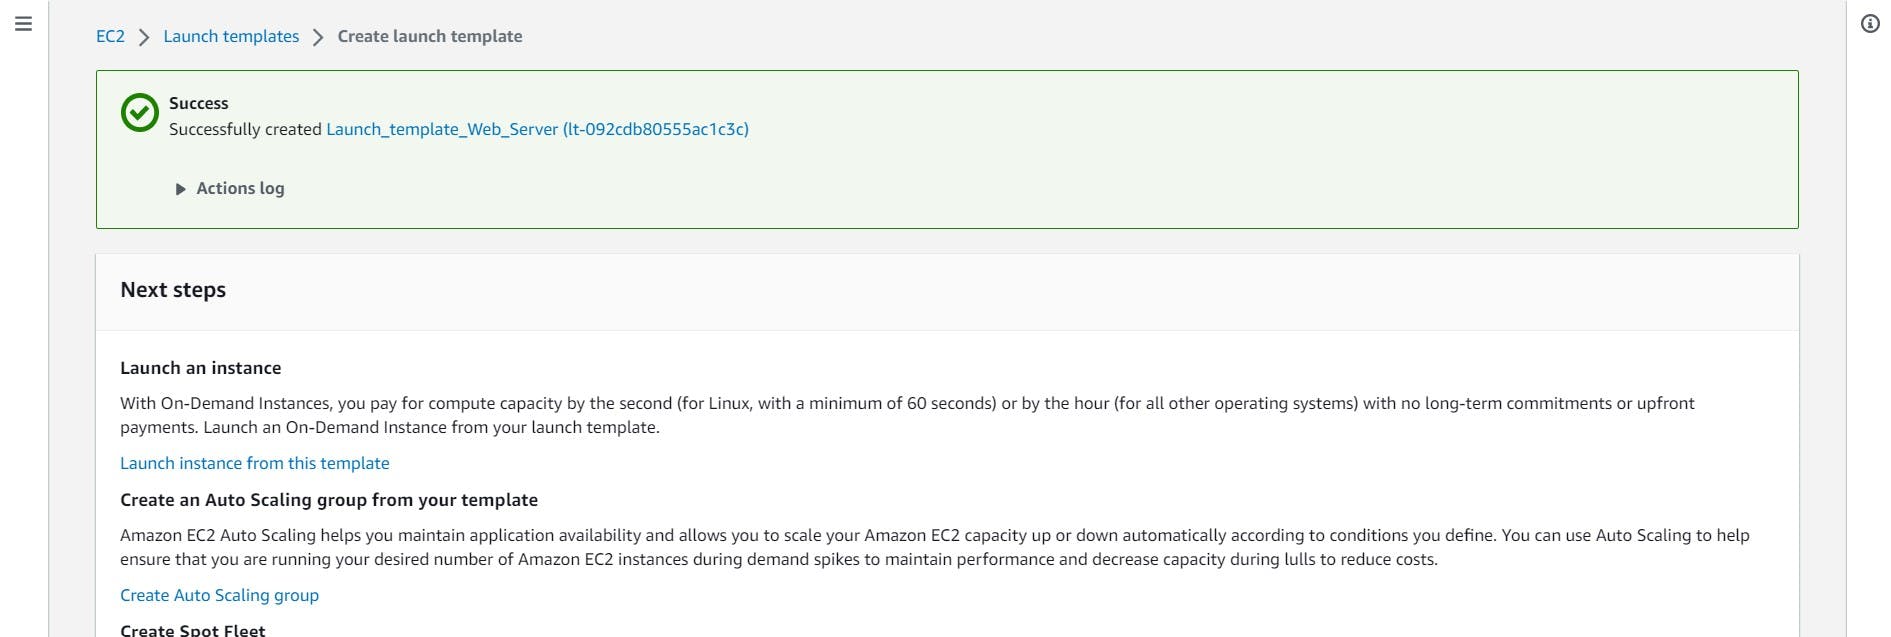
Now, the Template is created successfully.
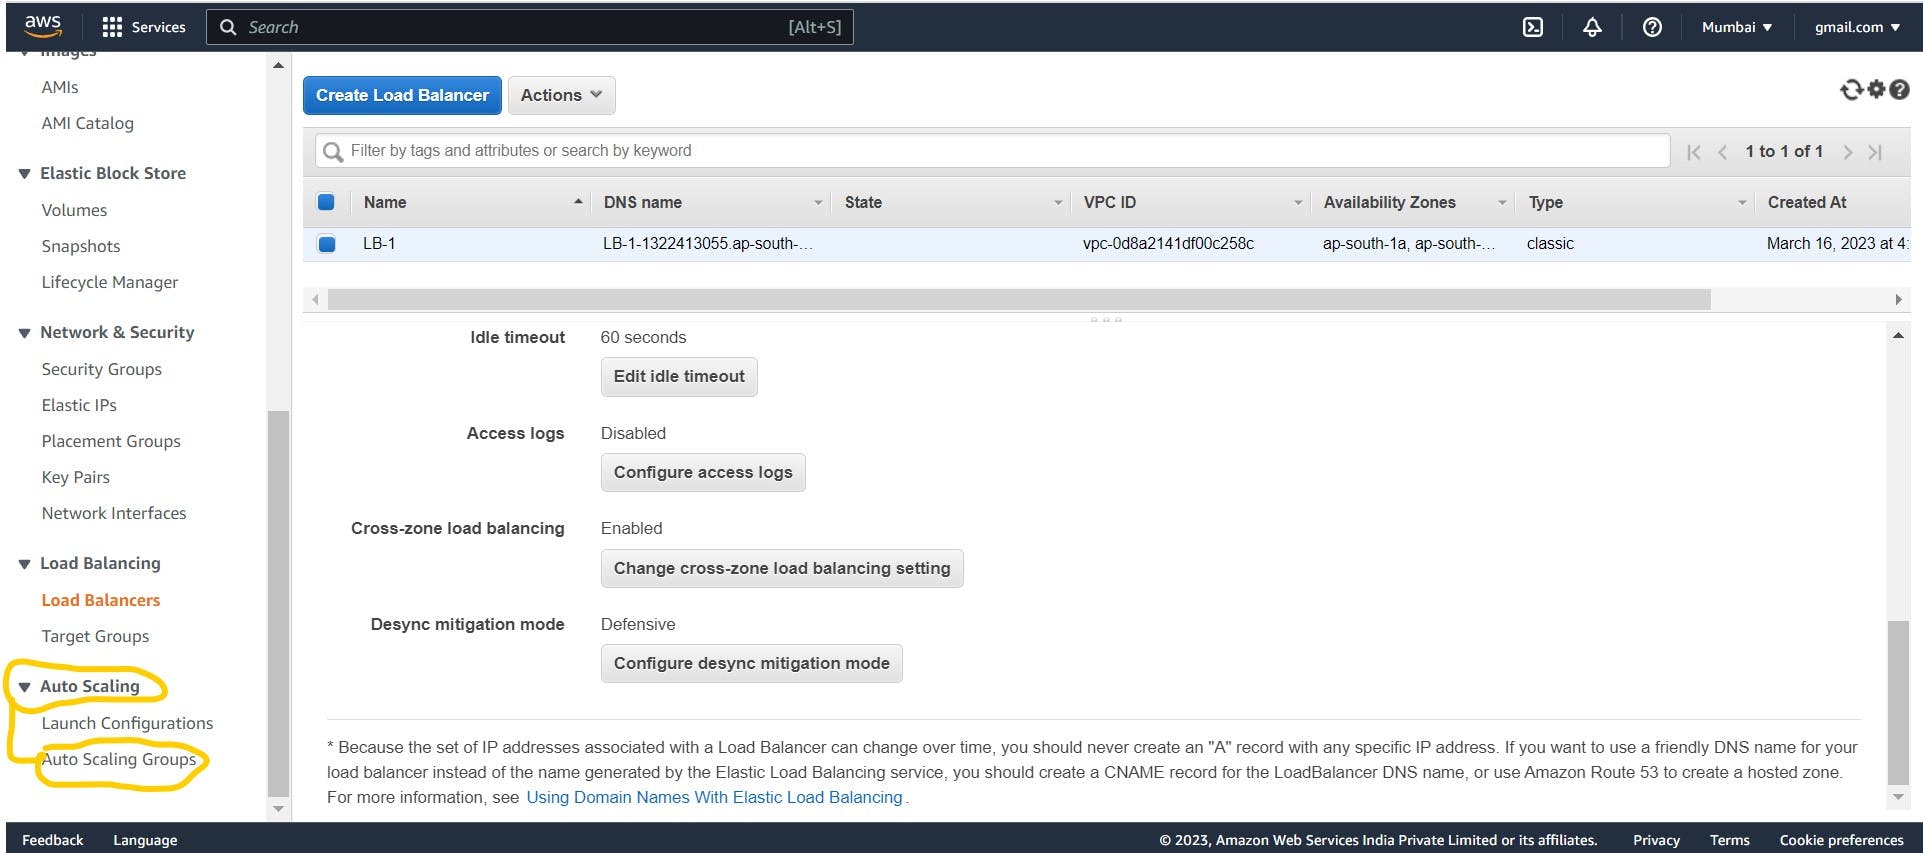
Step 3: - Defining Auto-Scaling Group
Under Auto Scaling click on Auto scaling group
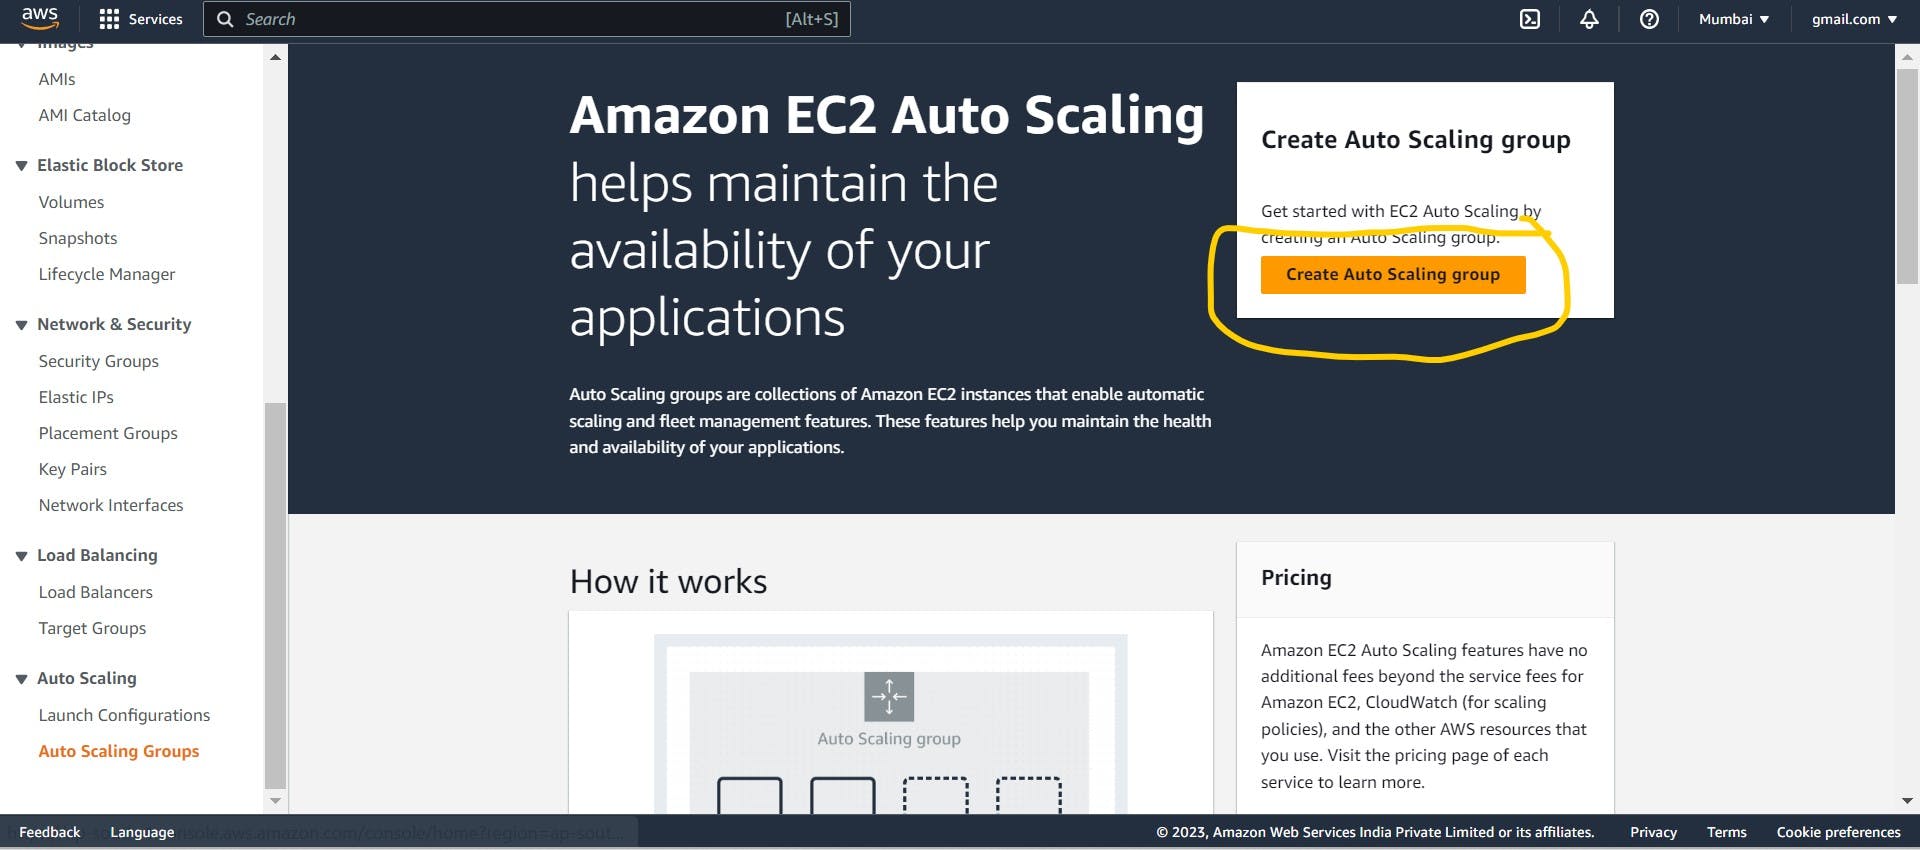
Create on the Auto scaling group
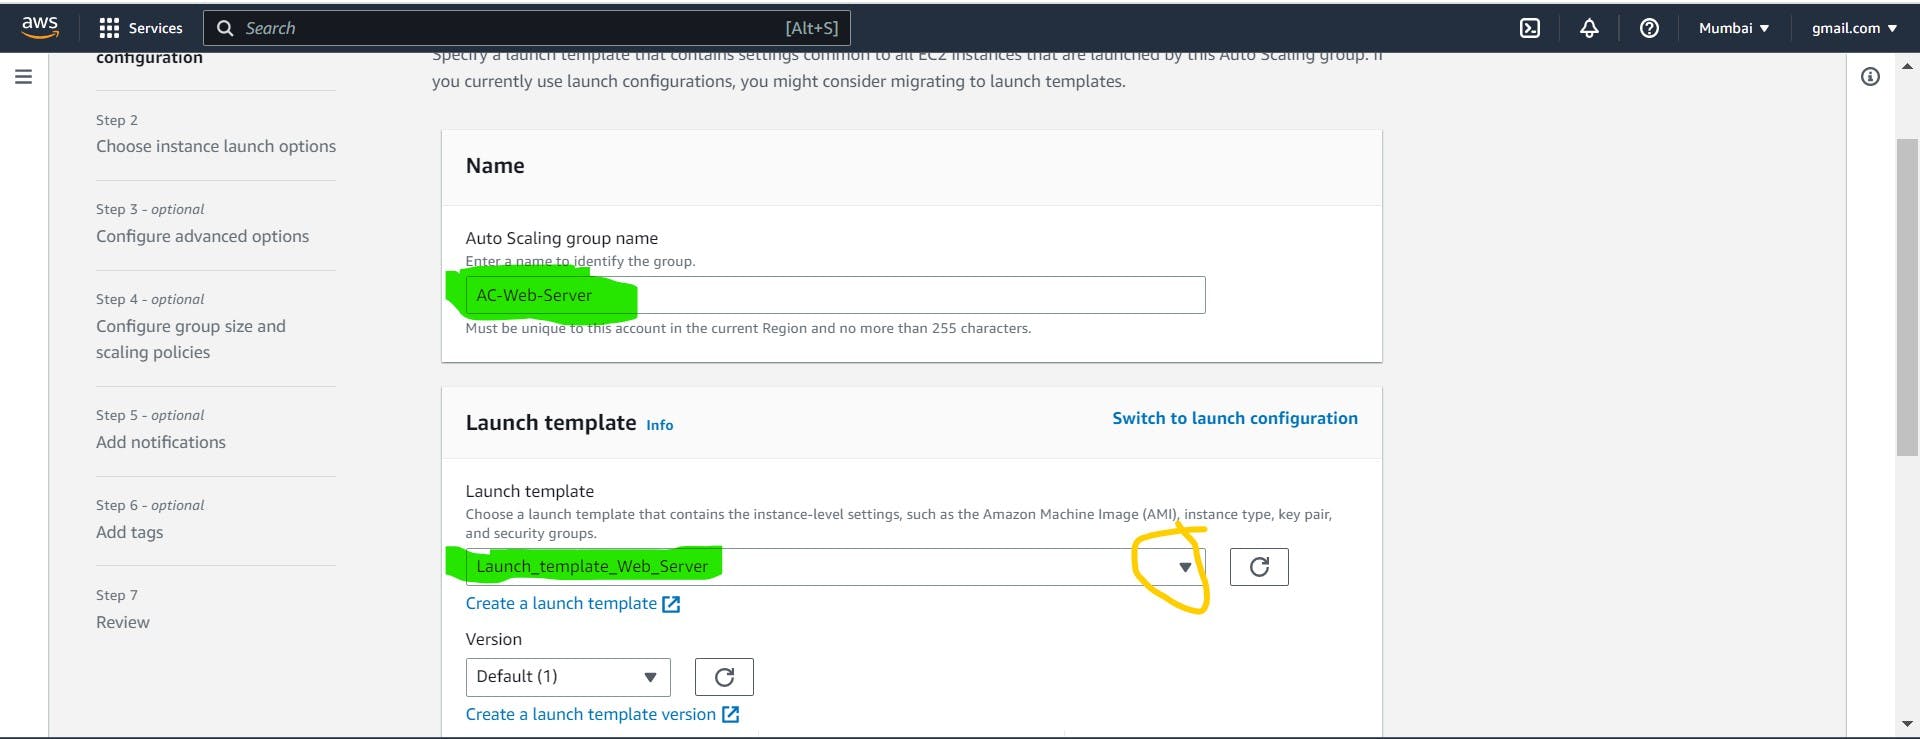
Give Auto Scaling group name and select template which we are created
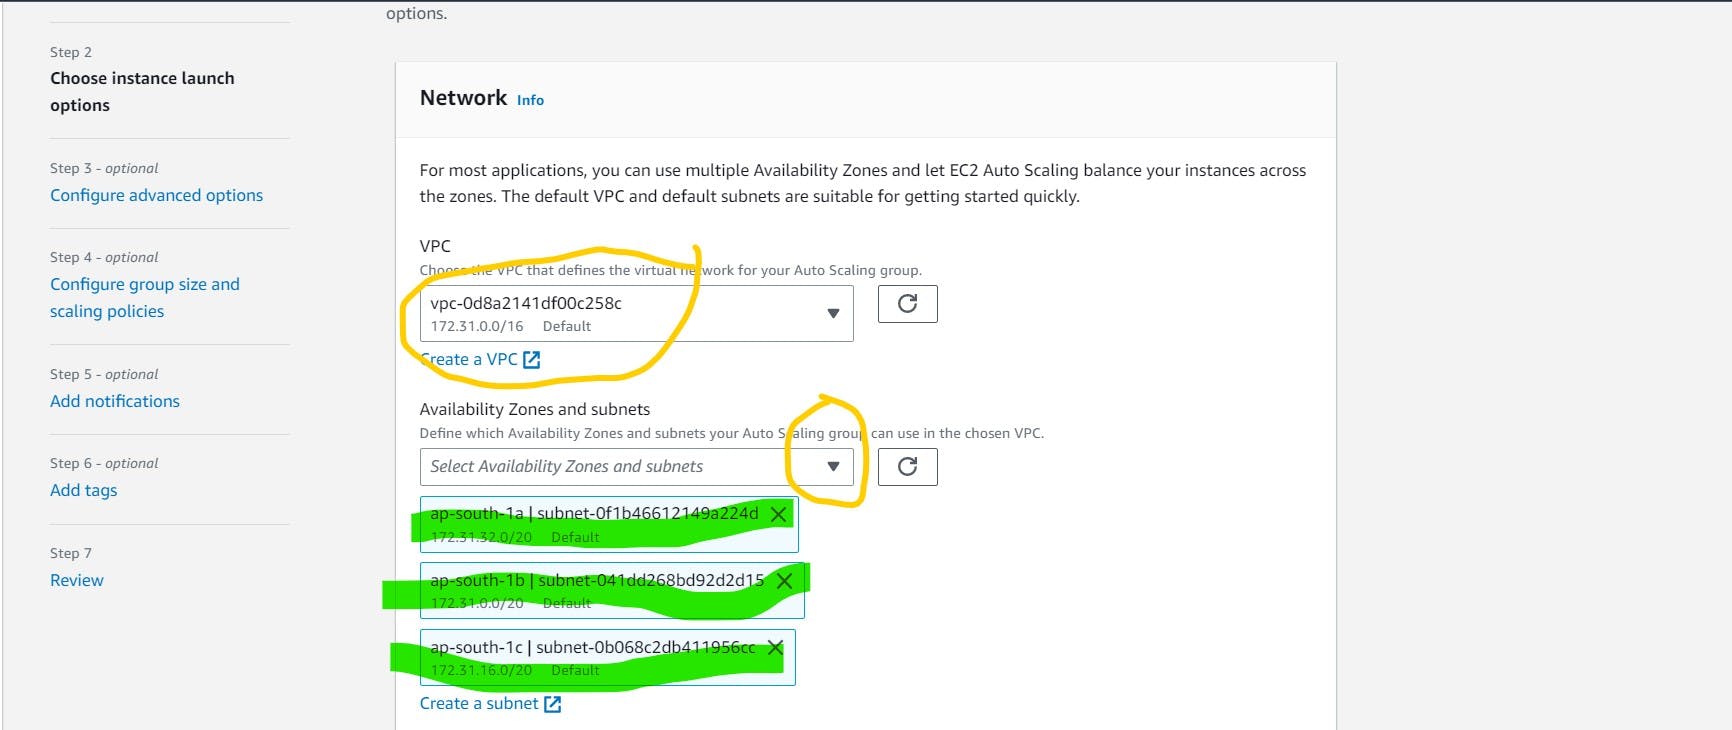
Choose instance launch options
For most applications, you can use multiple Availability Zones and let EC2 Auto Scaling balance your instances across the zones. The default VPC and default subnets are suitable for getting started quickly.
Here Add a subnet, So instance will be created on different subnets
- Configure advanced options
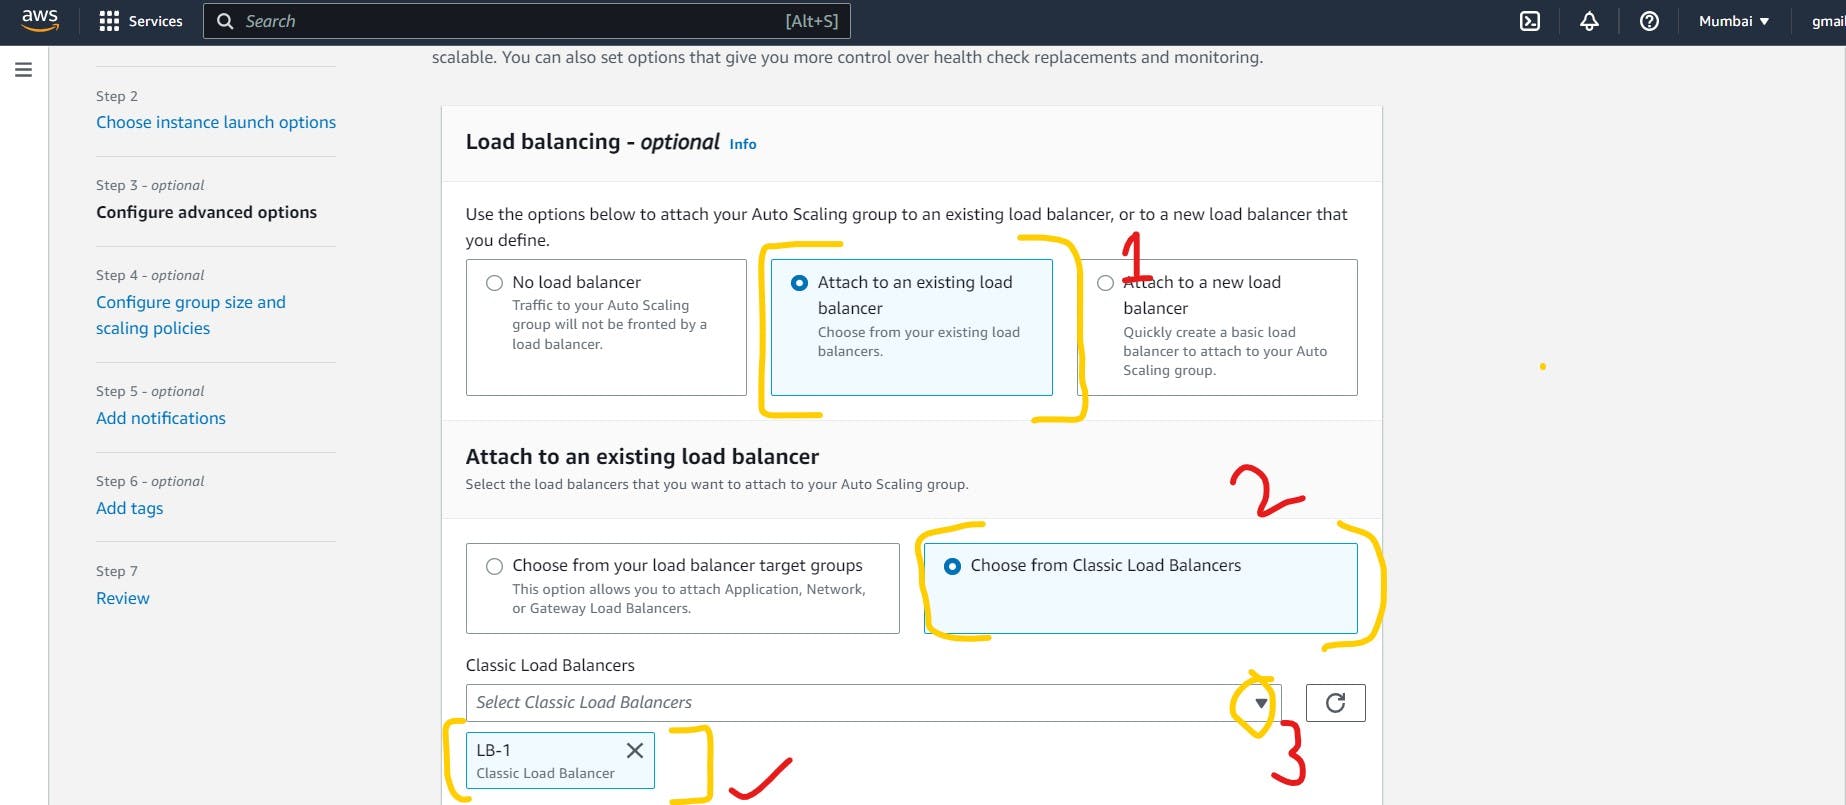
Choose a load balancer to distribute incoming traffic for your application across instances to make it more reliable and easily scalable. You can also set options that give you more control over health check replacements and monitoring.
click on Attach to an existing load balancer
choose from the classic load balancer
Select the Load balancer
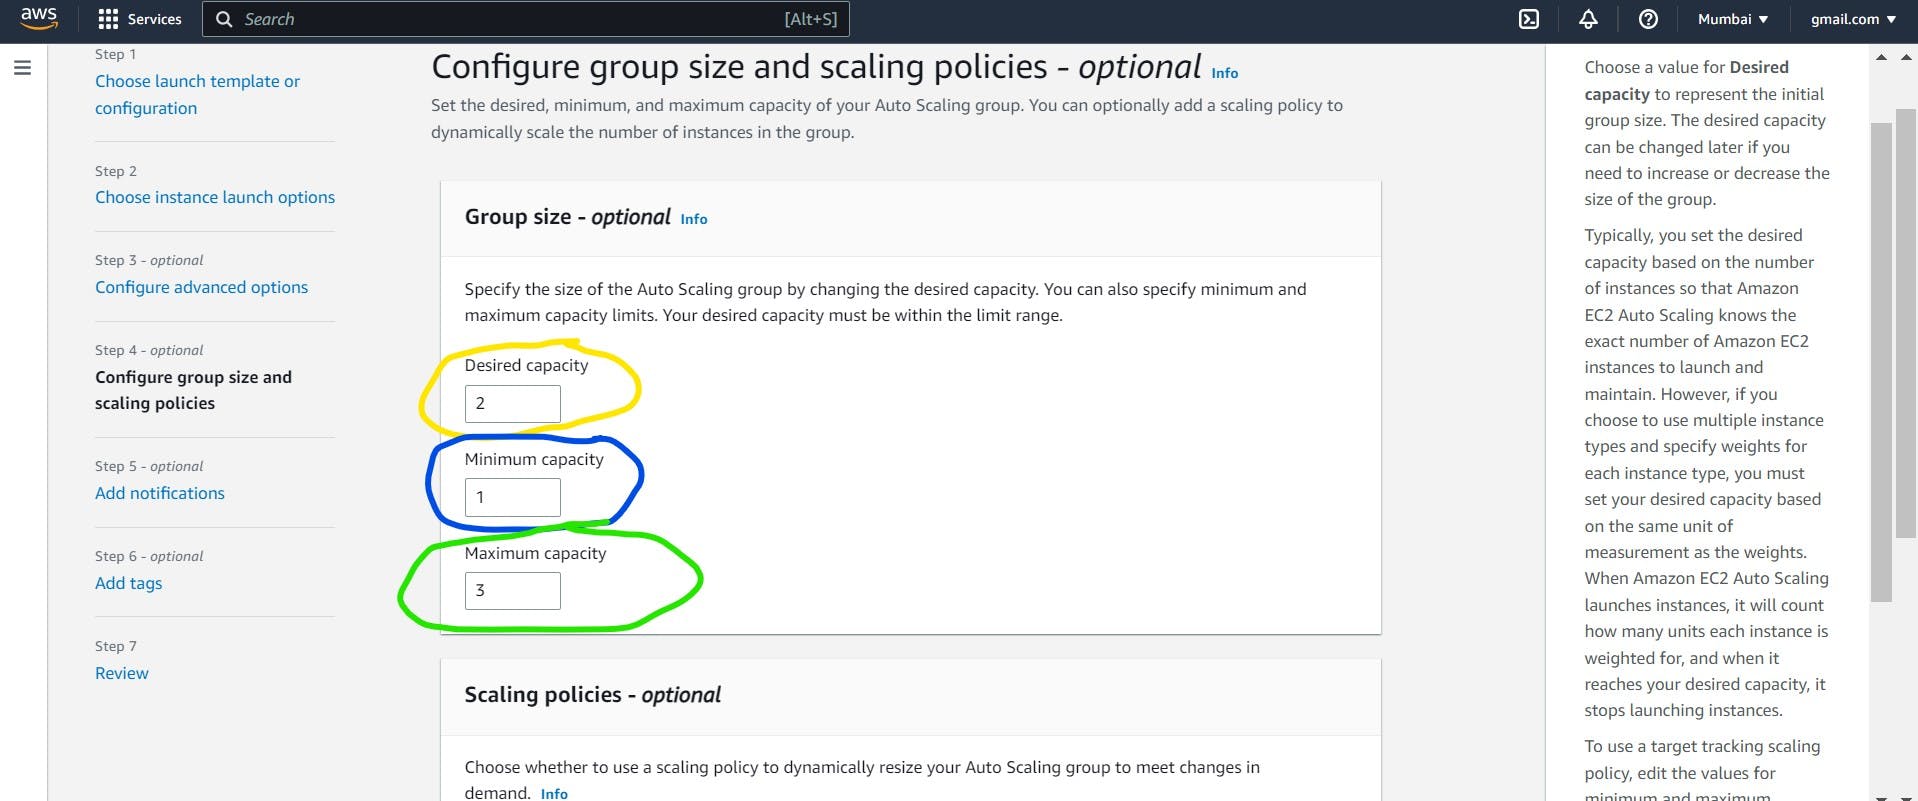
- Configure group size and scaling policies
Specify the size of the Auto Scaling group by changing the desired capacity. You can also specify minimum and maximum capacity limits. Your desired capacity must be within the limit range.
Desired capacity: - (Always Greater than the minimum capacity) It means there are two servers on standby
Minimum capacity: - Minimum one server is running always
Maximum capacity: - (Always greater than the minimum and desired capacity), here maximum of 3 servers will create using Auto-Scaling
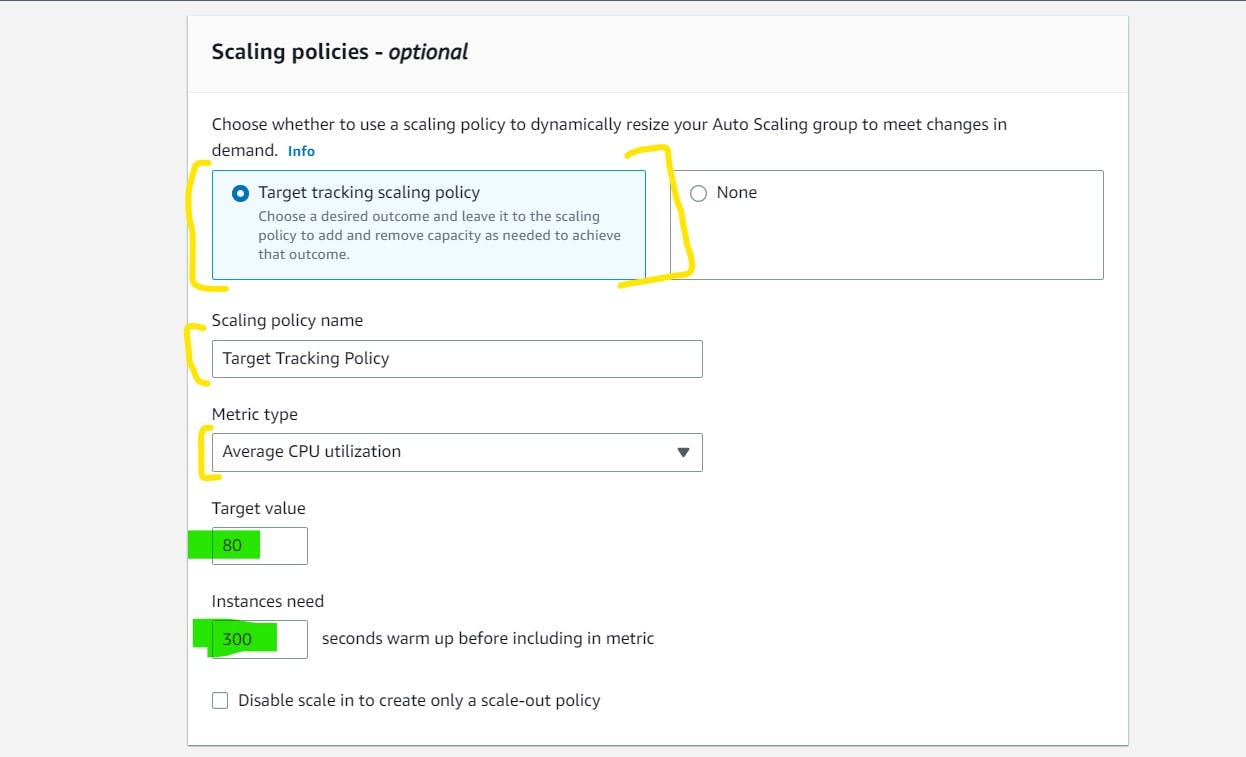
- Scaling policies
Target Value = 80
This means when the CPU utilization is equal to or greater than 80% then it creates a new instance using Auto-scaling
Instance need = 300 sec
This is for the duration between the creation of instance once after another
Then click on next, next and verify the details and click on create autoscaling group
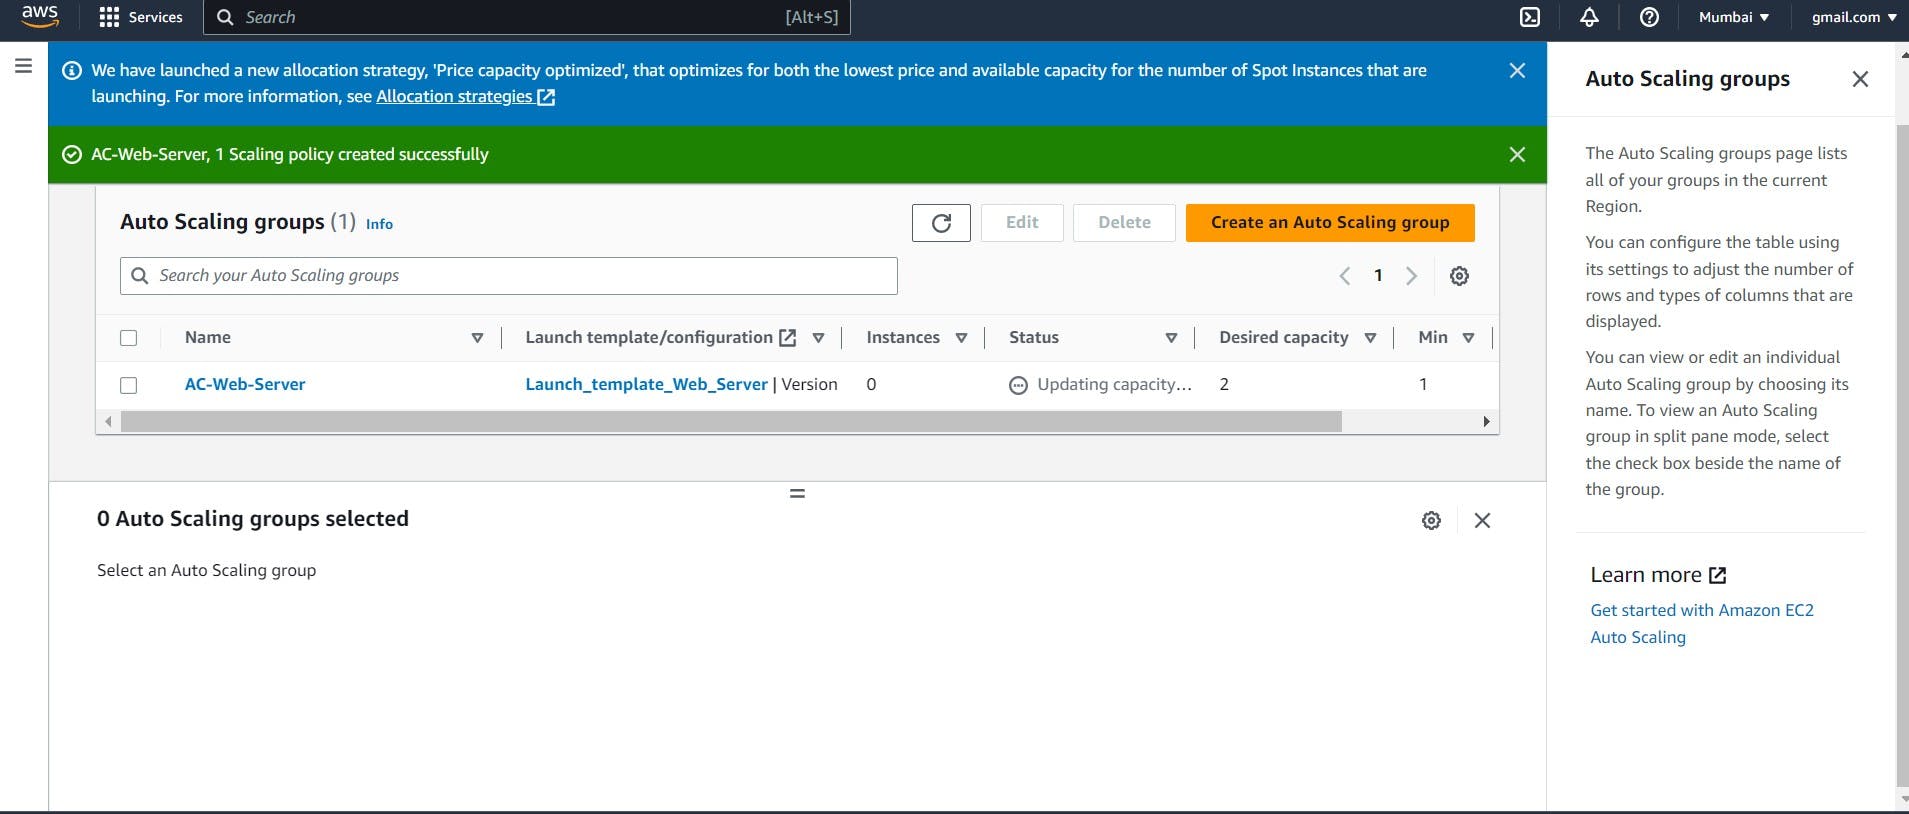
Auto Scaling group is created successfully
The Total configuration for Auto scaling is done here,
Verification
- Go to EC2 dashboard and click on instance
Here, Automatically EC2 instance is created using pre-defined template with the help of Auto-scaling group
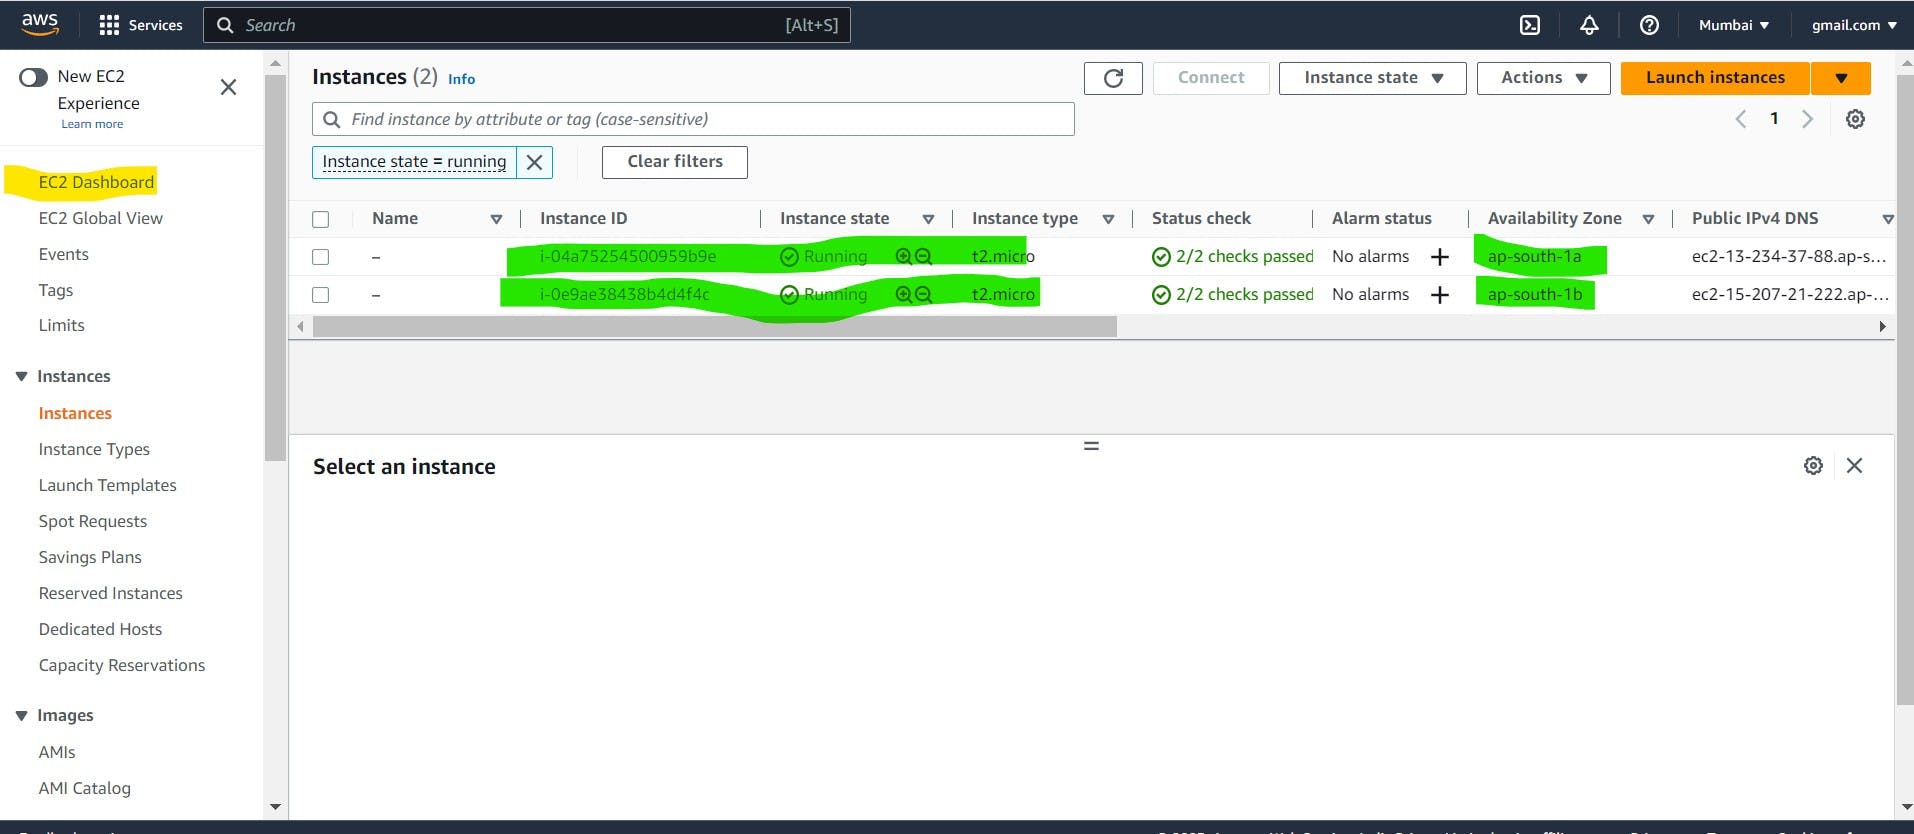
Note: - Both servers are created on different availability zones
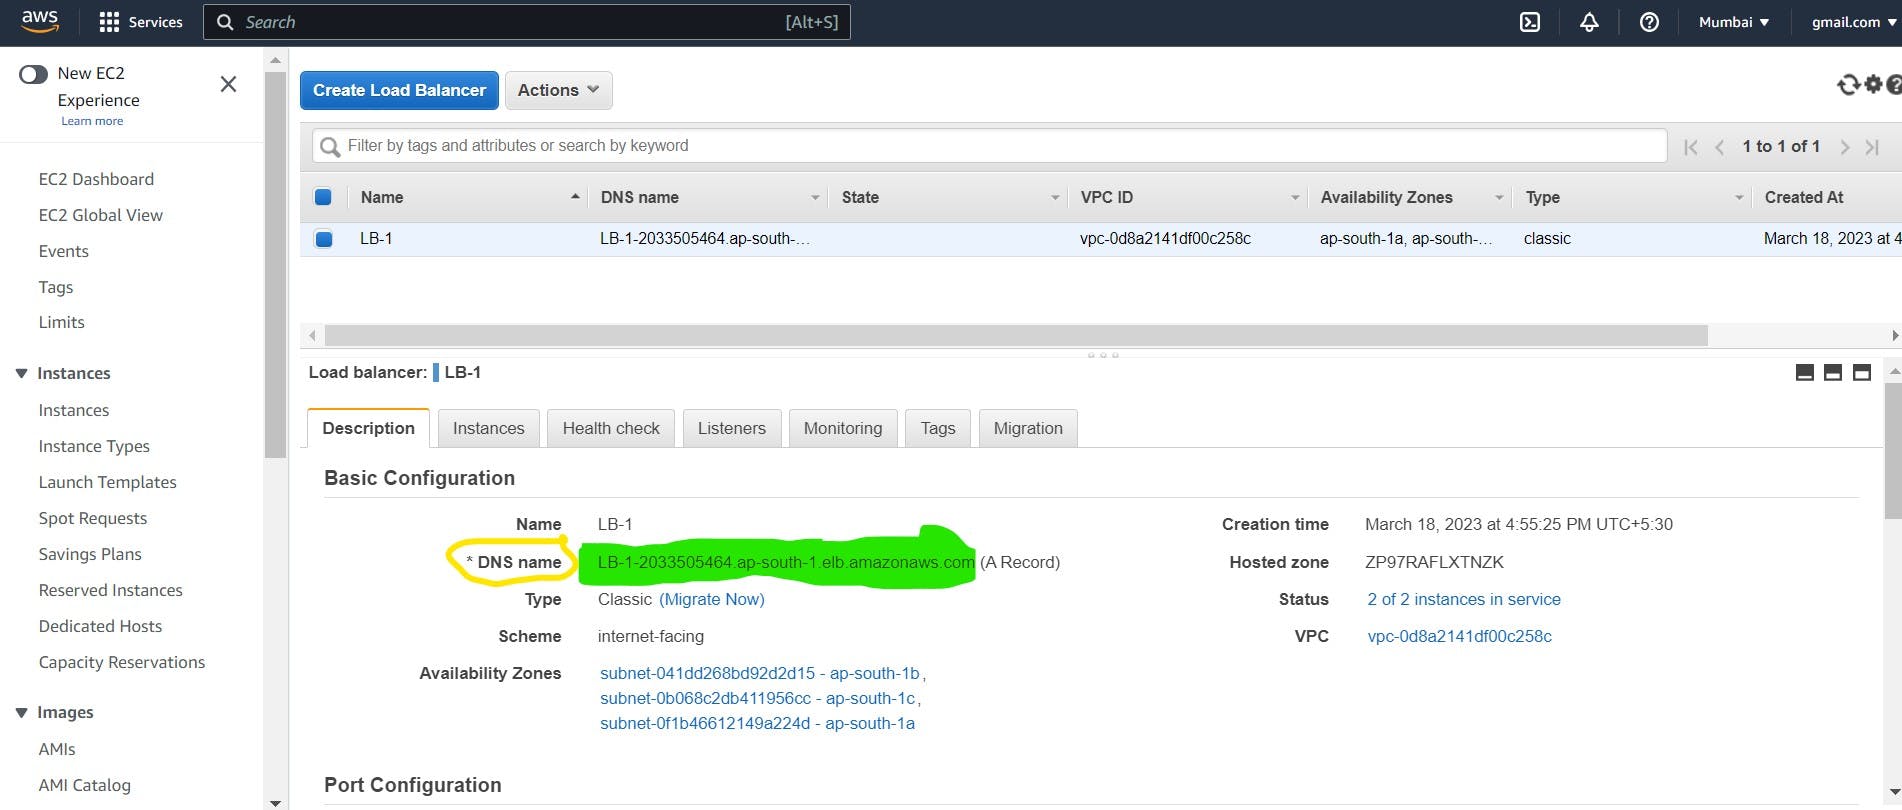
Click on EC2 dashboard and click on load balancer
Copy the DNS address and paste on browsers
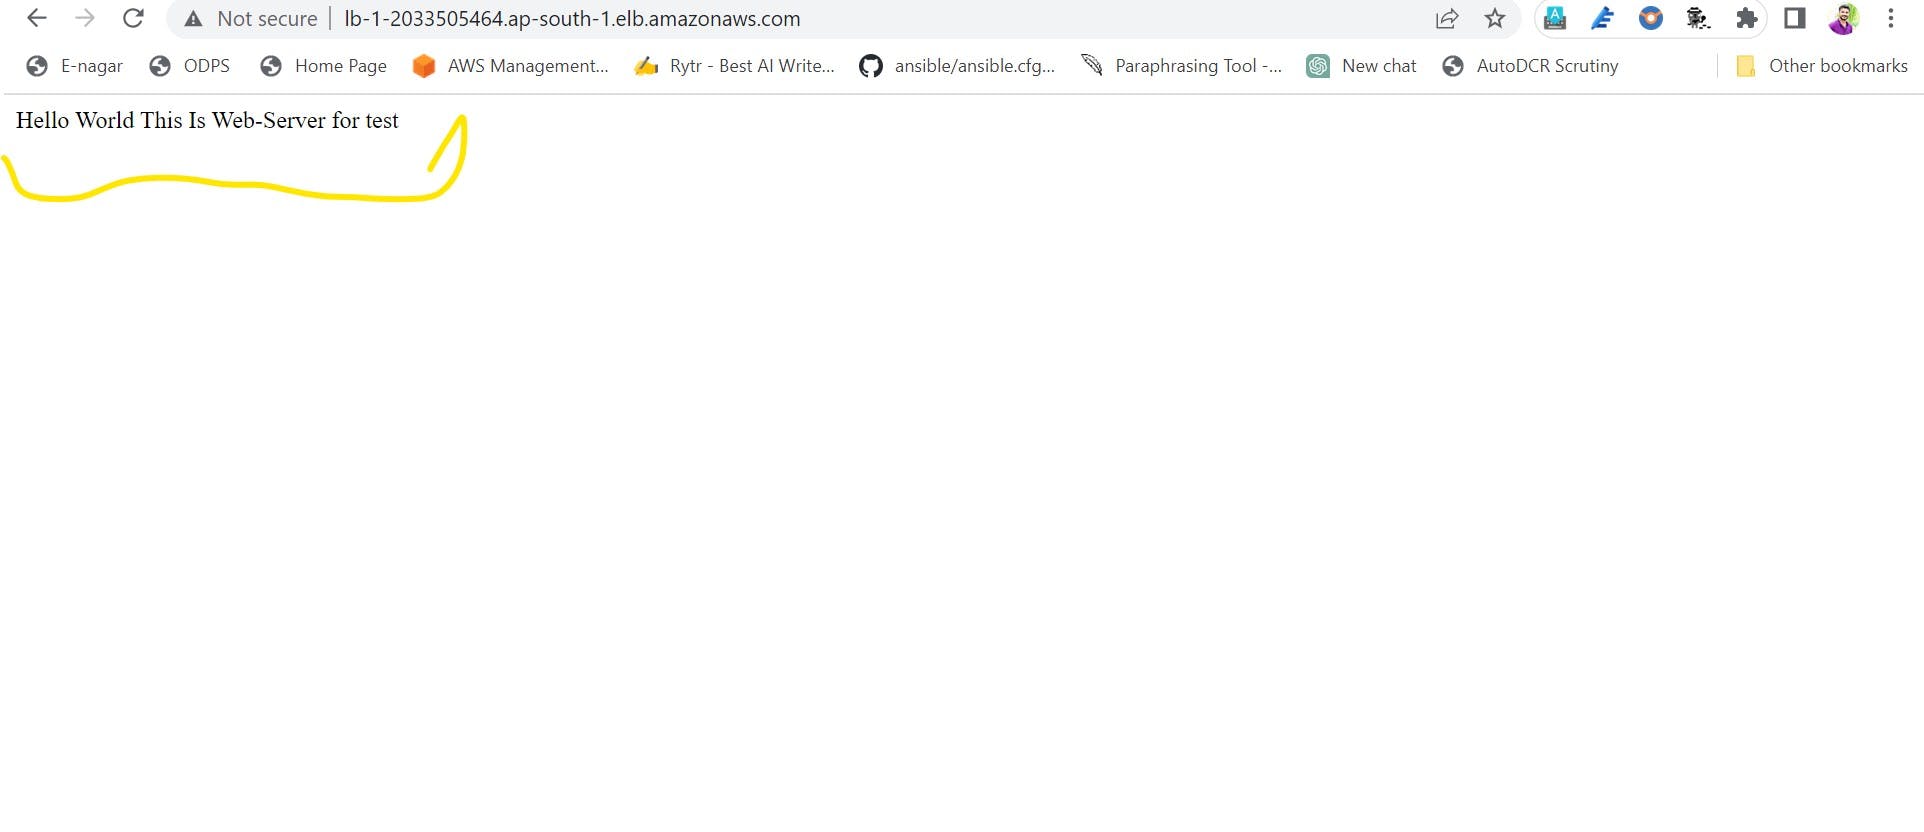
on Browser
If we deleted one instance then also we can access our website above link, Auto scaling not create instance because we configured minimum value is = 1 in auto-scaling group
If we terminate all the running instance then autoscaling automatically create the instance as per Group size configuration minimum number of instance =1
If the load exceeds 80% CPU utilization, it will create one instance, and if utilization remains high, it will create another instance until the CPU utilization falls below 80% (our configuration allows for a maximum of three instances to be created).
This is how we can use the Auto-scaling concept in our infrastructure also we see why not only a load balancer is sufficient to manage the load.
Note:- Once practice is done don't forget to delete the template, instances, Autoscaling group, key, and security groups.
Thank you for reading the blog!