


Table of contents
Overview
Hello everyone, This article is part of the CircleCI series, The knowledge in this series is built in sequence; however, this is the first article in this series.
CircleCI is a CI/CD platform that can be used to implement DevOps practices.
Its mission is to manage change, so software teams can innovate faster, That means to be less complex as can be.
The main Aim of creating CI/CD pipelines is to Deliver changes, Build new releases; however, with a non-cloud CI/CD platform you should manage the CI/CD platform infrastructure itself.
Therefore, CircleCI helps you to focus on Delivering changes and starting to build pipelines very fast "will figure that in this article"
Also, CircleCi Provides a Free plan on its cloud-based solution.
To list How powerful is CircleCI
Build pipelines very fast, with less complexity.
Hold and Handel The CI/CD solution infrastructure.
Have a free plan pricing.

Learn more about CircleCI Benefits.
Environment Setup
#1 CircleCI signup
CircleCI is integrated with GitHub, So in this lab environment will signup with my GitHub account.
#2 Create a Project
After Signing up, you'll be redirected to the Project section That has all GitHub repos listed below, to start creating a project Press on the Set Up Project button.

Then, select Fast to discover the config.yaml template file.
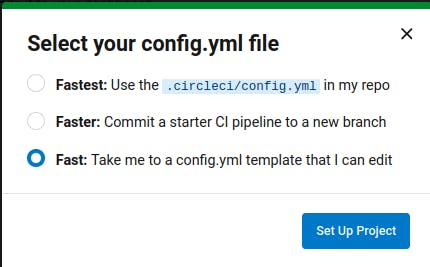
config.yaml template is The pipeline configuration yaml file
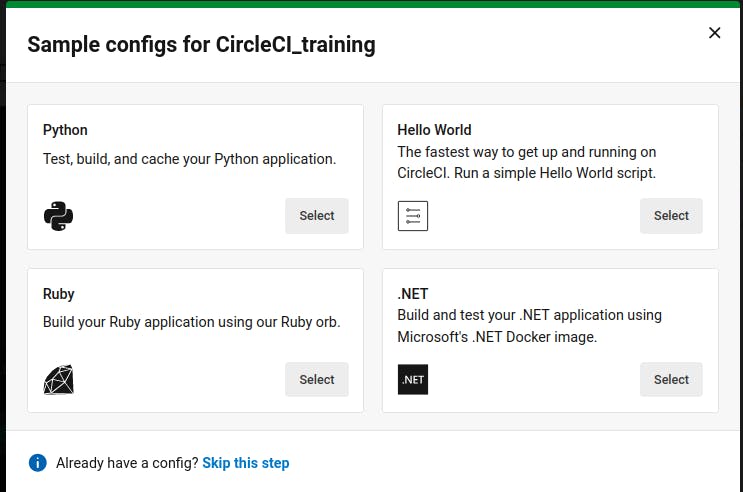
Now, Let's select the Hello World sample, This sample provides config.yaml files with minimum configurations, Just note that if you have already config.yaml file you can press skip this step.
Discover the config.yaml file, then press on commit and run.
this will fire the pipeline and creates a config.yaml file in the GitHub repo

Here's your first pipeline has run successfully with one job called say-hello

Check webhook
While signing up with a GitHub account on CircleCI, CircleCI will automatically create and manage webhooks for your repo.
The webhook is used for integration between CircleCI and GitHub for CI actions (i.e. fire the pipeline when any change happens on the repos)

Setup Triggers
Triggers are used to auto-trigger the pipeline without human intervention.
all that you do is commit your changes to your repo and the pipeline will fire automatically.
How To.
Press on Dashboard
Ensure that you're selecting the right project and branch
Then press the Trigger pipeline button, Press the Trigger pipeline again, on the other screen that appears.

Check Triggers
let's check our whole process
- Open your GitHub repo
- In the URL section, replace .com with .dev, this will open codespace in the browser.
- Make any changes, and commit
- This should fire the CircleCI pipeline with the new change

Now, go to the CircleCI platform, select dashboard, and in the pipeline section click on say-hello job, Collapse say-hello job; you should see your changes here

That's it, Hope this article inspired you and will appreciate your feedback.
Thank you