Building a blog with Astro and Headless Hashnode GraphQL APIs

Table of contents
- The GraphQL APIs at the core
- Starting with the custom blog utilizing headless Hashnode and Astro
- Create the Astro project
- Run the Astro project locally
- Installing GraphQL client and TailwindCSS dependencies
- Create the GrphQL client for accessing data using Hashnode APIs
- Create queries to fetch post lists, post details, and the about Page
- Create the post list page - the blog page
- Create the post details page
- Create the page to list posts by tag
- Create the about page
- Conclusion and what's next?
Imagine a world where developers and companies can focus on creating and publishing blog content effortlessly without worrying much about the underlying technical details. On top of that, they can customize and personalize the blog interface as they like using any technology of their choice! That will be a boon.
The good news is the amazing world already exists with the Headless Hashnode. It is a headless CMS designed for building blogs with all batteries included. It’s like Headless Shopify, which can’t be used as a generic CMS but nails the eCommerce front end.
You get a robust markdown-based WYSIWYG editor with out-of-the-box blogging features such as tags, reactions, comments, author pages, etc.
You can collaborate with your team using its review system to perform draft reviews before the articles go live.
As an author, you may want to see how your article looks on various devices once published. You can do that with a few clicks without any additional development work.
You can even run your blog as a newsletter, and it is just a matter of switching it on in a single click. There is no subscriber limit, and you can manage them effortlessly.
You can do custom domain mappings, such as you can host the blog on a mapped subdomain
blog.company.comor a subpathcompany.com/blog. Amazing, isn't it?Last but not the least is the cost-effectiveness. The Headless Hashnode is FREE for individual bloggers. Headless Hashnode for teams will be a paid product, but Hashnode is running a beta program currently where the first 50 companies would get it for free forever. You can contact the Hashnode team by filling out this form.
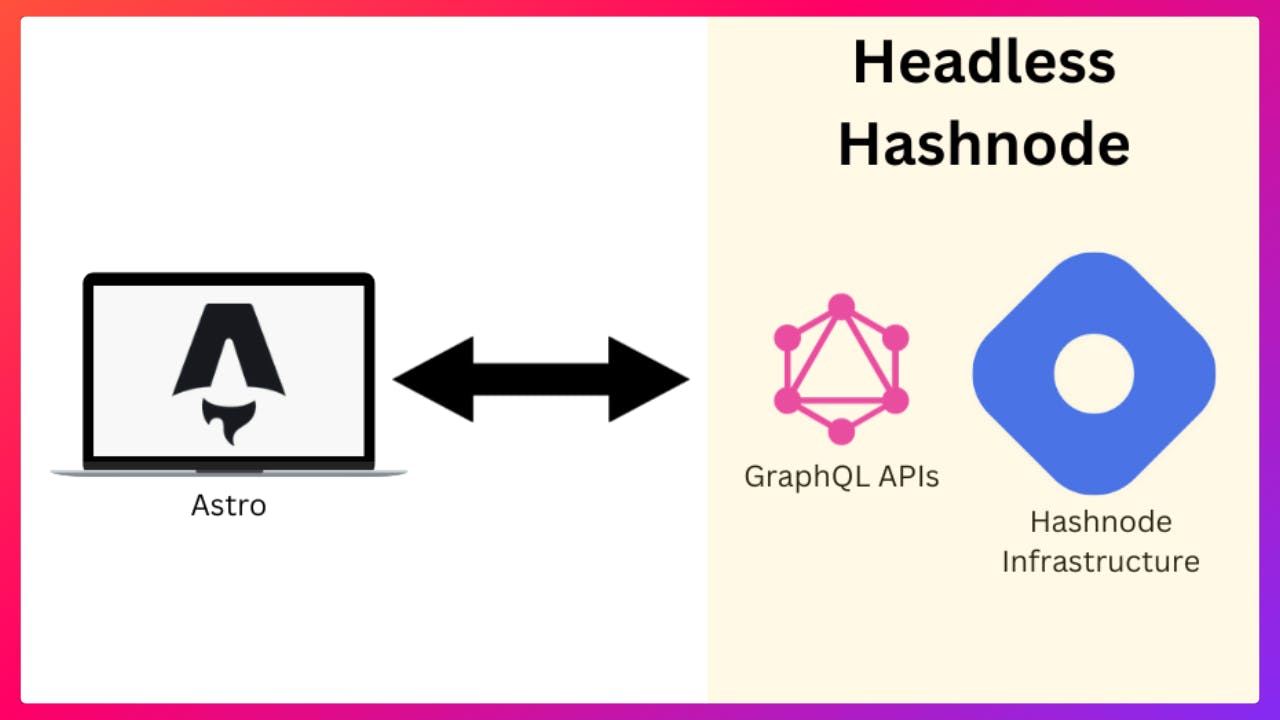
With all that overview, let us take a deep dive into exploring the Headless Hashnode by building a custom blog front end. We will use Astro, the supercharged web framework, to build the front end and connect it to the Headless Hashnode to build a customized blog from scratch. Sounds exciting? Let's do it.
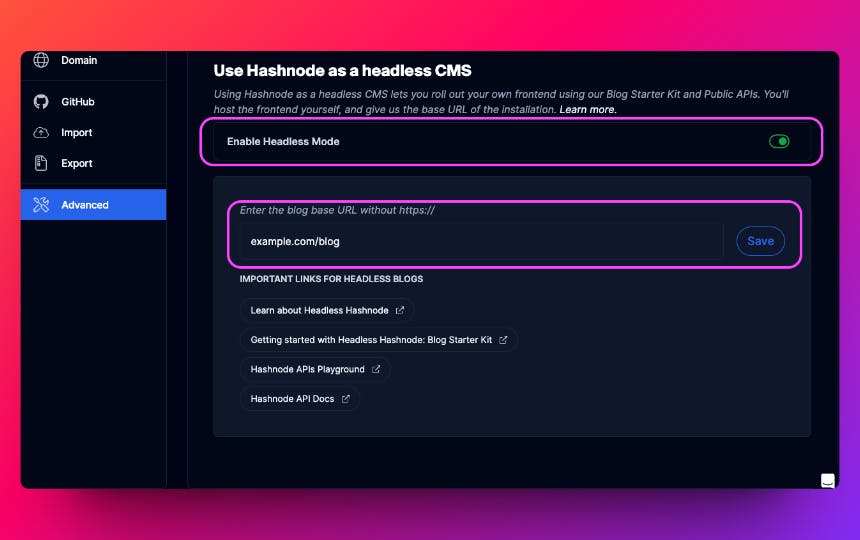
💡Did you know Hashnode created an optimized open-source blog starter kit utilizing Next.js, TailwindCSS, and Headless Hashnode? Check it out here if interested.You can create your own front end using the Blog Starter Kit and public APIs. Once you host the front end publicly, you can enable the headless mode in Hashnode by providing the base URL of your app. This configuration can be found under the Advanced menu of your blog dashboard.
The GraphQL APIs at the core
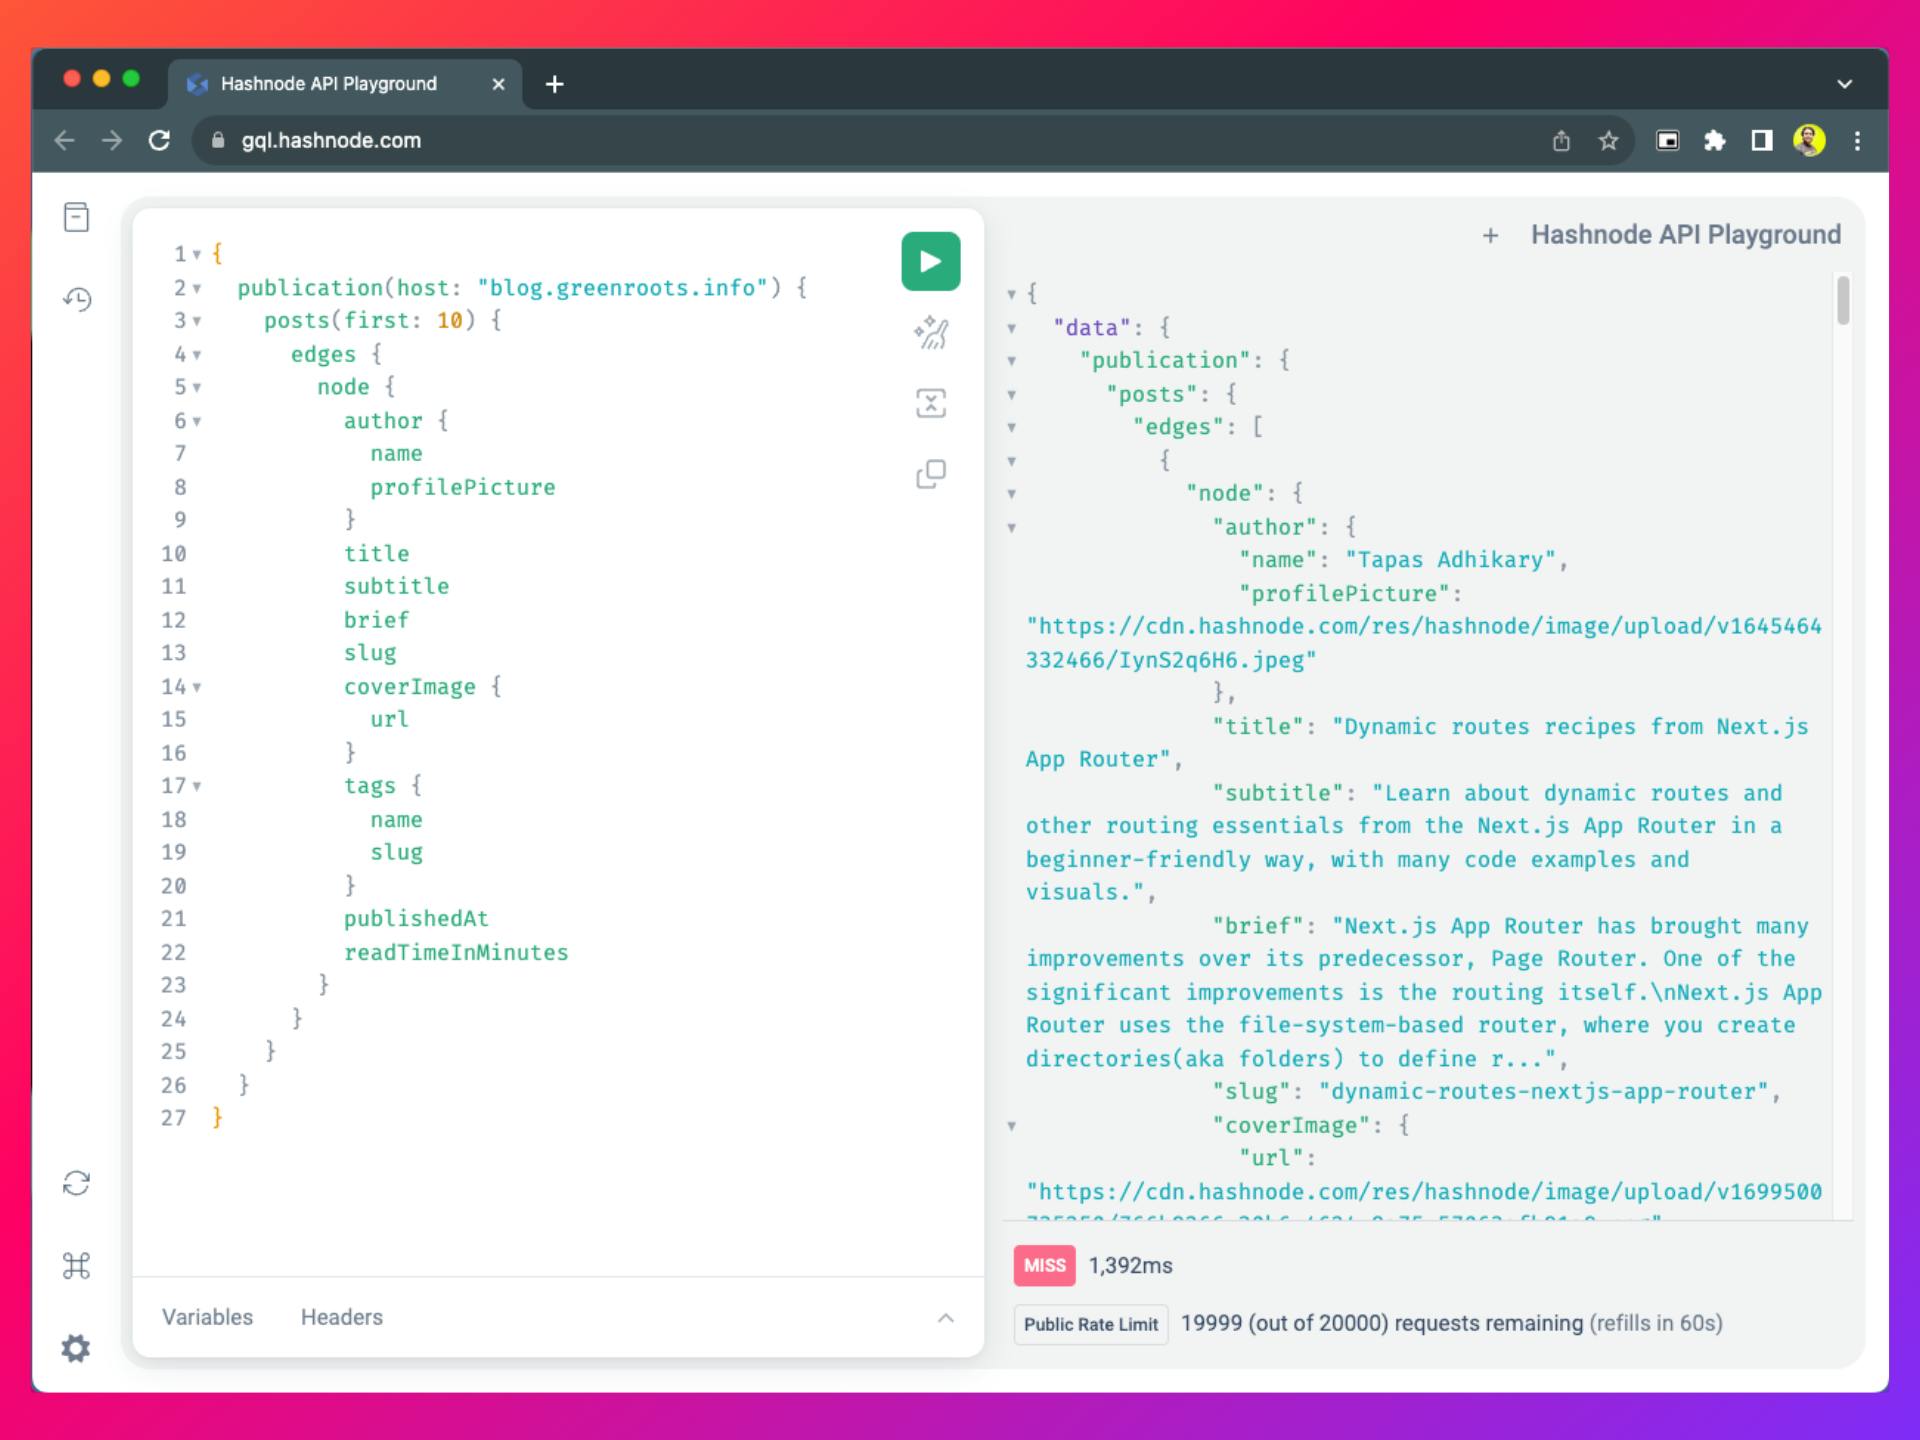
Hashnode's GraphQL APIs enable you to build a blog frontend on top of it using any tech stack, just like we will use Astro for our custom blog. The APIs are hosted on https://gql.hashnode.com and you can explore them before consuming them in your application development.
Here is the complete API documentation you can refer to: https://apidocs.hashnode.com/
Starting with the custom blog utilizing headless Hashnode and Astro
We will create the blog front end with Astro. It is an all-in-one web framework for building blazing-fast, scalable, and content-focused applications. We will use a GraphQL client to connect to the Hashnode's GraphQL APIs, and fetch posts, pages, tags, etc, to build the user interfaces.
Our target today is to create the following pages:
Post Lists Page: A page that lists down the posts(or articles) with minimal details from a publication say,
blog.greenroots.info.Post Details Page: A page to render the post details. When users click on any post from the post list page, they will navigate to this page to read the post.
About Page: We will create an About page. We will create a static author page in Hashnode and then fetch data to show in the front end.
List Posts by Tag: We will create a page to list posts that match a tag.
While you follow along, you can also look into the source code ahead. Please find it here: https://github.com/atapas/astronode.
Create the Astro project
You will need the Node.js version v18.14.1 or later installed to run the Astro project on your system. To check its availability, run the following command from your terminal. If you get an error, please install the required version of Node.js.
node -v

// Example output
v18.18.2
In the terminal, run the following command to start creating the Astro project:
# Using NPM
npm create astro@latest
# Using YARN
yarn create astro
# Using PNPM
pnpm create astro@latest
Now, you need to provide a few details to create the project skeleton:
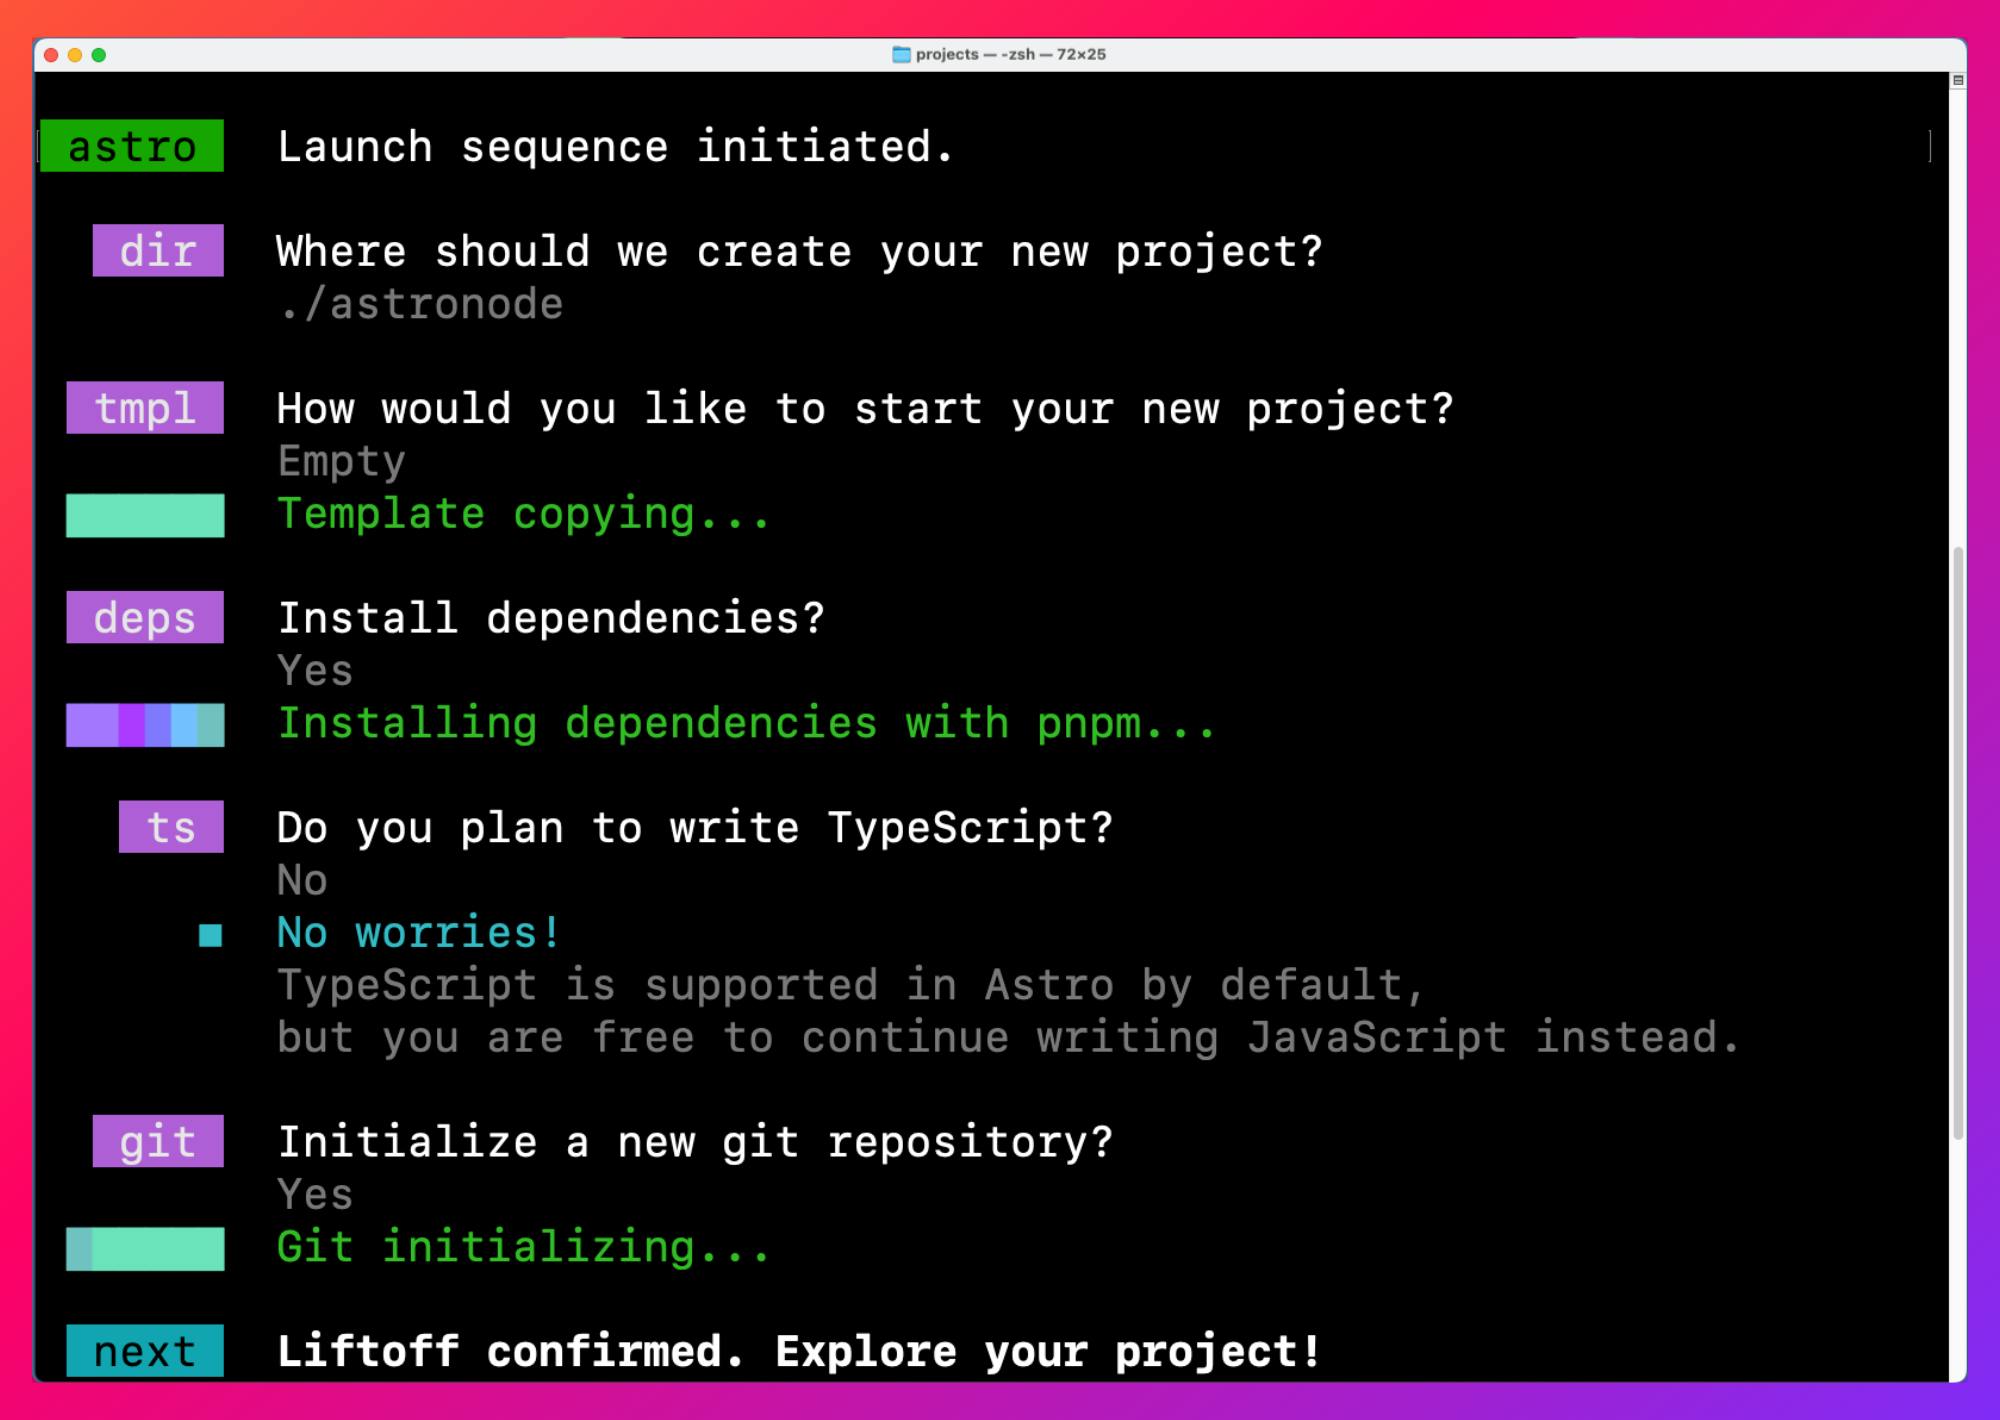
When the prompt asks, "Where should we create your new project?" provide the name of the folder to create your project directory, for example,
./astronode.Then select
Emptyas the option to start the project.Opt for installing dependencies by selecting the
Yesoption.We will not use TypeScript. Select
Nowhen it asks if we plan to write TypeScript.Select
Yeswhen asked to create a new git repository.
If you follow the instructions above correctly, the terminal output will look like the image below, and you will have the project files created under the folder astronode.
Run the Astro project locally
Now, run the project locally using the following command:
# Using NPM
npm run dev
# Using Yarn
yarn dev
# Using PNPM
pnpm run dev
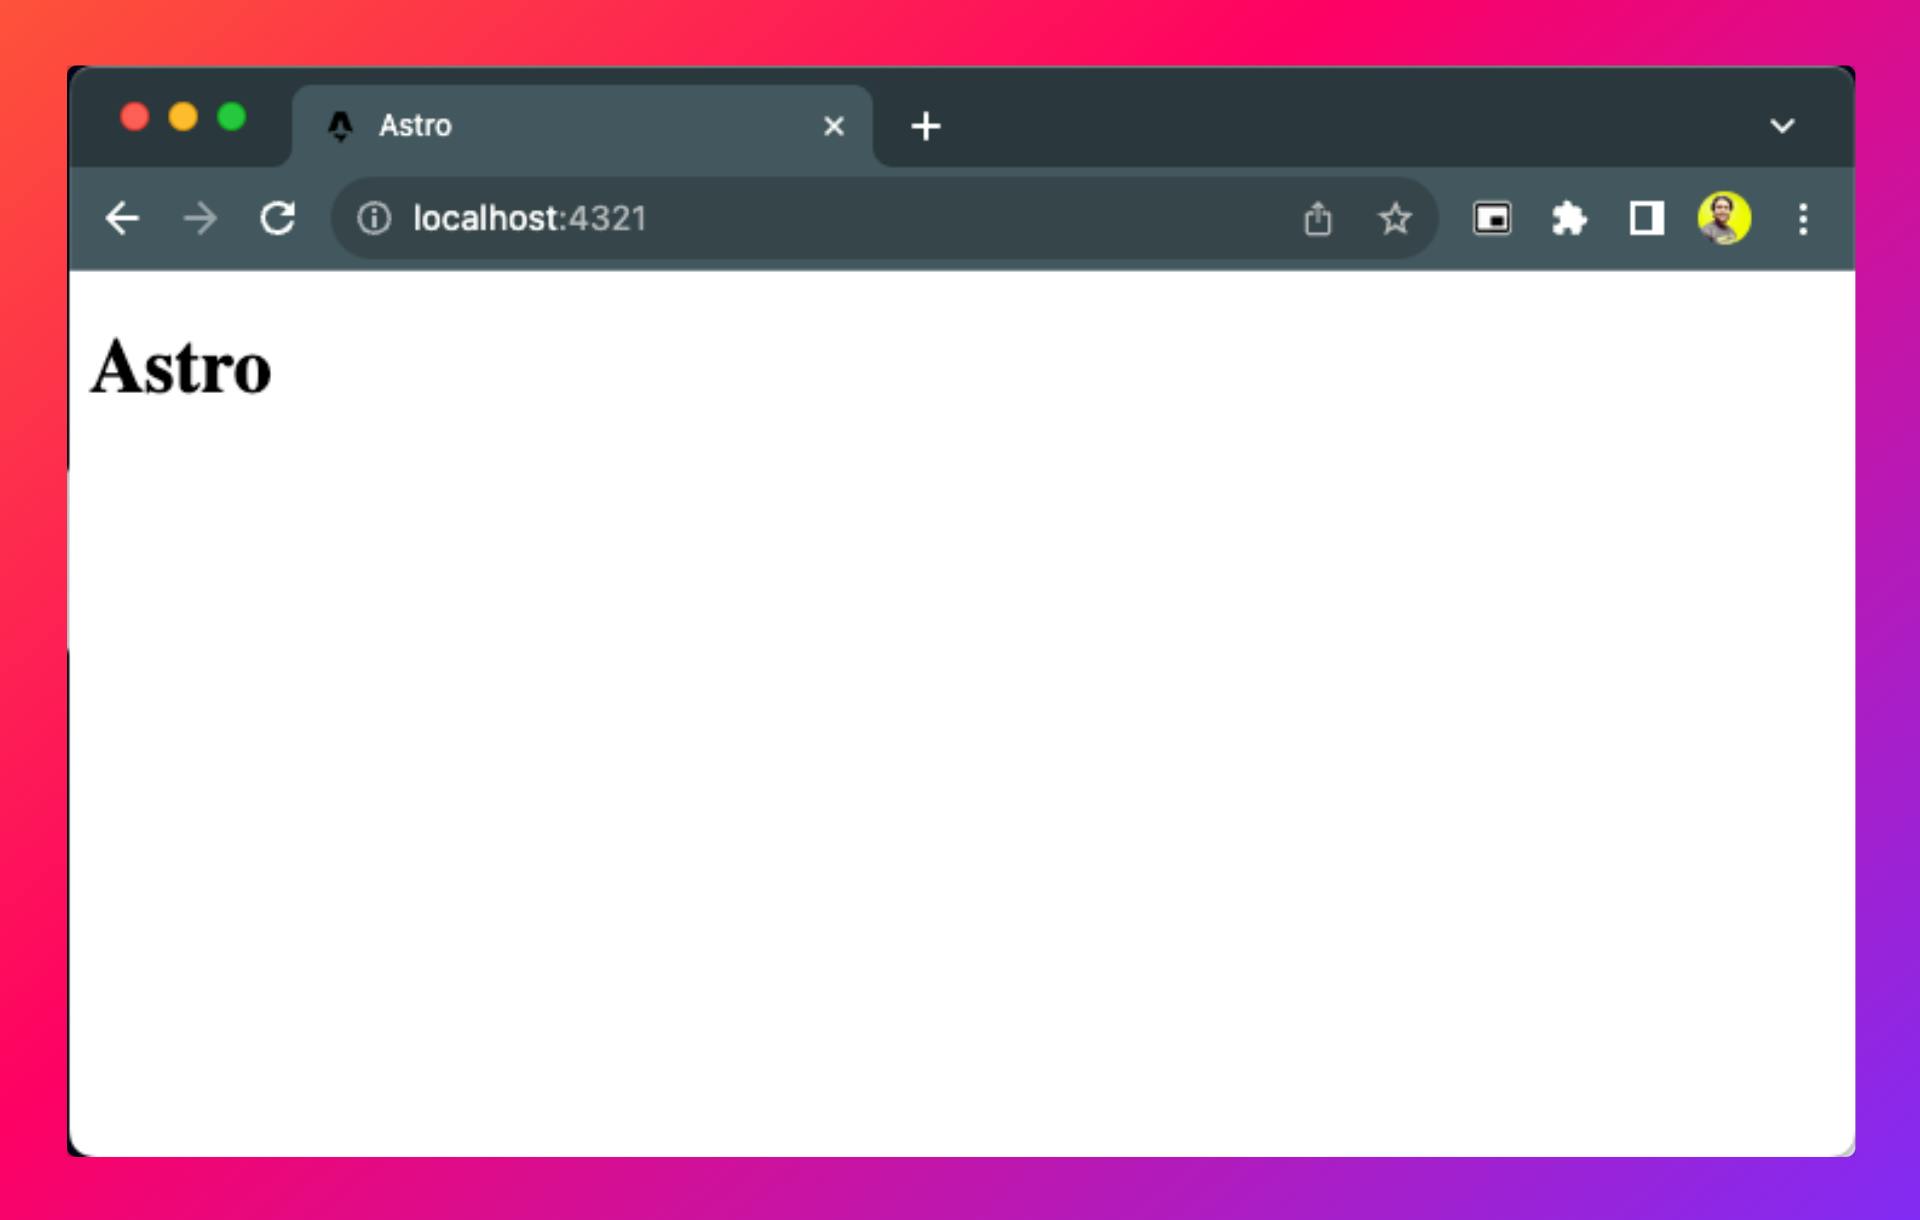
By default, the app runs on the http://localhost:4321/. You will see a page like this when you access the URL on the browser:
Installing GraphQL client and TailwindCSS dependencies
We will fetch data from the Hashnode GraphQL APIs. Hence, we need a GraphQL client to facilitate the data fetching. Install graphql and graphql-request dependencies using the following command from your terminal:
# Using NPM
npm install graphql graphql-request
# Using Yarn
yarn add graphql graphql-request
# Using PNPM
pnpm install graphql graphql-request
We will use TailwindCSS to style the application. You can do a quick install of it using the astro add command:
# Using NPM
npx astro add tailwind
# Using Yarn
yarn astro add tailwind
# Using PNPM
pnpm astro add tailwind
Press y for all the questions asked while adding tailwindcss to the project.
Create the GrphQL client for accessing data using Hashnode APIs
Import the astronode project into your favourite code editor. Now, create a directory called lib/ inside the src/ directory, and create a file called graphQLClient.js under lib/ with the following code:
// lib/graphQLClient.js

import { GraphQLClient } from "graphql-request";

export const getClient = () => {
  const client = new GraphQLClient(`https://gql.hashnode.com`);
  return client;
}
Here, we have imported the GraphQLClient API method from the graphql-request npm and used it to create a GraphQL client instance for the Hashnode GraphQL API endpoint: https://gql.hashnode.com.
Now, we can use the getClient() function anywhere in our project to obtain an instance of the client.
Create queries to fetch post lists, post details, and the about Page
Let us now create the queries needed to build the pages.
✅ Query to fetch multiple posts
We are interested in fetching 20 of the latest posts from the publication. We are interested in details like title, brief, author information, tags, cover image, slug, reading time, and the publish date. So, we can form a GraphQL query that returns all required details.
Create a directory data/ under src/. Now, create a file blog-data.js with the following code in it:
blog.greenroots.info) in the code below to your Hashnode publication name. Also, you can test the query using the Hashnode API Playground. // blog-data.js
import { gql } from "graphql-request";
import { getClient } from "../lib/graphQLClient";
export const getAllPosts = async () => {
const client = getClient();
const allPosts = await client.request(
gql`
query allPosts {
publication(host: "blog.greenroots.info") {
title
posts(first: 20) {
pageInfo{
hasNextPage
endCursor
}
edges {
node {
author{
name
profilePicture
}
title
subtitle
brief
slug
coverImage {
url
}
tags {
name
slug
}
publishedAt
readTimeInMinutes
}
}
}
}
}
`
);
return allPosts;
};
✅ Query to fetch single post details
We will use the slug value of the post to fetch its details. Copy and paste the following code snippet into the blog-data.js file we created.
how-to-learn is the slug of the URL https://example.com/blog/how-to-learn.Notice that we fetch the post details, including the content of it, in the HTML format.
    // blog-data.js
    // ---- existing code ----

    export const getPost = async (slug) => {
      const client = getClient();

      const data = await client.request(
        gql`
          query postDetails($slug: String!) {
            publication(host: "blog.greenroots.info") {
              post(slug: $slug) {
                author{
                  name
                  profilePicture
                }
                publishedAt
                title
                subtitle
                readTimeInMinutes
                content{
                  html
                }
                tags {
                  name
                  slug
                }
                coverImage {
                  url
                }
              }
            }
          }
        `,
        { slug: slug }
      );

      return data.publication.post;
    };
✅ Query to fetch the About page
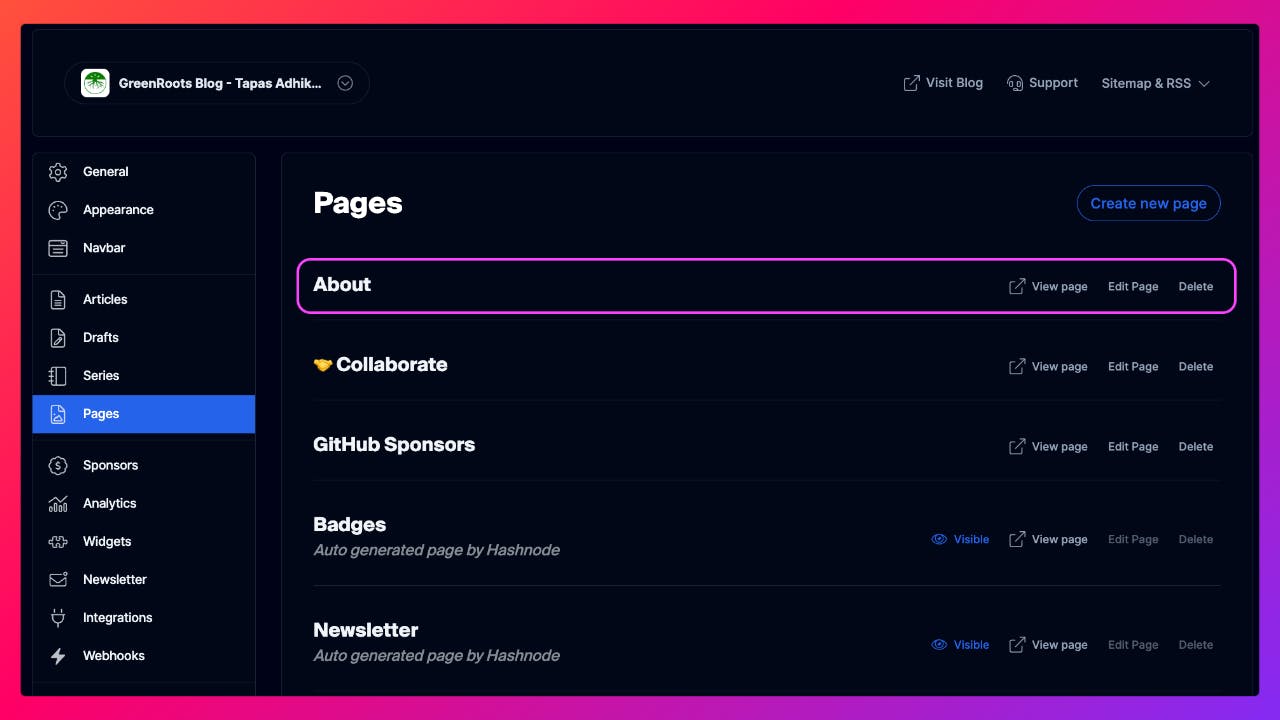
You can create static pages in Hashnode from your admin dashboard. This feature is ideal for creating pages like an About page, a collaboration page, etc. Create an About page in Hashnode from your blog dashboard.
Add the following code snippet at the end of the blog-data.js file. Here, we use the GraphQL query to fetch a static page's title and content in the markdown format.
// blog-data.js
// ---- existing code ----

export const getPage = async () => {
  const client = getClient();

  const page = await client.request(
    gql`
      query pageData {
        publication(host: "blog.greenroots.info") {
          staticPage(slug: "about") {
            title
            content {
              markdown
            }
          }
          title
        }
      }
    `
  );

  return page.publication.staticPage;
};
Create the post list page - the blog page
Astro uses file-based routing, where each file under the /src/pages/ directory becomes a page for you. If you need to create subroutes, you need to create a folder under the pages/ directory for the subroute.
For our app, we want to create a page on the route /blog. To do that, create a file called index.astro under the /pages/blog/ directory with the following content:
// /pages/blog/index.astro

---
import Posts from '../../components/Posts.astro';
import {getAllPosts} from '../../data/blog-data';

const data = await getAllPosts();
const allPosts = data.publication.posts.edges;
---

<html lang="en">
    <head>
        <meta charset="utf-8" />
        <link rel="icon" type="image/svg+xml" href="/favicon.svg" />
        <meta name="viewport" content="width=device-width" />
        <meta name="generator" content={Astro.generator} />
        <meta name="robots" content="noindex">
        <title>AstroNode - Blog</title>
    </head>
    <body>
        <div class="flex flex-col justify-center items-center p-2">
            <h2 class="text-2xl pt-2 font-semibold">
                {`Welcome to ${data.publication.title}`}
            </h2>
            <Posts allPosts={allPosts}/>
        </div>
    </body>
</html>
Let's discuss the code above:
We get all the post data by calling the getAllPosts() method.
Then, we display the publication title as a heading.
Lastly, we pass the
allPostsdata to a component calledPoststhat we will create next.
Components are the basic building blocks of an Astro project. You compose components inside the pages to build an Astro app. Let us create the Posts component. Create a directory called components and create a file called Posts.astro under it with the following content:
// /components/Posts.astro

---
const {allPosts} = Astro.props;
import PostCard from './PostCard.astro';
---

<div>
  {allPosts.map((post) => <PostCard post={post?.node} />)}
</div>
A couple of things are going on here:
First, we get
allPostsdata as a prop from the blog page.Next, we iterate through all the posts and pass each post's detail to another component called
PostCard.
Let's create the PostCard component. Create a file called PostCard.astro under the components directory with the following content:
// /components/PostCard.astro

---
import Author from './Author.astro';
import Tag from './Tag.astro';

const {post} = Astro.props;
---
<a href={`/blog/${post.slug}`}>
  <div class="p-6 bg-white rounded shadow-sm my-4">
    <h2 class="text-4xl pb-5 font-semibold">{post.title}</h2>
    <div class="flex lg:flex-row md:flex-col max-sm:flex-col ">
      <img
        class="w-full rounded-lg shadow-xl"
        src={post.coverImage?.url}
        alt={post.title} />
      <div class="flex flex-col m-4">
        <p class="mb-2 text-lg">{post.brief}</p>
        <div class="mt-5 mb-5">
          <Author post={post} />
        </div>
        <div class="flex justify-center items-center">
            {post?.tags.map((tag) => <Tag tag={tag} />)}
        </div>
      </div>
    </div>
  </div>
</a>
The PostCard component has the following:
It receives a post as a prop.
We create a card structure user interface and display the post title, brief, cover image, author, and tag information.
The card is made clickable and routed to a path
/blog/{slug}.
The author and tag details are handled as separate components. Let us create them one by one. First, the Author component. Create a file Author.astro under the components directory with the following content:
// /components/Author.astro

---
const {post} = Astro.props;

// Format the date
const getFormattedDate = (dateString) => {
  return new Intl.DateTimeFormat('en-US', {
    year: "numeric",
    month: "long",
    day: "numeric",
    }).format(new Date(dateString));
}
---

<div class="relative flex flex-row flex-wrap items-center justify-center">
  <div class="mb-5 flex w-full flex-row items-center justify-center md:mb-0 md:w-auto md:justify-start">
    <div class="flex mr-1">
      <img
        src={post.author.profilePicture}
        alt={post.author.name}
        width="50px"
        height="50px"
        class="rounded-3xl mr-3" />
      <div class="mt-3 flex">
        <span>{post.author.name}</span>
        <span class="mx-3 block font-bold text-slate-500">.</span>
      </div>
    </div>
  </div>
  <div class="mb-5 flex w-full flex-row items-center justify-center md:mb-0 md:w-auto md:justify-start">
    <span>{getFormattedDate(post.publishedAt)}</span>
    <span class="mx-3 block font-bold text-slate-500">.</span>
    <span>{post.readTimeInMinutes} min read</span>
  </div>
</div>
It is a simple component where,
Get the post as a prop and display the author's image and name.
We also display the reading time and a formatted date.
Lastly, for the Tag component create a file Tag.astro under the components directory with the following content:
// /components/Tag.astro

---
const {tag} = Astro.props;
---

<div class="m-1 bg-purple-500 text-white rounded-md p-1 text-sm">
  <a href={`/blog/tags/${tag.slug}`}>{tag.name}</a>
</div>
It is a simple component that iterates through all the tags of a post and displays the tag names. We also link the tag name using the route /blog/tag/{tag.slug}.
That's it. Now access the blog route using the URL http://localhost:4321/blog/. You should see the post list page where each post is listed as a card with details.
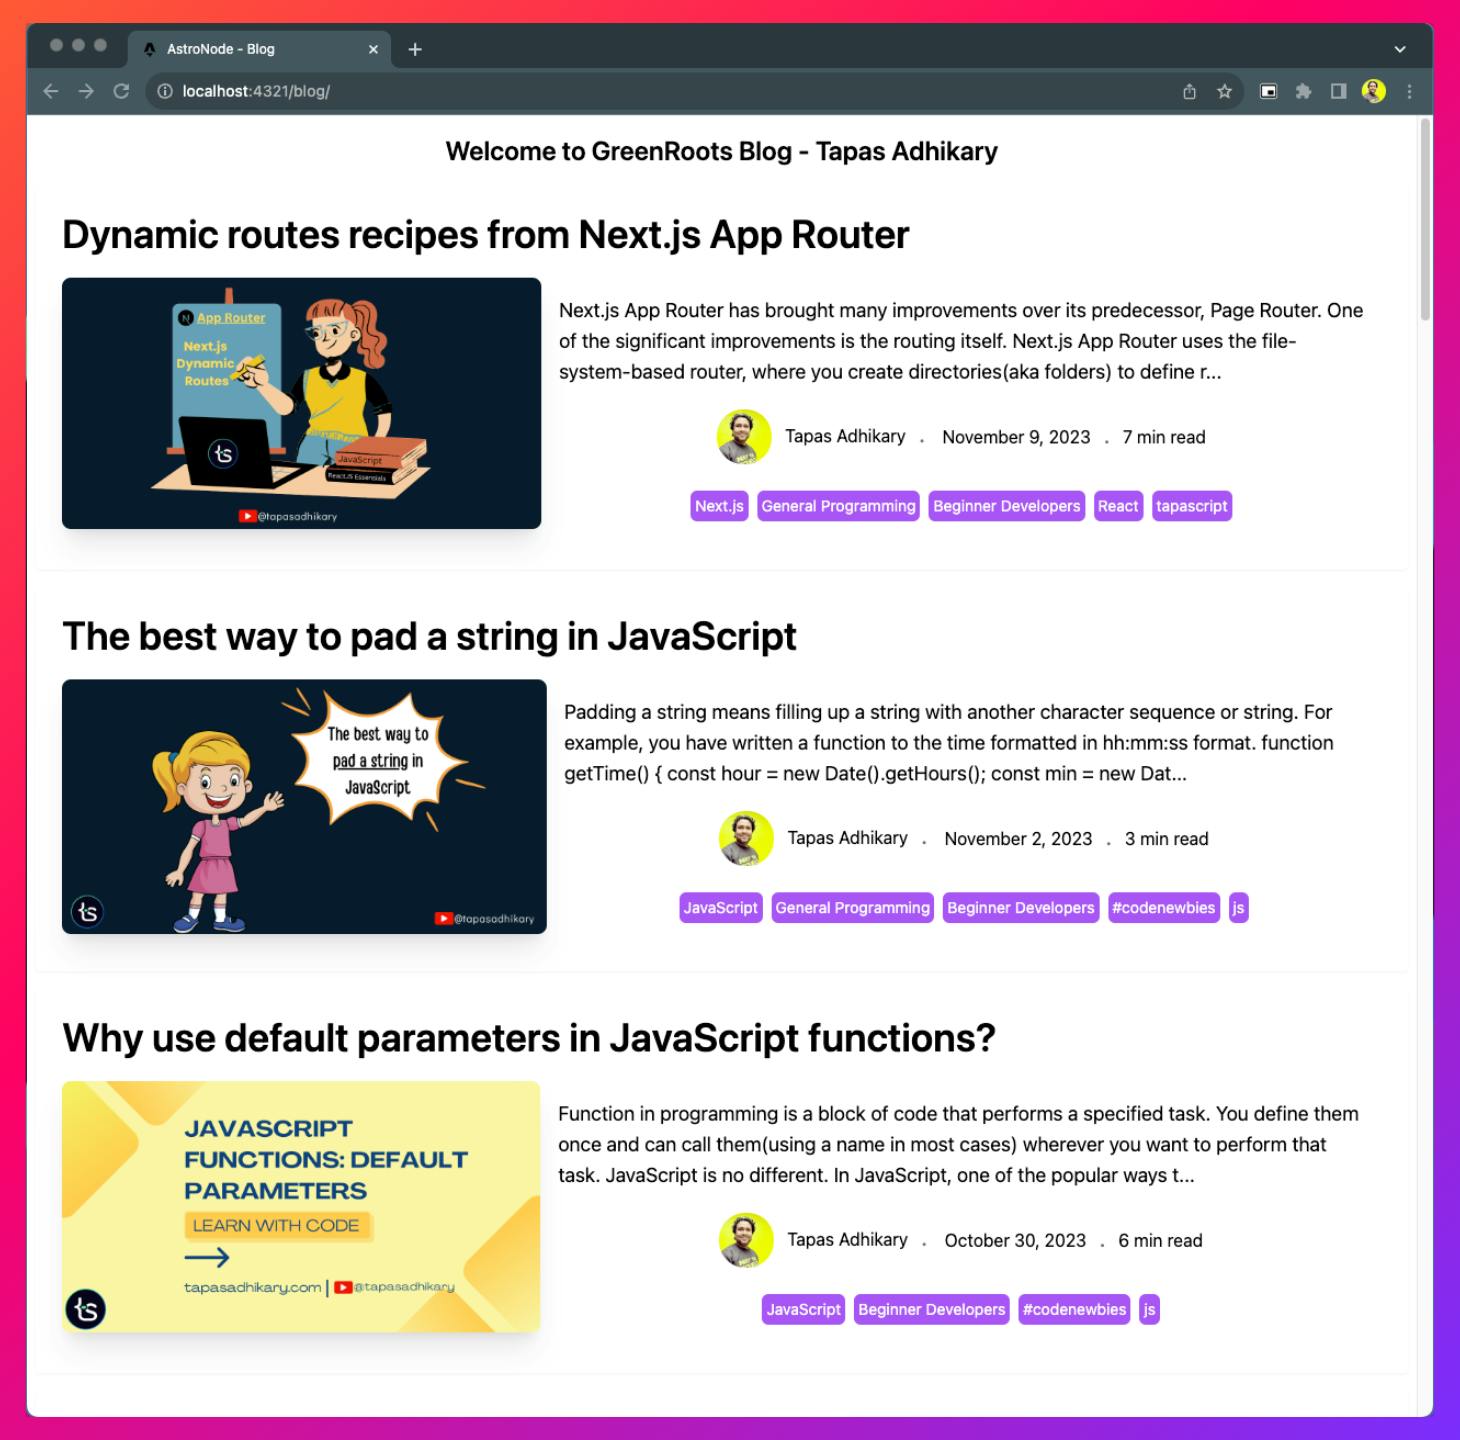
Notice that each of the cards on the page is clickable. However, when you click on them, it doesn't go to a post details page; rather, it gives a 404 error(page not found!). Let's fix that.
Create the post details page
We have to create a dynamic route now. In Astro, you create a dynamic route by enclosing the route name within the square brackets, i.e., [route]. The slug value of a blog is unique and dynamic. So, to create routes with the dynamic slug value, create a file called [slug].astro under the blog directory and paste the following code:
// /pages/blog/[slug].astro

---
import {getAllPosts, getPost} from '../../data/blog-data';
import Tag from '../../components/Tag.astro';
import Author from '../../components/Author.astro';

export async function getStaticPaths() {
  const data = await getAllPosts();
  const allPosts = data.publication.posts.edges;
  return allPosts.map((post) => {
    return {params: { slug: post.node.slug }}
  })
}
const { slug } = Astro.params;
const post = await getPost(slug);
---
  <article class="bg-white p-3 mt-3 flex flex-col">
    <img
        class="rounded-lg"
        src={post.coverImage?.url}
        alt={post.title} />
    <h1 class="text-4xl font-bold pt-5">{post?.title}</h1>
    <h2 class="text-xl pt-3 pb-3">{post.subtitle}</h2>

    <Author post={post} />

    <div class="flex flex-wrap justify-center items-center mt-5 mb-5">
      {post?.tags.map((tag) => <Tag tag={tag} />)}
    </div>

    <div class="post-details">
      <p set:html={post?.content?.html} />
    </div>
  </article>
A few points to note here:
Astro wants us to create all the slug mapping. In the getStaticPaths() methods, we create an array of all slugs so that if we hit any slug dynamically, we can match the above page.
Next, we query the post details, passing the slug value.
Now, display the post details. Pay attention to the part where we handle the post's content. We get the content as HTML, and Astro allows you to render HTML as it is with the
set:htmltemplate directive.
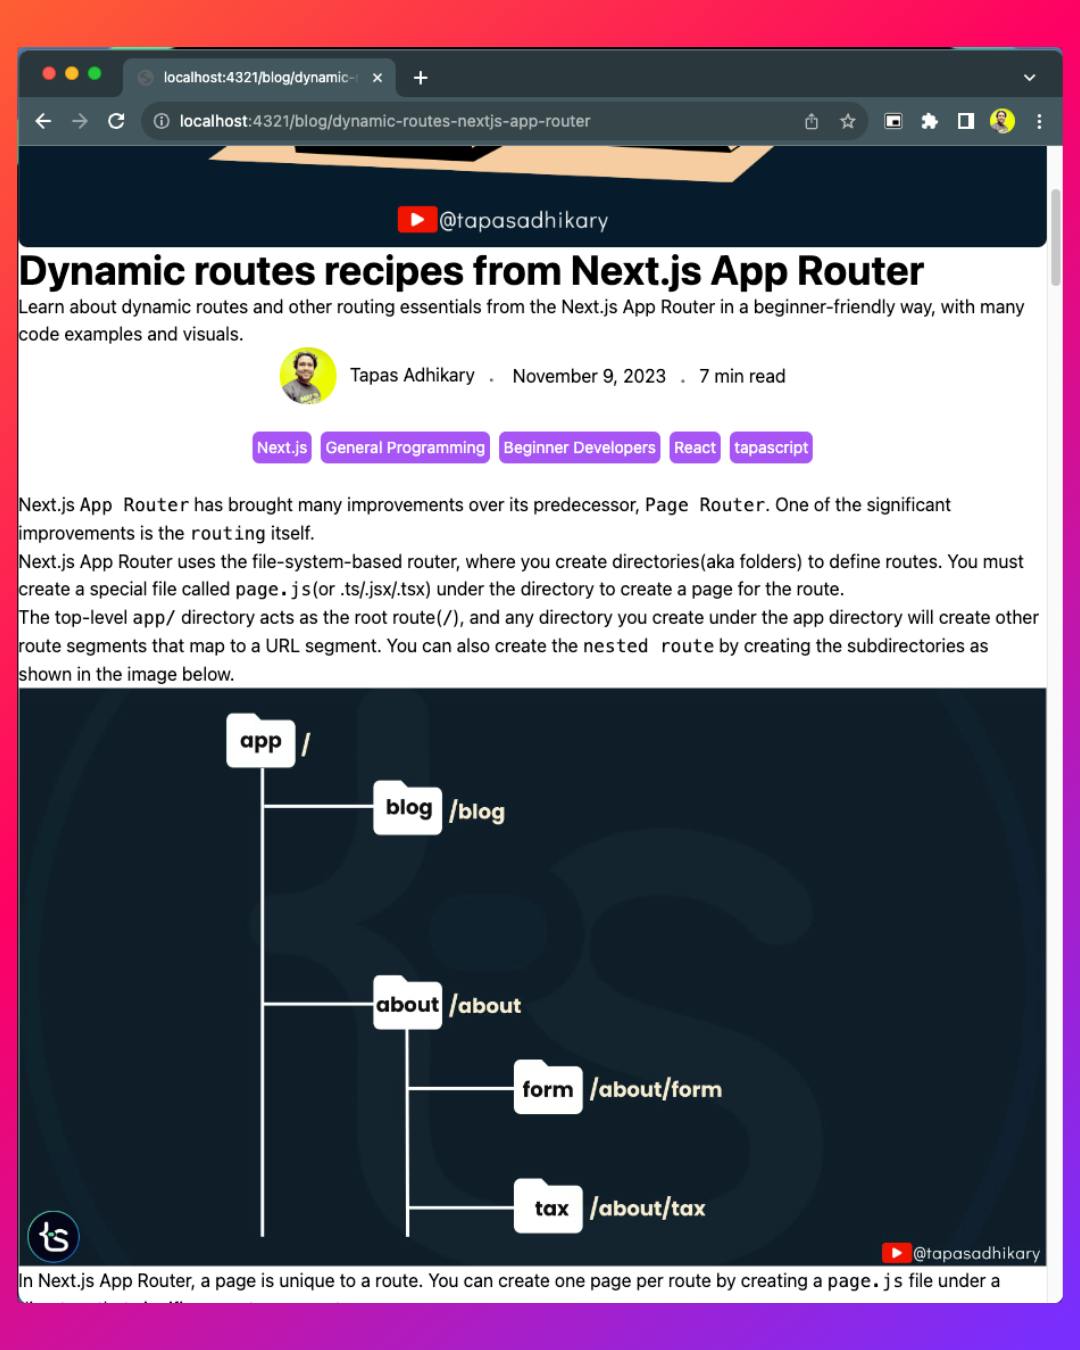
It's time to click on any post from the post list page. You will be led to the post details page, which is dynamically created.
Create the page to list posts by tag
Each of the posts fetched from the headless Hashnode may have one or more tags associated with them. How about we create another dynamic page listing posts matching a tag when we click on a tag name from a post?
Each tag on the posts in the list page and details is linked with the tags/${tag.slug} href. So, we will not create a file called [tag].astro under the blog/tags directory with the following code:
// /pages/blog/tags/[tag].astro
---
import Posts from '../../../components/Posts.astro';
import {getAllPosts} from '../../../data/blog-data';
import Tag from '../../../components/Tag.astro';
export async function getStaticPaths() {
const data = await getAllPosts();
const allPosts = data.publication.posts.edges;
const allTags = [...new Set(allPosts.map((post) => post.node.tags).flat())];
const jsonObject = allTags.map(JSON.stringify);
const uniqueSet = new Set(jsonObject);
const uniqueTags = Array.from(uniqueSet).map(JSON.parse);
return uniqueTags.map((uTag) => {
const filteredPosts = [];
allPosts.forEach((post) => {
const tags = post.node.tags;
tags.forEach((tag) => {
if(tag.slug === uTag.slug) {
filteredPosts.push(post)
}
})
})
return {
params: { tag: uTag.slug },
props: { posts: filteredPosts, matchedTag: uTag },
};
});
}
const { tag } = Astro.params;
const { posts, matchedTag } = Astro.props;
---
<div class="p-2">
<div class="flex pt-3">
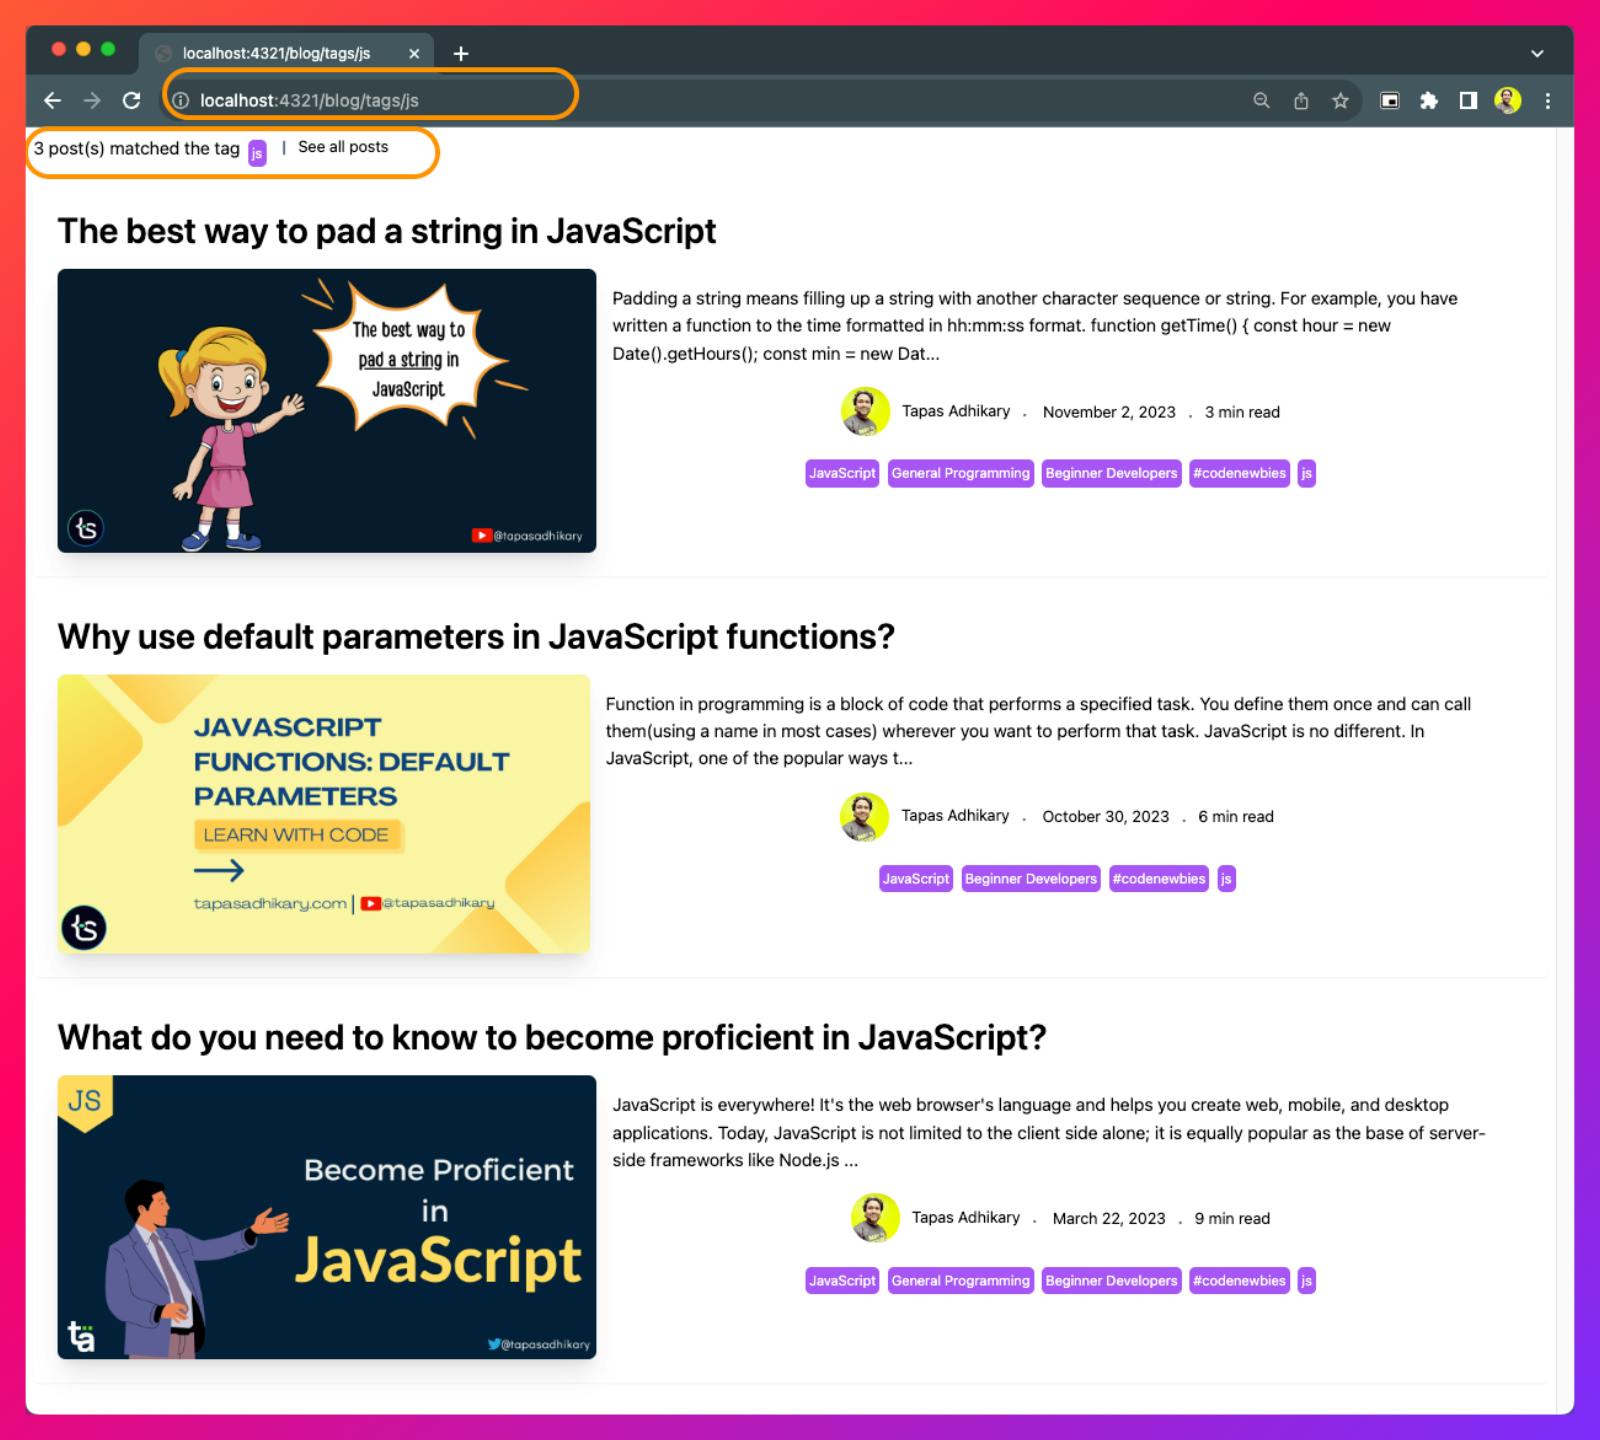
<p class="text-lg pt-1.5 px-1 mr-1">
{posts.length} post(s) matched the tag
</p>
<Tag tag={matchedTag} />
<span class="mx-3 mt-1 block font-bold text-slate-500 text-xl">
|
</span>
<a class="pt-1.5" href="/blog">See all posts</a>
</div>
<Posts allPosts={posts} />
</div>
It is a dynamic route where,
We create the mapping for all available tags across all the posts.
Then, we retrieve the posts that match the tag.
Finally, we passed the matched posts to the
Postscomponent we created a while back to render the matching posts.
Great! Now, clicking on any tag will lead you to a page listing all the posts that match that tag.
Create the about page
The only thing we are left with is to create the About page. To showcase that Headless Hashnode can deliver you content in a format other than HTML, we fetched the static page data in the markdown format. Now, we must handle the markdown in the front end.
To do that, install this library to help us with markdown content.
npm install @astropub/md # You know the PNPM & YARN alternatives by now.
Create a page about.astro under the blog/ directory with the following code:
// /pages/blog/about.astro

---
import {getPage} from '../../data/blog-data';
import { Markdown } from '@astropub/md';

const data = await getPage();
---

<html lang="en">
  <head>
    <meta charset="utf-8" />
    <meta name="viewport" content="width=device-width" />
    <meta name="robots" content="noindex">
    <title>AstroNode - About</title>
  </head>
  <body>
      <div class="flex flex-col justify-center p-2">
        <h2 class="text-3xl mb-3">{data.title} Page</h2>
        <div class="about-content">
          <Markdown of={data?.content?.markdown} />
        </div>
      </div>
  </body>
</html>
A few things to note here:
We import the function to fetch the static page data.
We import the
Markdowncomponent to handle the markdown format.Then, we use the markdown data with the Markdown component to render it.
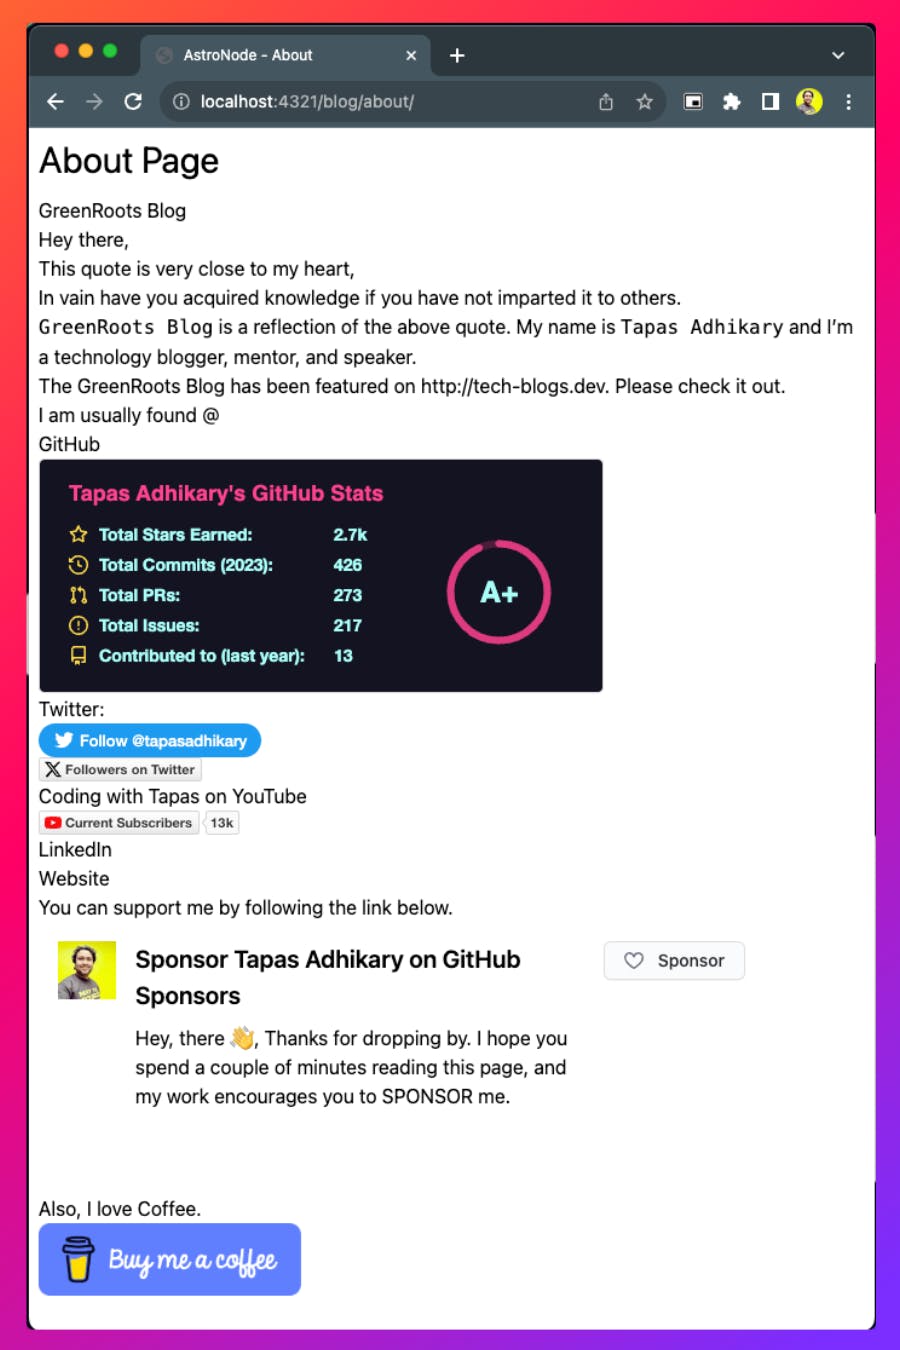
Here goes the outcome when you access the About page:
Hurray! We completed everything we planned and built a custom blog front end using Astro and Headless Hashnode.
Conclusion and what's next?
Headless Hashnode is a compelling headless CMS for bloggers and companies to be creative on the data and infrastructure that provides many smart features. If you want to learn more about comparing Headless Hashnode with other headless CMS available, I strongly recommend this read.
I hope you found the article insightful and that it helped you understand the usage of Headless Hashnode features with the Astro web framework. All the source code used in this article is available as Open Source on this GitHub repository.
Do you want to extend it and build on top of it? How about you add features like showing the reaction count and comments on a post? How about adding a header and footer to all the pages? How about trying out more use cases based on the data you get from the Hashnode GraphQL APIs? It would be great if you did that.
See you with the next one soon.