A step by step guide to deploying a headless Hashnode project to Netlify
Learn how to deploy a headless Hashnode project to Netlify with a few simple steps.
Modern technologies provide developers with a plethora of options to build applications based on their needs and use cases. Personalizations and customizations are now the implicit expectations of the end users. The world of blogging and websites is not far from this.
Individuals and companies want their blogging sites to carry their brand identities and immense customizations based on their target user base. The traditional blogging platforms are limited in providing this freedom to end users. Headless Hashnode is here to solve that problem. It is a headless CMS designed for building blogs with all batteries included.
The Headless Hashnode provides a full-fledged infrastructure to create, review, publish, and manage blog posts. It also provides GraphQL APIs to access your blog data and create a custom blog user interface with any chosen technologies. Exciting, isn't it?
Now, you can build your blog's user interface(the blog front end) with your favourite user interface technologies like ReactJs, Angular, Next.js, Astro, and anything else. If you are interested in learning how to use Headless Hashnode's GraphQL APIs and infrastructure with a web framework like Astro or Remix, we have published a couple of articles on them already:
Building a blog with Astro and Headless Hashnode GraphQL APIs
Building a blog with Remix and Headless Hashnode GraphQL APIs
Did you know Hashnode created an optimized open-source blog starter kit utilizing Next.js, TailwindCSS, and Headless Hashnode? Check it out here if interested.
In this article, we will move one more step ahead to learn how to deploy a Headless Hashnode project on Netlify to make your blog front end accessible publicly.
Setting up your project on Netlify
Netlify is a popular cloud solution that enables developers to deploy front-end applications and back-end services as serverless functions. We will deploy a blog front-end developed with Astro and Headless Hashnode on Netlify. Here is the application's source code we plan to deploy.
Please note: Deployment steps of apps developed with any other web frameworks will be exactly the same as we will see below. A few minor changes we will point out as we cover the steps.
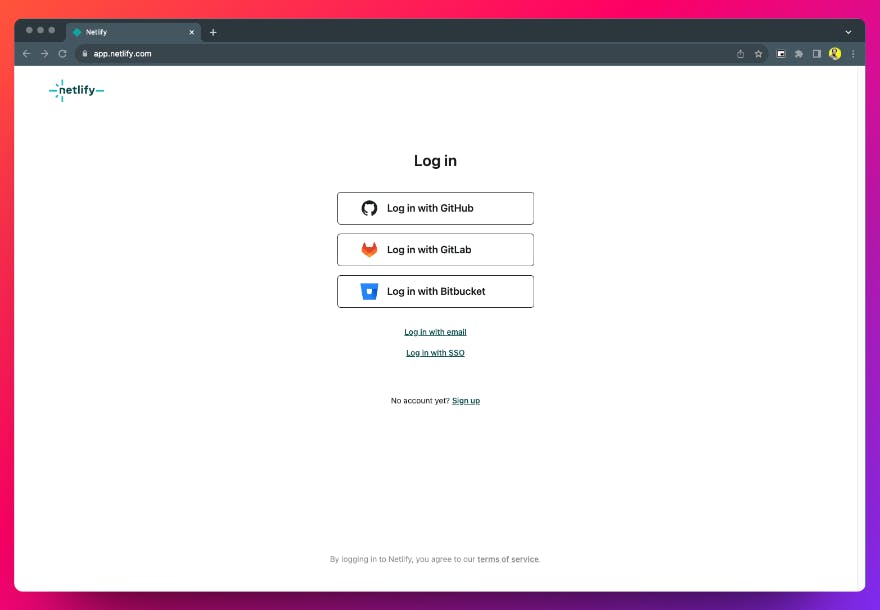
Please open your browser and go to the URL: https://www.netlify.com/. If you have an account with Netlify, please log in. Otherwise, sign up to create an account and log in. For this article, let's assume we log in with GitHub.
After logging in, you will find a Sites option in the left-side navigation bar. Please click on the Sites option to add a new site to deploy.
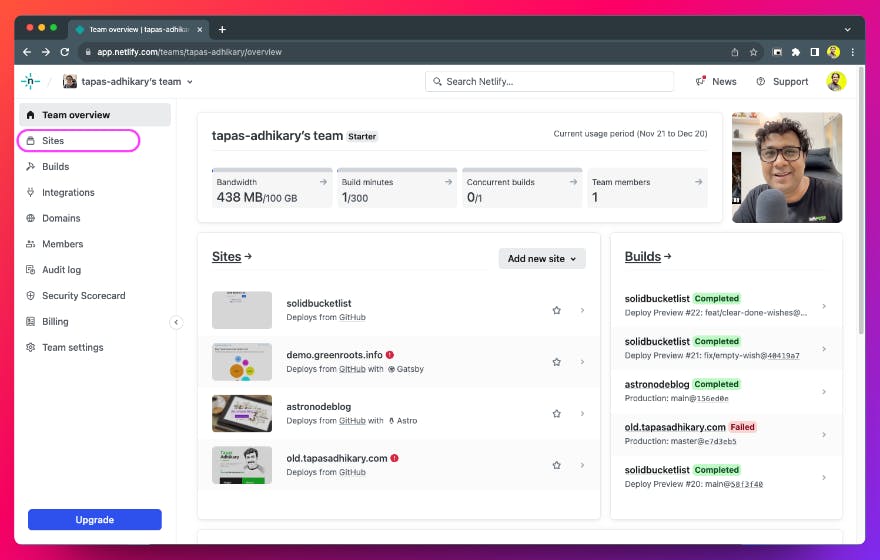
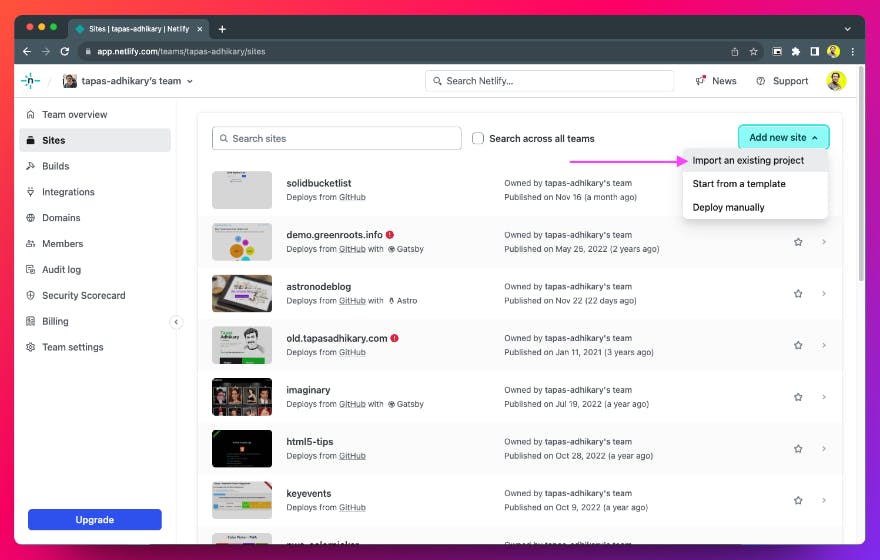
Now, we will add our project as a new site on Netlify. Please click the Add new site button and select the option to Import an existing project, as shown in the image below. In the next step, we must connect to our remote code repository and select the project we want to deploy.
Deploy the project on Netlify
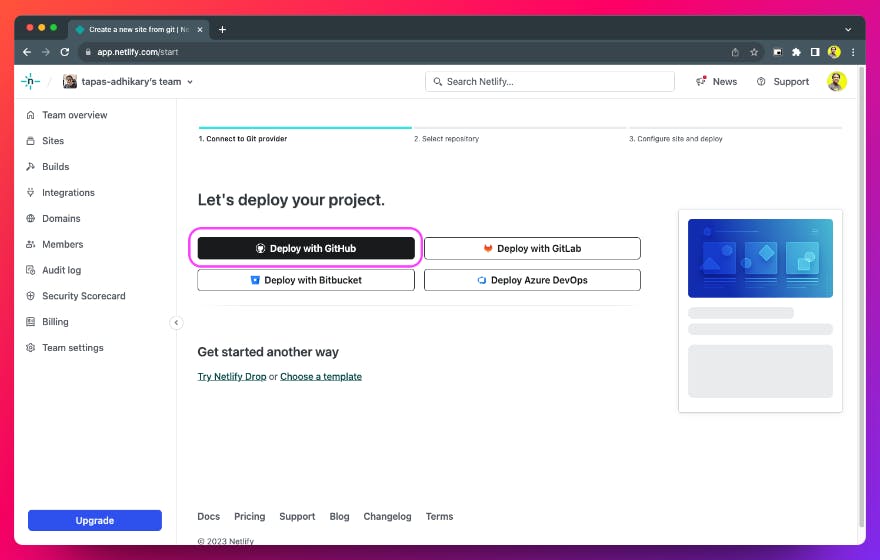
The astronode Blog project's source code is on GitHub. So, we need to follow the steps to Deploy with GitHub. As shown in the image below, there are multiple ways to connect to your remote repositories depending on where they are situated, i.e., GitHub, GitLab, BitBucket, or Azure.
In our case, please click on the button to Deploy with GitHub.
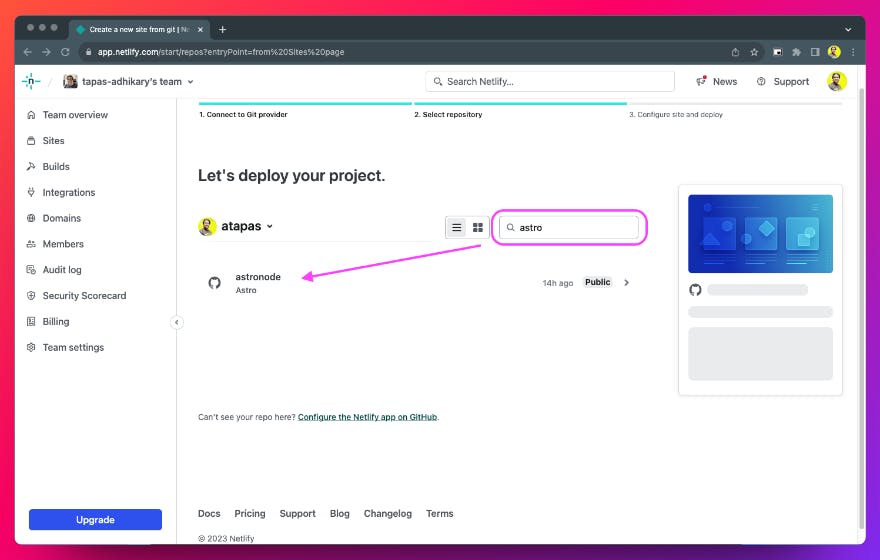
As we had logged in to Netlify using the GitHub credentials, we will not be asked to provide the credentials again. In the next step, you need to select the project to deploy. Please search and select the project to deploy.
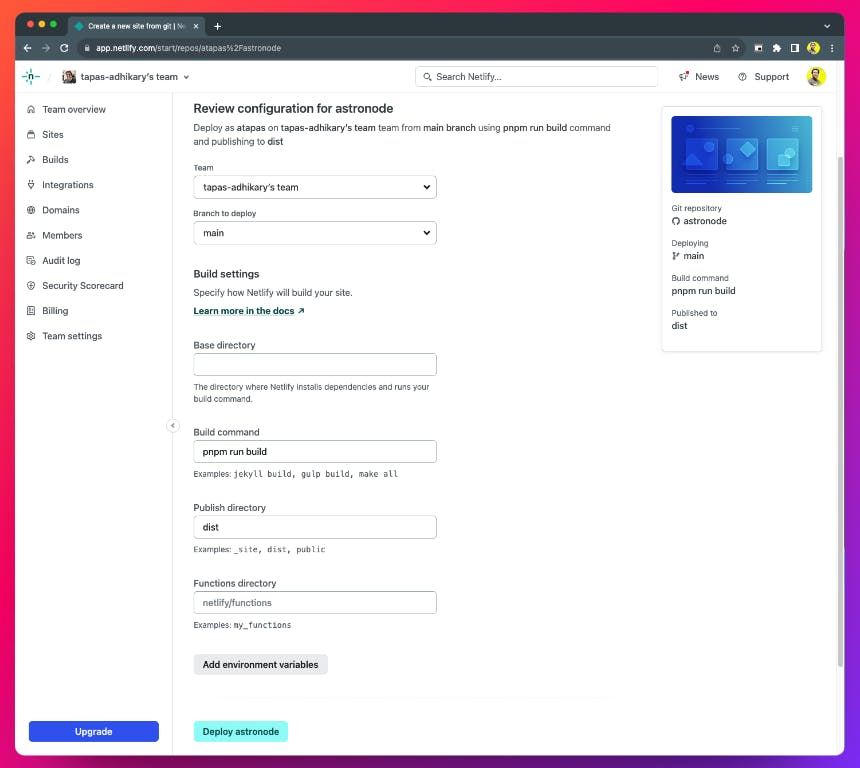
In this step, we have to configure the deployment based on the type of project we are deploying. In most cases, Netlify will automatically pick the required settings, so you do not have to edit most parameters in the screen below. However, there may be situations where you need to. For example:
You may want to deploy a branch other than the main branch. That time, you need to select the respective branch to deploy.
At times, the deployable source code could be inside a subdirectory. In that case, you need to provide the path to the base directory of the source code in the repository.
The build command will be populated from your project's package.json file. In case you want to customize it, you can do so by changing the default value.
When a web project gets built, it manages its deployable files in an output folder. The usual name the frameworks use for it is dist. However, it could be different sometimes, and Netlify may not be aware of it. Then, you need to provide the publish directory name.
If your project uses a serverless function, you can provide the directory name where those functions reside in your codebase. For Netlify functions, the default directory is netlify/functions.
Last, if your project uses any Environment Variables, you can add them in the deployment setting. In our case, we do not have any.
We have nothing to modify as Netlify correctly identified our Astro project's deployment settings. We will click the Deploy astronode button to proceed to the next step.
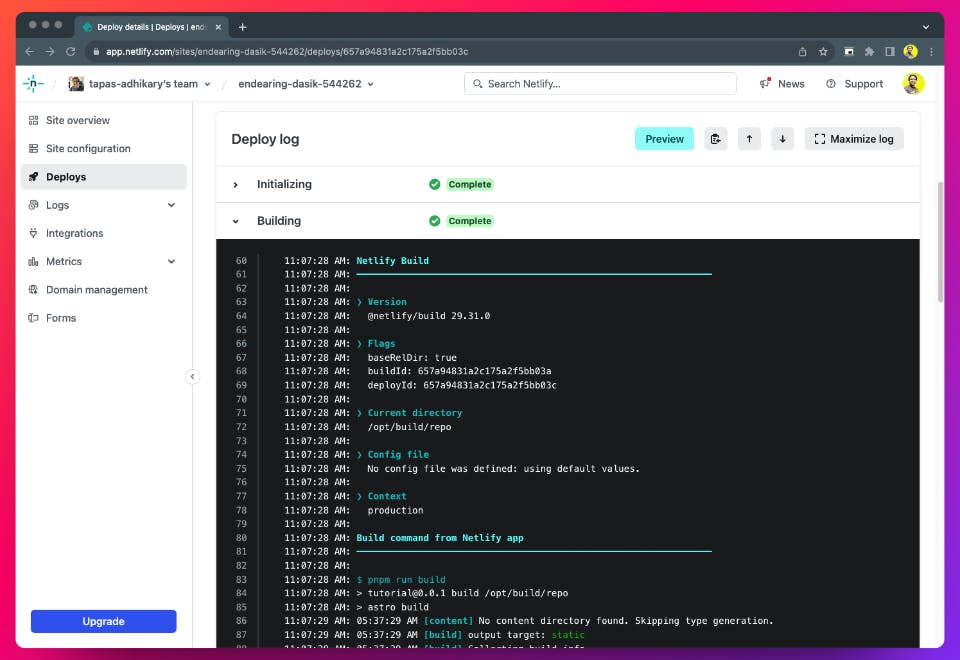
In the next step, we can see the status of the project building. The project must build successfully on the Netlify cloud environment before being publicly deployed.
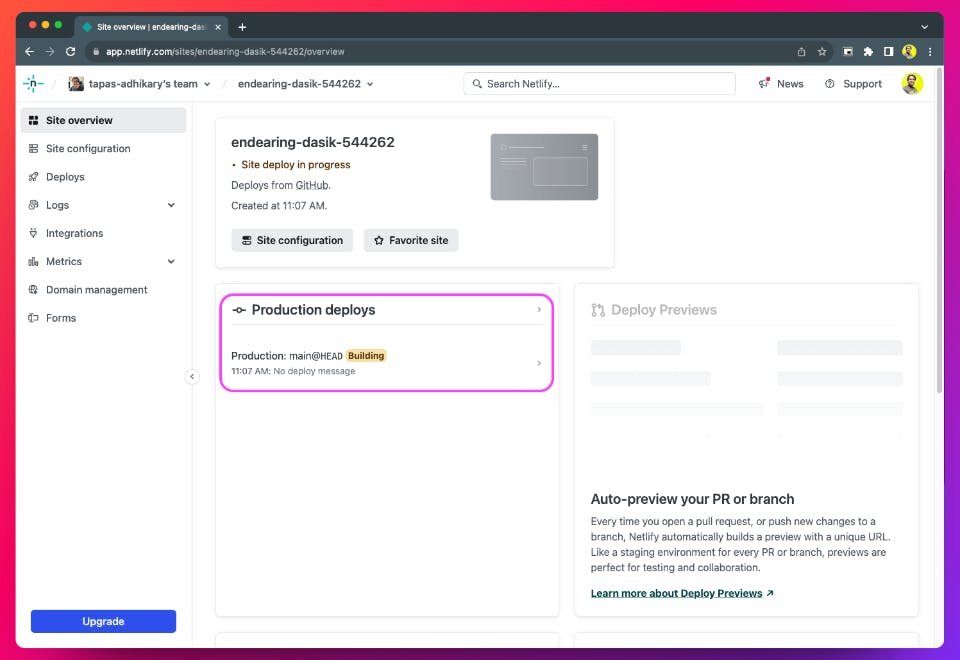
You can observe the project building log at any point in time. It is useful to diagnose a build failure in the deployment process.
Site configuration on Netlify for your project
Once the build is successful, Netlify will automatically publish the project and provide us with a public URL to access the project. This URL will be a subdomain of netlify.app domain. You can map your custom domain to this subdomain from Netlify's site configurations.
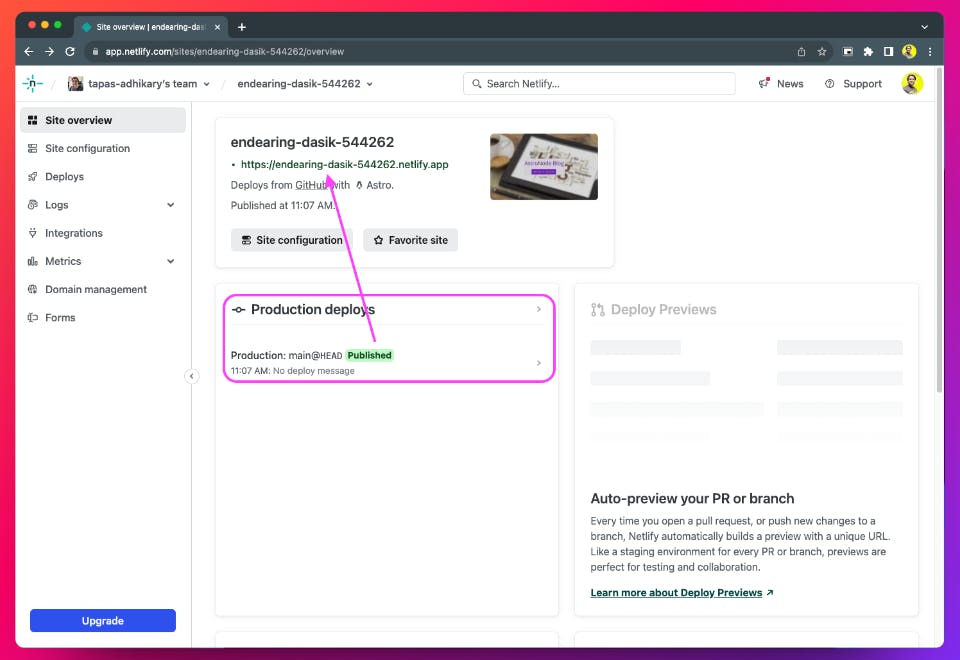
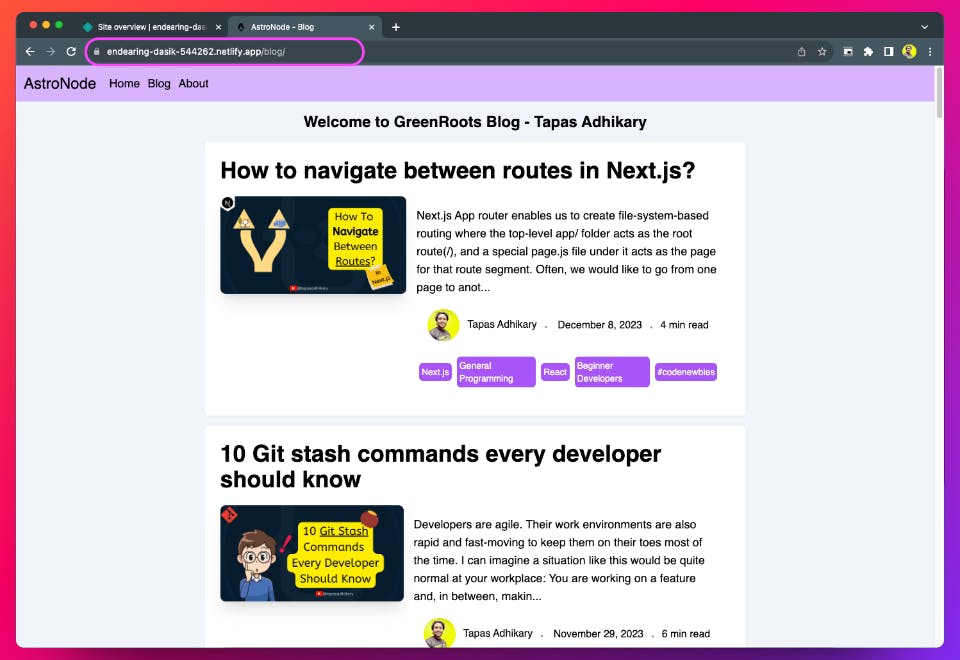
When we click on the domain link and access it on the browser, we see the astronode blog page rendered successfully.
Have you noticed the application URL closely? As it is randomly generated, the texts in the URL are not easy to remember. Netlify allows you to customize the name to something you'd prefer. You can initiate the change by clicking the Site configuration button.
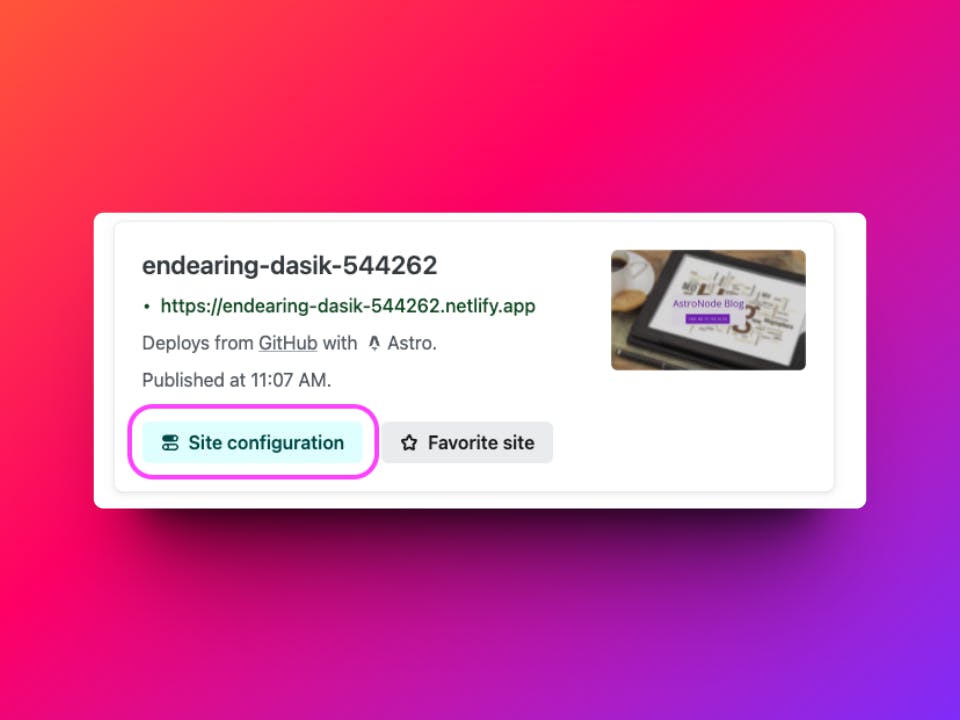
Then click on the Change site name button. It will open up a popup for you to enter the new name.
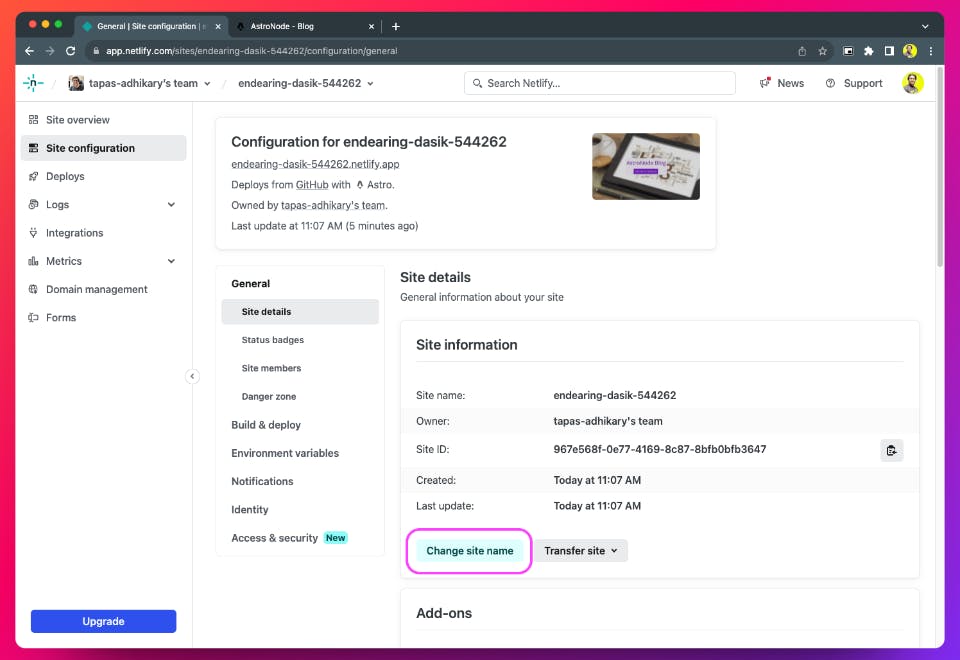
Provide a name that works best for you. Please note that Netlify will check the name's availability and assign it to you only if it is available. Otherwise, you have to select something else. For example, the astronodeblog name was available in our case.
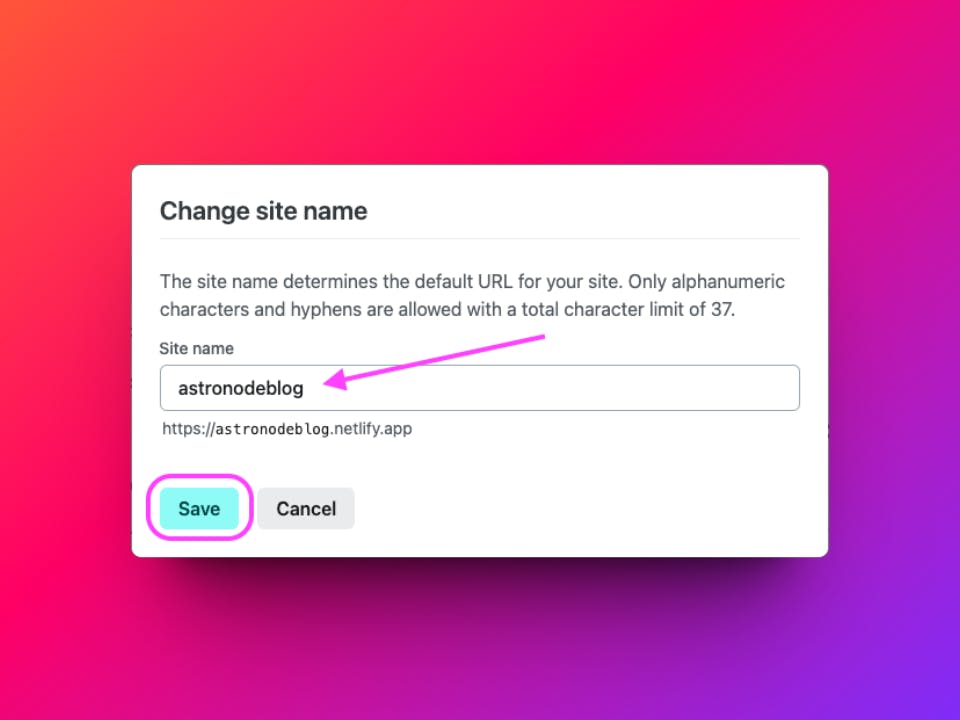
That's it. Now, you should be able to access the blog front end of the Headless Hashnode project on the new URL, i.e., https://astronodeblog.netlify.app.
The final configuration needed on the Hashnode
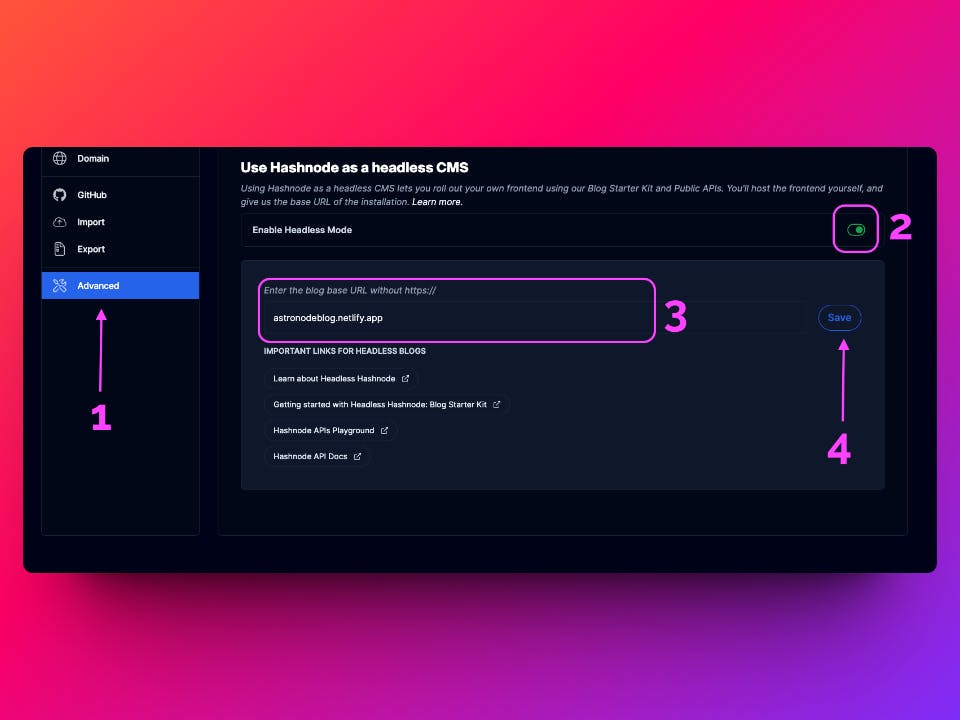
The final thing left is to let Hashnode know about your blog frontend URL.
Got to your blog dashboard on Hashnode.
Browse to the Advanced option from the navigation menu.
Enable the Headless Mode by toggling the switch button.
Enter the URL of your blog frontend(ensure to provide the URL without the https:// part).
Save the changes.
That's it. You have successfully deployed your headless hashnode project on Netlify and configured it with the Hashnode ecosystem.
Conclusion
I hope you found the article insightful and will help you deploy the blog front end of your Headless Hashnode project on Netlify.
Headless Hashnode is a compelling headless CMS for bloggers and companies to be creative on the data and infrastructure that provides many smart features. If you want to learn more about comparing Headless Hashnode with other headless CMS available, we strongly recommend this read.
See you with the next article soon.