


What is The Navigation Component?
Android Jetpack Navigation component is a suite of libraries, tooling, and guidance that simplifies in-app navigation. It helps you as an Android developer have a higher-level view of your app and gives you a mental model of how your users are going to interact with your app.
Android Jetpack makes navigation code easy. Here are some of its benefits:
i) It handles fragment transactions for you.
ii) It handles Back and Up actions correctly by default.
iii)It Provides standardized resources for animation and transitions.
iv) It offers support for type safety argument passing using Safe Args.
v) Support for Menu navigation including Navigation Drawer, Bottom navigation, Overflow Menu, ActionBar, and Toolbar.
It consists of three key parts:
1.Navigation Graph
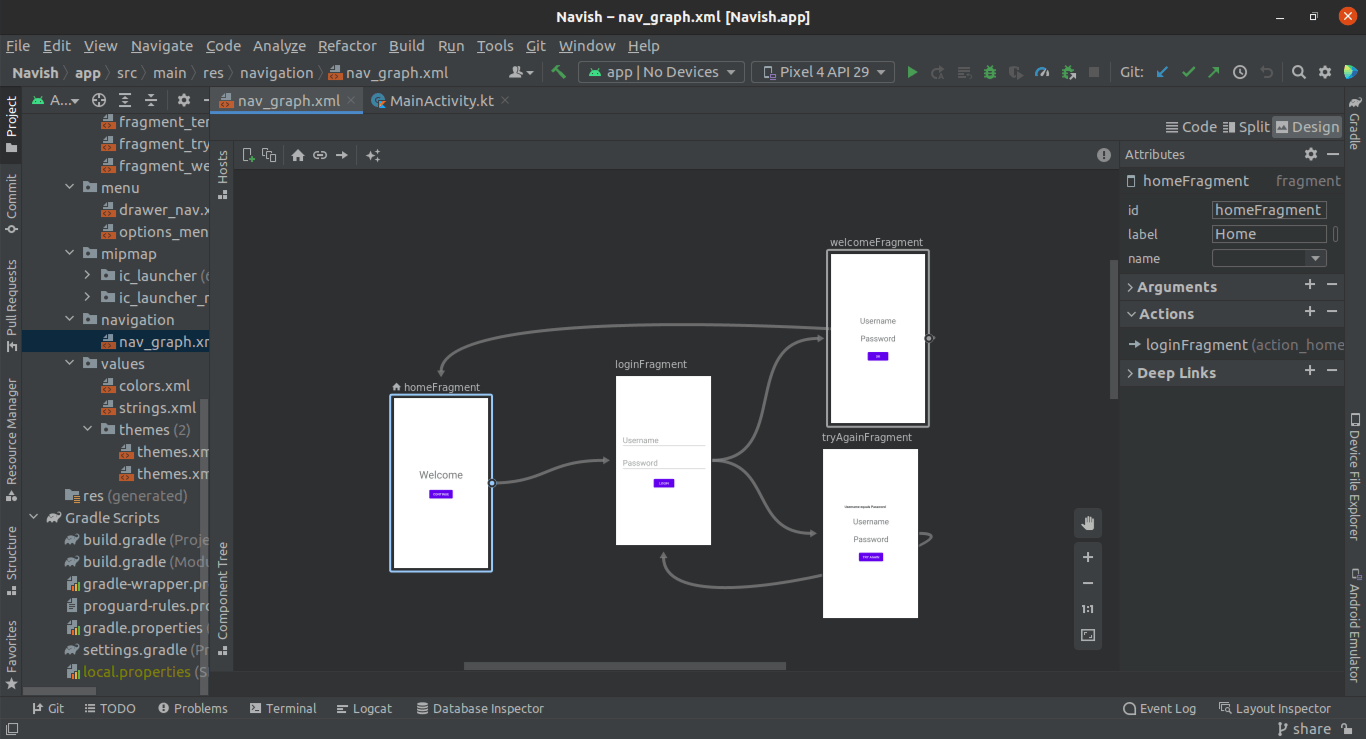
This is an XML resource type that contains and centralizes all navigation information. It defines all possible paths a user can take in your app. Within this graph is where you visually show all the destinations users of your app can go from their current destination and actions they can take.
Here’s a visual graph editor by Android Studio that shows paths users can take through the app. The arrows show the actions users can take and the screens are respective destinations users can navigate to.
2.NavHost
A NavHost is an empty container that provides an area within your layout where fragments are swapped from one fragment to another. The default NavHost implementation according to the Navigation component is the NavHostFragment, which displays fragment destinations.
3.NavController.
This is a Kotlin/ Java object that you use when navigating between your screens in the navigation graph. The NavController swaps the fragments in the NavHost from one fragment destination to the next when the user takes an action like, say clicking a button. Each fragment has its own NavController. I think one cool thing about defining the graph is that it allows you only to follow these paths.
That’s a lot of theory, let's do some practical: I’ve created a basic starter project here so we can focus on the navigation component and its features. You can access the code here:
Step1: Adding the dependencies.
I’ve already added them in the build. gradle file app module but you can check them at the dependencies{ } block commented out as Navigation.
Step 2: Let’s add the navigation graph.
Go to the res folder and right-click. The folder is shown in the image below:
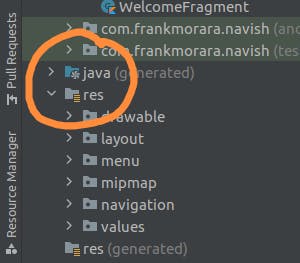
A popup dialog window opens. Select New > Android Resource file and click it. Another popup dialog opens, select Resource type as Navigation and file name any name you wish to call it and click OK. Personally, I have called mine nav_graph.
This will create the navigation folder and the navigation graph you need. Then click and open the file you just created and it opens a window for you. Then click the + sign in the right corner which opens up a dialog that contains fragments to choose from. Click on the home fragment and it is displayed on the screen.
Click on another fragment and it’s also displayed on the screen too.
Click on the home fragment and there’s an extended circle that appears at the end of the fragment and click it and drag it to the next fragment and thus creating a direction from the first to the second fragment.
Step3: Add the NavHostFragment
Open the activity_main.xml. That’s where we are going to add our NavHostFragment. Add this code: Define a nav host fragment with the code below:
<androidx.fragment.app.FragmentContainerView
      android:id="@+id/nav_host_fragment"
      android:layout_width="match_parent"
      android:layout_height="match_parent"
      android:name="androidx.navigation.fragment.NavHostFragment"
      app:defaultNavHost="true"
      app:navGraph="@navigation/nav_graph"/>
Step4: Now let’s add the click handlers on the buttons:
Open the HomeFagment.kt file. Inside onCreateView below the binding variable, Create a button variable and bind it to the button continue using a binding object.
Create a click listener on the button. Inside the click listener define an action and pass to it the action using its id.
Finally, find the nav controller and navigate. Repeat the same for all the other Fragment classes: Here’s a code for the same. Add the code and click run.
//        Setting a click listener on continue button to find the navController that moves the home fragment to the login fragment
        val continueButton = binding.buttonContinue
        continueButton.setOnClickListener {
            val action = R.id.action_homeFragment_to_loginFragment
            findNavController().navigate(action)
        }
Don’t worry if you got stuck, here’s the link to the solution code:
Yaay! Congratulations!!. You just finished creating the basic implementation of the Navigation component.
Conclusion.
As you can see, the navigation component simplifies in-app navigation. That’s not all there is. The navigation component also offers other navigation patterns that help with app navigation like Navigation Drawer, Navigation view, Options menu, ActionBar, Toolbar, Collapsing Toolbar, and Bottom Navigation. Stay tuned for the next post where we look at how the SafeArgs plugin makes it easy to pass data between screens. Best of wishes.