


In the first blog, we set up our first app and server. Now let’s dive into Angular!. In this article, we will answer some questions like - how does Angular work? How does our project start running? What are components, etc? Since this topic is a bit lengthy, I will make it a 2-blog one.
Table of contents for Angular Basics part 1:
How does an Angular application start
You can open the project folder in your local IDE and open the file names as app.component.html - this is the file whose contents are currently showing in your localhost:4200.
- Remember, ng serve should be in action while working with angular apps.
But how does Angular automatically know that the contents of app.component.html should be rendered by our browser?. In reality, app.component.html is not the file served by the server but it is index.html. Angular allows us to create SPAs and this index.html is the SPA created by Angular.
But how is Angular triggered?. If you open the developer tools on your localhost:4200, you will see something like this:
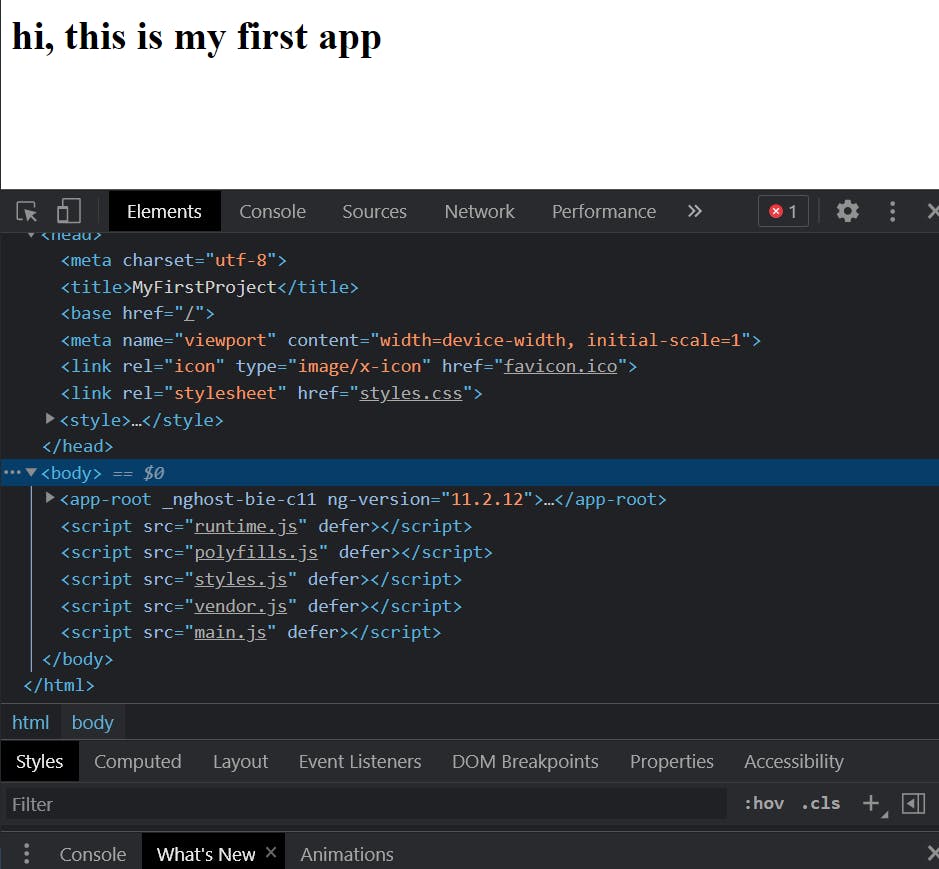
As you can see, we have many scripts attached to our html file which we could not see in our IDE. These are the files which are injected by the Angular CLI. So, when we run ng serve, our project is rebuilt and automatically adds the correct Js script import. Hence, in the final file (which we can see in our chrome developer tools), so many scripts are imported.
Which is the first file which is executed when we run the server?. With a background in CS, we know by now that any file named “main” is expected to run as the first file. In your IDE, you can find “main.ts” and it is the first file that runs when our server loads.
When you open main.ts, you find a piece of code at the end:
platformBrowserDynamic().bootstrapModule(AppModule)
  .catch(err => console.error(err));
Again, as a CS student, you might know what bootstrapping means and hence this piece of code bootstraps or starts our application by passing “AppModule” as its parameter. What is AppModule? Search over for a file named “app.module.ts” and this is the AppModule. Now, when you open app.module.ts, you can again see a bunch of code in it. Let us understand some part of it. You might see a line of code :
bootstrap: [AppComponent]
This line means we have a “bootstrap” array which contains all the components that Angular must know in advance . Now, Angular is able to handle app-root in index.html file and load all the Js script imports it needs to. This is everything about how an Angular application starts.
What are components
Components are very important in Angular. Think of lego toys, we build everything by combining everything. An Angular app can be thought of the same with each component as its building blocks. Many components are combined to form one final project.
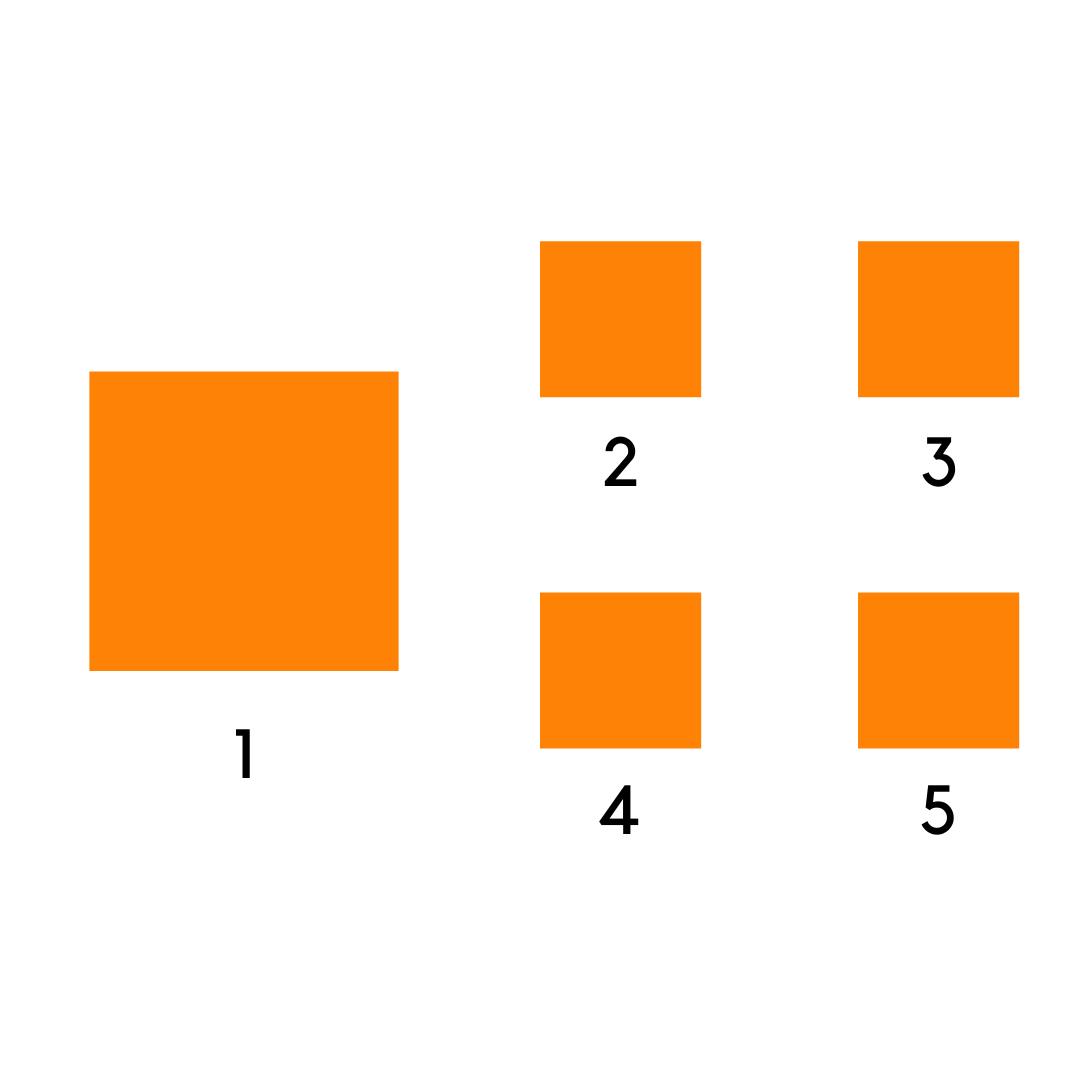
The best thing about components? - reusability. Think of functions in any programming language. Why do we make functions? Simply because we want to use that piece of code again and again but don’t want to write the code again and again (DRY principle). Similarly, we can use a single component as many times as we like. For example, I have a simple rectangular component on the left of the following image and I can use the same component to create 4 more of the same kind :
The most important component currently for us is the AppComponent (remember it was used in the bootstrap array?). The AppComponent is used as the root component i.e. everything begins from here. The components we create on our own - where will they be found? They will all be found in app.component.ts.
Creating first component
Now let us try and create a component.
- We start by making a new folder in our app folder. Basically, everything that you do or create related to our app will be in this folder. I kept my folder name as firstComponent.
- Now we need to create a file inside this folder. I named it as first.component.ts. The “.component” tells us that this file holds a component and makes it easier for us to differentiate components with other building blocks in Angular. All the files are saved with the extension of “.ts” for typescript.
- A component is basically a class. (Real-life OOP? Yes, please!.). So we create a class and add the “export” keyword so that we can use our component outside too. Also, we need to tell Angular that this is a special class i.e. a component. This is done by adding decorators like the ones we add in python.
// importing the decorator to be used from angular/core
import { Component, Component } from '@angular/core';
// adding the decorator
@Component({})
// creating our component
export class firstComp {}
Now we need to add a Javascript object to the component we created for configuration purposes. Some important explanations :
Selector - selector is an HTML tag that can be used in your application. Make sure the selector is a string and it's name does not clash with any other html tag name. With the help of selector, we can use my component in other parts of our project too.
templateURL - template contains an external file containing the html code of your component. I created a first.component.html file and now my templateURL points to this. Feel free to write anything inside the html file of your choice.
Angular does not know yet of our component so we need to register it in app.module.ts. In this file, we mention our component inside the “declarations” part of our NgModel decorator (notice the @ sign). This will register our component in our app. We also need to import our component for use because otherwise, typescript won’t know where our component is stored.
import { NgModule } from '@angular/core';
import { BrowserModule } from '@angular/platform-browser';

import { AppComponent } from './app.component';
import { firstComp } from './firstComponent/first.component';

@NgModule({
  declarations: [AppComponent, firstComp],
  imports: [BrowserModule],
  providers: [],
  bootstrap: [AppComponent],
})
export class AppModule {}
We created our open first component !
We can also create our component with the help of CLI. In the terminal of your IDE, type the following:
ng generate component [name of the component]
You will see a folder with the name you entered and with all the files required. This was it for this blog. We will continue diving into basics of angular with upcoming blog posts. Feel free to reach out for any doubts, feedbacks or queries!.