


Previously, we used ASP.NET Core to build a web application with a single protected page. Let's extend the application to display the role of the user in FusionAuth as well as a custom claim. We're going to create a group, assign a role to that group and then place our user in that group. We'll also explore modifying our JSON Web Token (JWT) by using a lambda to expose the user's favorite color. Finally, we'll display all the claims on the "Secure" page.
If you haven't yet, please set up FusionAuth and the web application as specified in the previous post.
Setting up roles and groups
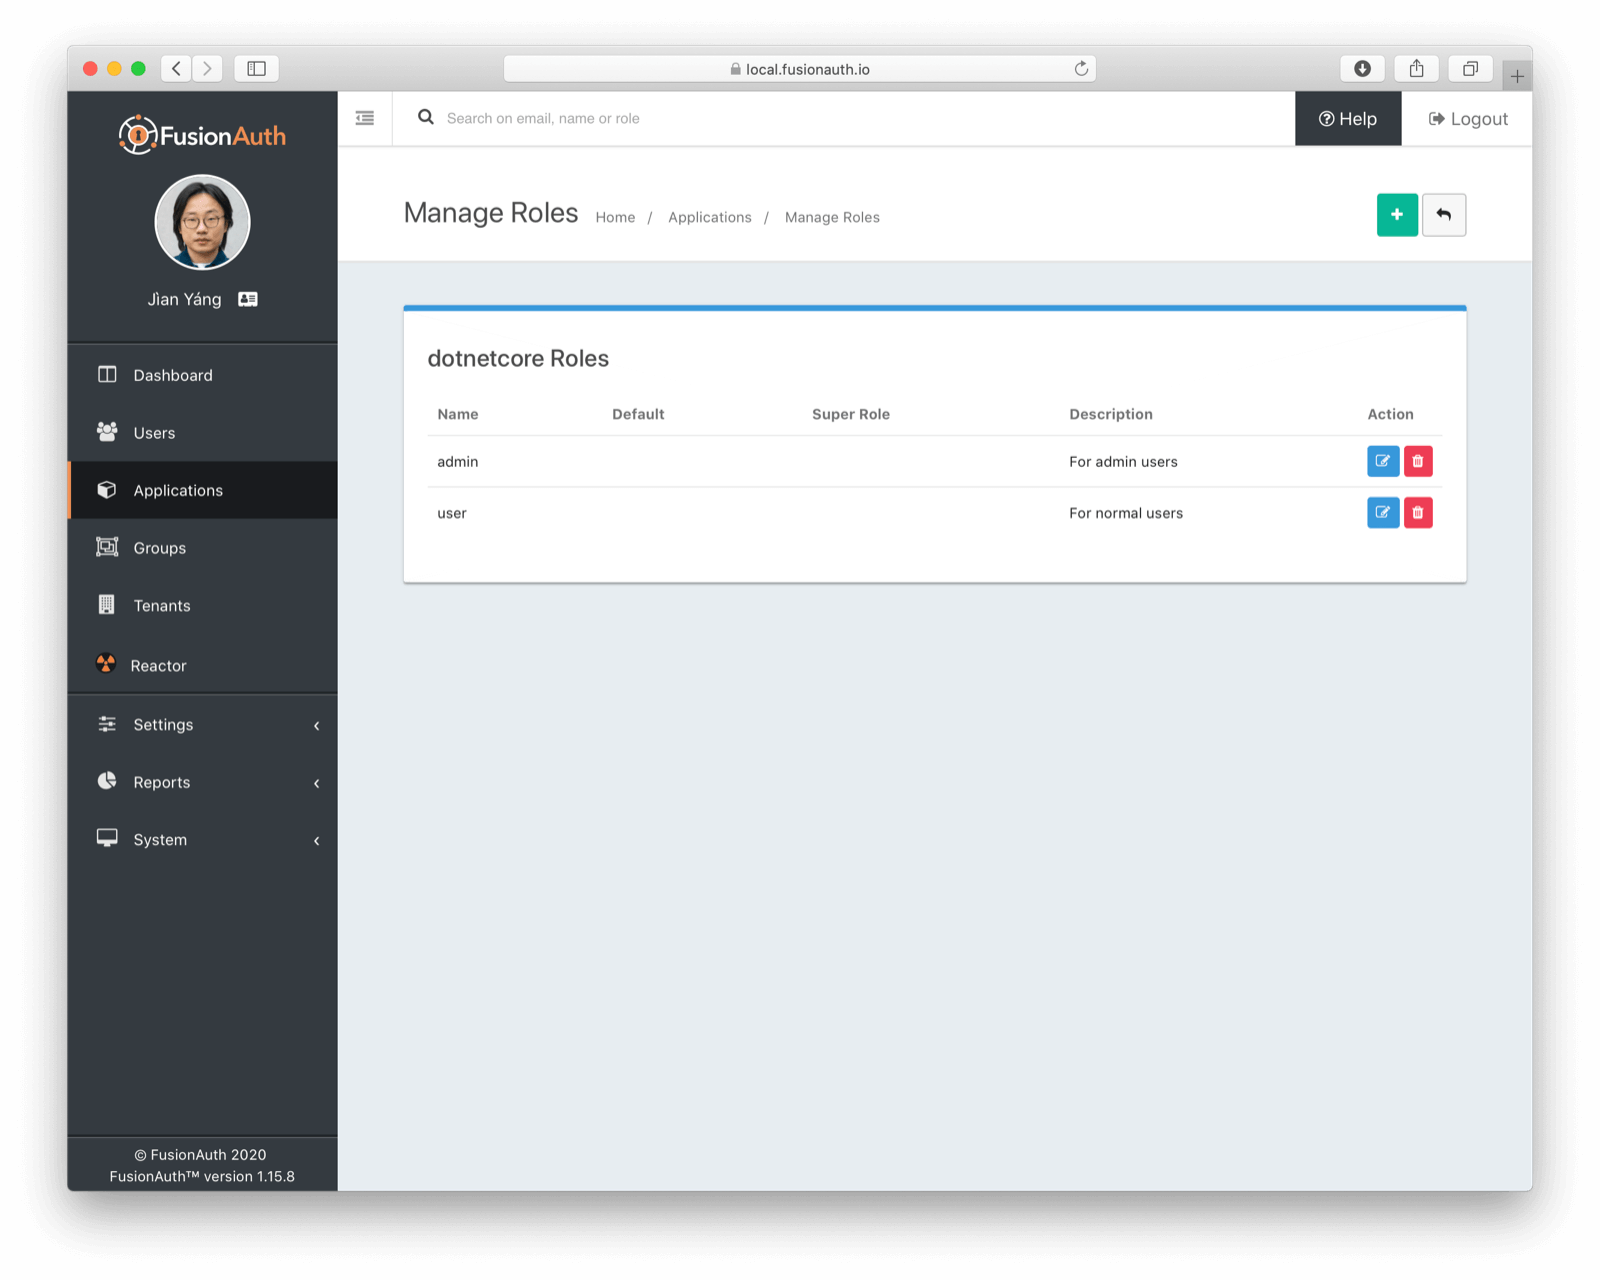
Let's navigate to the FusionAuth administration console and add a role to the application. Note that instead of the blue button where you edit the application configuration, click on the dark blue button with the person symbol. This is where you can add application roles. As many as you want--they're free! I limited myself to adding an admin and a user role.
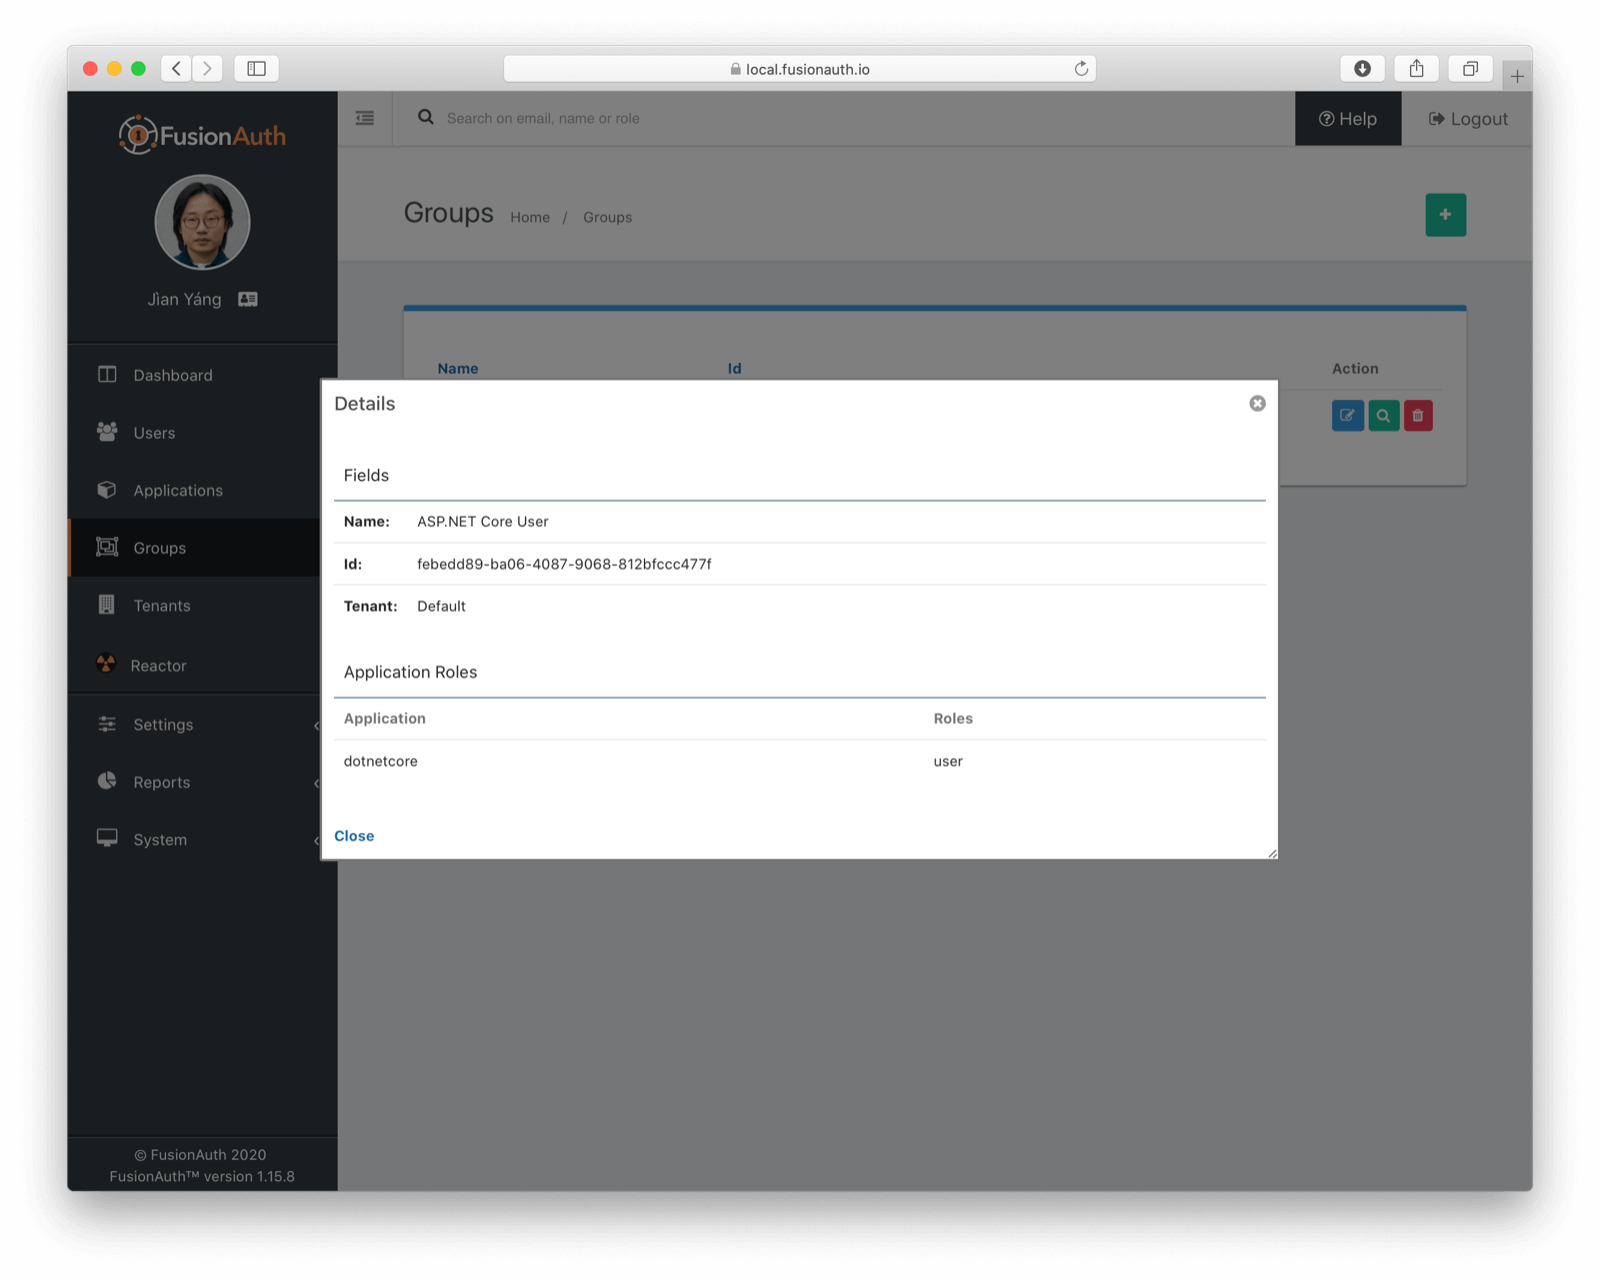
Then we want to create a group. We'll call this the "ASP.NET Core User" group, and associate the user role with it.
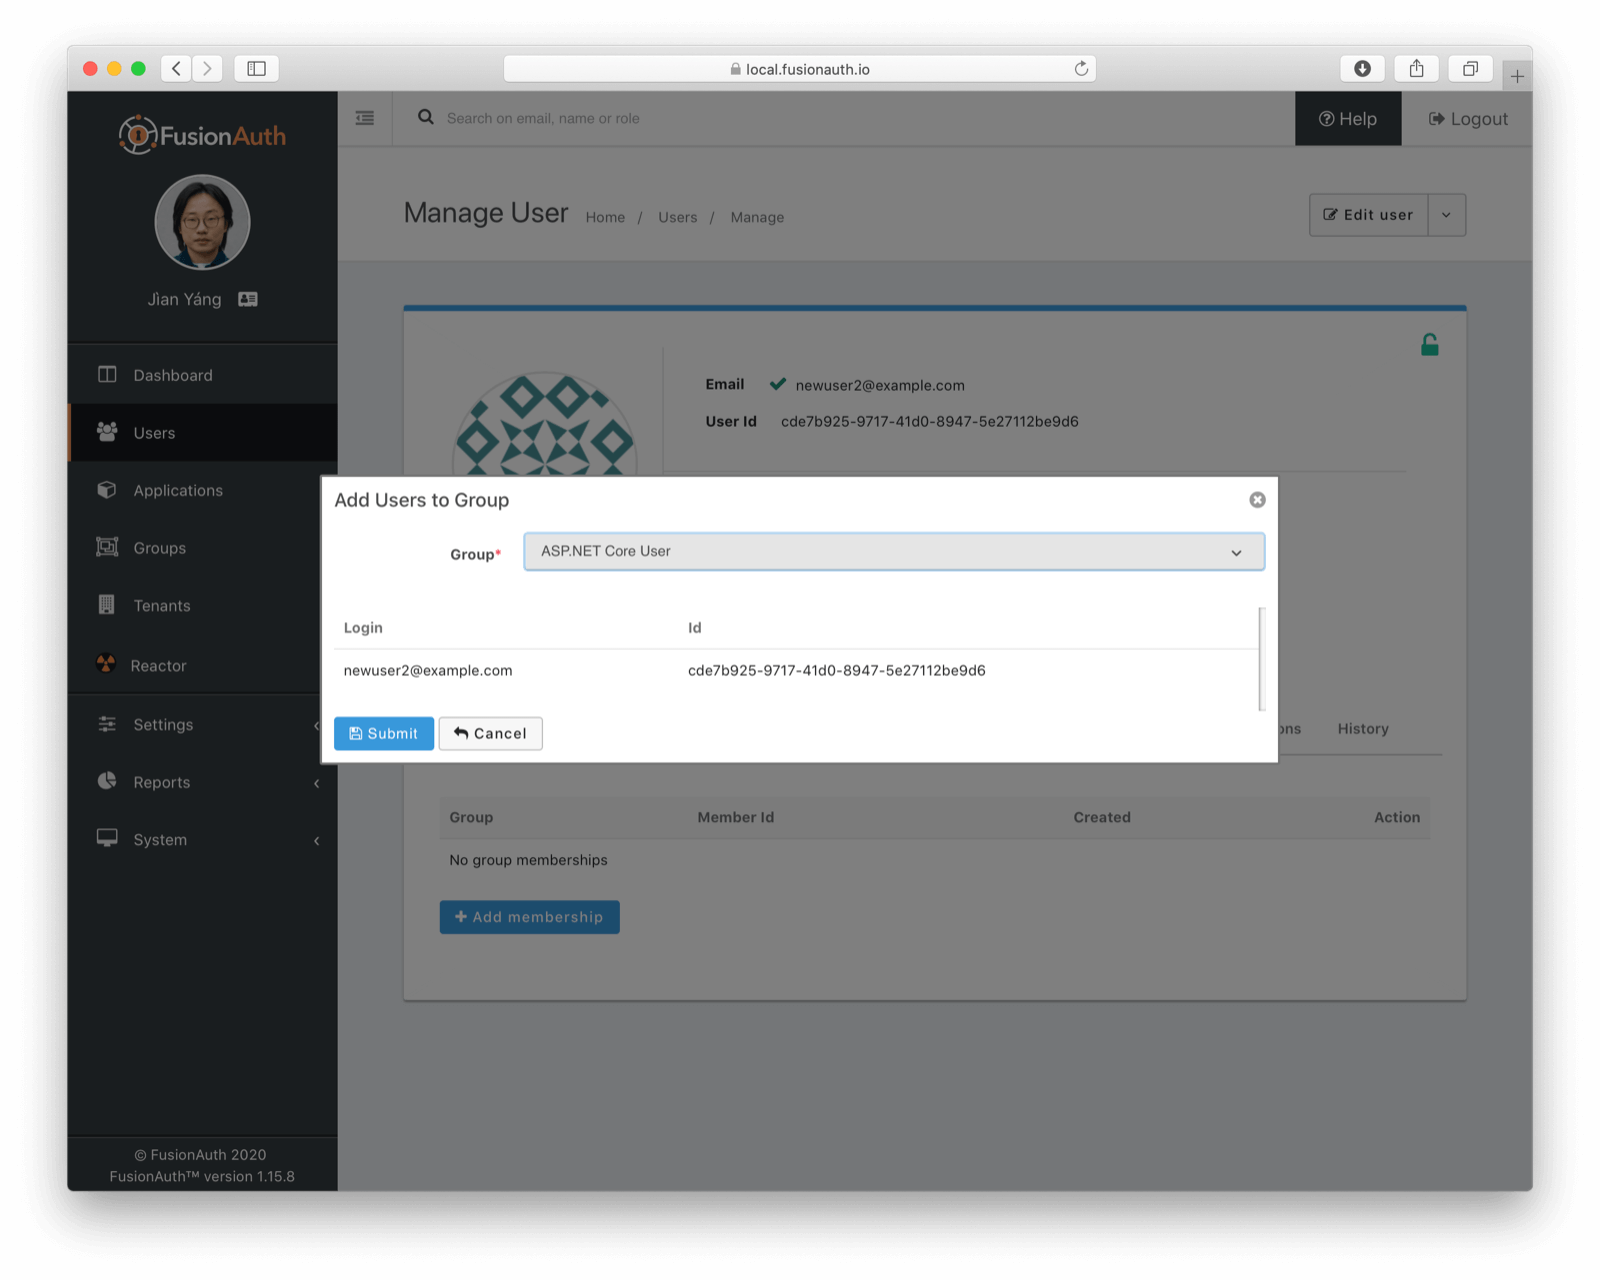
Finally, we need to add our user to our group. Navigate to the "newuser2@example.com" user (or any other user you've created and registered for the "dotnetcore" application) and go to the "Groups" tab. Add the user to the "ASP.NET Core User" group. WARNING: if a user isn't registered for an application, being a member of a group that has a role for that application does nothing.
Let's login. As a reminder, here's how we can start the ASP.NET Core application (again full source code available here).
dotnet publish -r win-x64 && SampleApp__ClientSecret=H4... bin/Debug/netcoreapp3.1/win-x64/publish/SampleApp.exe
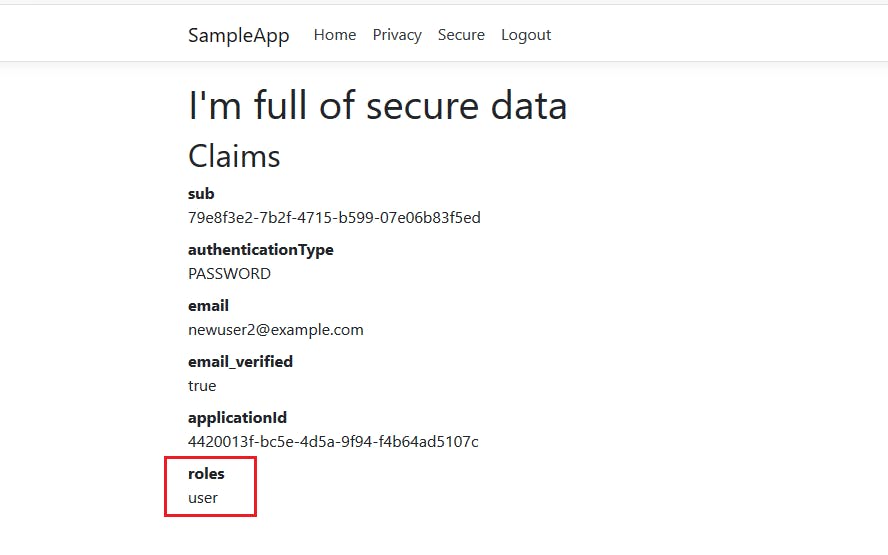
If you head to localhost:5000 and click on the "Secure" page, you'll see the claims. If you were previously signed in, you may need to sign out and sign in again. The role is present in the JWT, as you can see below:
Since the role and other claims are encoded in the JWT, which is stored in a cookie, whenever you change any user data in FusionAuth, you'll need to log out and log in as that user to see the changes reflected in the ASP.NET Core application.
Adding custom claims
You can add claims based on user data, the time of day or anything else. In FusionAuth, you add this data to a JWT with a lambda. This is a JavaScript function that receives the JWT object before it is signed and can modify it. Remember way back when we created the user and specified their favorite color as a command line option? Well, we're going to send that information down to the ASP.NET Core web application so that it can display that very valuable data.
A lambda is flexible and can pull from user or registration data. You can modify the token by removing attributes also, though there are some that are immutable. Here's the lambda:
function populate(jwt, user, registration) {
  jwt.favoriteColor = user.data.favoriteColor;
}
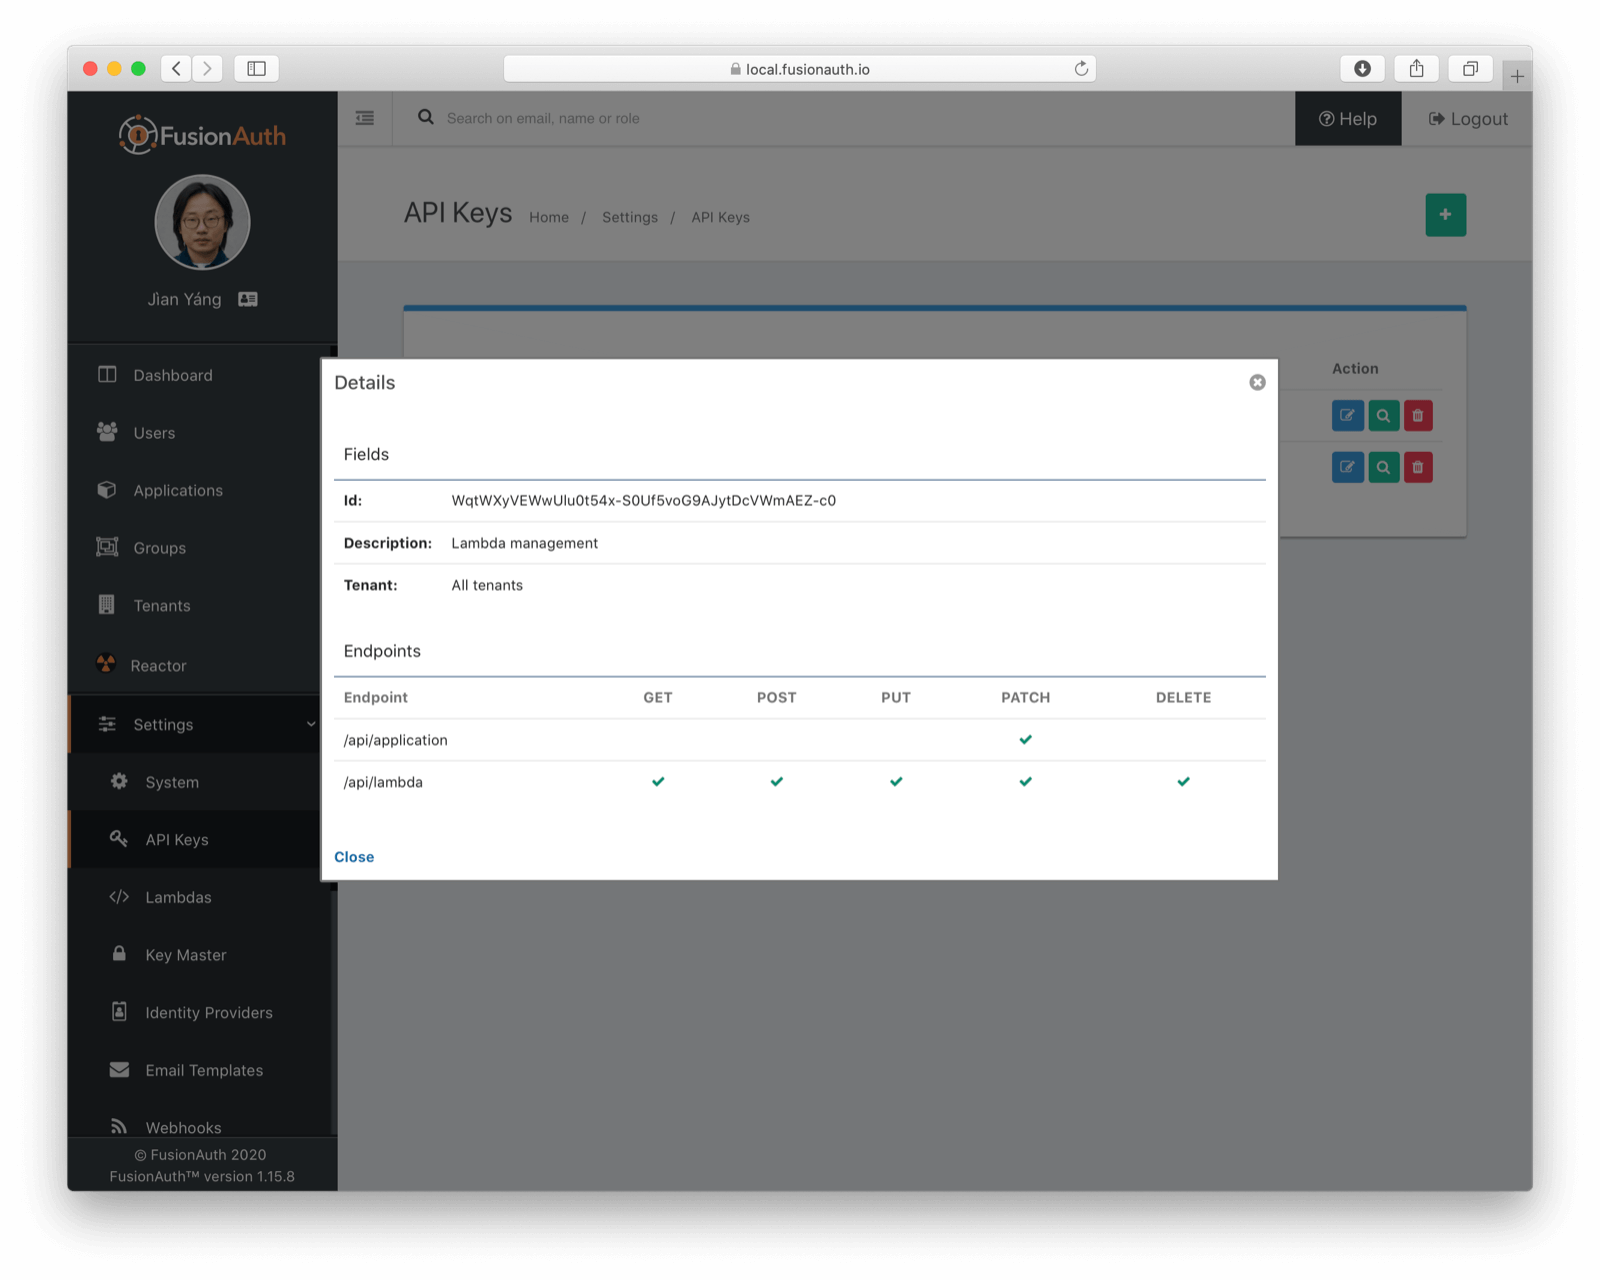
To create it, we're going to use the FusionAuth API, rather than the administration console. I just felt it had been too long since I curled something. Create an API key called "Lambda management" allowing full access to the Lambda API. Allow the user of this key to PATCH on application objects as well. We'll need the latter to configure our FusionAuth application to use our lambda.
Here's the shell script which creates the lambda and associates it with the "dotnetcore" application. You must update the AUTH_HEADER environment variable to the value of the API key we just created. Also, be sure to update APPLICATION_ID to the id of the "dotnetcore" application. This script calls one API to create our lambda, and another to configure the application to use it. We also need to extract the ID of the lambda we create, so I used a sed regular expression to extract the ID from the response of the first API call.
AUTH_HEADER=YOUR_API_KEY_HERE
APPLICATION_ID=YOUR_APP_ID_HERE

lambda_output=`curl -s -XPOST -H "Authorization: $AUTH_HEADER" -H"Content-Type: application/json" localhost:9011/api/lambda -d '{ "lambda" : {"body" : "function populate(jwt, user, registration) { jwt.favoriteColor = user.data.favoriteColor; }", "name": "addFavoriteColor", "type" : "JWTPopulate" } }'`

lambda_id=`echo $lambda_output|sed -r 's/.*"id":"([^"]*)".*/\1/g'`
application_patch='{"application" : {"lambdaConfiguration" : { "accessTokenPopulateId" : "'$lambda_id'", "idTokenPopulateId" : "'$lambda_id'" } } }'

output=`curl -s -XPATCH -H "Authorization: $AUTH_HEADER" -H"Content-Type: application/json" localhost:9011/api/application/$APPLICATIO… -d "$application_patch"`
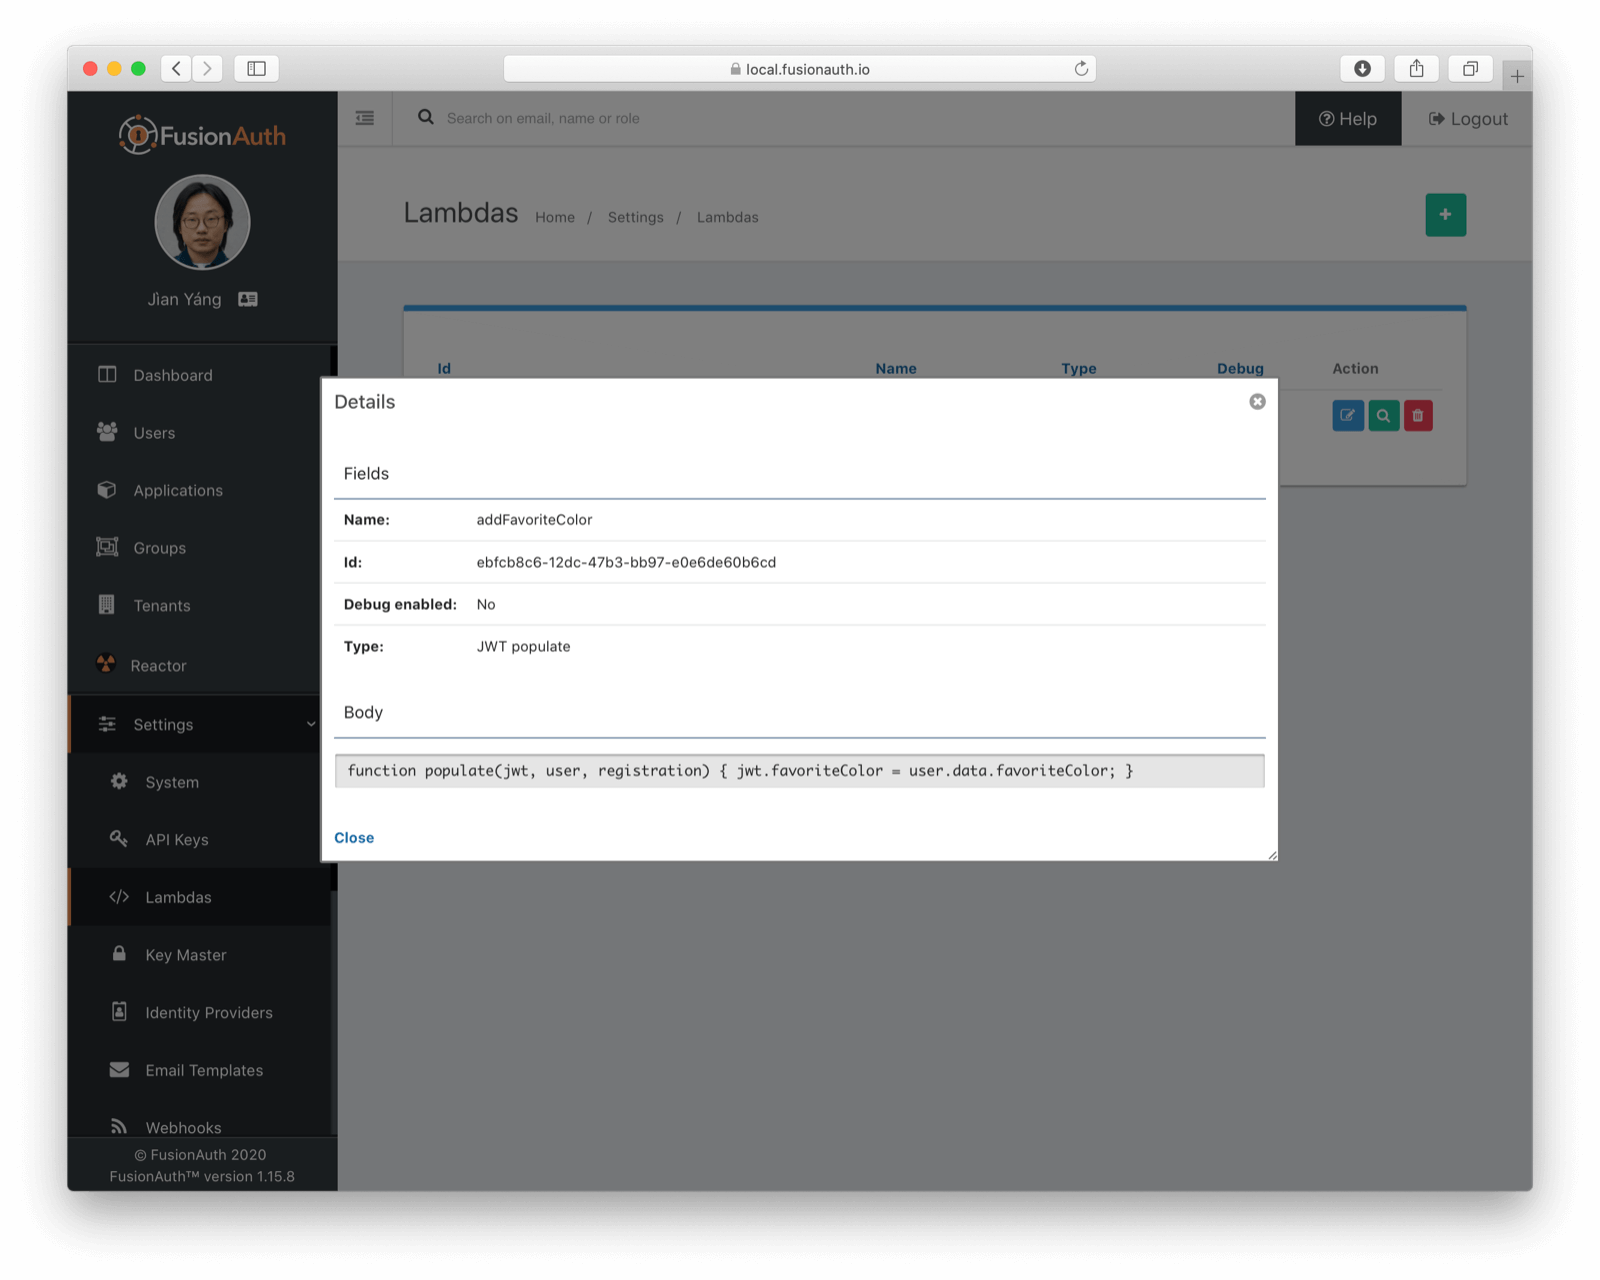
After running this shell script, log in to the admin user interface and see that the lambda exists:
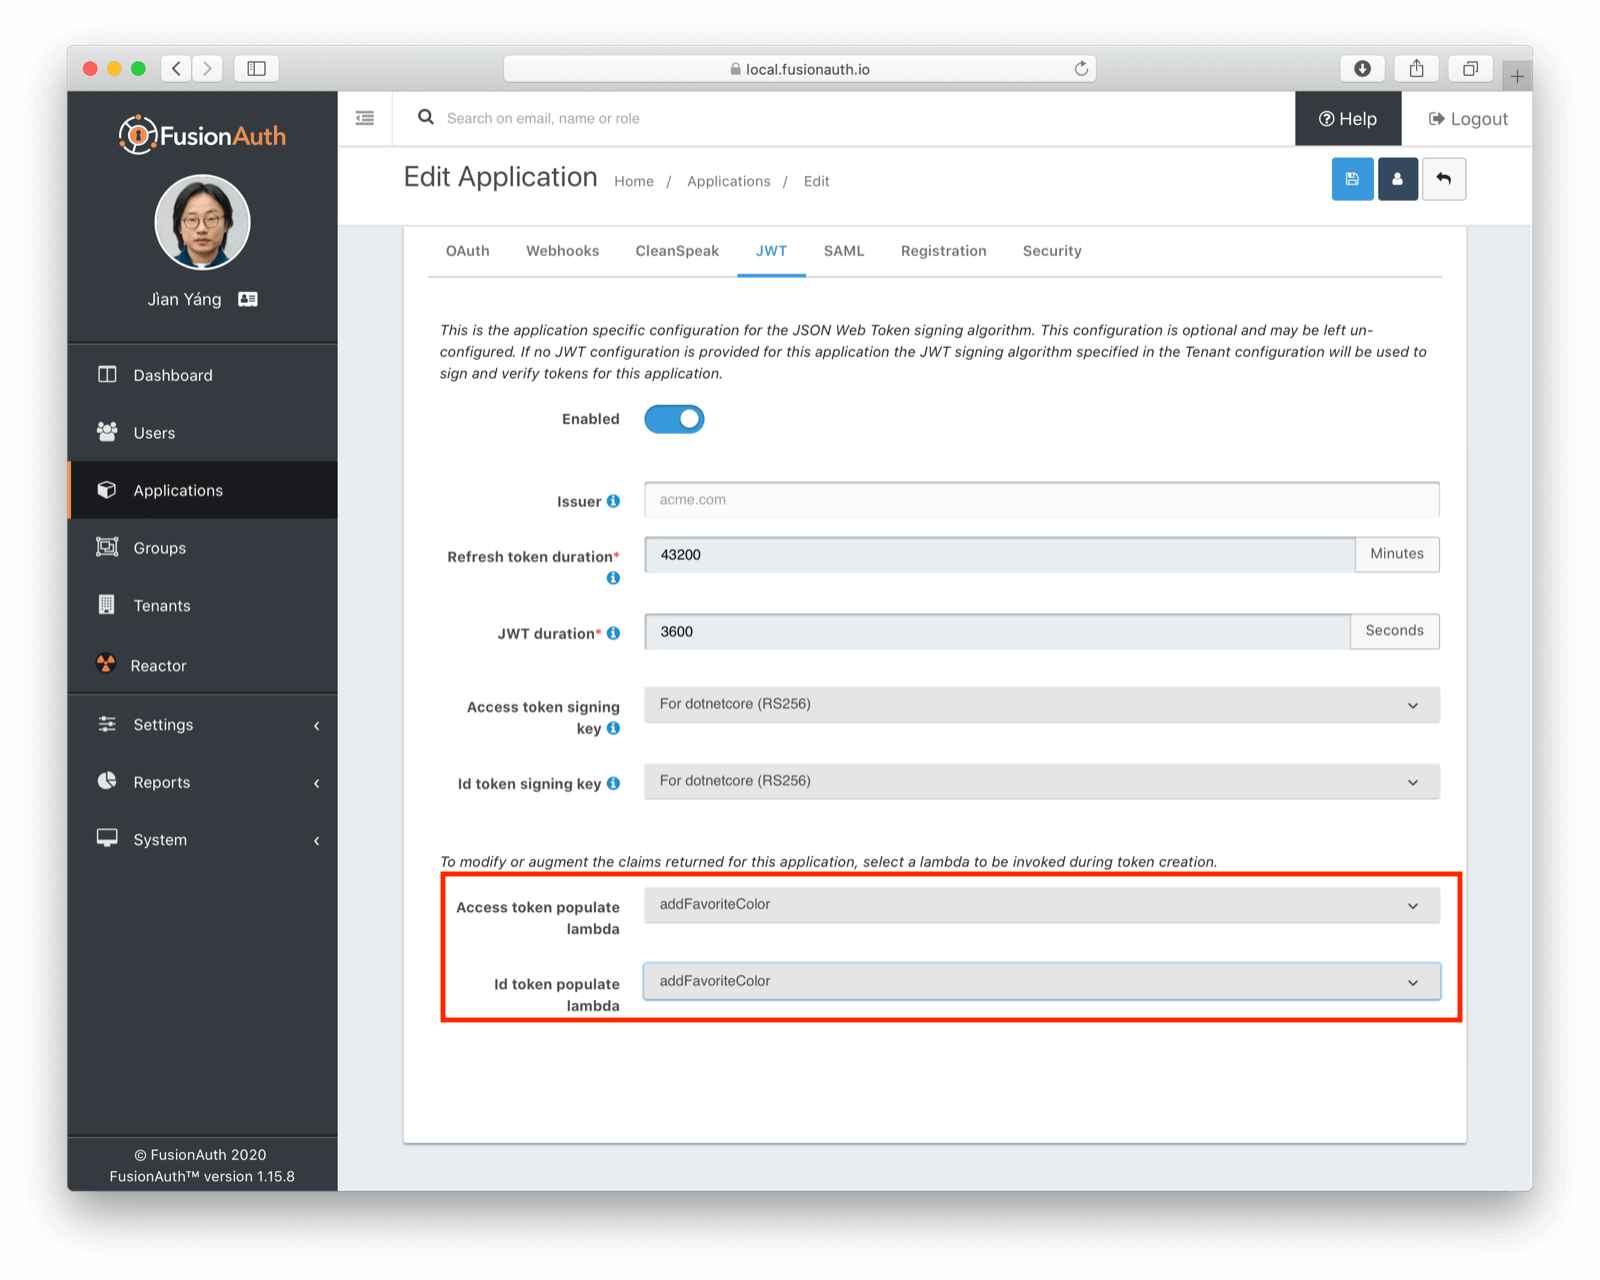
And that it has been assigned to run when JWTs are created for your application:
Of course, as implied above, rather than running a script, you could create the lambda using the administration user interface. Then you'd associate it with your application. I think that doing this lambda setup via a shell script shows the power of the FusionAuth API. Everything you can do in the admin interface you can automate using the API.
Viewing custom claims
Now if you head to localhost:5000, you should see something like this:
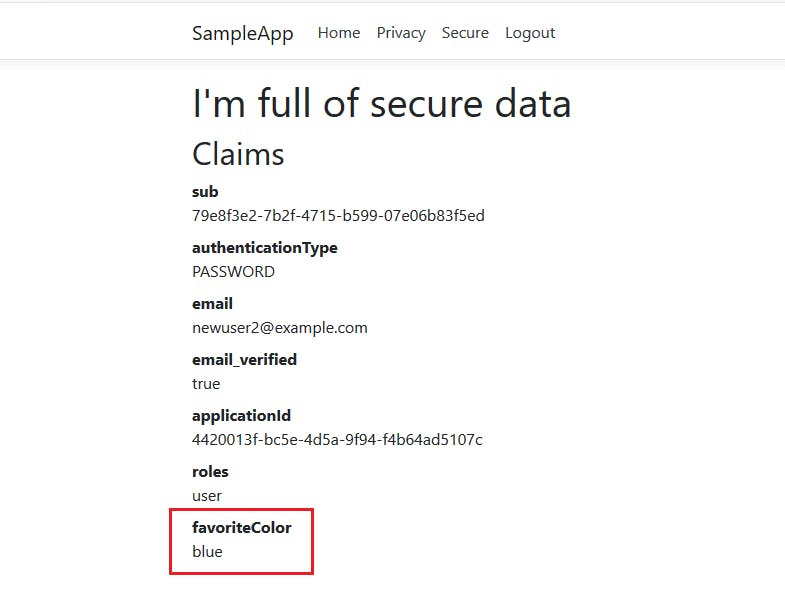
Of course, this isn't much use.
In a real-world application you'd do more than display these claims. You might customize a user's display based on their favorite color. A user's role could gate functionality or information.
Conclusion
This post is the end of our journey integrating FusionAuth and ASP.NET Core. Offloading your user management concerns to an identity management solution such as FusionAuth frees you to focus on the features and business logic of your application, whether that's displaying your user's favorite color or (hopefully)_something more useful!
This post was originally published at https://fusionauth.io/blog/2020/05/27/sharing-custom-oauth-claims-with-a-asp-netcore-app