


cover photo credits to Alejandro Escamilla
Making sure you have the latest dependency updates is an important concern for any software project. Besides getting the latest functionality and bug fixes, it’s relevant because of security concerns. It’s a tedious process if done manually, so let’s learn how to automate it.
🛑 Manually
How many times have you had to deal with a project crammed with old libraries? Usually, no one updates the dependencies. They only become a problem when you can’t use some features. However, you might be missing speed improvements, bug fixes, and even security fixes. Why does this happen? Because you only do things when you need them, which makes sense in a lean approach. The problem is that once these old dependencies accumulate, it’s hard to evolve due to breaking changes and the fear of creating bugs in the apps.
We need a technique that ensures libraries are kept up to date. If you update them slowly, the risk and the work are spread over time. A proper automated testing strategy is supposed to provide a good safety net, so you don’t have to be afraid to update dependencies. I worked on a few projects where there was barely any fear because we used Test-Driven Development, which guaranteed that we tested all the functionality. I’ll describe two approaches to deal with dependency updates in an automated way: using console scripts and relying on a cloud service tool.
🟡 Using console scripts
I usually add a test.sh script to my projects, which runs the test suite. Its goal is to reduce the gap between local and CI/CD environments. You can take advantage of such a script to anchor the checking of outdated dependencies. This way, every time the tests run, you can see a warning and decide what to do.
Let’s see some examples for a few runtimes. The idea is to run the dependencies check after the tests so that we can see the outdated libraries after the script finishes (and don’t have to scroll up). However, if there’s a test failing, we won’t run the check, as it will only bring visual clutter.
⚠️ Make sure that outdated dependencies don’t make the build fail. It should be merely informative.
Node.js
Node.js is the easiest environment for dependency updates because it embeds npm outdated for that purpose.
#!/bin/bash
set -e
npm run test
npm outdated || true
After this, you may want to run npm update to update the outdated libraries. Some libraries may require a manual update because of breaking changes.
Gradle - JVM
In Gradle (Java, Kotlin…) we need to configure Gradle Versions Plugin. Then, a new target is created under Gradle, which you can add to your test script:
#!/bin/bash
set -e
./gradlew clean test
./gradlew dependencyUpdates
Go
If your language is Go, then you need a hack, since there’s no tool designed for this purpose. The workaround is to rely on the go list command.
I’m sure you have already noticed some limitations of this technique. You still have to manually update the dependencies (or create another script for an automated way). After that you need to commit, push and integrate the changes. And let’s not forget that you have more code to maintain.
✅ Using a cloud tool
We can go a step further by using a cloud tool like Dependabot (for GitHub) or WhiteSource Renovate (for GitHub and GitLab). The way these tools behave is by constantly scanning your repositories and creating a pull request (PR) when they find an outdated dependency. Then it’s up to the developers to verify and merge them. For this article, I’ll be demonstrating with WhiteSource Renovate. It has a free plan, supporting public and private repositories, and can deal with a wide range of languages/runtimes (Go, Java, Ruby, Node.js, PHP...). Let’s see how to do it with WhiteSource Renovate for GitHub:
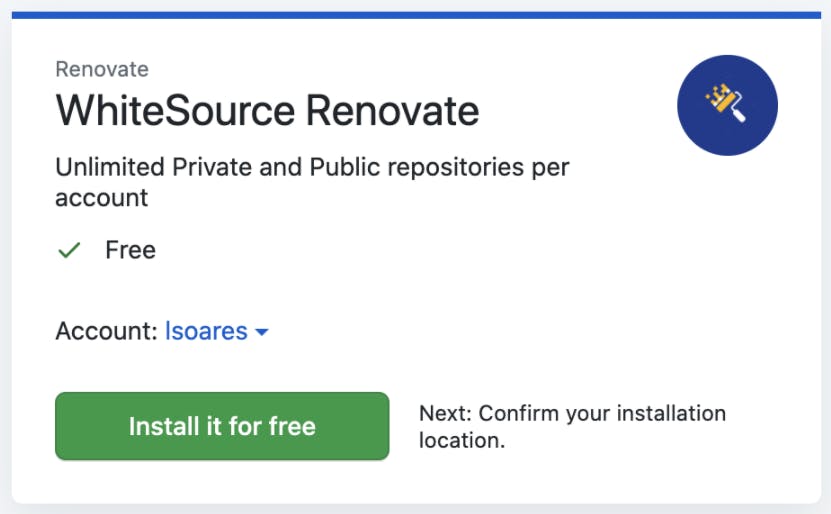
Go to the Whitesource Renovate page in GitHub Marketplace and click “Set up a Plan”.
Click on “Install it for Free”.
Click on “Complete order and begin installation”.
Pick the repositories you want to give Renovate access to.
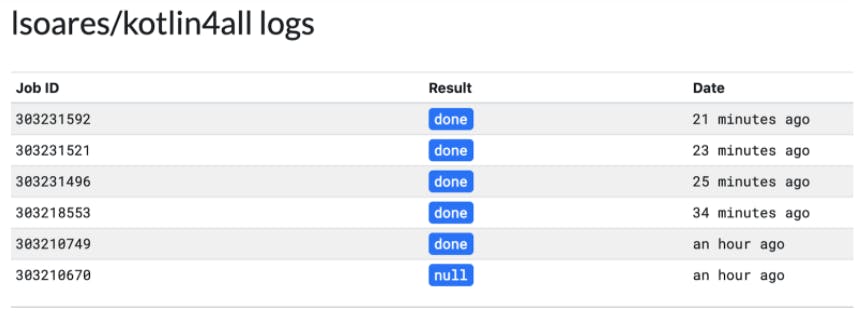
Click on “Activate Now” and login with GitHub. There you’ll have a dashboard with all the projects and their past jobs with logs:
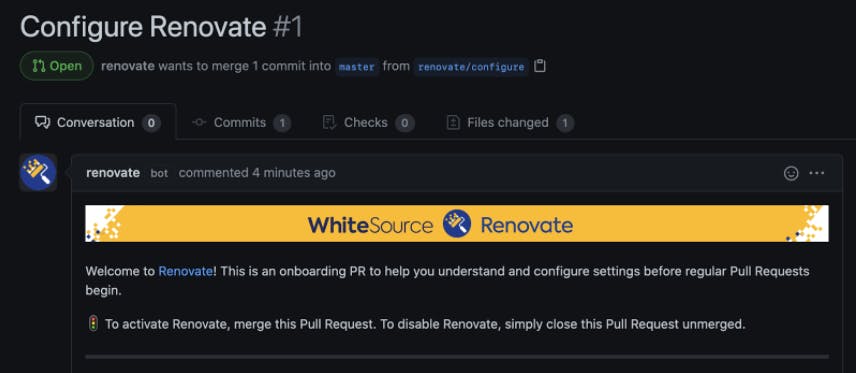
To finish the configuration, go to the desired project’s GitHub and check the pending PRs. There should be a “Configure Renovate” PR that contains a welcome page. Take a look at it. After you’re ready, you can merge the PRs. This will activate WhiteSource Renovate.
A few moments later you’ll start receiving PRs (if you have outdated dependencies):
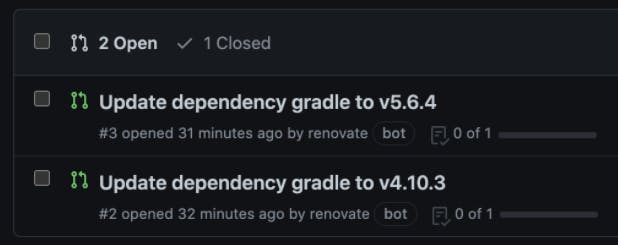 In this example, it’s interesting to see that Gradle can be gradually upgraded (to reduce risk) since we received two PRs about it.
In each PR page, you can read the release notes and other meta information. Now you can merge the PRs.
Notice, in the root folder, a renovate.json configuration file (created when you merged the first Renovate PR at Step 6). This file allows us to tune Renovate to our needs. There are lots of configuration options but the defaults are very reasonable.
The main benefit of this method is the unobtrusive integration with your development and delivery process. After a PR is merged, your CI/CD pipeline is triggered, so all the tests (and other checks) will run. Also, you can easily revert the commit if anything happens. This can reduce the pains of the outdated dependencies we all felt before. The amount of manual work is very low and it can even be further automated (e.g. auto-merge on certain conditions).