It is a privilege for me to help you upgrade your skillset in this post, and you do not need to be a hardcore developer to get this chatbot up and running. You are going to learn how to build a simple chatbot from scratch using flutter and dialogflow.
Let’s begin:
Chatbot Definition A chatbot is a program that can conduct an intelligent conversation. It should be able to convincingly simulate human behavior.
Content details:
Creating our first Dialogflow agent
Setting Up our Flutter app
How to Download JSON from Google Cloud Platform (GCP)
What is Dialogflow?
Dialogflow is a Google-owned developer of human-computer interaction technologies based on natural language conversations. The company is best known for creating the Assistant, a virtual buddy for Android, iOS, and Windows Phone smartphones that perform tasks and answers users’ question in a natural language. To create a dialogflow account, go to dialogflow.com At the top right corner of the site click on “Go to console”.

Finally, You will need to sign in and authorize with Google Account to use Dialogflow.

We are going to create a Dialogflow Agent, and I named my Dialogflow agent to be“Tutorial”

Once you create an agent, Dialogflow will generate a default intents for you. Those Default intents are:
Default Welcome Intent: This intent helps to greet the users.
Default Fallback Intent: This intent is being triggered once the user enters any word your chatbot does not understand.
NOTE: An Intent can be defined as the service that the user wants from the agent. Intent are configured by the developers.
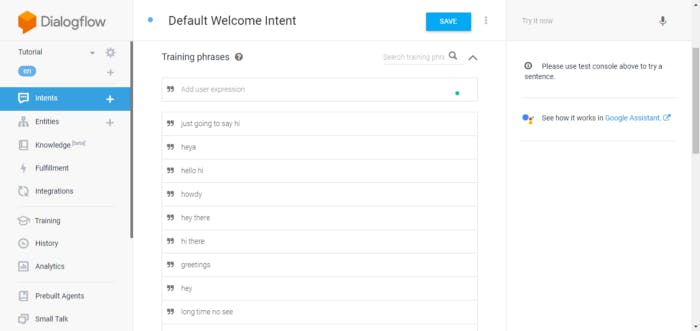
Let's open the Default Welcome Intent, you will some words add to the Training phrases.

Default Response.

Step 2: Setting Up Flutter app
Create your flutter app using Visual Studio, IntelliJ or Android studio, then install the package via this link: flutter_dialogflow
dependencies:
flutter_dialogflow: ^0.1.2
Step 3: Download JSON from Google Cloud Platform (GCP)
Create or select an existing GCP project, in Console Google Cloud
From the GCP console, go to APIs and Services and click on credentials.

Click on Create credentials and choose Service account key.

Select your service account from the dropdown, choose JSON and click Create. This will download the JSON file to your computer.
NOTE: keep it secure.

Step 3: How to use the downloaded JSON file in an app
- In your project create a folder and name it “assets”
- Move the JSON file which you downloaded from Google Cloud Platform (GCP) into the assets folder.
- open “pubspec.yaml”
e.g Let's save the file as credentials.json, we should use the same name credentials.json in our pubspec.yaml file.
flutter:
 uses-material-design: true
 assets:
   - assets/credentials.json
NOTE: The path here (in dart code), should be the same in our pubspec.yaml file (“assets/credentials.json”)
Add this code to your main.dart
Run your app on your smartphone or emulator.
Congratulations, we have built our chatbot.

If you found this article helpful and educating, please hit the like button and also share with your friends.
You can keep in touch with me via Facebook, Twitter , Linkedin , and GitHub .
My name is Promise Amadi. I am a writer and Flutter Developer. I work with startups across the globe to build mobile solutions using Flutter.