


Turn Your Shopify Store Into Mobile Apps for iOS and Android in Minutes Are you a Shopify store owner or working for a Shopify business? Then you MUST launch a native mobile app to the App Store and Google Play, in order to boost your sales & business authority. By buying our React Native Shopify template , you can launch a mobile app for your Shopify store today, with no headaches.
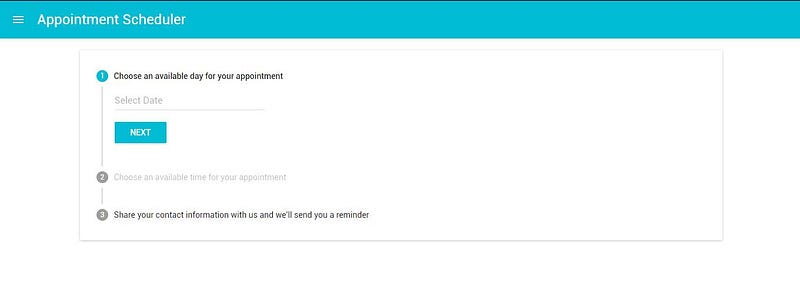
We will be creating an appointment scheduler that enables users to schedule appointments by selecting date and time and providing their user information(name, email, phone numbers). A confirmation is sent to the user’s phone via text to confirm the appointment.
See the preview below:
We are going to concentrate on the following:
Backend (Part 1)
- Creating a template Express Web app
- MongoDB database configuration
- Creating a Nexmo account
- Creating routes, model, and controllers for Express web app
- Testing Express Web App with Postman
Frontend (Part 2)
- Creating a template React App
- Creating Views for React
- App Functionality in Depth.
See here for source code
Backend with Nodejs
For the Backend we are going to use the following Frameworks:
Express is a fast, flexible modular Node.js web application framework that provides a robust set of features for web and mobile applications.
Nexmo helps growing startups and agile enterprises enhance their customer experience — and realize new business outcomes at scale. Nexmo has an SMS service which we will use to send messages to the users.
MongoDB is a free document-oriented database program. it’s regarded as a NoSQL database program, MongoDB uses JSON-like documents with schemas.
Mongoose models MongoDB objects for node.js, for this demo it will enable us to model MongoDB objects for our express app.
NPM and Node Install<br> The installation of Node and npm is required before anything reasonable can be achieved. Installing Node automatically installs npm as well. Node can be installed from the installation instructions (basically download and install) from the website. Skip this step if you already have the installation both packages.)
After download, check if node and npm were installed via command line(CLI):
node -v
npm -v
Creating a template Express Web App<br> Create a folder named “appointment-scheduler-web-react-app”
From your Command Line access your “ appointment-scheduler-web-react-app” folder, proceed to the api folder like this:
cd appointment-scheduler-web-react-app
install the express CLI (Command Line Interface) tools globally:
npm install express-generator -g
To create a new express project:
express --view=ejs api
The generator creates a new express app called api. The — view flag tells the generator to use ejs template engine for the view files.
Access your folder:
cd api<br> Folder structure should look like this:
+---bin<br> +---public<br> +---routes<br> +---views<br>
+---app.js<br> +---package.json
Next, install the following dependencies in your new api folder via Command line(CLI):
npm install
npm install mongoose
Mongoose will be used to create MongoDB objects and connect them to the MongoDB database.
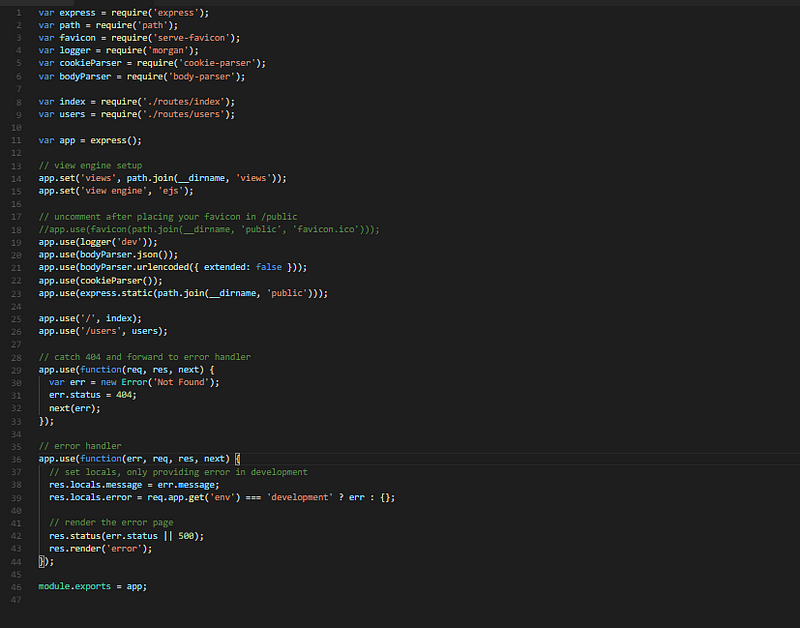
Your app.js file should look like this:
Creating a Nexmo Account<br> We are going to use Nexmo to send a text message to user’s mobile phone number after scheduling the appointment.
We are going to create a Nexmo account, signup here
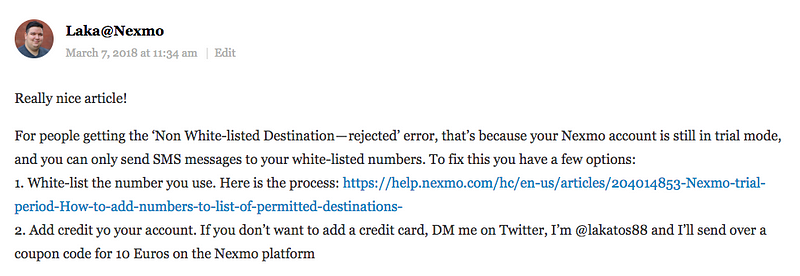
if you get error on nexmo I’ve recive comment from Nexmo crew
To install Nexmo via CLI:
npm install nexmo
After account setup make sure you get the following from the console dashboard
1.API Key<br> 2. API Secret
Copy them to somewhere safe, we will need it later to create the nexmo object in file, controllers/appointments.js.
Creating a MongoDB Database<br> MongoDB is an open-source cross-platform document-oriented database program. Classified as a NoSQL database program, MongoDB uses JSON-like documents with schemas.
MongoDB instance can be downloaded and installed in your machine, see link for more, but for this tutorial, we are interested in the cloud option where we can connect our express app to the database via the Mongoose connection string.
Now let’s create a MongoDB database via MongoLab, Mongolab is free tier and easy to set up.
To start:
Create a MongoLab account<br> Create a new database as shown in the image below:
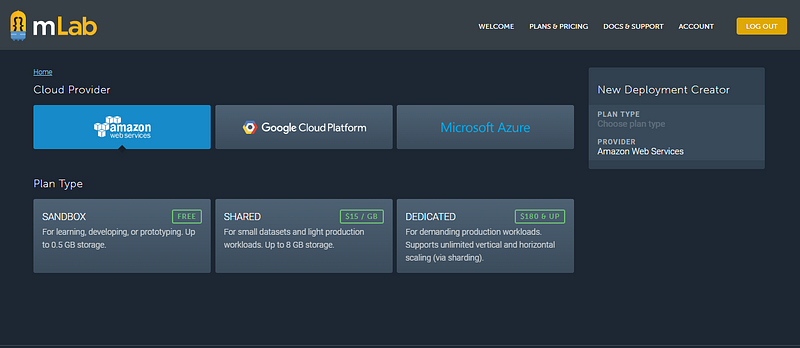
Click on the SandBox option above to create a free tier
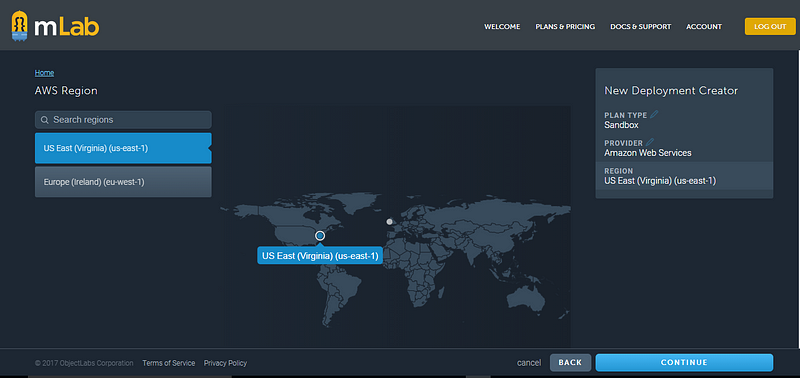
Next, for the AWS Region below choose US East (Virginia) (us-east -1) option:
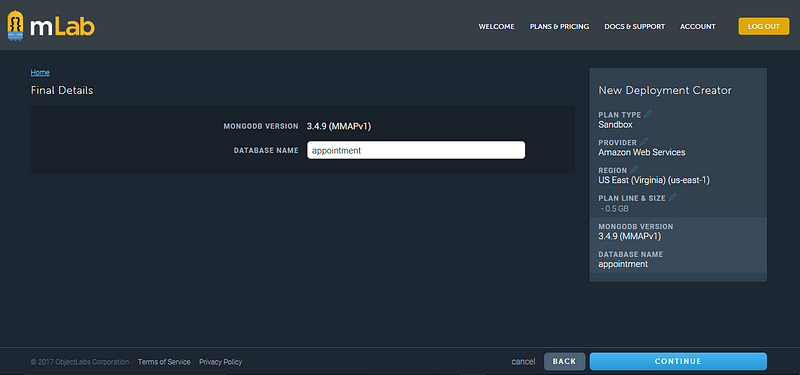
Below, type “appointments” as database name
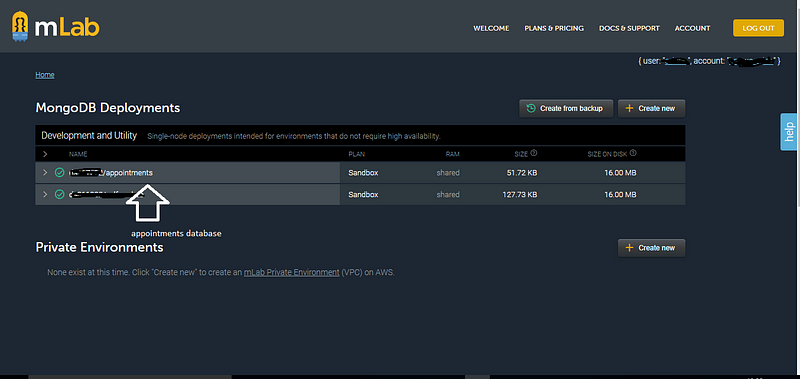
Click continue and you are done. Congrats you have completed the database creation process. below is a preview of your database.You should see your database listed on the MongoDB deployments:
Creating routes, models, and controllers for the Express Web App<br> We are now going to build express app features. Our express app is will enable the appointment scheduler app to interact with the MongoDB we created earlier.
The express app requires the following:
Models: To access the MongoDB database using mongoose, we need to define schemas and models. schemas and models convey to mongoose a simplified representation of the data structure comprising of fields and data types.
Routes: Express makes use of routes to handle request and responses from the client app (appointment scheduler in this case) and MongoDB.
Controllers: Controllers are actually callback functions. Moving forward appointmentController.all, slotController.all and appointmentController.create are callback functions which we are referring to as controllers.
First, we have to edit the app.js file to add our mongoose connection:
Create a models/index.js file in your base api folder:
Controllers for Express App
Create a controllers/appointments.js file in your base api folder
Create a controllers/slot.js file in your base api folder
Routing for Express App
Edit the routes/index.js file to look like this:
The express router is responsible for navigation within the app, from above it gets and displays the express app default page located in path views/index .ejs.
Let’s continue by creating our own route. Create a routes/api/index.js
Both the express and react apps use the port 3000 in development mode. so we
are a going to change the localhost port value to 8083
Go to bin/www.js in your express app
change port from 3000 to 8083
Stop express app with Ctrl C(for windows), Ctrl Z(for mac), rerun with:
npm start
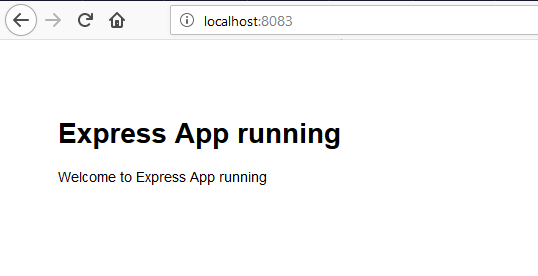
Go to localhost:8083 using your browser:
Now we are done with our express app creation. Let’s see if we can post and get values using our express app.

Upgrade your JavaScript skills.<br> Learn React.js in just a couple of
afternoons.
A premium step-by-step training course by Wes Bos to get you building real-world React.js + Firebase apps and website components. START LEARNING NOW
Testing with Postman
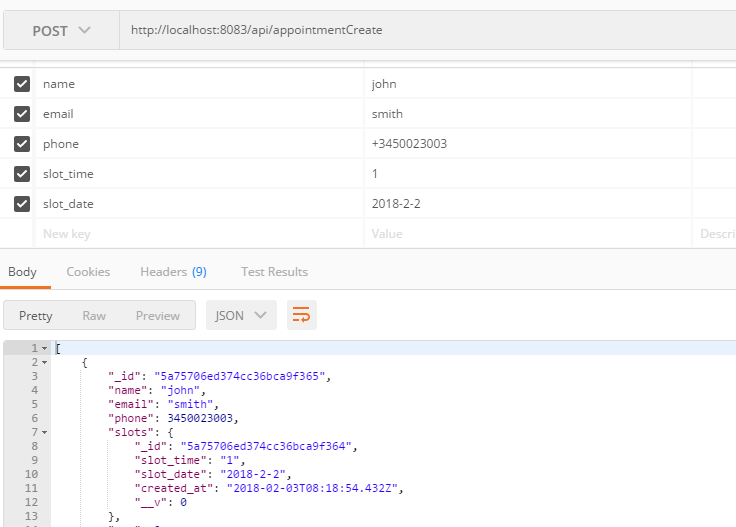
Since we don’t have a form to send values, Postman is a utility tool for testing APIs is ideal to run tests, with Postman we can post and get values to and from the database using the routes we created earlier, let’s proceed:
You need to download and install Postman
Let’s start testing locally, with posting appointments:
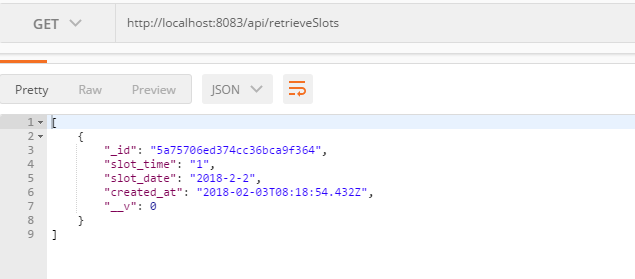
Followed by, retrieving slots:
Front end with React App
Now access your command line Interface (CLI) and use the following command to create react app globally using npm:
For npm version 5.1 or earlier<br> npm install -g create-react-app
To create our appointment scheduler app, run a single command<br> npm install create-react-app appointment-scheduler
For npm version 5.2+ and higher<br> npx install -g create-react-app
To create our appointment scheduler app, run a single command<br> npx install
create-react-app appointment-scheduler
A directory called appointment-scheduler is created at the current directory.
Inside the folder you should see the following transitive dependencies<br>
appointment-scheduler<br> ├── README.md<br> ├── node_modules<br> ├──
package.json<br> ├── .gitignore<br> ├── public<br> │ └──
favicon.ico<br> │ └── index.html<br> │ └── manifest.json<br> └──
src<br> └── App.css<br> └── App.js<br> └── App.test.js<br> └──
index.css<br> └── index.js<br> └── logo.svg<br> └──
registerServiceWorker.js
To start the project in development mode via CLI<br> npm start
Access your app directory using:<br> cd appointment-scheduler
Install the following dependencies:<br> npm install material-ui
npm install axios
Creating Views for Appointment Scheduler App
We will start by creating a components folder:
Create a folder with the name “components” in your “src” folder directory of your appointment-scheduler app. see below:
appointment-scheduler/src/components
Create AppointmentApp.js in the components folder with the following code:
update your src/App.js
Notice that we imported the AppointmentApp component and included a MuiThemeProvider component. The appointmentApp component is enclosed inside the MuiThemeProvider to inject material-ui theme into your application context. Following that, you can use any of the components in the material-ui documentation.
App Functionality In Depth
App state Description<br> The app loads data from an database via the express app
- Our appointment scheduling process we’ll take place in three steps: selecting a date, selecting a time slot, and filling out personal information. We need to track which step the user is on, the date and time they’ve selected, their contact details, and we also need to validate their email address and phone number.
- We’ll be loading scheduled appointments slots that we’d benefit from when the user is selecting available slot times. A slot time that has already been selected by a previous user cannot be selected again.
- As our user proceeds through the scheduling steps, after selecting the date in step 1 the application will proceed to step 2 where the user will select either AM or PM which will display the available appointment times (slot times), when that is done the demo will proceed to step 3 where the user will enter their details and schedule the appointment.
- A modal will display the appointment date and time for user confirmation.
- Finally, a snackbar will display a message indicating appointment success or failure.
Method Description of AppointmentApp Component
Because the AppointmentApp component is over four hundred lines of code. we are going to divide and explain each chunk of code as we progress. See here for a complete version of source code.
Various components are imported from respective frameworks/libraries we installed. the state of various fields such as firstName, lastName are set using this.state.<br> For the componentWillMount lifecycle method below, previous scheduled appointments slots are retrieved from the database via the express app.
The handleNext method moves the stepper to the next position using the
stepIndex field.<br> The handlePrev method moves the stepper to the previous
position using the stepIndex field.
The validateEmail method checks the email parameter and returns true if the email value is valid or false if it is not.
The validatePhone method checks the phone parameter and returns true if phone value is valid or false if it is not.
The renderStepActions method renders the Next, finish and Back Buttons.
The handleSetAppointmentDate method is used to set the state of the
appointmentDate field.<br> The handleSetAppointmentSlot method is used to set
the state of the appointmentSlot field.<br> The handleSetAppointmentMeridiem
method is used to set the state of the appointmentMeridiem field.
The checkDisableDate method passes disabled dates to the date picker
component.
The handleDBResponse method handles the appointment slot data from the
database.
The renderAppointmentTimes method renders available time slots to user and
disables the rest if any.
The renderAppointmentConfirmation method display a modal with the user’s
inputted information and asks th user to confirm, before saving to database.
The handleSubmit method is used to pass user data to the database via the
express app. it will display a snackbar message if the data is successfully
saved in the database or if it fails.
The render method renders all components to the virtual DOM(Document Object
Model).
update your AppointmentApp.js with source code, run your app via Command line using:
npm start
Make sure both the express and appointment-scheduler apps are running, test to see if working properly.
Conclusion
Now we are done with our apps, congratulations!, I know it was challenging, but you have created two app demos. WELL DONE…
Featured React JS Courses
Upgrade your JavaScript skills. Learn React.js in just a couple of
afternoons.
A premium step-by-step training course by Wes Bos to get you building real-world React.js + Firebase apps and website components. START LEARNING NOW
Disclaimer
This post contains affiliate links to products. We may receive a commission for purchases made through these links.