


One thing that sets you apart when looking for a developer gig is a portfolio website. It gives potential clients or employers insight into who you are as a professional, the kind of work you’ve done in the past and what you’re currently up to. Unfortunately, a common impediment that keeps many — including most recently myself — from having portfolio sites is dreading all the work, planning and thought that goes into building a site from scratch, which hosting provider to choose, if the domain you want is available, how much hosting and a domain will set you back (especially if you’re strapped for cash) etc.
In this tutorial, I’m going to walk you through how to set up and host your portfolio site fairly quickly and at no cost.
But, first… is it even that important to have a Portfolio Site?
Yes. Here’s why:
- It lays out your technical skills as a developer. Not only can you list what skills you've honed over your career but also link to everything that concretely demonstrate them. These can include your projects, hackathons you’ve participated in, interviews you’ve given, articles you’ve published, tutorials you’ve made, talks, opensource work, etc.
- It supports you when networking. Networking is just connecting with people with similar interests and your portfolio shows other people in the SWE space what your interests are.
- It's a way to appeal to potential clients and employers.
- It helps you establish your brand. It allows you to define how you'd like new people who come across your portfolio to view you.
- It allows you to showcase your style.
- It’s a gateway to the rest of your presence on the internet as a developer. You could point people to your Dribble, Github, LinkedIn, Codepen, Dev.to, Medium, Youtube, Twitch and your various other developer accounts.
Prerequisites
- Github account: Here’s a link to create one if you don’t already have one.
- Hugo installed: Installation instructions for macOS , Windows and Linux.
Step 1: Generate your new site
- Navigate to your terminal and
cdinto a directory where you'd set up your site. - Pick a name for your site’s folder. We’ll use the placeholder
<PORTFOLIO_NAME>. - Generate your site as follows.
hugo new site <PORTFOLIO_NAME> cdinto the newly generated folder and initialize a git repository.cd <PORTFOLIO_NAME> && git init .
Step 2: Choose and add a theme
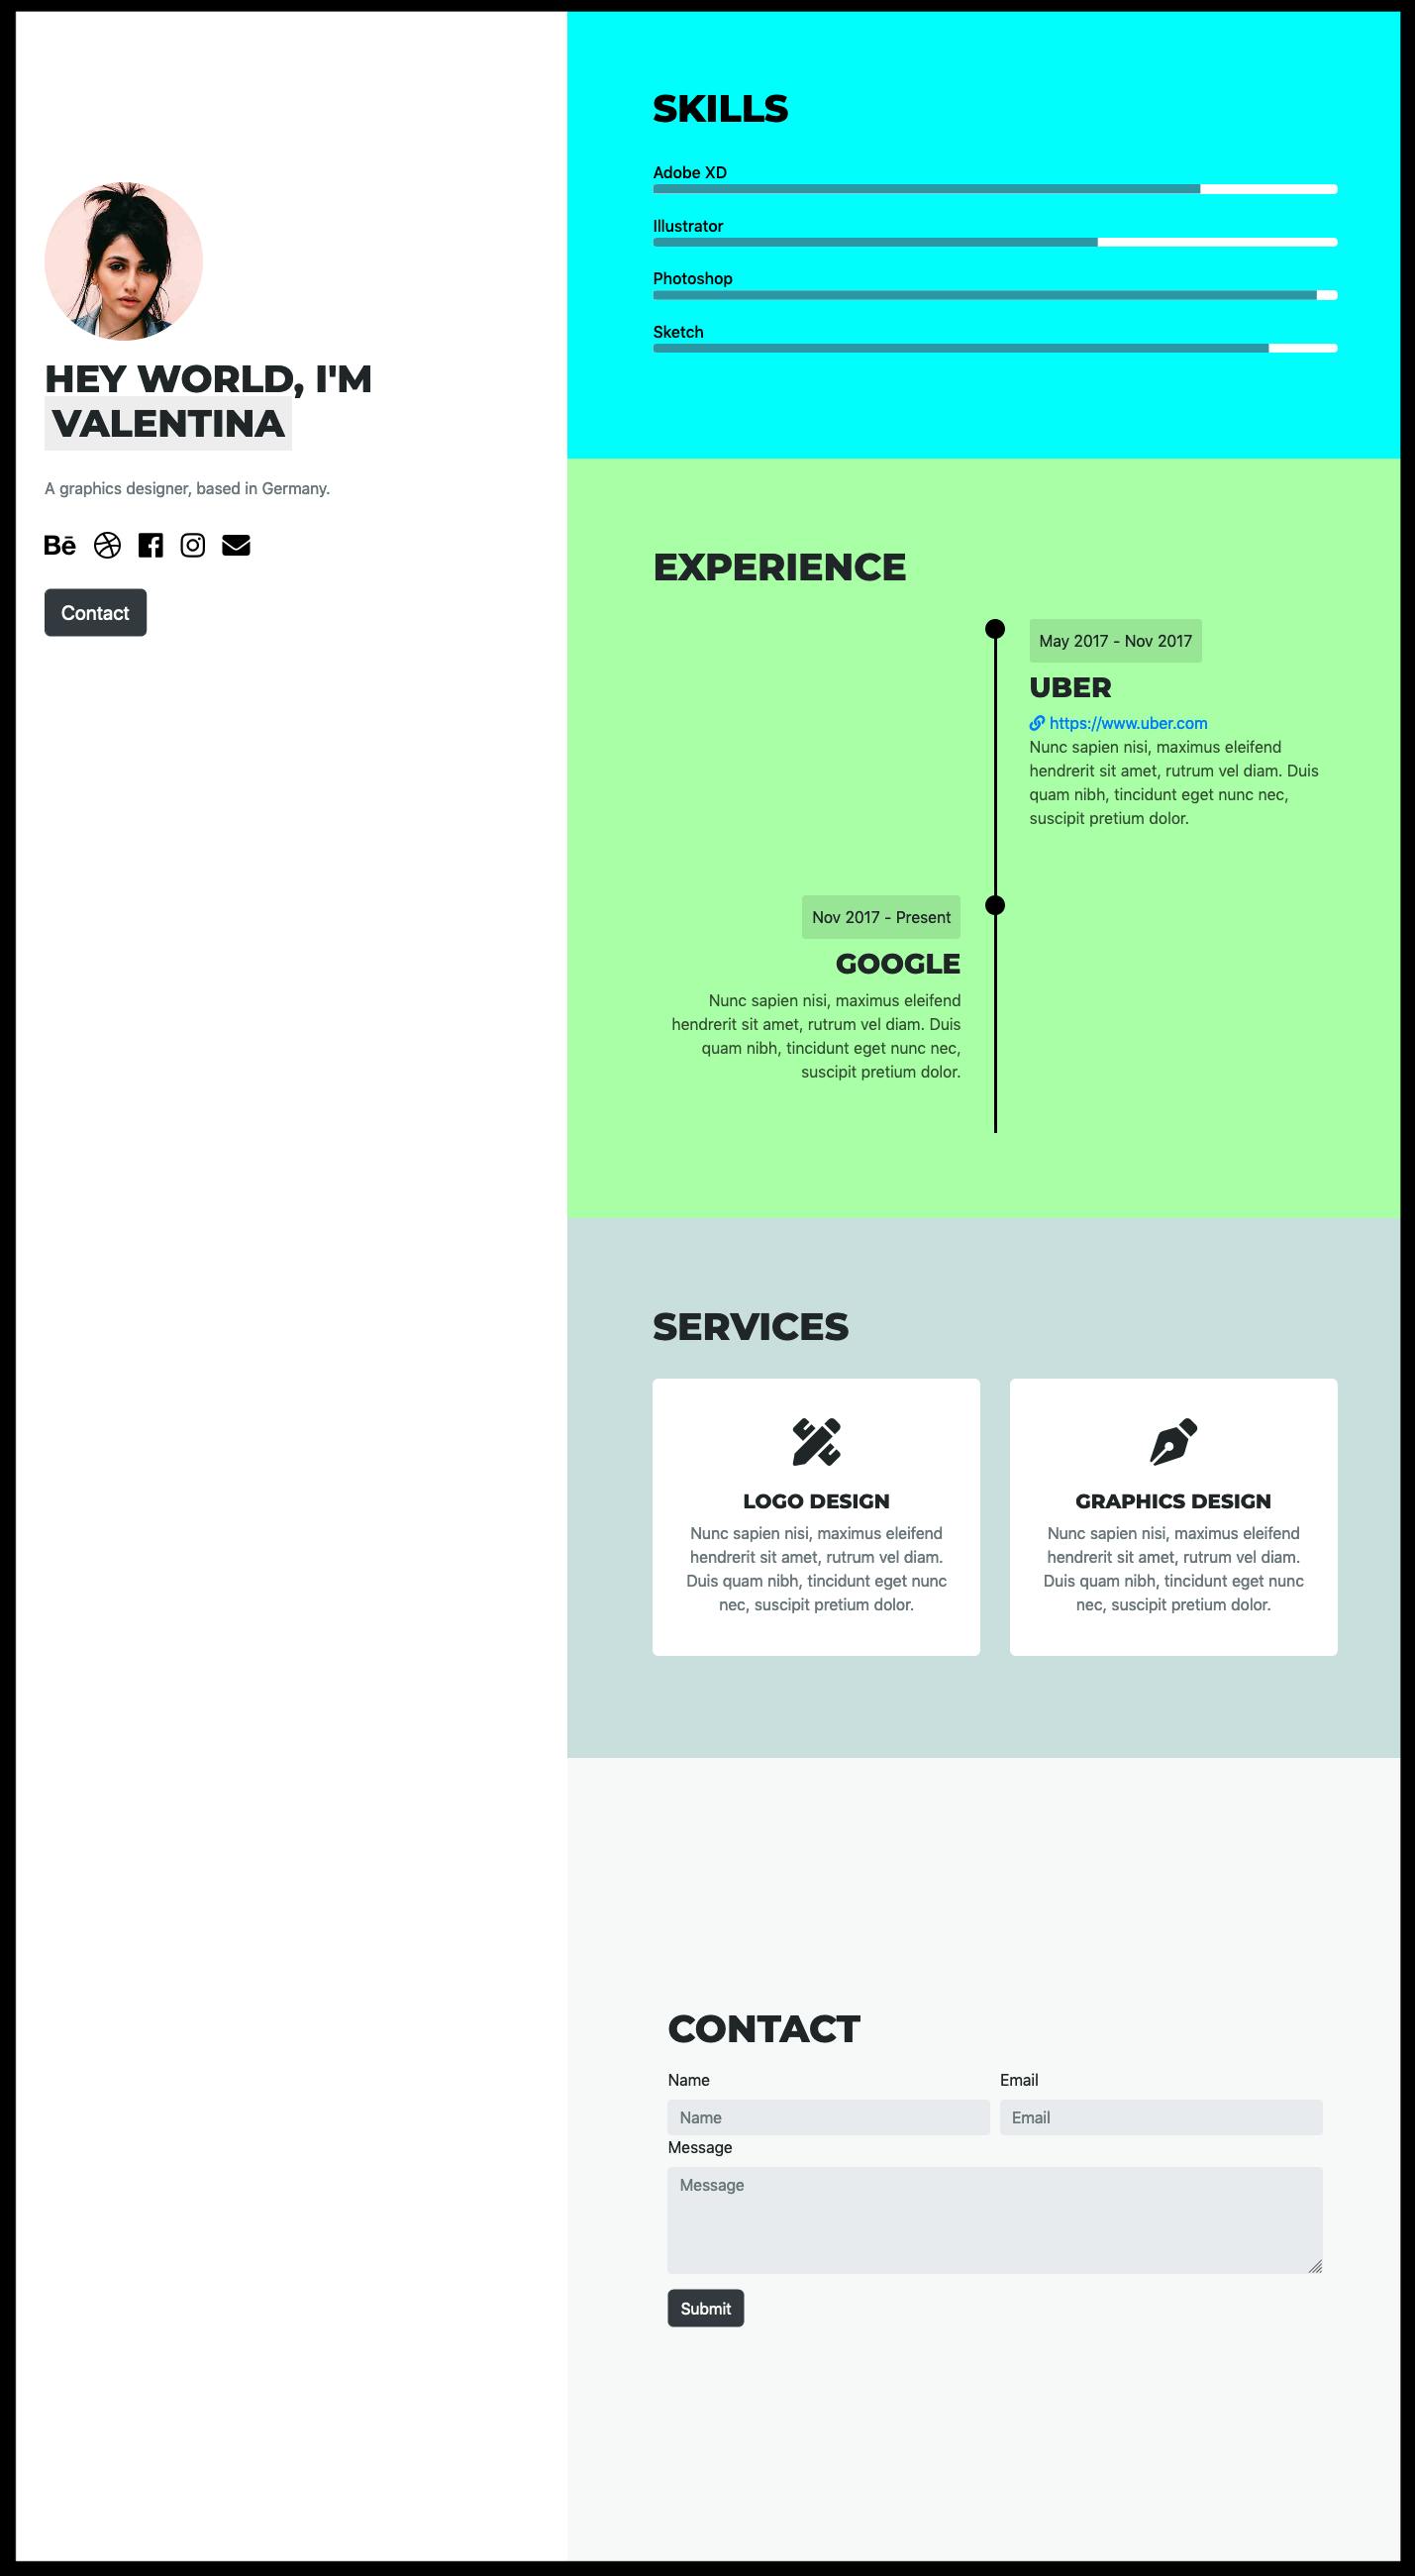
Head on over to the Hugo's Portfolio Themes page and pick a theme that you like. For this tutorial, I picked a theme called UILite. It’s simple, looks pretty cool and meets the basic needs of a portfolio. There are many other cool themes to choose from though.
This is what the UILite theme looks like.
Add the theme as a git submodule to
<PORTFOLIO_NAME>. This step varies from theme to theme but almost all encourage the use of the theme as a submodule. You add the theme by running:git submodule add <LINK_TO_THEME_REPO> themes/<THEME_NAME>In our case:
git submodule add github.com/uicardiodev/hugo-uilite themes/hugo-uiliteIndicate the
<THEME_NAME>you're going to use for your portfolio site in the config.toml file already autogenerated for you. The config.toml file allows you to specify settings for your entire site.echo ‘theme = "<THEME_NAME>”’ >> config.tomlFor our theme, this is what we’ll do:
echo ‘theme = "hugo-uilite”’ >> config.tomlAt the end of this step, your config.toml file should look something like:
 baseURL = "example.org"
 languageCode = "en-us”
 title = "My New Hugo Site”
 theme = "hugo-uilite”
This would be a great point to change the baseURL and title of the portfolio site.
Step 3: Test your site
Start the Hugo server.
hugo serverOn a browser, navigate to http://localhost:1313. Your site should be working now and look something like this:
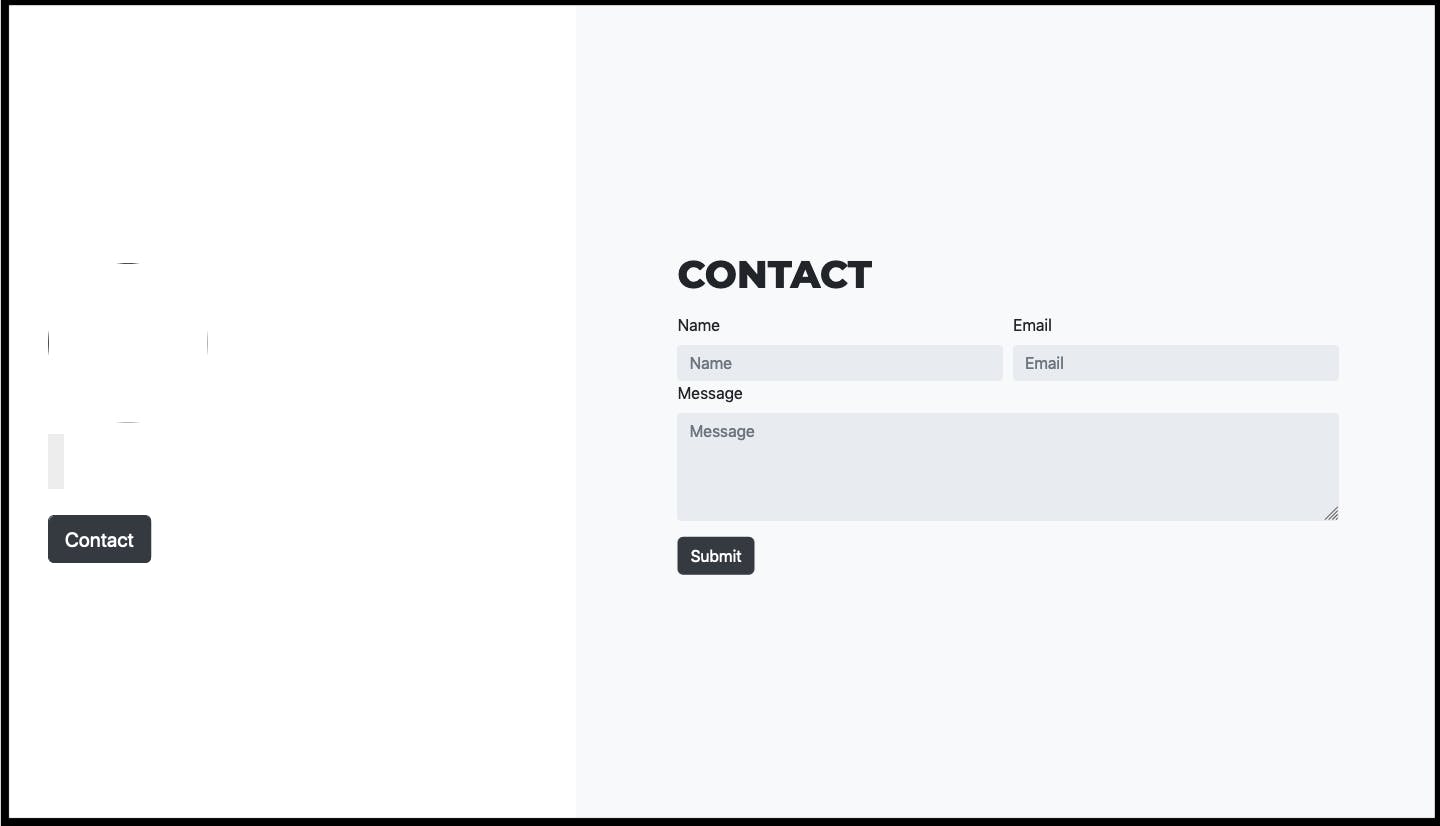
It looks broken but it’s not. We just haven't added content to the site yet. That's what we'll do next.
Step 4: Tweak your theme
So this part is subjective and depends on your theme, the content you’d like to add and your styling tastes. Some common things portfolios have are prominently displayed names, a brief bio, links to social developer profiles, skills, projects, work experience, accomplishments, etc.
Here's one way to tweak the hugo-uilite theme:
Start by restoring the theme to its original glory. For the hugo-uilite theme, we’ll do this by copying some files from its exampleSite folder. If your theme seems broken at first, the theme’s README should be the first place to look for a solution. If nothing is specified — like in our case — look to the exampleSite folder of your theme’s repo. To fix the site, copy missing files from the data folder of exampleSite to the data folder of the portfolio site.
 mkdir data
 cp themes/hugo-uilite/exampleSite/data/* data/
This leaves our data folder containing:
 data
 ├── config.json
 ├── experience.json
 ├── services.json
 ├── sidebar.json
 ├── skills.json
 └── social.json
The Hugo server picks up the changes and on reload, our site now looks just as it did on the theme's demo page.
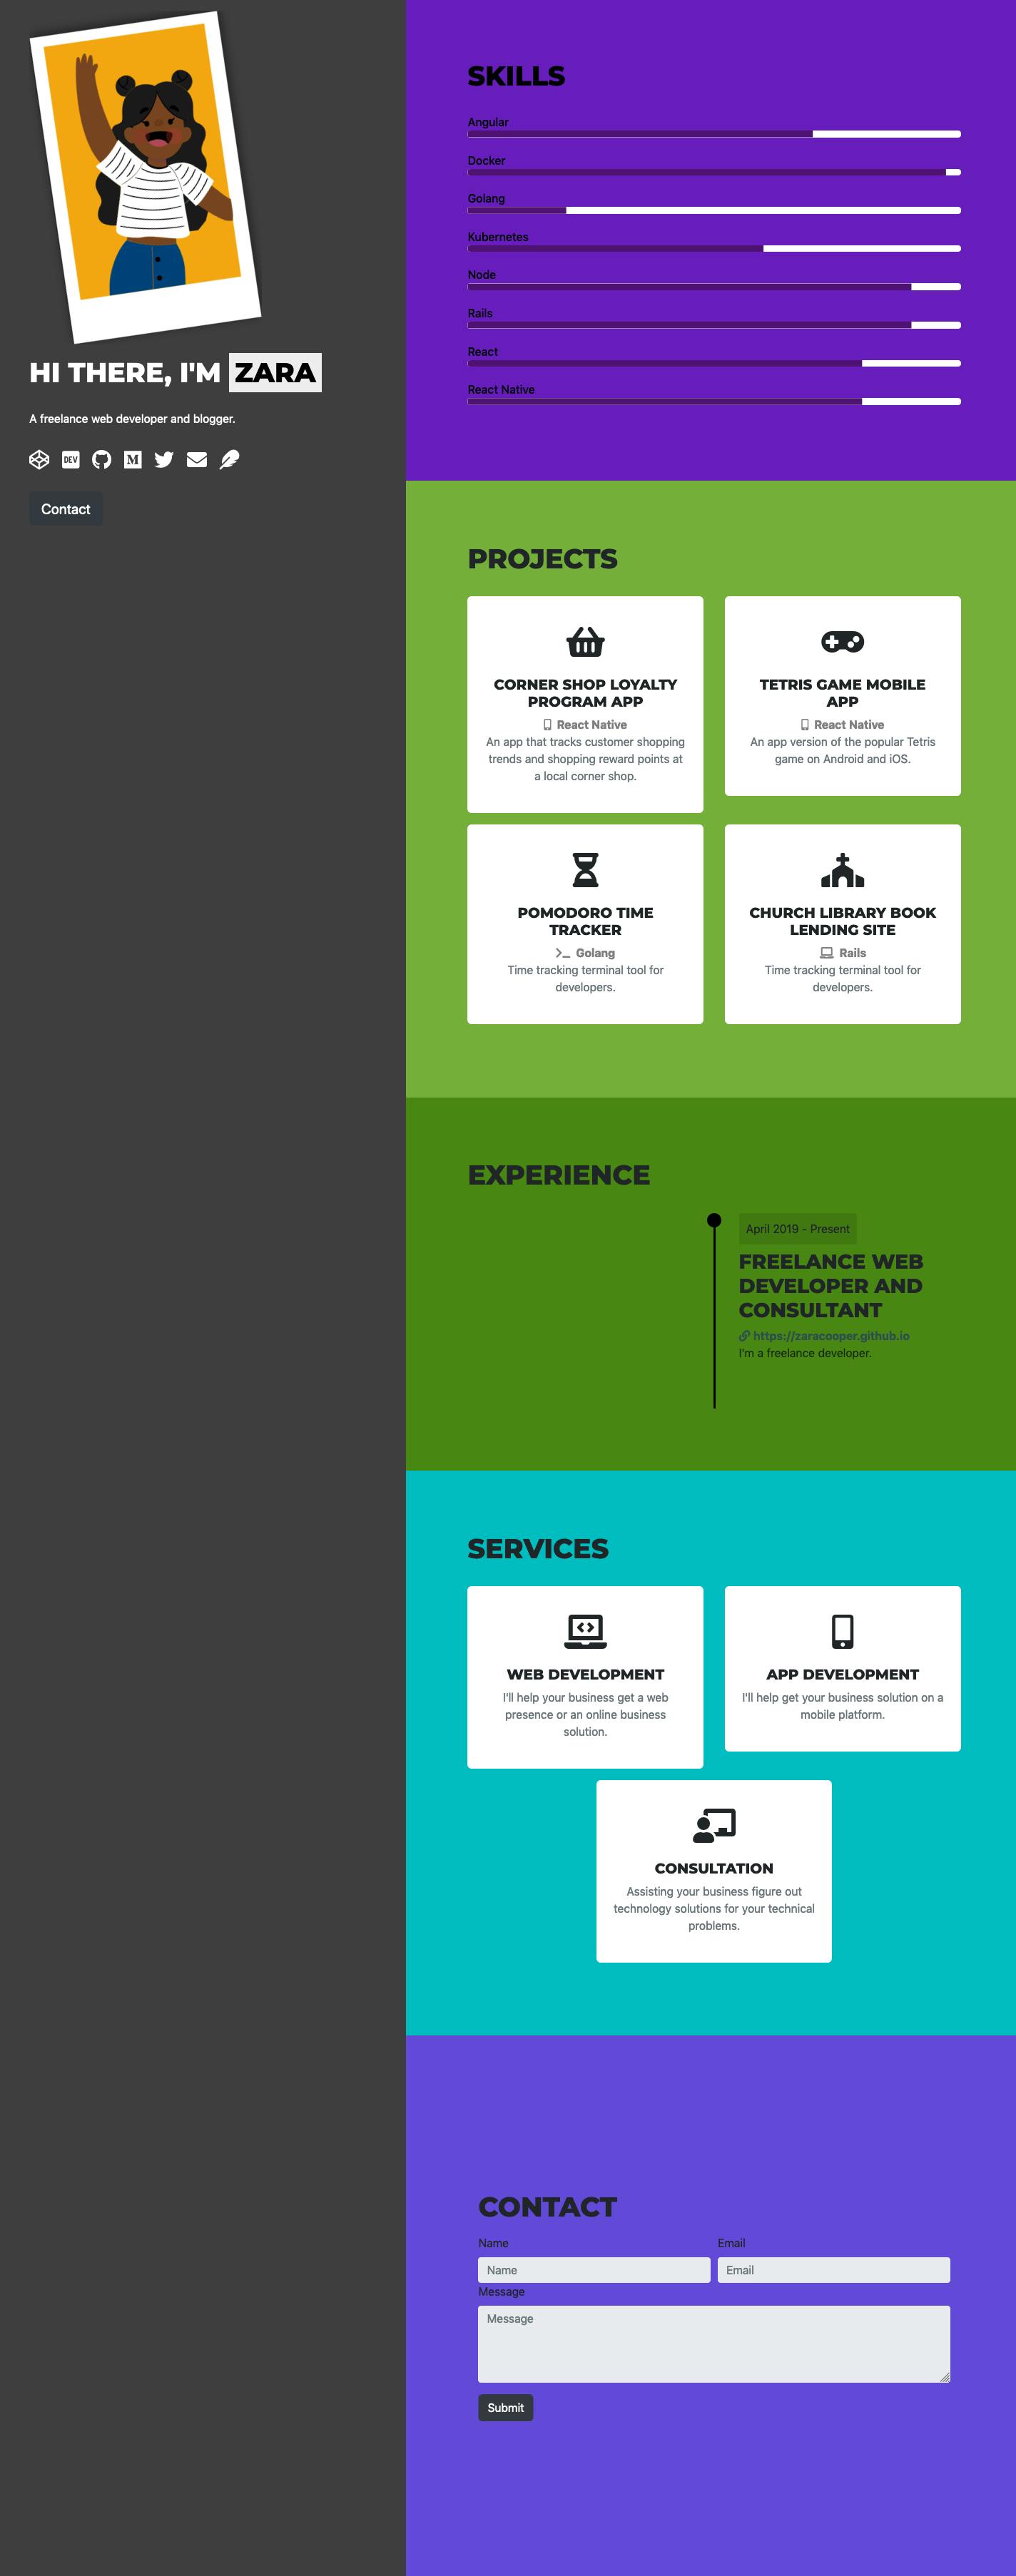
Next, we’ll add professional information to the site. As mentioned above, there are several details you could include. Styling changes to the theme can also be made. Below I'll describe what I did to modify the theme picked to look like the site screenshotted below. The changes are large and would be unnecessary to describe in detail since not all themes are made the same. So instead, here's a summary:
a. Changed the theme's color palette
- I added a CSS file with additional styling to the
staticfolder. - Any styling you add here will override styling from the theme.
The
layoutsfolder of the theme is a great place to find out what the ids and classes of components you'd like to style differently are.b. Added professional information
Since we already copied over the
datafolder, all we have to do is change the information in the respective files for it to reflect on the site e.g forExperiencewe just edit theexperience.jsonfile.c. Changed the site favicon
- If a theme doesn't provide a configuration setting to change the site's favicon, it needs to be added to the header of the site.
- In this case, the header file was in the theme's
layouts/partialsfolder. - To add the favicon, copy this file over to the portfolio's
layout/partialsfolder and edit as necessary. Also, don't forget to add the favicon to the
staticfolder if it's not a link.d. Added a projects section
- This theme did not come with a Projects Section.
- Since it's similar to the Services Section, I duplicated its HTML file (
layouts/partials/projects.html), modified it to make the project cards linkable, added a data file for it (data/projects.json) and added it to thelayouts/index.htmlfile (which I copied over from the theme). In cases where you do not provide services, all you have to do is change the contents of
data/services.jsonfile to reflect Projects or something else, not Services.e. Added social information
- There are already
data/socials.jsonanddata/socialsfas.json(for Font Awesome Solid Style Icons) files where you could specify social information.
- I added a CSS file with additional styling to the
This is what the final site looks like.
Step 5: Create your repos on Github and push your source code
- Commit your changes to the master branch.
- Create a repo on Github to host your site's source code, for example, called
<PORTFOLIO_NAME>. You can make this repo private as it just serves to store your site's source code. - Push your latest changes to this repo.
- Create a second repo from which your site will be hosted. It should have the name
<USERNAME>.github.io. - Locally,
cdback into the<PORTFOLIO_NAME>folder and check that you’re happy with how your site looks like by running the Hugo server. If you’re satisfied with the resulting portfolio, kill the server. We next have to link the
publicfolder generated when we build the site locally to the<USERNAME>.github.iorepo we created. We’ll make the<USERNAME>.github.iorepo the remote origin of the public folder and also make thepublicfolder a submodule of our<PORTFOLIO_NAME>project. Do this by running:git submodule add -b master git@github.com:<USERNAME>/<USERNAME>.github.io.git publicWe may often make changes to our site and as such, we’ll need to make deployment of our portfolio easier the next time around. Hugo provides a script that pushes your changes to your origin (with an optional commit message) and deploys your portfolio site. It can be added to your
<PORTFOLIO_NAME>project and simply run when you make a change. The script named deploy.sh can be found here. Once you’ve copied the script over, all you need to do to make the first deployment of your portfolio site is:# Make the script executable chmod +x deploy.sh # Deploy your portfolio site with an optional commit message ./deploy.sh "Deploy the first version of my portfolio site”
Step 6: Host your site on GitHub Pages
If you’re unfamiliar with or interested in Github User Pages you could read about them here.
We’re going to be hosting the portfolio we created on a User Page which will be found at the <USERNAME>.github.io URL. We’ll be hosting directly from the master branch of the <USERNAME>.github.io repo we created in step 5. To do this:
- First, the repo has to be public if you are on Github's free plan (you can host from a private repo if you're on an upgraded plan). If your
<USERNAME>.github.iorepo is private, head on over to Settings > Options > Danger Zone to change it back to public.

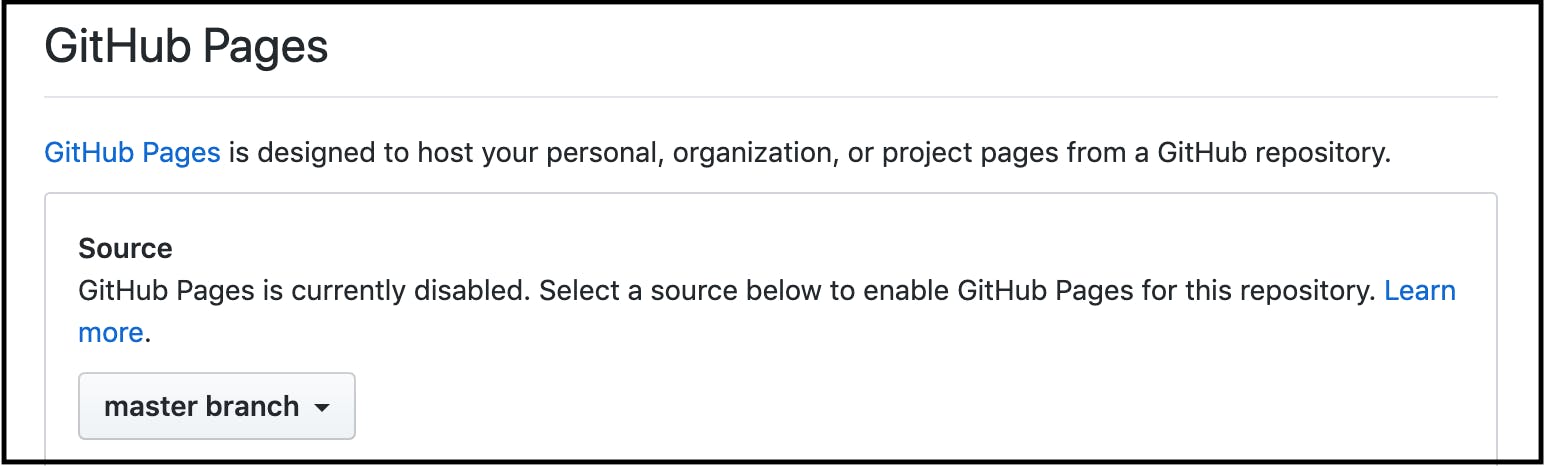
- Next, we’ll need to set the source of the Github User Page. If your repo is named
<USERNAME>.github.io, Github Pages is enabled by default with public repos or private repos if you're on an upgraded plan. This setting can be found at Settings > Options > Github Pages. We’ll select the source of the page as themasterbranch.
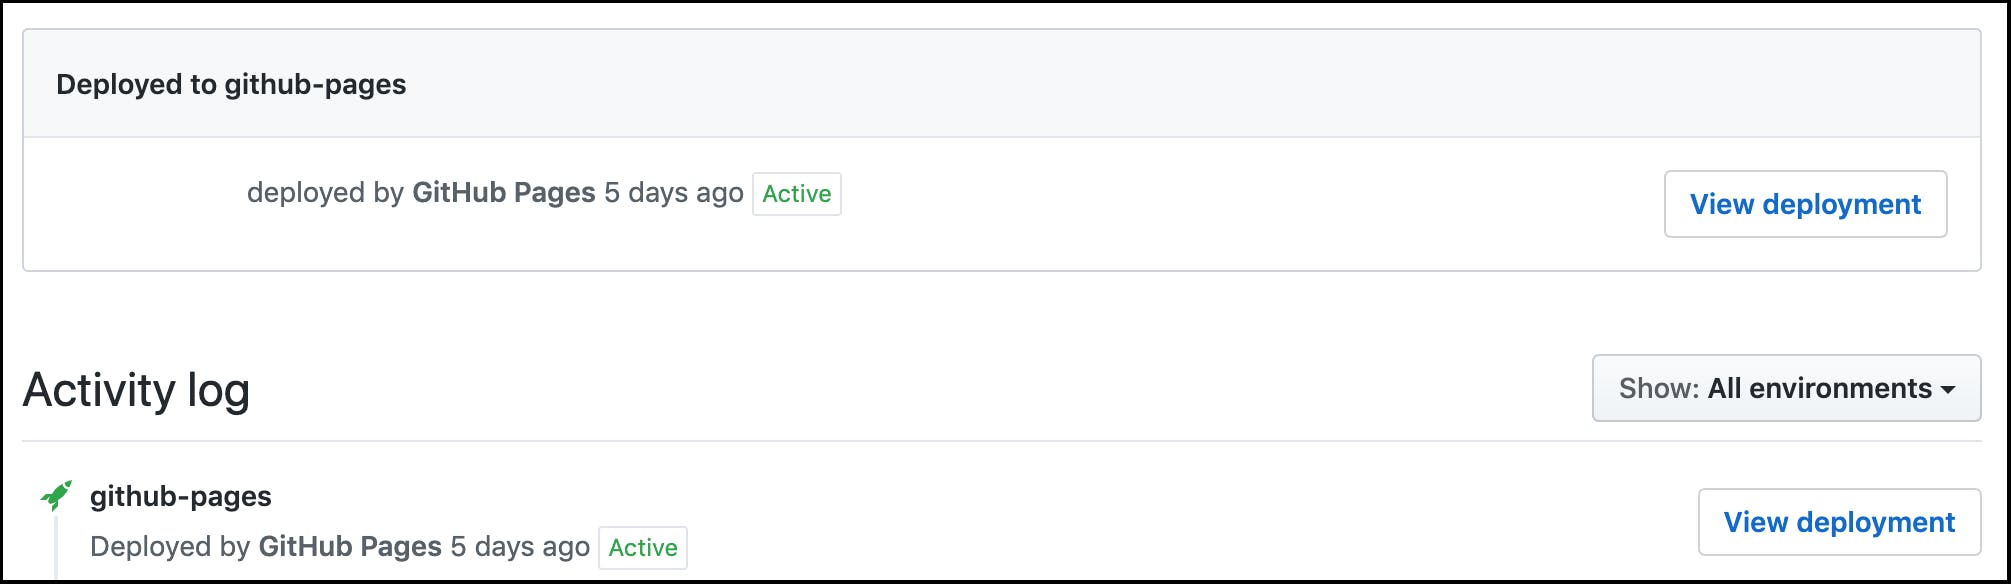
- Make your way to the Environments tab of the Code tab on your repo's page to make sure that the deployment was successful. On this tab, you will see an activity log of your past deploys and highlighted at the top will be your most recent deployment.
- Lastly, enter
<USERNAME>.github.ioon a new browser tab and behold your portfolio.
Conclusion
I hope that this was helpful. Although there are tonnes of easier ways to get a static portfolio site on Github Pages, I love Hugo’s approach because of its customizability, wide range of themes and inbuilt templates for things like Google Analytics, Disqus, etc. I also appreciate Github’s User Pages free static site hosting.