After setting up git on your local machine and signing up to GitHub you will be required to supply your GitHub login details every time you tried to push to your remote repository, and that can be a really painful repetitive task you would not like to do. For newbies using git and GitHub, this is one thing that might have bothered you whenever you tried communicating with your remote repository.
In this article, I will walk you through the process I took to set up my local machine to connect to my GitHub repository using SSH access.
The first step will be to generate a new SSH key:
- Open Terminal and paste the command below, substituting in your GitHub email address. This will create a new ssh key, using the provided email as a label.
$ ssh-keygen -t rsa -b 4096 -C "your_email@example.com"
When you're prompted to Enter a file in which to save the key, press Enter. This accepts the default file location.
At the prompt, type a secure passphrase, you will be required to verify the passphrase you just entered.
With these steps, you just created a brand new ssh key in a folder named .ssh located in your root directory.
The next steps will be to add your just generated SSH key to the ssh-agent.
- Start the ssh-agent in the background.
$ eval "$(ssh-agent -s)"
- Add your SSH private key to the ssh-agent with the following command.
$ ssh-add ~/.ssh/id_rsa
At this point, there is an ssh key on your local machine but GitHub knows nothing about it, so in the following steps, you will be adding the SSH key to your GitHub account.
- Copy the SSH key to your clipboard, you can locate the hidden
.sshfolder, open the file in your favorite text editor and copy it to your clipboard. But to help with the copying you will be installing xclip, If you don't haveapt-get, you might need to use another installer (likeyum)
$ sudo apt-get install xclip

$ xclip -sel clip < ~/.ssh/id_rsa.pub
You will be pasting the ssh key you just copied into your GitHub account with the following steps.
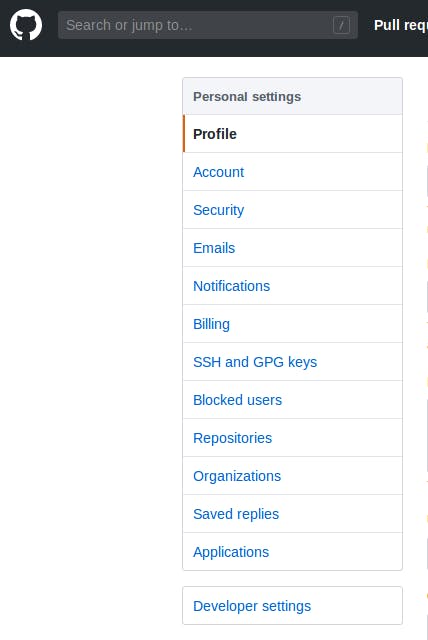
In the upper-right corner of your GitHub page, click on your profile photo, then click Settings.

- In the user settings sidebar, click SSH and GPG keys.

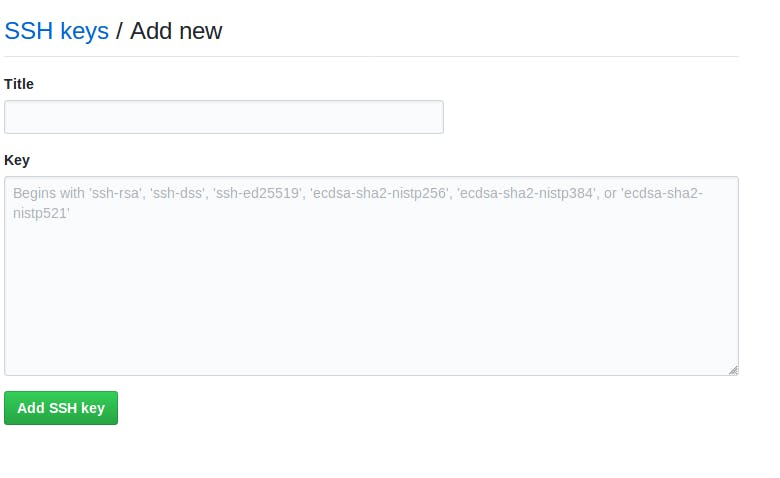
Click New SSH key.

In the Title field, add a descriptive label for the new key. For example, if your Operating System is Ubuntu, you might call this key "My Personal Ubuntu". Then you should paste your key into the Key field and press the add key button at the bottom.

After you click the button to Add SSH Key you will be prompted to confirm your GitHub password.
At this point, your GitHub account has given access to your local machine and they can communicate via secure shell access SSH, but there is still one thing you will have to do in order to communicate to a specific repository on GitHub account.
You will take the following step to switch your remote URLs from HTTPS to SSH for the local repositories you will like to give ssh access to your GitHub repository.
Open Terminal or Command Prompt and change the current working directory to your local project, the project you will like to give SSH Access.
List your existing remotes in order to get the name of the remote you want to change with any of these commands.
    $ git remote -v
    $ git remote get-url origin
    $ git remote show origin
- Change your remote's URL from HTTPS to SSH with the following command.
$ git remote set-url origin git@github.com:USERNAME/REPOSITORY.git
- You can verify that the remote URL has changed with this command.
$ git remote -v
Now you can test it by making some changes in your local project and try to push to remote, if everything worked well you should not be asked for your GitHub username and password again for this specific project.
FURTHER READING About SSH