


Today we'll build an API twice with Node.js and NoCode and we will learn how NoCodeAPI will save your time, resources & money.
Since you're already here. I am sure you already know about NoCodeAPI, but still a brief introduction about it.
NoCodeAPI lets you consume data from third-party services without setting up a backend. Typically you need to set up a server and code a fairly complex app to get data from a third party service. You need to get the tokens, API keys, securely authenticate them, handle the CRUD transactions, pagination, query the data, etc.
Today we will try to build an Express API that will retrieve our Instagram feed as JSON to use in webpages.
The Traditional way with Node.js
An overview of what we're doing.
- Go through some of the worst documentation ever from Facebook! It took me 30 mins just to understand what exactly is happening in the docs and how to get the feed.
- Find the right page in the docs on how to get the data.
- Get the
access_tokenfrom Instagram. - Make a backend server written in Express which will call Instagram api and retrieve it in a json format.
- Host the code in a cloud server and relay the json back.
To all the beginners out there, doing this in a server is important (and mandatory) because your
access_tokencomes with admin privileges, which can be read/write your Instagram account details, if not handled properly. If in case you called the instagram api in your browser directly, anyone can just open the browser dev tools and get youraccess_tokenand misuse it.
How do we get the token from instagram?
1. Make a facebook app
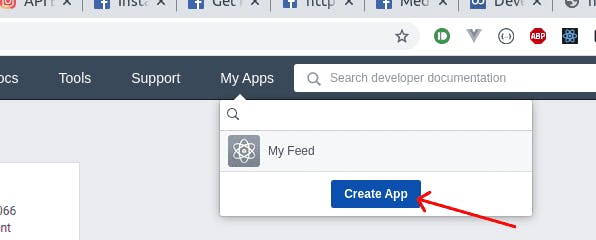
Open Facebook Developer portal https://developers.facebook.com/apps/ & Create an app. (this is what fb calls it).
If you're doing this for the first time, join FB developers portal by logging in > Click on Get Started on top > Verify your account & you're good to go.
After clicking on Create App, click on "For Everything Else" from the popup. Give your App a Name.
2. Add Instagram Testers
Now select "Instagram" from the set of FB products, as we want the Instagram feed. You will be taken to an agreement page, select **Basic Display** from the sidebar click on **Create App**, give it a name again and you will now be seeing the Instagram developer console. Awesome.
Scroll down and you will be able to see a section called **User Token Generator. Click on Add or Remove Instagram Testers.**
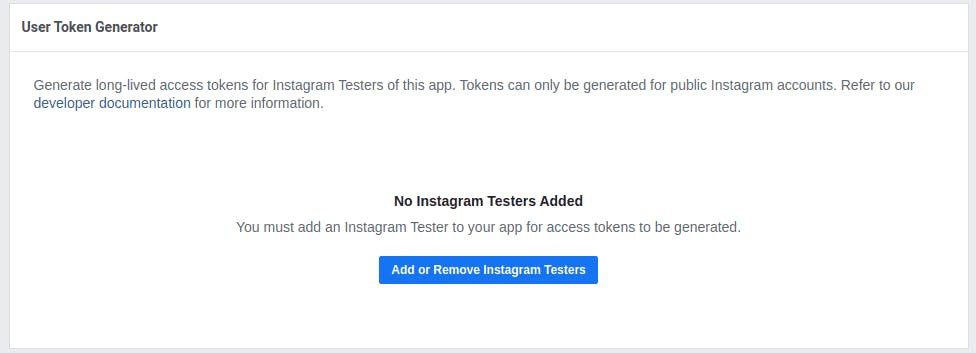
Scroll down and add the Instagram username of whose feed you want in the api, this only works for accounts that are set as public and you will not be able to access private accounts.
Let's add our own account username and accept the testing invite by accessing this link https://www.instagram.com/accounts/manage_access/
Once done come back to the FB developer portal, open your app, click on **Basic Display** and click **Generate Token**.
You now have finally generated an Instagram access token, keep it aside for now.
3. Understand the Instagram API.
The docs on Instagram.com are deprecated, you need the new version called Instagram Basic Display Graph API. Navigate through it and find the Reference section > Me > and you will find the endless complex API docs that facebook makes you go through.
After 30 mins of navigating, I found out the actual endpoint that needs to be called to access the feed as json.
API Endpoint: https://graph.instagram.com/me/media?fields=id,media_type,media_url,caption&access_token
The fields parameter is mandatory and specifies the scope of data you want from your account.
4. Make an Express app which calls the Instagram API
const express = require("express");
const app = express();
const axios = require("axios");
const cors = require("cors");

app.use(cors());

app.get("/", async (_, res) => {
  const api = `graph.instagram.com/me/media?fields=id,med…${process.env.SECRET}`;
  const { data } = await axios.get(api);
  res.send(data);
});

// listen for requests :)
const listener = app.listen(process.env.PORT, () => {
  console.log("Your app is listening on port " + listener.address().port);
});
A brief explanation of the above code.
We are initializing express and adding axios and cors module(enabling for all domains, just for this article).
Code a GET request on the " / " route as an async function, where we will make an api request to Instagram, to the endpoint mentioned in step 2.
Note, it is very important to keep your token safe by encrypting them, even on servers. Not doing this will potentially allow hackers to get access to your keys if in case there is a breach.
Once done, relay the data back.
5. Host the app on a server.
The above express app should now be hosted on a server that runs Node.js. There are multiple cloud providers like Heroku, Digital Ocean, AWS, Google Cloud, etc. These servers usually aren't cheap. You need to purchase a machine, set up a node environment, with a production process manager like pm2 and handle your domains, SSL encryption, Nginx setup for port routing, etc.
You now have finally made your API to access your Instagram feed.
Honestly, that was a lot of work for a small task. Let's see how we can do this NoCode API.
The NoCode API way.
Nocode API is a modern way of consuming APIs, you get prebuilt apps that will do the work for you. Some of the advantages listed below.
- Fast & Quicker - (read on to know why).
- You need not write even a single line of code. Everything is handled by Nocode API.
- Safe: All your access tokens and keys are encrypted with state of the art standards.
- Zero Setup: No need to host anything or worry about server setups. You just need to create an account.
- Generous free usage tier.
- Analytics: You get to see detailed reports on api usage.
How do we build the same thing we did above?
1. Create a Nocode API account & Activate the Instagram app
Create a Nocode API account here and select Instagram from the marketplace.
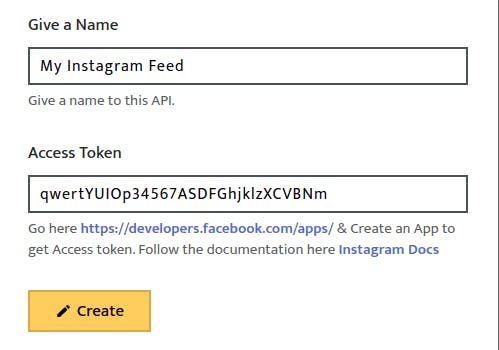
Click on **Create** button on the top left. Give your app name and enter the access_token which we retrieved above.
That's it, no more steps. 😮😮 !!
NoCode API will generate API instantly. It took me approx 2 minutes to host a full-fledged API, without having to write a single line of code. I did not have to worry about hosting it, handle the keys, or even go through the documentation.

It won't stop here. NoCode API will also let you query the data by adding pagination limits. Click on the View Docs button to get additional parameters you can append to you api to make your API more powerful.
You can also secure your APIs, allowing CRUD operations authenticated with an api key to the endpoints. Clicking on the Secure button will open a panel to manage this. This way you will have more control over your APIs how your APIs are used.

NoCode API has multiple such apps where you will be able to generate APIs without code. Below are some of the most popular ones.
- Airtable - Quickly Convert your Airtable datasheet into APIs for your further automation.
- Google Sheets - Use your google sheet as JSON APIs to make websites and lots of stuff.
- Telegram Webhook - Send data into your telegram channel, a group with a simple endpoint.
- Google Analytics - Make a simple endpoint of your website daily. monthly pageviews and user data to make a simple and nice interface about your website analytics.
- Twitter - Make Twitter APIs endpoint as search, user tweets, etc. in a few clicks.
- GitHub - Access your GitHub information without any rate limits.
- Many more at NoCodeAPI Marketplace - https://app.nocodeapi.com/dashboard/marketplace.
Make sure you sign up to our newsletter for more awesome articles and updated on NoCodeAPI and it's use cases, directly in your email.