How to Create Staging Server for React application on AWS EC2 Service


If you are looking to create a simple and affordable staging server for your React application then Amazon EC2 is the solution.
A walkthrough on setting up a production-similar staging server from scratch on Amazon EC2.
Create and Launch EC2 Instance
Go to AWS Management Console by using the following link: console.aws.amazon.com/ec2/v2
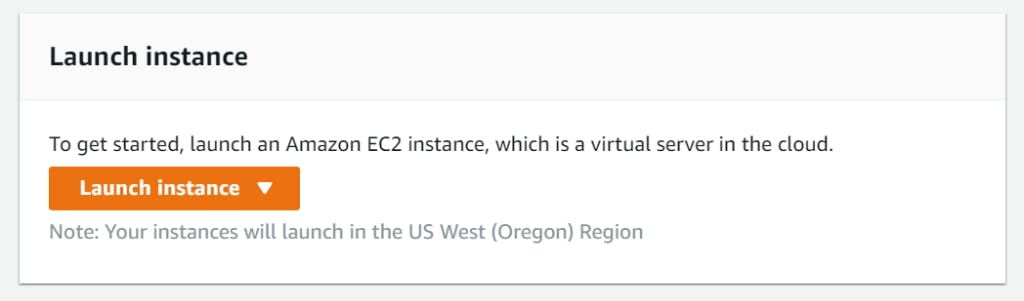
Click on Launch Instance to create a new EC2 Instance
- Choose an Amazon Machine Image (AMI): Here you need to choose on what operating system you want the instance you are launching. We will be using Ubuntu Server 20.04 LTS (HVM), SSD Volume Type - ami-0ca5c3bd5a268e7db (64-bit x86) / ami-0ae8c80279572fa66 (64-bit Arm).

- Choose an Instance Type: Here you need to choose the Instance Type that will add the resources for the instance. We will be using t2.micro, which is available for free-tier. After choosing the instance type click on Next: Configure Instance Details

Configure Instance Details: Lets keep the default settings and move to next screen, click on Next: Add Storage
Add Storage: Again, lets keep the default settings and move to next screen, click on Next: Add Tags
Add Tags: Move to next screen, without adding any tag, click on Next: Configure Security Group
Configure Security Group: Here you need to add Rule for the application. So add HTTP and for source select Anywhere from the dropdown instead of Custom. Once done click on Review and Launch, review the instance details and click on Launch. You can also add Rules afterwards, if required, by heading to Change Security Settings.

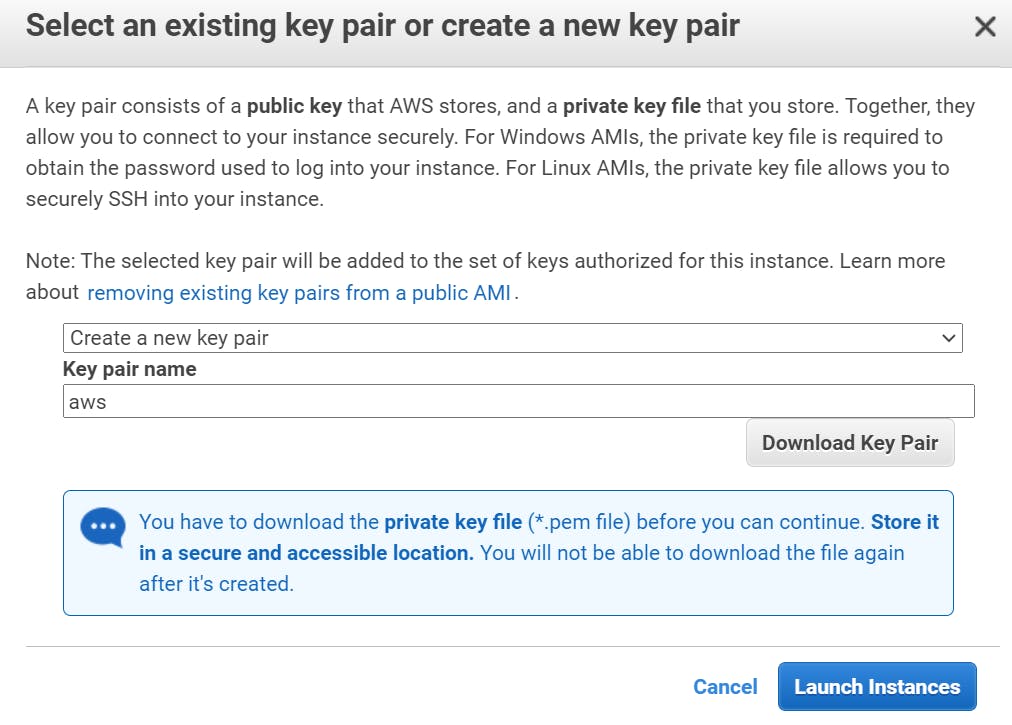
- Select an existing key pair or create a new key pair: Key pair is used to access the instance. Create and download a new key pair, if you don't have one, and keep it in a secure location. Once done, click on Launch Instances.
Beyond this point you will not have the option to download the key pair again, and without the key pair you cannot access your instance.
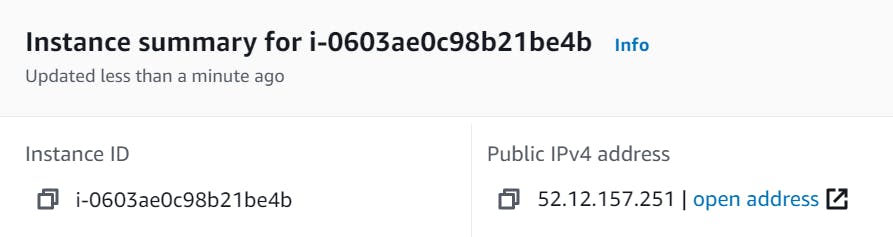
- Launch Status: After successful launch status, click on View Instances. Your new instance will be present in the instance table. Click on the instance ID and save Public IPv4 address, this will be used to connect with the instance.
Connecting to the Instance Through SSH
Launch terminal, where you have saved your key pair.
Type the below command to open .ssh folder. Here, aws.pem is key pair name ( created at the time of instance creation ) with .pem extension and 52.12.157.251 is Public IPv4 address.
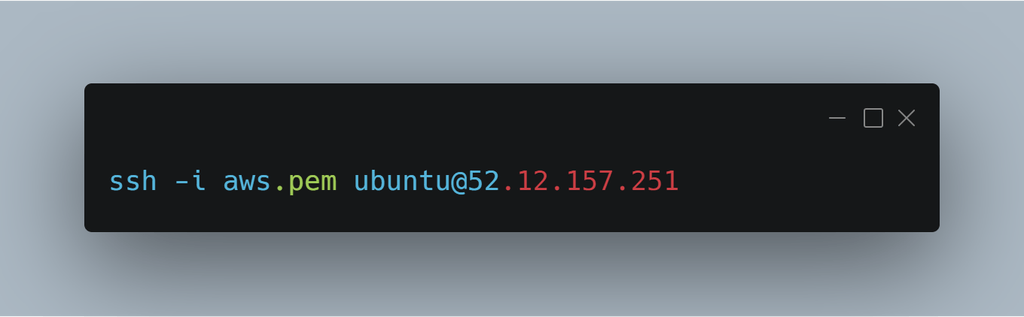
- If you have written the correct command then you will be connected to the ubuntu server.
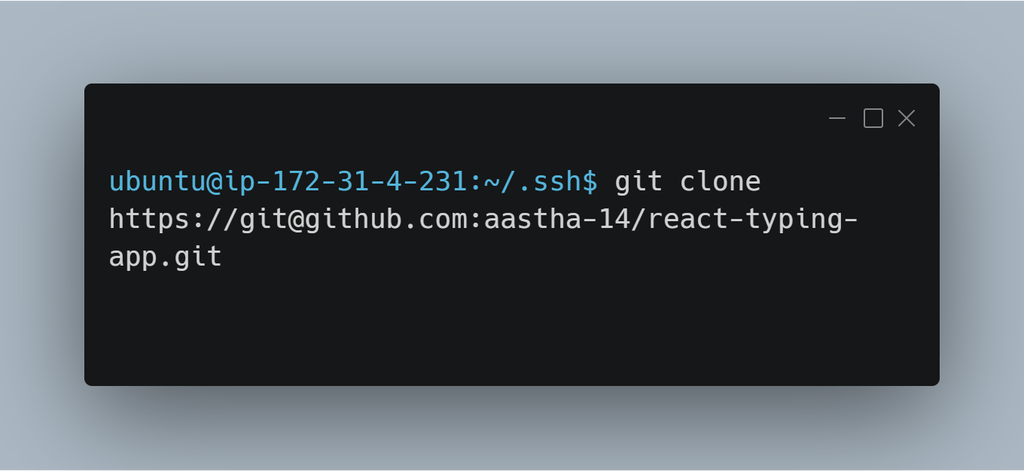
Cloning GitHub repo on ubuntu server
You can clone your own repo or use the repo this: github.com/aastha-14/react-typing-app.git
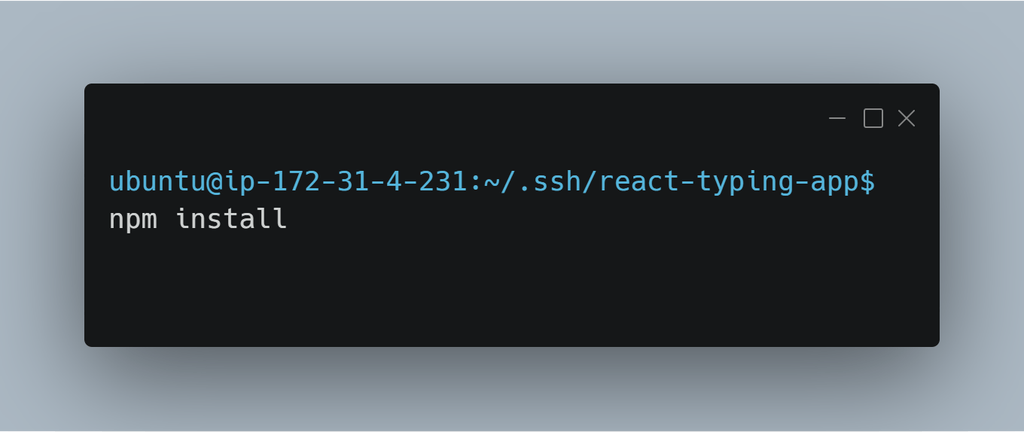
Installing Required Software
- Install node: Copy the curl command from the following link: github.com/nodesource/distributions and paste in the terminal.

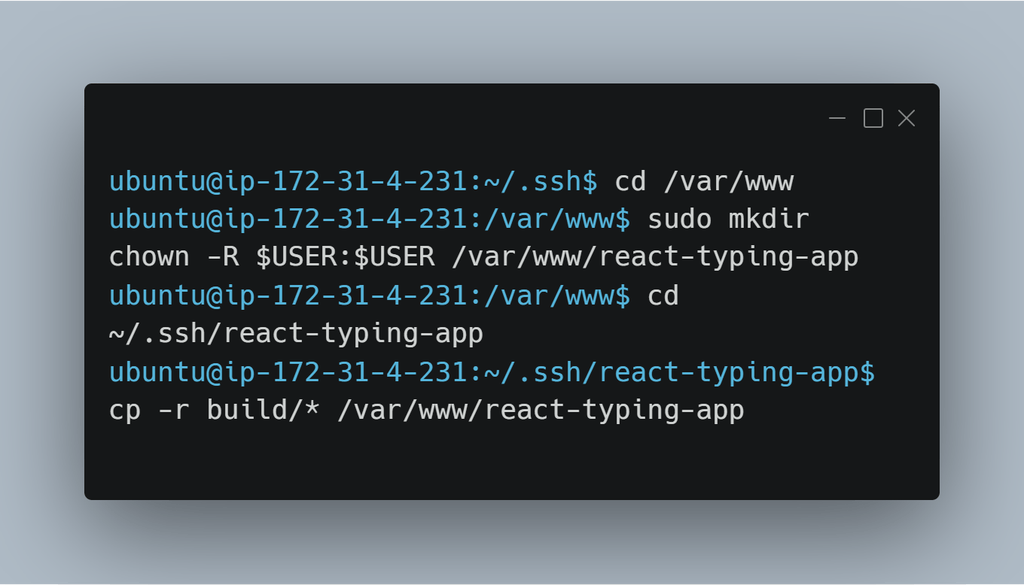
- Run the below commands.


- Edit the nginx configuration

- You will see the below file, here you have to change the root path and location.

- Path and location should be
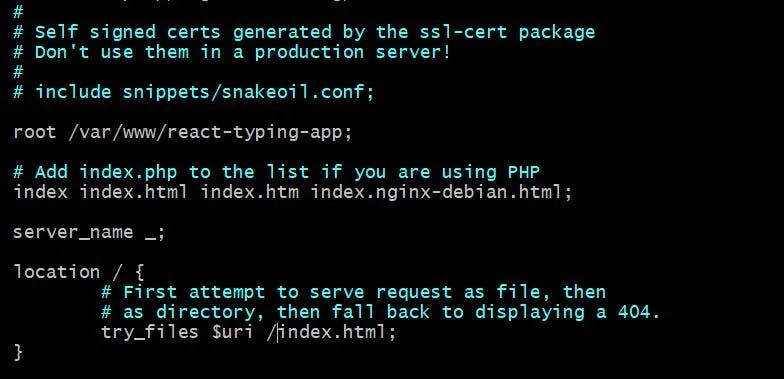
Save the changes and exit the editor.
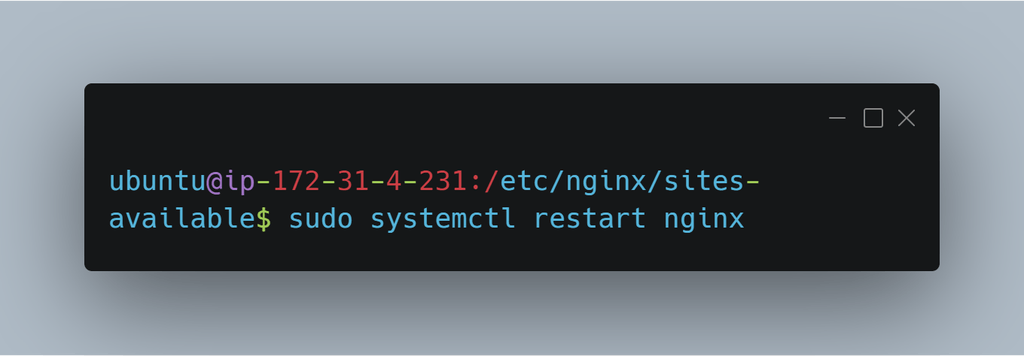
Restart the nginx.
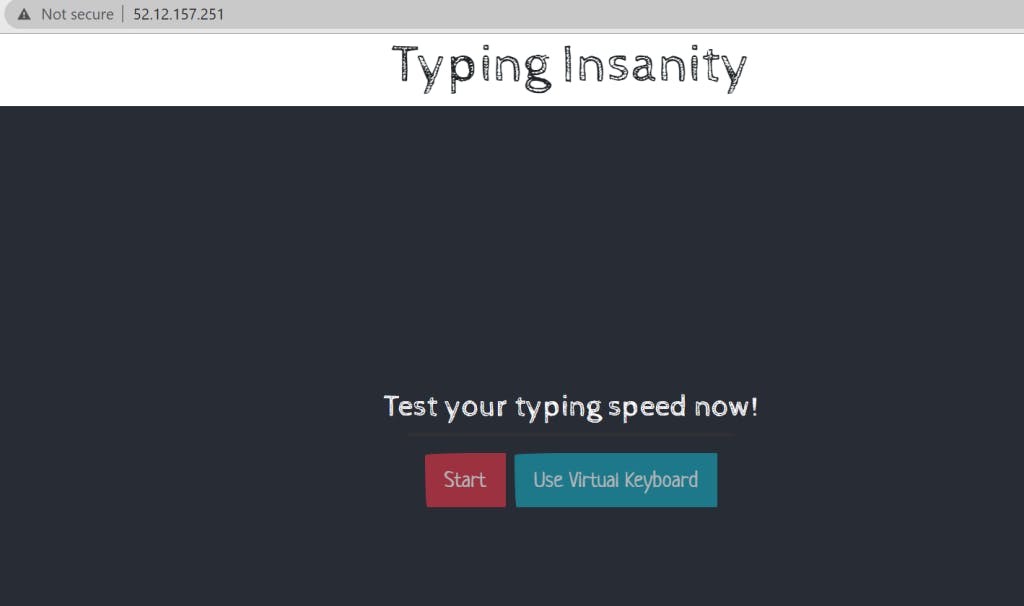
- You can now check the app running on Public IPv4 address.