

Introduction
In this article, I am going to introduce NodeJS with Node Package Module (NPM), step-by-step basic implementation and explanation.
This article will covers the following areas of NodeJS.
Introduction of NodeJS Installation of NodeJS and NPM Node Package Module (NPM) Package.json Basic Example
What is NodeJS
NodeJS is an open-source, cross-platform runtime environment for developing server-side web applications. NodeJS also has an event-driven architecture capable of asynchronous I/O .
NodeJS uses an event-driven, non-blocking I/O model that makes it lightweight and efficient.
Installation of NodeJS and NPM
Installation of NodeJS and NPM is straightforward using the installer package available at NodeJS web site.
Download the installer from NodeJS WebSite .
Run the installer.
Follow the installer steps, agree the license agreement and click the next button.
Restart your system/machine.
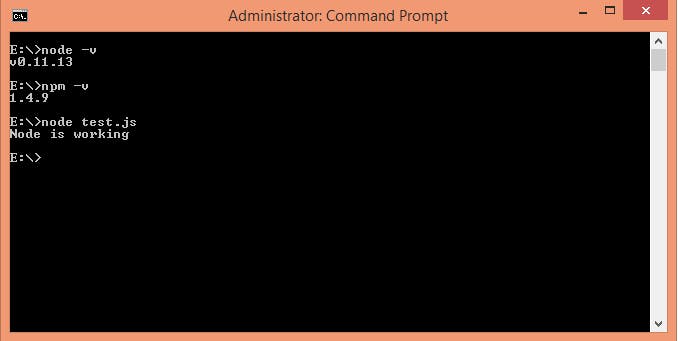
Now, test NodeJS by printing its version using the following command in Command Prompt:
node -v
and test npm by printing its version using command
npm -v
Simple way to test nodeJS work in your system is to create a javascript file which print a message.
Lets create test.js file
console.log("Node is working");
Run the test.js file using Node command > node test.js in command prompt.
if you are done with the installation.
Now let go through our Node Package Module
NPM is the package module which helps javascript developers load dependencies effectively. To load dependencies we just have to run a command in command prompt:
npm install
This command is finding a json file named as package.json in root directory to install all dependencies defined in the file.
Package.json
Package.json looks like:
  "name": "ApplicationName",
  "version": "0.0.1",
  "description": "Application Description",
  "main": "server.js",
  "scripts": {
    "start": "node server.js"
  },
  "repository": {
    "type": "git",
    "url": "github.com/npm/npm.git"
  },
  "dependencies": {
    "express": "~3.0.1",
    "sequelize": "latest",
    "q": "latest",
    "tedious": "latest",
    "angular": "latest",
    "angular-ui-router": "~0.2.11",
    "path": "latest",
    "dat-gui": "latest"
  }
}
The most important things in your package.json are name and version. Those are actually required, and your package won't install without them. The name and version together form an identifier that is assumed to be completely unique. Changes to the package should come along with changes to the version.
Repository
  "repository": {
    "type": "git",
    "url": "github.com/npm/npm.git"
  }
}
Specify the place where your code lives. Through this repository, developers can reach out and contribute to your application. If the git repository is not GitHub, then the npm docs command will be able to find you.
Scripts
 "scripts": {
    "start": "node server.js"
  }
}
NPM provide many useful Scripts like npm install, npm start, npm stop etc.
Some default script values are based on package contents.
"start": "node server.js"
If there is a server.js file in the root of your package, then npm will default the start command to node server.js.
Dependencies
"dependencies": {
    "express": "~3.0.1",
    "sequelize":"latest",
    "q":"latest",
    "tedious":"latest",
    "angular":"latest",
    "angular-ui-router": "~0.2.11",
    "path":"latest",
    "dat-gui":"latest"
  }
}
Dependencies are specified in a simple object that maps a package name to a version range. Version Name must be Version exactly.
If you want to install the latest version of a file, you just have to put latest in place of the version name.
Tilde(~) is used to tell "Approximately equivalent to version".
Let do some Basic Example
Create a server.js javascript file with following code
const http = require('http');

const hostname = '127.0.0.1';
const port = 3000;

const server = http.createServer(function(req, res) {
  res.statusCode = 200;
  res.setHeader('Content-Type', 'text/plain');
  res.end('Hello World\n');
});

server.listen(port, hostname, function() {
  console.log('Server running at http://'+ hostname + ':' + port + '/');
});
As we need http to create an http server we use require('http') and pass it to a variable named http
var http = require('http');
We also need to defined hostname and port number, here we use localHost i.e 127.0.0.1 and port number 3000 and assign this to the variables hostname and port, respectively.
hostname = '127.0.0.1'; var port = 3000;
Next we create the http server using the createServer method.
var server = http.createServer(function(req, res){
res.statusCode = 200;
res.setHeader('Content-Type', 'text/plain');
res.end('Hello World\n');
});
This created the server as well as a response having statusCode: 200, Content-Type header of plain text and and ends with the string Hello World. This is the response that the server can send to browser.
the function has two parameters req and res which is the request from and response to the server, respectively.
In our example we are creating responses.
We created the server, now we have to assign it a hostname and port number.
server.listen(port, hostname, function() {
console.log('Server running at http://'+ hostname + ':' + port + '/');
});
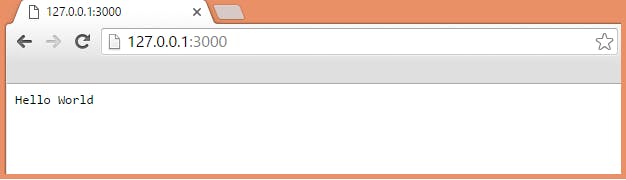
Here, the server listens to localhost on port 3000 and prints "Server running at http://127.0.0.1:3000/" in command prompt.
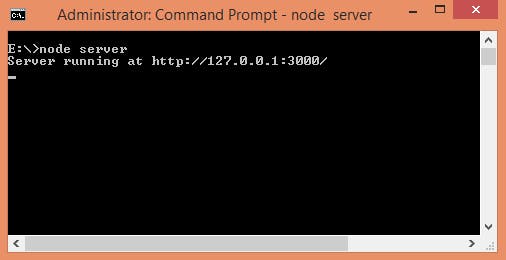
Now Run server.js file un node using command
node server
Open a browser and enter url 127.0.0.1:3000. The browser will display Hello World message on the screen.