How to Install Windows 10 Using a Bootable USB


There are many instances where you might need to reinstall your operating system or get a new one entirely. For example, you’d need to reinstall Windows if you encountered a serious error, your hard drive became damaged or corrupted, or you’re upgrading/downgrading your system.
When planning to reinstall or install a Windows operating system on your PC, you need to have the necessary installation files beforehand. This will allow you to boot and install the system.
How to create a Windows bootable USB with the Media Creation Tool
Before installing Windows using a USB, you need to create the installation media itself. This will be read by your computer once the USB flash drive is connected, allowing it to boot from USB. Below are the steps to create this bootable USB flash drive using the Media Creation Tool issued by Microsoft.
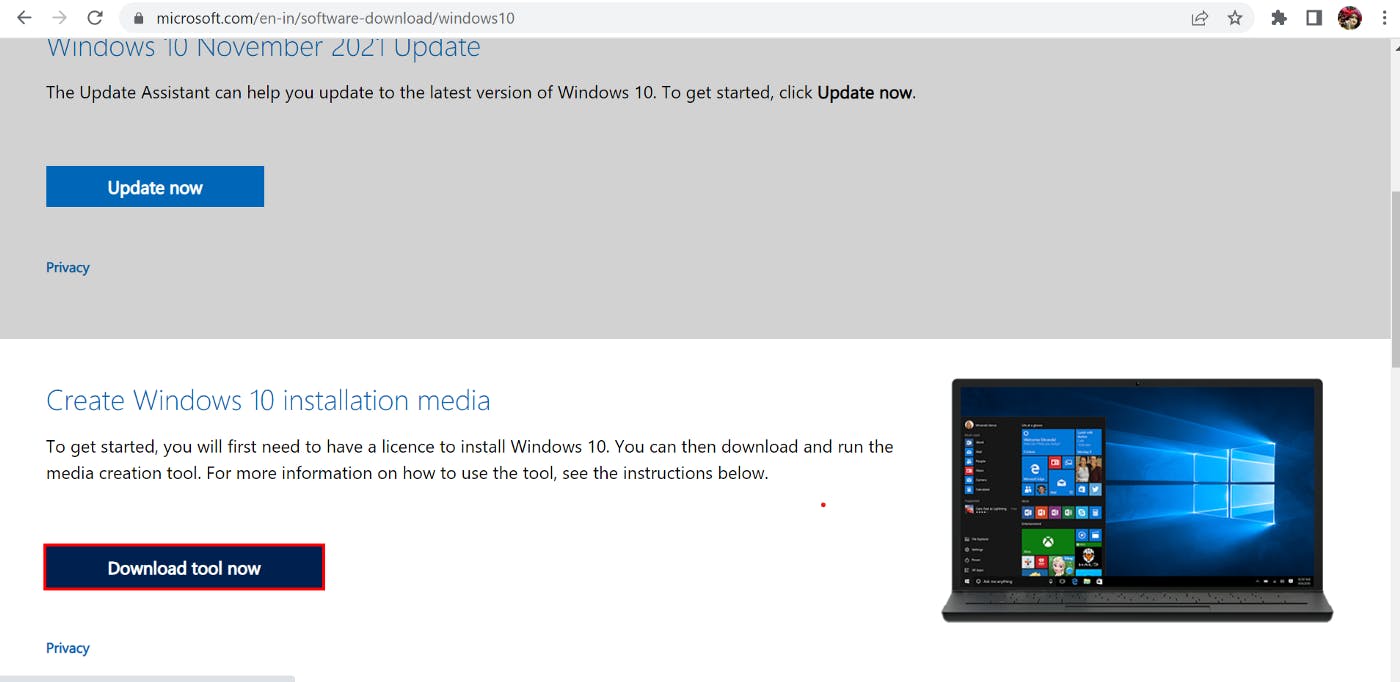
- Download installation media from Microsoft: %[microsoft.com/en-in/software-download/wind…]
- Follow the steps to download the Windows version you want.
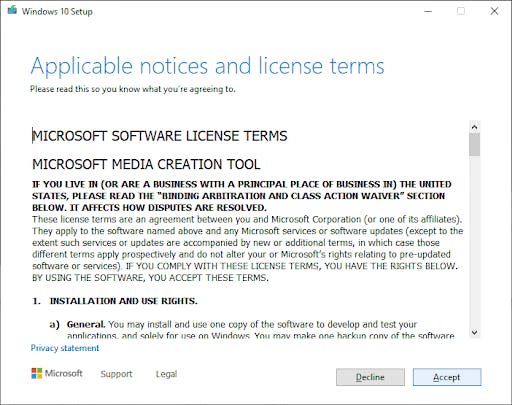
Save the Media Creation Tool to your computer. When the download is finished, launch the file and click Accept when prompted to agree to the software license terms.
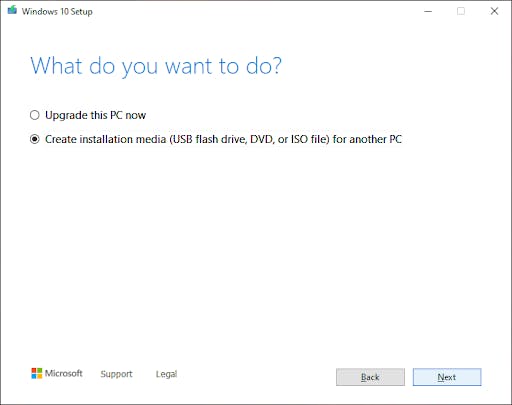
Select Create installation media (USB flash drive, DVD, or ISO file) for another PC and click the Next button.
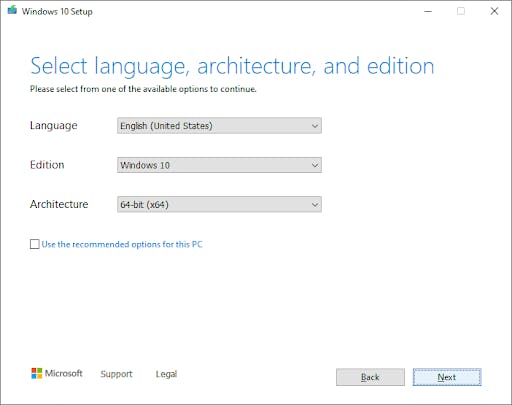
Follow any on-screen instructions to set your preferred language, Windows edition, and System Architecture. If unsure, check the Use the recommended options for this PC option and proceed.
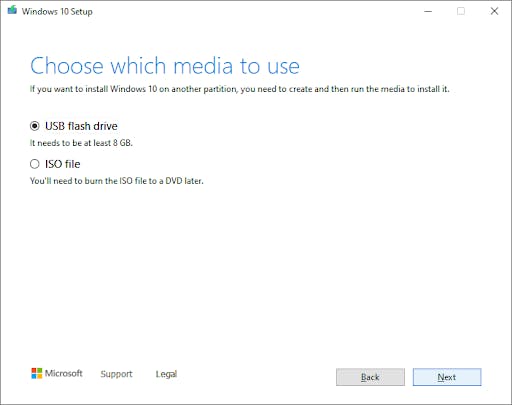
Choose the USB flash drive, and then select your USB from the list. The Windows installation files will start to download to your USB drive.
Download may take a long time depending on your internet connection. Make sure not to disrupt the process until the bootable USB drive is created.
- Plug your USB device into your computer’s USB port, and start up the computer. You may be asked to press a key to boot from the USB.
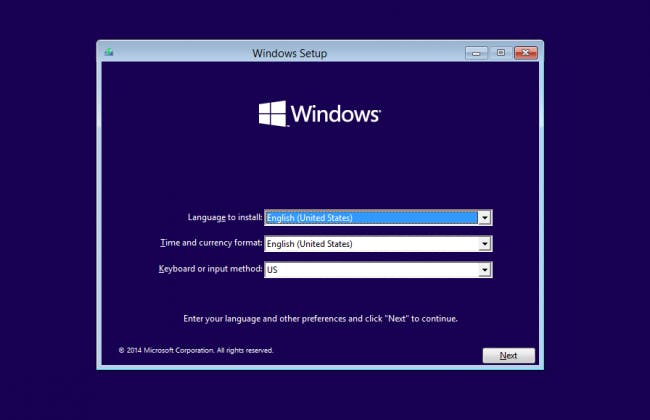
- Choose your preferred language, time zone, currency, and keyboard settings. Once you’re happy with customizing these settings, click Next.
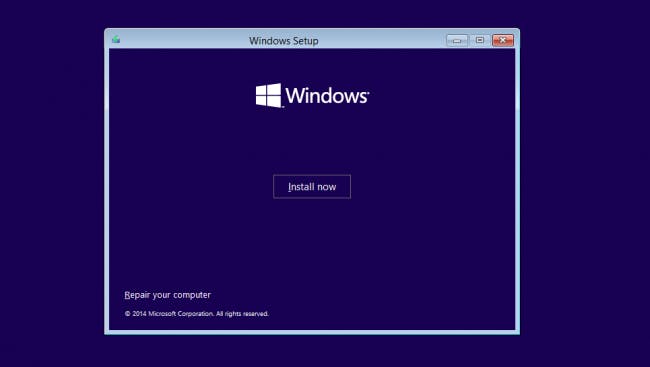
- Click Install Now and select the Windows 10 edition you’ve purchased. Now click Next to start the installation process.

- Choose your installation type. You can either choose Upgrade, which will allow keeping your current files, settings, and apps; or do a fresh clean installation by picking Custom. In this example, we’ll be choosing custom to do a fresh Windows installation.
To install Windows, you need a partition on your hard drive for storing system files; this will become the main C: drive. You can either pick an existing partition and format it, or you can delete everything and create new partitions.
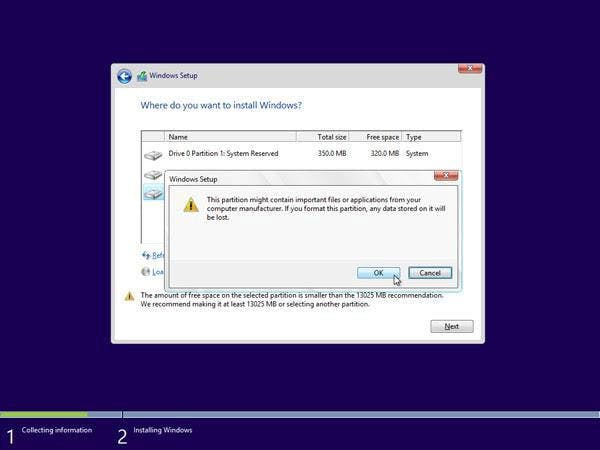
Note: If you haven’t yet backed up your hard drive, you may want to stop now, back everything up, and start over. Once you’ve deleted a partition, you won’t be able to recover the data previously stored on it.
- You can either use one of the existing partitions on your hard drive by formatting it or you can delete the ones there and create new ones from fresh instead:
- To use one of the existing partitions, select it, and click Format.
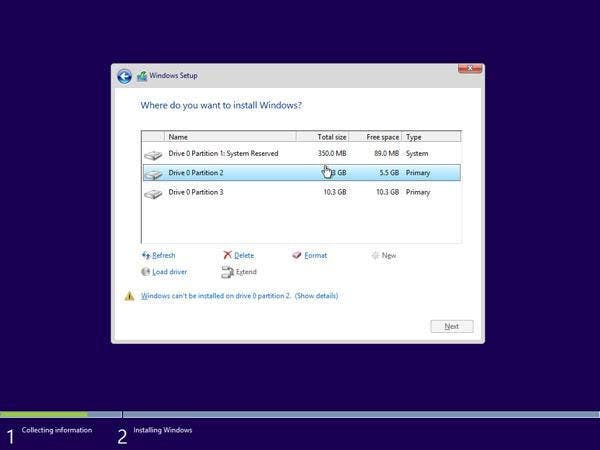
To delete the existing partitions, select each one and click Delete, then OK.
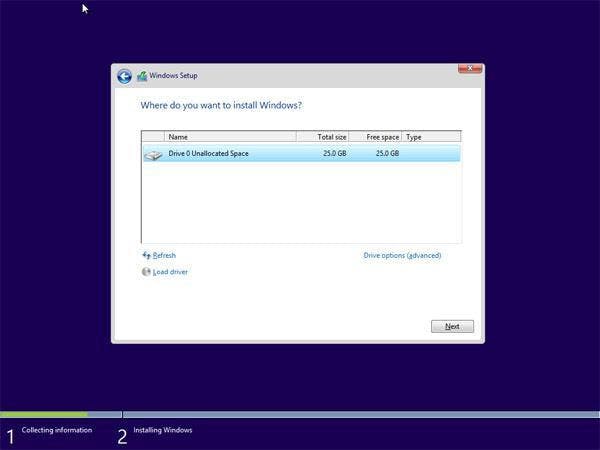
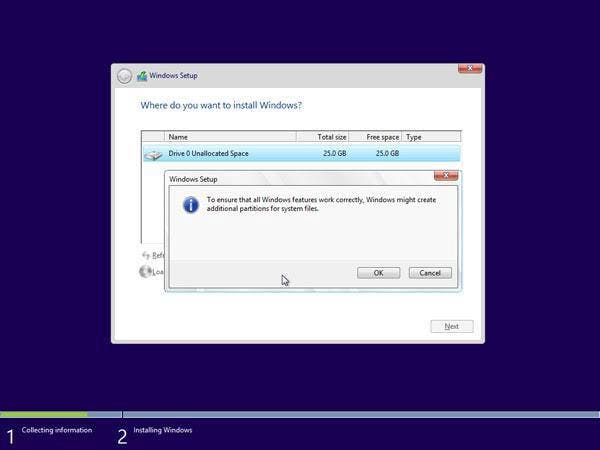
- If you’ve deleted all the existing partitions, your hard drive’s space will be unallocated, and you’ll need to create new partitions. If you just formatted an existing partition, then skip to Step 7 now. To create new partitions:
Click Drive options (advanced).
Now click New and choose the size for your new partition, then click Next.
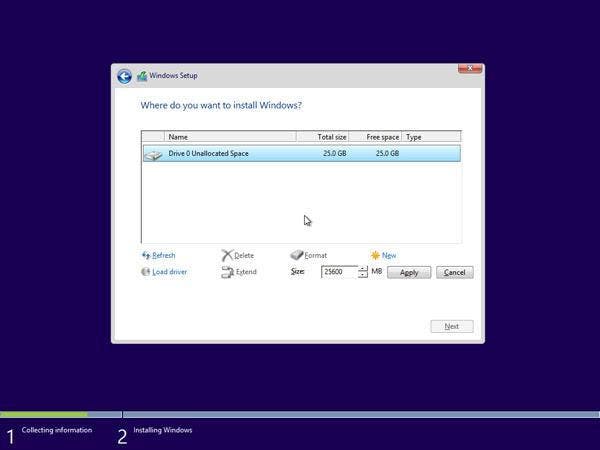
Windows will now create a new partition for storing system files. Click OK to accept.
Repeat this process if you wish to create more partitions. Once you’ve finished creating all the partitions you want, format each one except for the partition you want to store your Windows system files on. Select the partitions one by one and click Format, then OK when prompted.
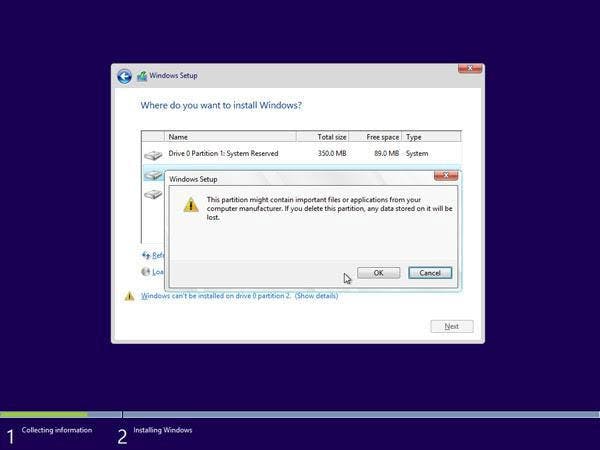
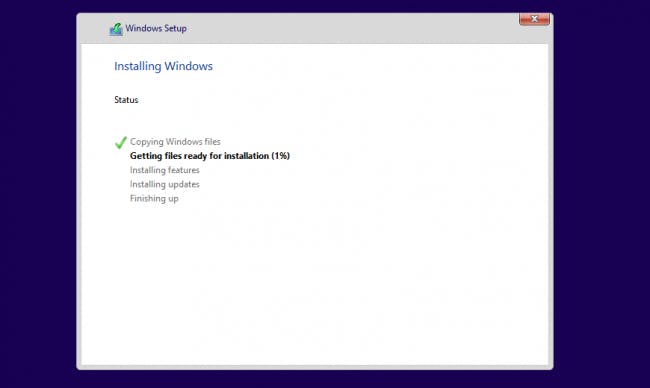
- Now select the partition where you want to install Windows and click Next. The Windows 10 installation will begin. Your computer may reboot a few times during the process. This is normal.
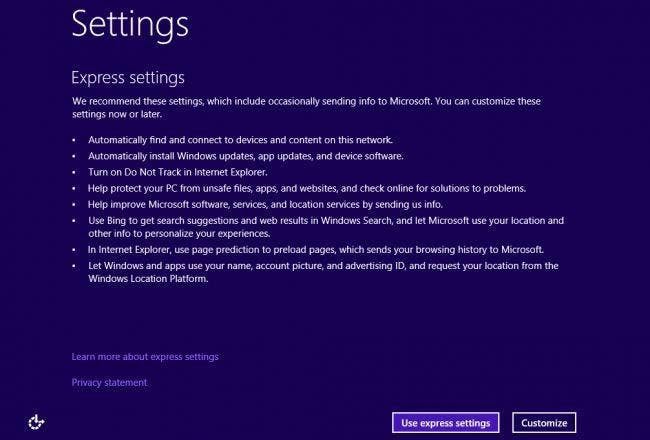
- After the installation is complete, your computer will automatically restart one last time. When it starts up again for the first time, you’ll be able to choose more of your settings, or you use express settings recommended by Microsoft.
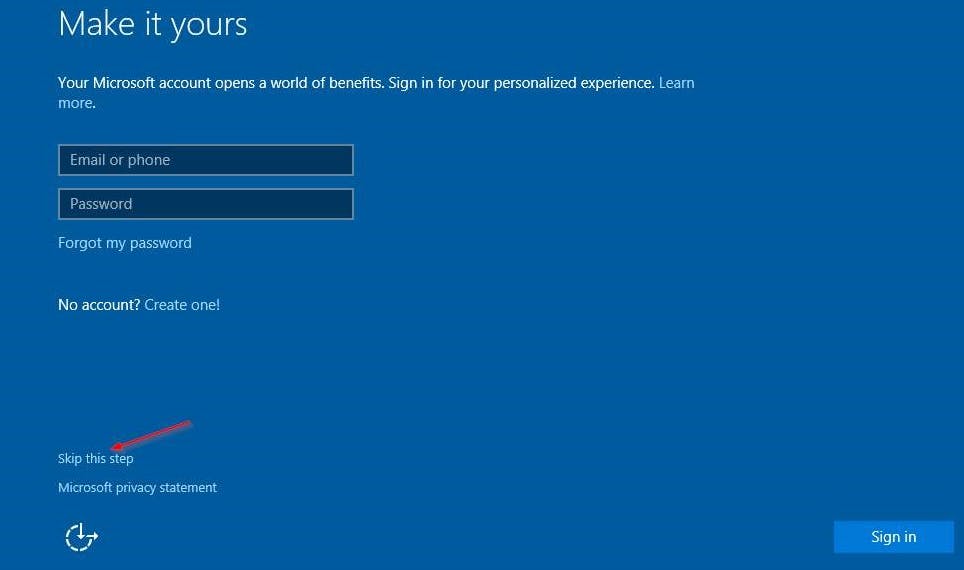
- Finally, sign in to your Microsoft account to use some of the new features with Windows 10 such as password recovery, and to access One Drive. If you don’t want to sign in with your Microsoft account, click Skip this step and follow the instructions to create a local user account instead.