

How to keep track of bugs by Integrating Firebase Crashlytics in Flutter App


I'm excited to write about this topic because its an area where all mobile app developers spend much time on.
As an app developer, building and deploying apps on the Google play store or Apple store does not mean that you have completed the mobile app development cycle.
The mobile app development cycle involves keeping track of app performance, crash report and fixing stability issues.
That is why I'm sharing this article so that you will learn how to keep track of bugs in your mobile app.
At the end of this article, you will learn the simplest method on how to integrate Firebase Crashlytics in your Flutter apps.
As a bonus, you will also learn the following:
How to create a new project in Firebase.
How to configure your app to use Firebase.
How to integrate Firebase Crashlytics in your Flutter apps.
A quick definition for you
Firebase Crashlytics is a lightweight, realtime crash reporting solution that helps you track, prioritize, and fix stability issues that erode app quality, in realtime.
To integrate firebase Crashlytics in your flutter app, you need to follow these simple steps below:
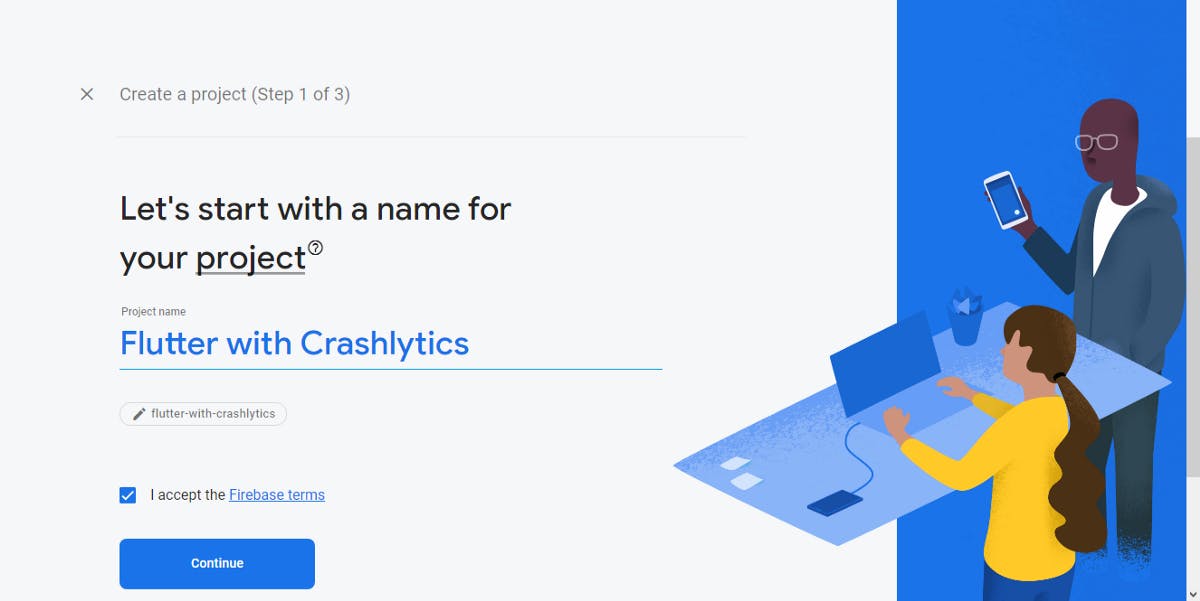
Step 1: Create a new project in Firebase.
To do this, click the Firebase Console.
Enter a project name, accept the Firebase terms and click on Continue. (See image below)
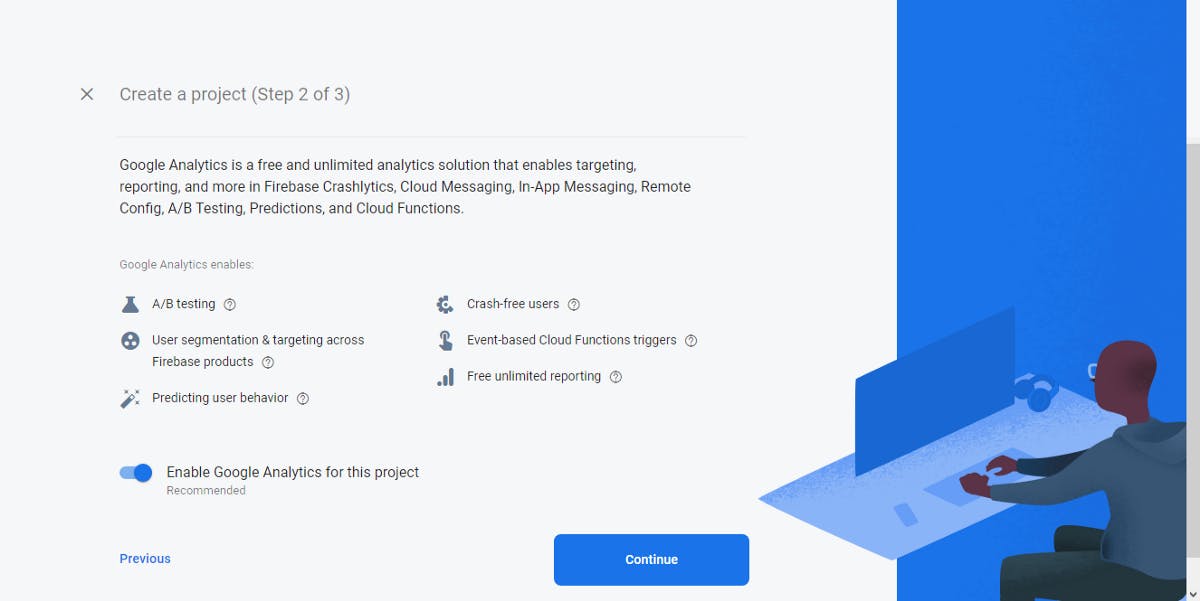
Enable Google Analytics, click on Continue to move to the next page.
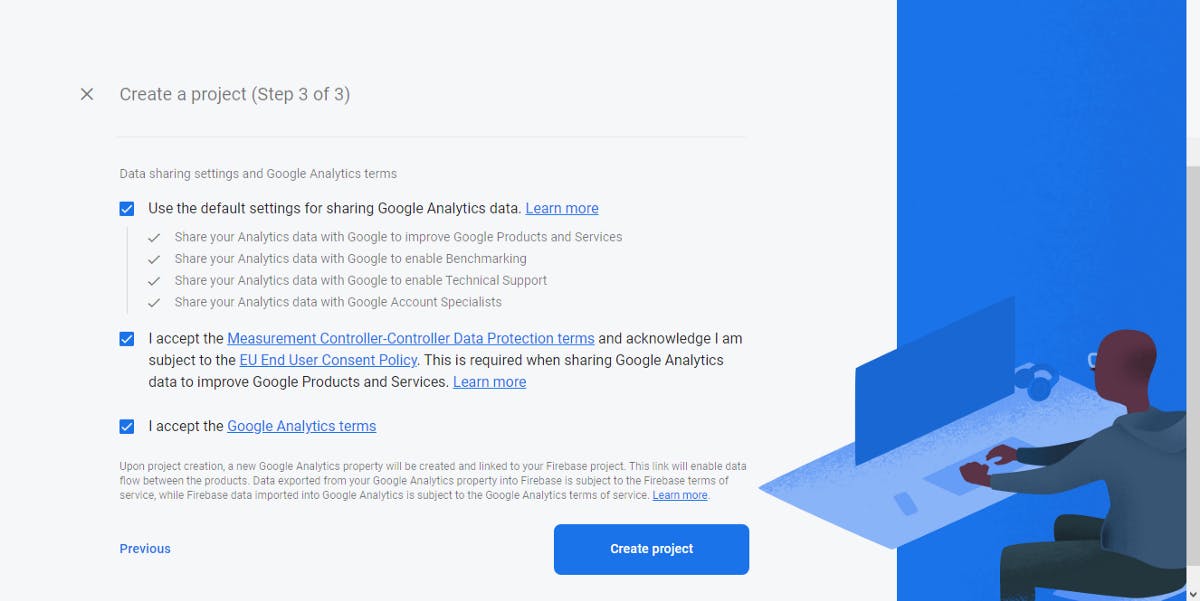
Review and accept the terms and conditions.
Click "Create project" to create a new firebase project.
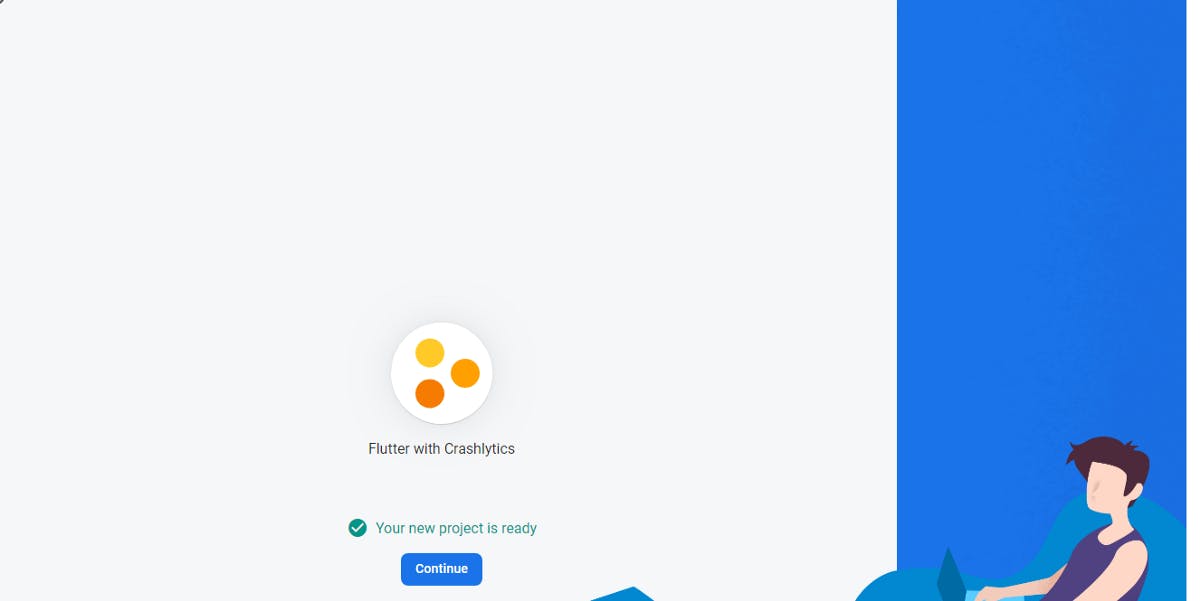
After the project is created successfully, Firebase will show a prompt stating that your new project is ready.
Click on Continue to complete the flow.
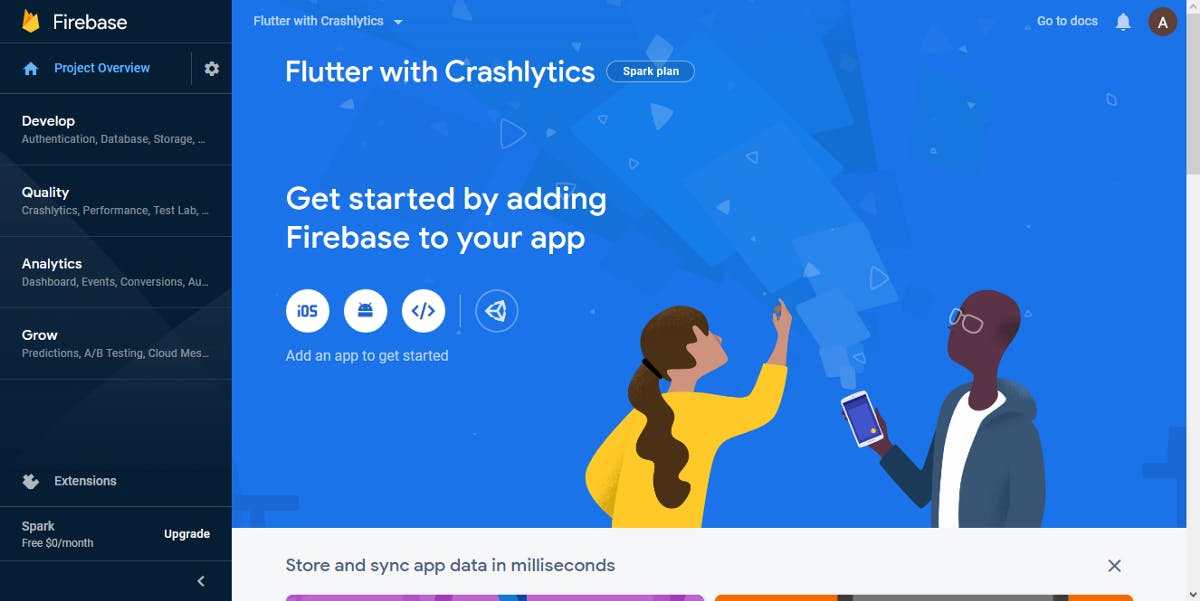
You will be redirected to your project homepage.
Congratulations on your first step!!!
Step 2: Configure your Android app to use Firebase.
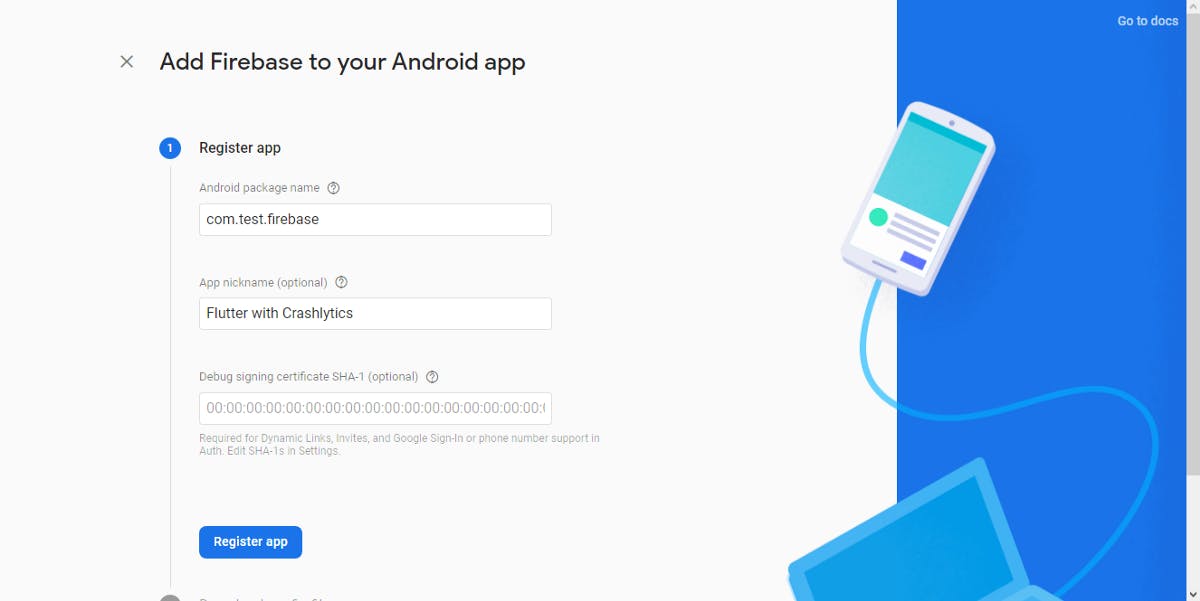
In the "Add an app to get started" section, click on Android Icon to add an Android app to Firebase. (See screenshot below)

Enter your Android package name and App nickname.
Click on Register App.
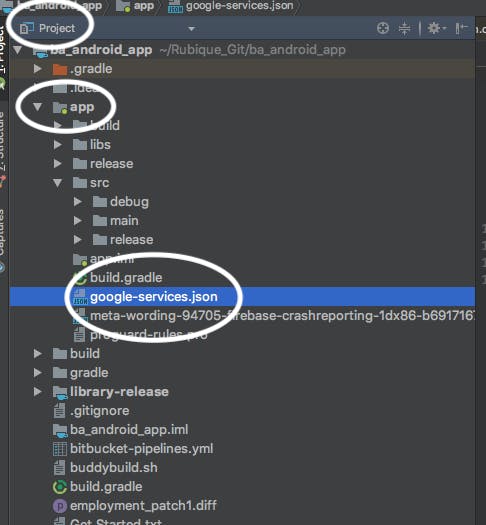
(Please note: you can find your app package name by opening your android/app/build.gradle files.)
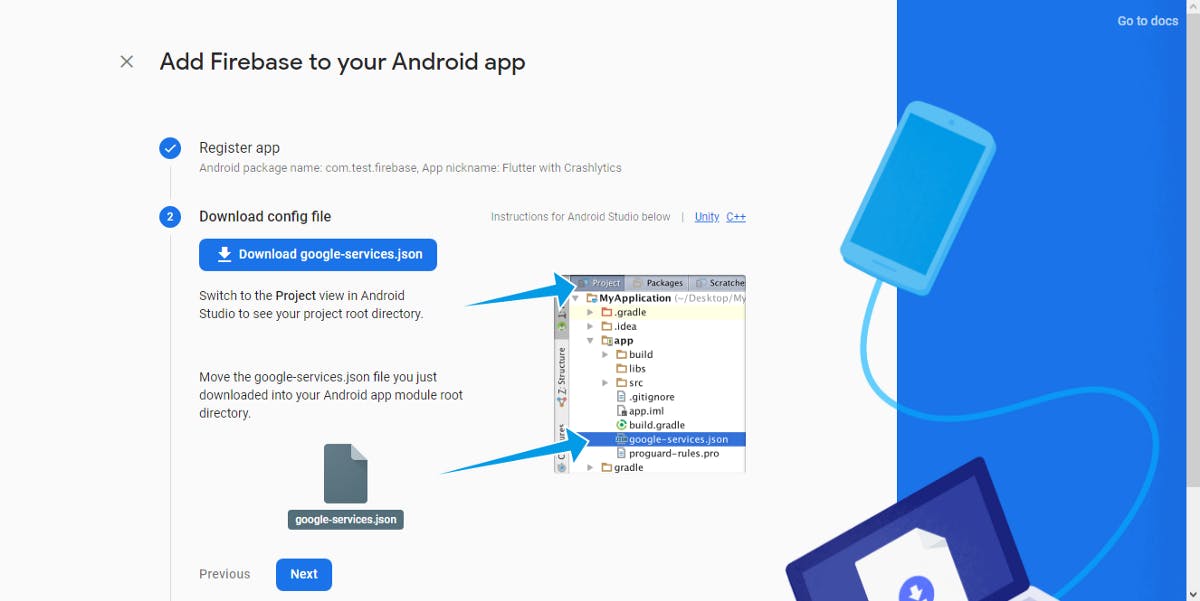
Download the google-services.json file & place it in your project's app root directory.
Click on the "Next" button to move to the next page.
Open up android/build.gradle and modify it to include the following:
buildscript {
  repositories {
    // Check that you have the following line (if not, add it):
    google()  // Google's Maven repository
  }
  dependencies {
    ...
    // Add this line
    classpath 'com.google.gms:google-services:4.3.3'
  }
}
allprojects {
  ...
  repositories {
    // Check that you have the following line (if not, add it):
    google()  // Google's Maven repository
    ...
  }
}
Modify your android/app/build.gradle files to use the plugin.
apply plugin: 'com.android.application'
// Add this line
apply plugin: 'com.google.gms.google-services'
dependencies {
  // add the Firebase SDK for Google Analytics
  implementation 'com.google.firebase:firebase-analytics:17.2.2'
  // add SDKs for any other desired Firebase products
  // firebase.google.com/docs/android/setup#ava…
}
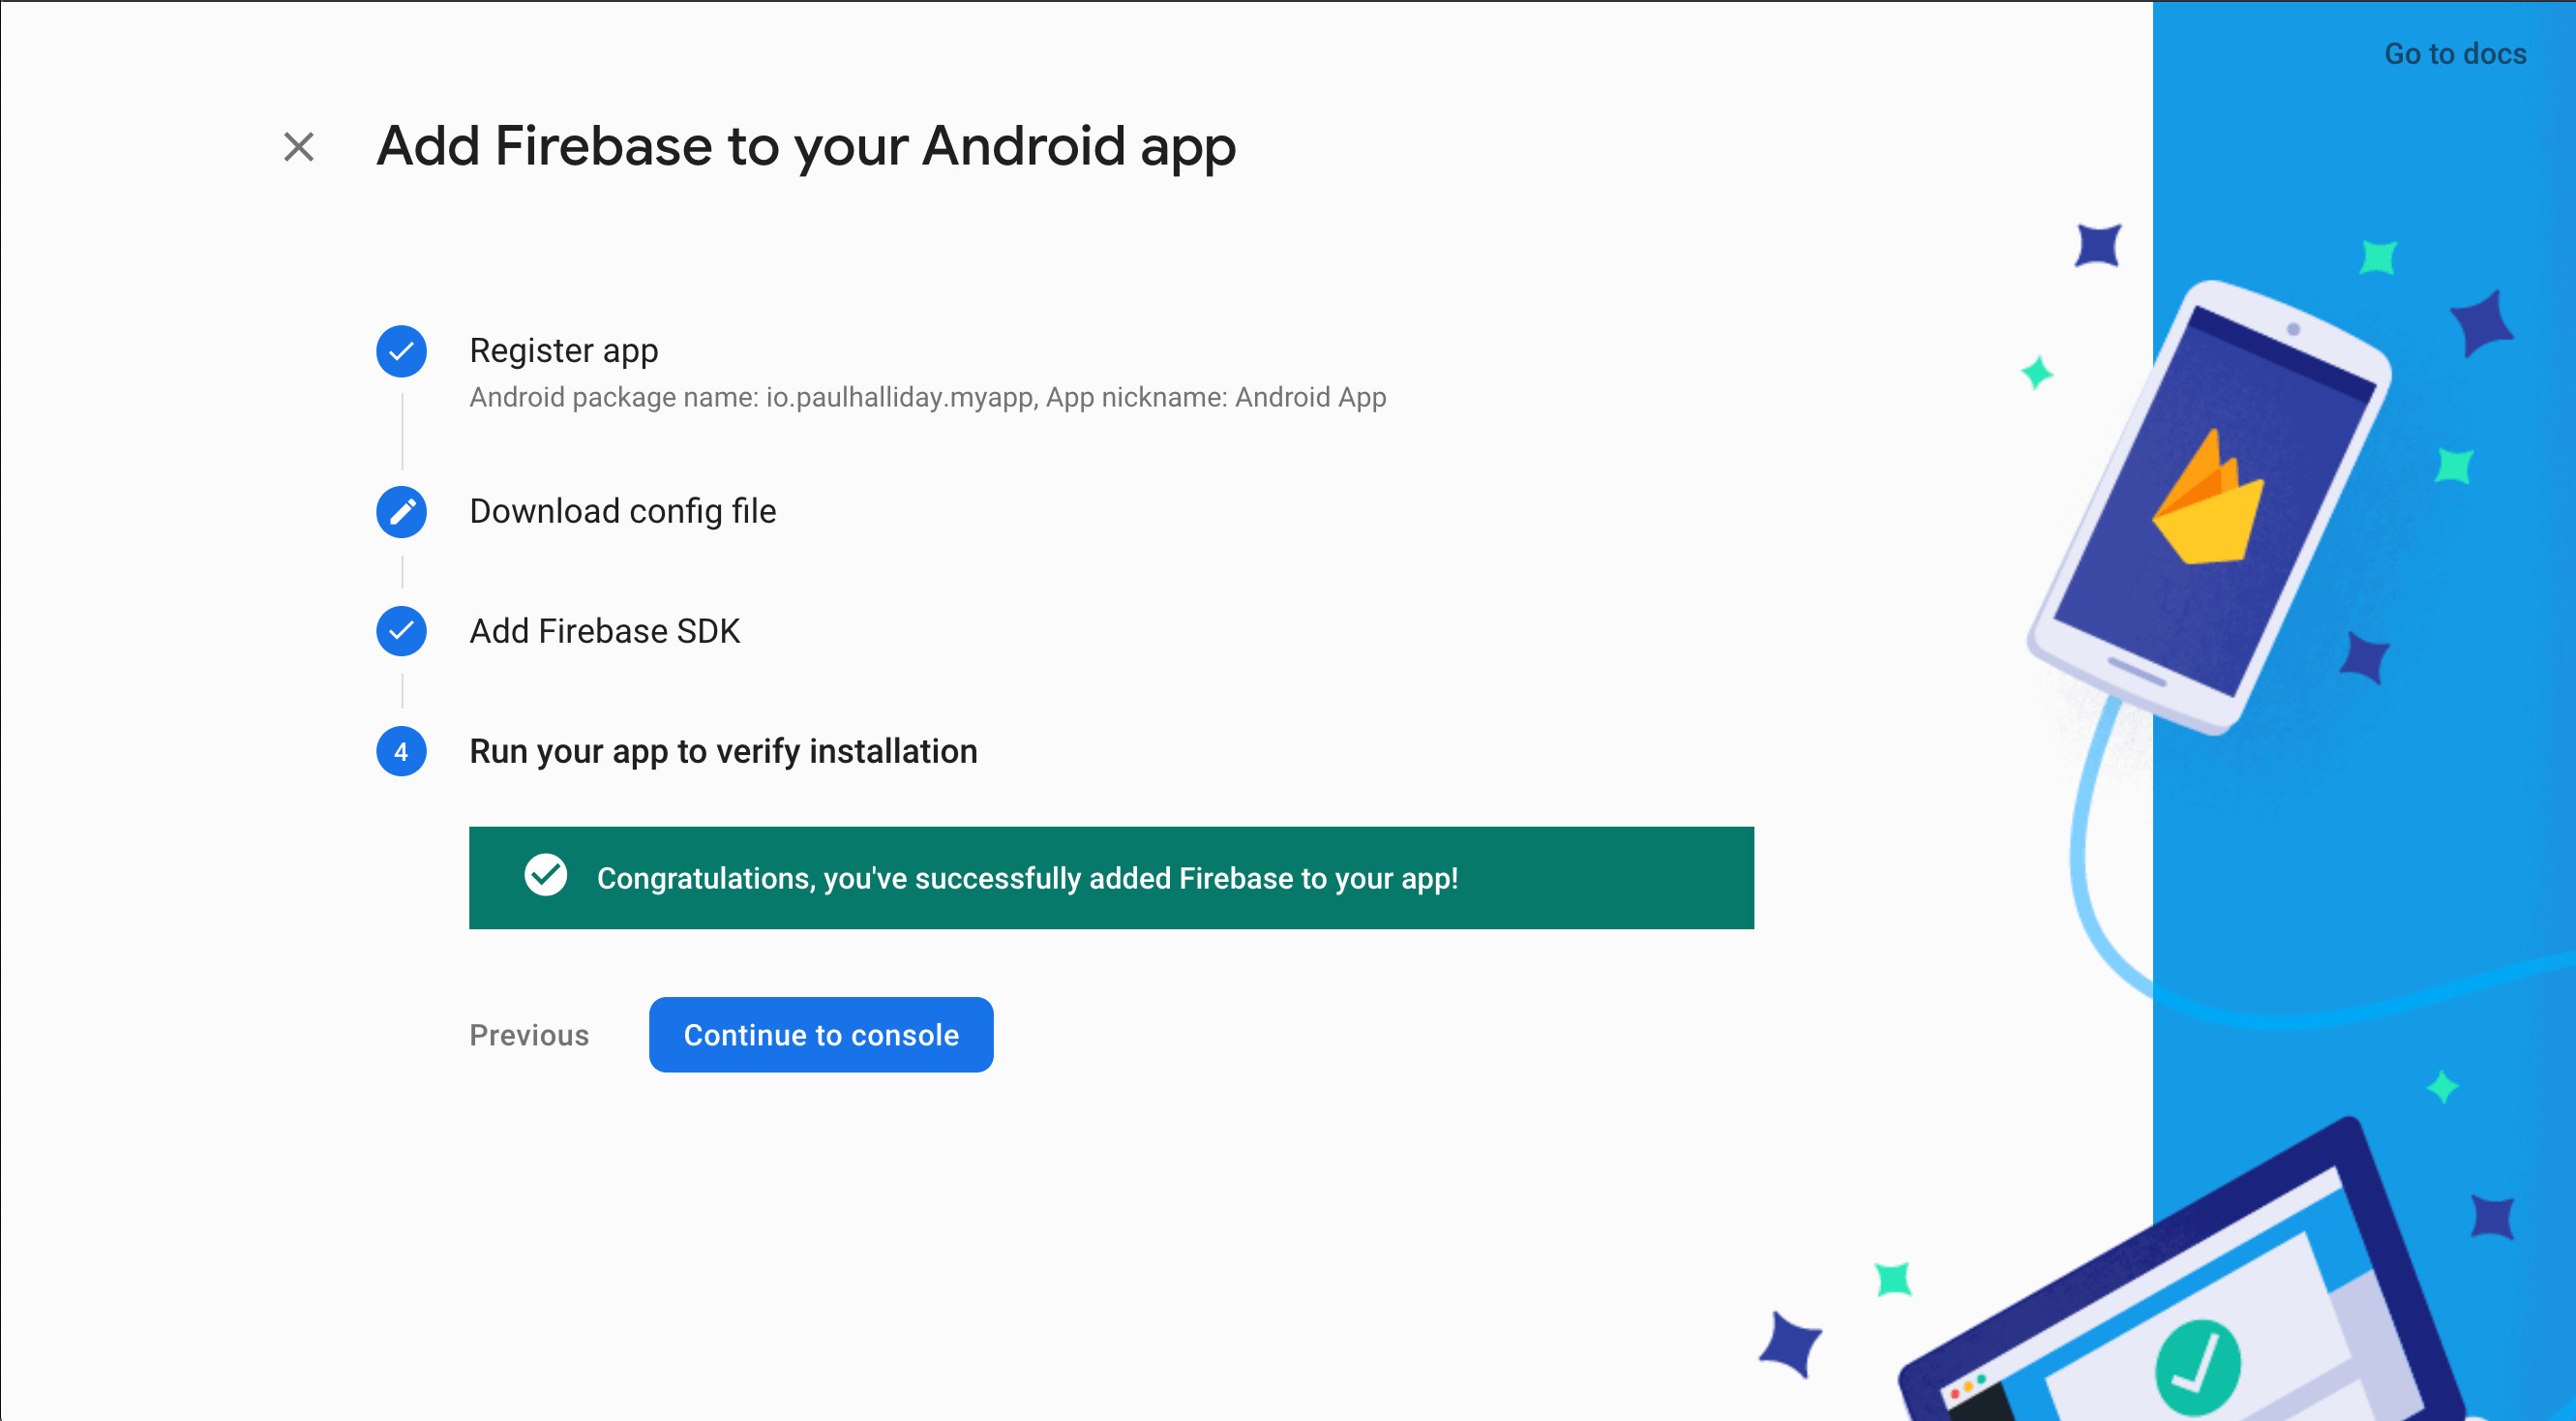
Click on the Next button to complete the remaining steps.
This is the image you receive (if you followed the steps)
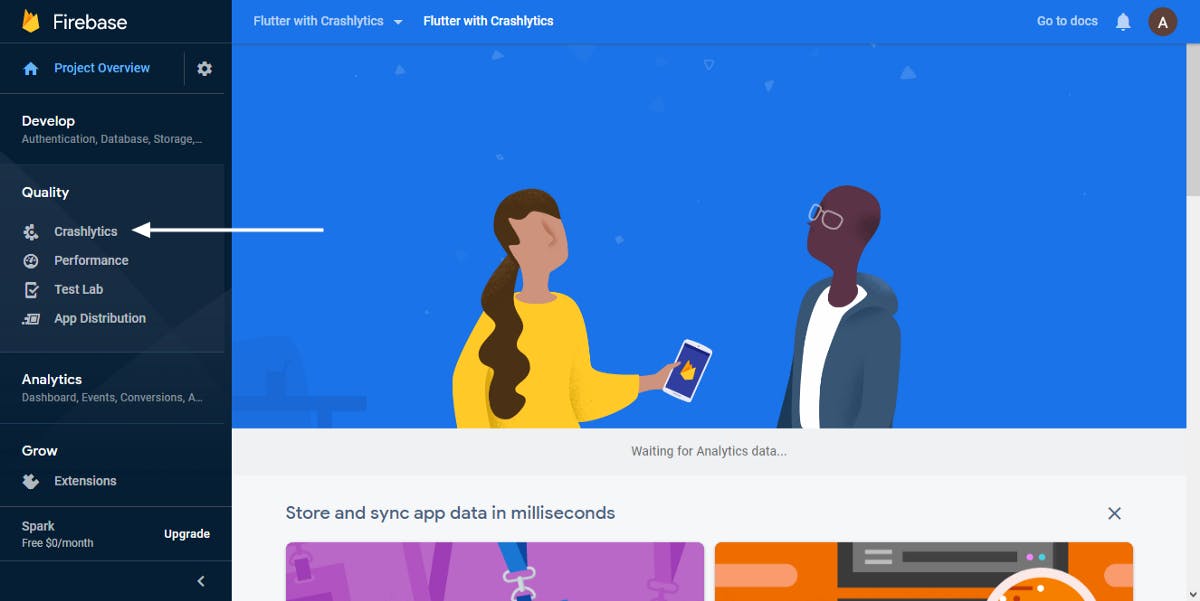
Click on "Continue to console" to go back to your project homepage. In the sidebar, click on "Quality" and select "Crashlytics".
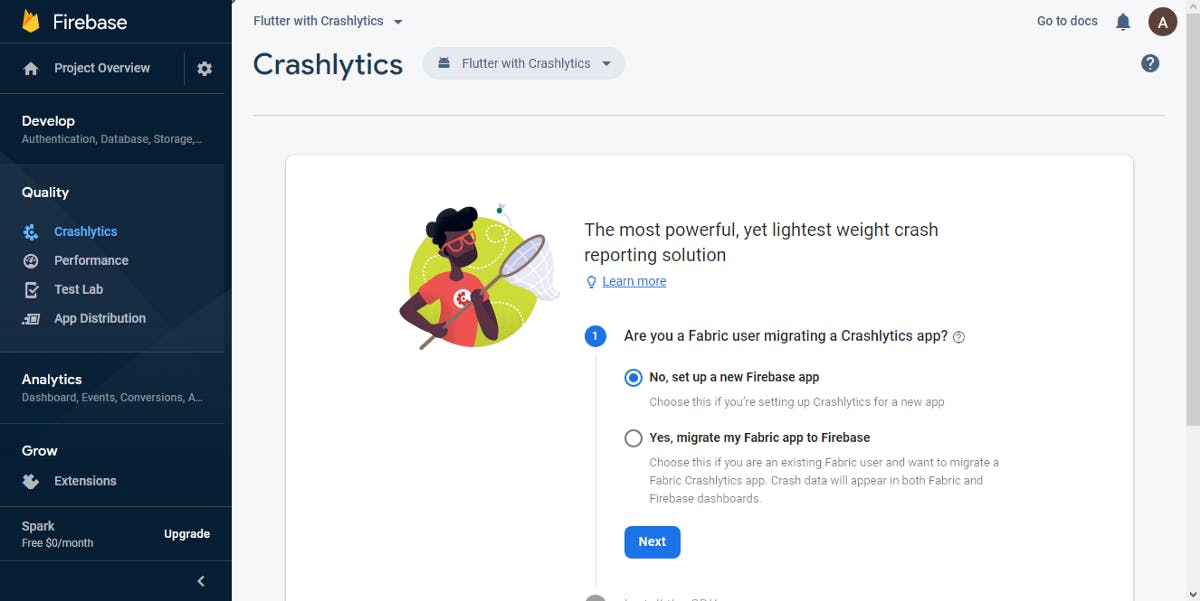
If you don't have an app on Fabric or you're setting up Crashlytics for a new app, select No, set up a new Firebase app.
But if you are an existing Fabric user and want to migrate a Fabric Crashlytics app, select Yes, migrate my Fabric app to Firebase and click on Next.
The next step will be to install the Firebase Crashlytics SDK, you can learn more about the Firebase Crashlytics SDK by check out the documentation.

Open up android/build.gradle and add the Crashlytics Gradle dependency:
buildscript {
  repositories {
    // Check that you have the following line (if not, add it):
    google()  // Google's Maven repository
  }
  dependencies {
    ...
    // Add this line
    classpath 'com.google.gms:google-services:4.3.3'
    // Add the Firebase Crashlytics Gradle plugin.
    classpath 'com.google.firebase:firebase-crashlytics-gradle:2.0.0-beta02'
  }
}
allprojects {
  ...
  repositories {
    // Check that you have the following line (if not, add it):
    google()  // Google's Maven repository
    ...
  }
}
In your android/app/build.gradle files, add the Firebase Crashlytics dependency:
apply plugin: 'com.android.application'
// Add the Firebase Crashlytics plugin.
apply plugin: 'com.google.firebase.crashlytics'
Finally, add the Firebase Crashlytics SDK, in your android/app/build.gradle files.
dependencies {
  // Add the Firebase Crashlytics SDK.
  implementation 'com.google.firebase:firebase-crashlytics:17.0.0-beta01'
}
Firebase Crashlytics offers crash reporting for apps built using the Android Native Development Kit (NDK). If you want your app to detect and report native crashes.
Open your android/app/build.gradle files and add the Android Native Development Kit (NDK)
android {
    // ...
    buildTypes {
        release {
            /* Add the firebaseCrashlytics extension (by default,
            * it's disabled to improve build speeds) and set
            * nativeSymbolUploadEnabled to true. */
            firebaseCrashlytics {
                nativeSymbolUploadEnabled true
            }
        }
    }
}
"nativeSymbolUploadEnabled" allows your app to process and upload native symbols to Crashlytics so you can view properly-symbolized stack traces in the Crashlytics dashboard.
Step 3: Integrate Firebase Crashlytics in your Flutter apps.
Install the firebase_crashlytics plugin in your flutter project.
dependencies:
  firebase_crashlytics: ^0.1.3
Add the following imports to your Dart code:
import 'package:firebase_crashlytics/firebase_crashlytics.dart';
Initialize Firebase Crashlytics in your flutter app
void main() {

  Crashlytics.instance.enableInDevMode = true;
  // Pass all uncaught errors from the framework to Crashlytics.
  FlutterError.onError = Crashlytics.instance.recordFlutterError;

  runApp(MyApp());
}
Connect your Emulator or physical Android device to test the application.
(Note: if you set Crashlytics.instance.enableInDevMode = true, you will get reports while in debug mode but if it's set to false you will not get reports while in debug mode )
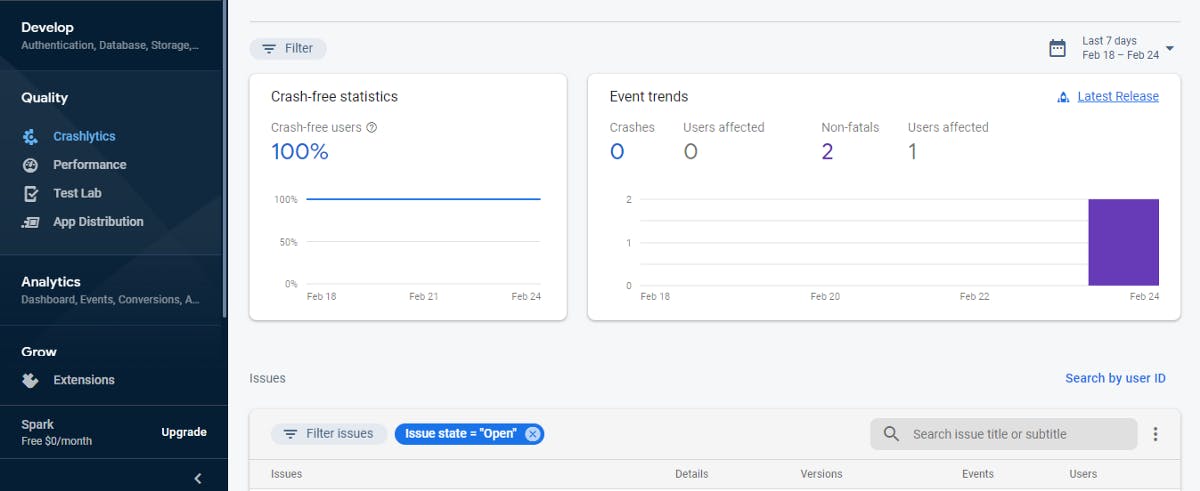
If you followed the steps correctly, you should see the Firebase Crashlytics image below:
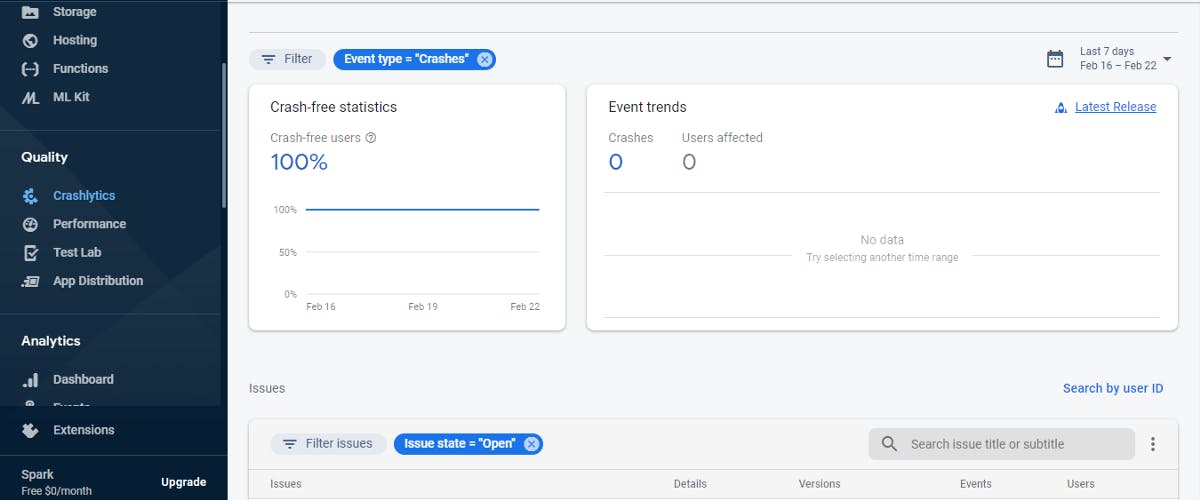
(Note: Firebase_crashlytics plugin only reports non-fatal exceptions, you can confirm that in the console by removing the default Event type = "Crashes" filter.)
Congratulation on integrating Firebase Crashlytics on your flutter app.
If you found this article helpful and educating, please hit the like button 👏 as many times as you can to show your support!
To get my latest updates and happenings from the world of Flutter, and mobile app development, follow me on Twitter, Facebook, Linkedin, and Github.
My name is Promise Amadi. I am a writer and Flutter Developer. I work with startups across the globe to build mobile solutions using Flutter.
I'm open to collaboration on Flutter-based projects. Send an e-mail to amadipromise07@gmail.com.