


I have been working on personal projects to learn & practice my skills.
The first real-world project I worked on in my Internship, I did not have to worry about deployment, as those things were taken care of by the senior engineers.
However, when I deployed my React app on Netlify, it didn't work as expected. I realized Netlify can't get access to the .env.local file as it's on my machine and not on Github.
In this article, we will learn how to use Firebase config in your React app when deploying on Netlify.
When I started using Firebase, in the beginning, I would use the Firebase config files like this:
// DO NOT USE IT LIKE THIS
// firebase.js
import Firebase from "firebase/app";
import "firebase/firestore";
import "firebase/auth";

const config = {
  apiKey: "asdfghkkl1v5KIPsMXfjVqiMhuu6rkYKsZ-Lk8",
  authDomain: "username-myapp.firebaseapp.com",
  projectId: "username-myapp",
  storageBucket: "username-myapp.appspot.com",
  messagingSenderId: "12345650860363",
  appId: "1:12345650860363:web:7ry374jee66b5a39d62ce",
};

const firebase = Firebase.initializeApp(config);
const { FieldValue } = Firebase.firestore;
const auth = firebase.auth();

export { firebase, FieldValue, auth };
To use it as an environment variable, create a .env.local in the root folder of your app.
Now write your variable name starting with REACT_APP_FIREBASE_.
So for apiKey, write REACT_APP_FIREBASE_API_KEY equal to the value.
Note: The values are not in quotes in the .env.local file.
REACT_APP_FIREBASE_API_KEY = asdfghkkl1v5KIPsMXfjVqiMhuu6rkYKsZ-Lk8
REACT_APP_FIREBASE_AUTH_DOMAIN = username-myapp.firebaseapp.com
REACT_APP_FIREBASE_PROJECT_ID = username-myapp
REACT_APP_FIREBASE_STORAGE_BUCKET = username-myapp.appspot.com
REACT_APP_FIREBASE_MESSAGING_SENDER_ID = 12345650860363
REACT_APP_FIREBASE_APP_ID = 1:12345650860363:web:7ry374jee66b5a39d62ce
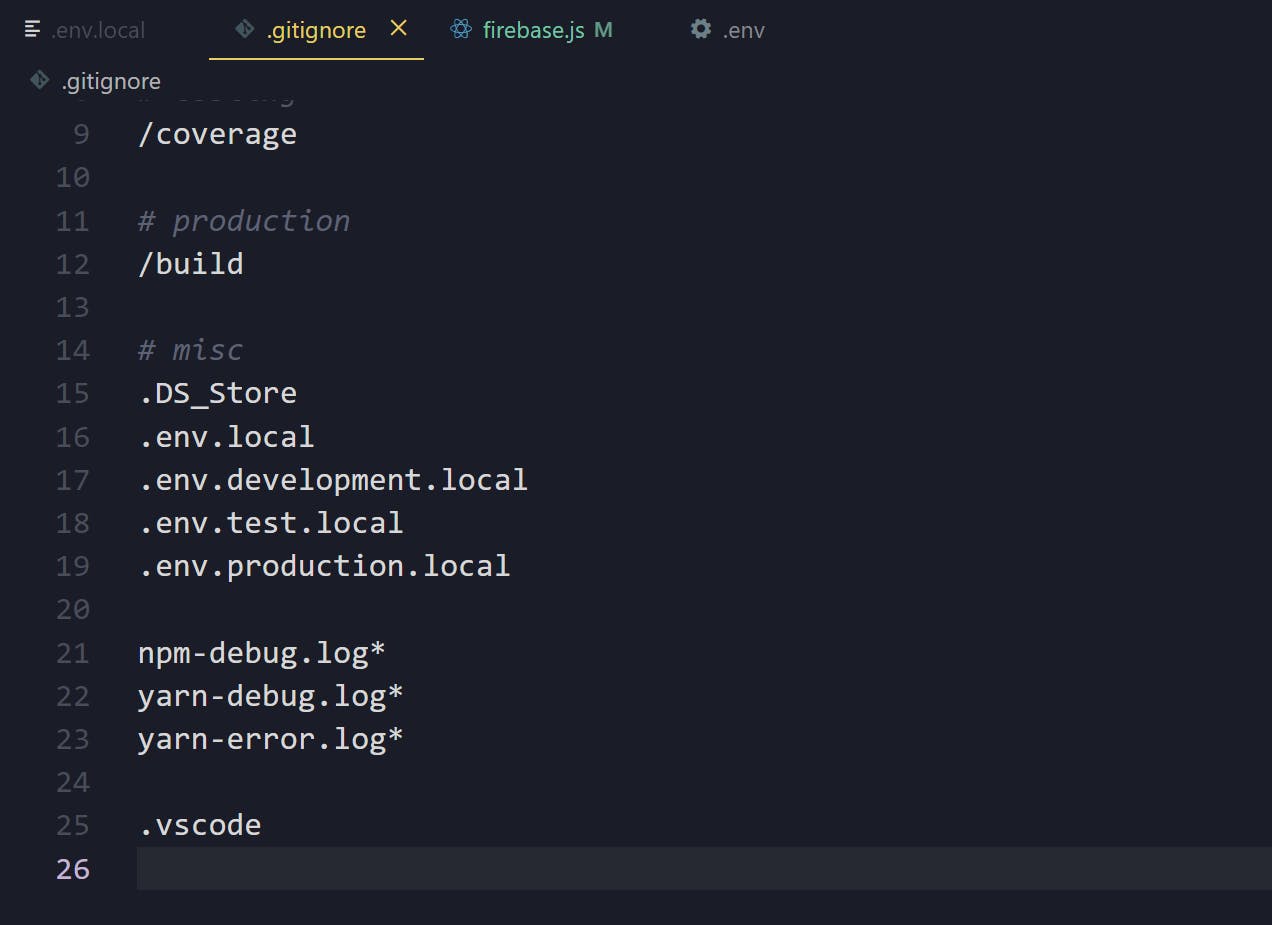
If you created your React app using Create React App, you will find that .env.local is already there in the .git.ignore file. This will ignore the file when you push your code to Github.
If not, then create a .git.ignore file in the root folder of your app and write .env.local inside it.
As shown below.
We have added the Firebase config values to our environment, now it's time to use it.
Open firebase.js and to access the values write process.env followed by the variable name that we defined in the .env.local file.
// firebase.js
import Firebase from "firebase/app";
import "firebase/firestore";
import "firebase/auth";

const config = {
  apiKey: process.env.REACT_APP_FIREBASE_API_KEY,
  authDomain: process.env.REACT_APP_FIREBASE_AUTH_DOMAIN,
  projectId: process.env.REACT_APP_FIREBASE_PROJECT_ID,
  storageBucket: process.env.REACT_APP_FIREBASE_STORAGE_BUCKET,
  messagingSenderId: process.env.REACT_APP_FIREBASE_MESSAGING_SENDER_ID,
  appId: process.env.REACT_APP_FIREBASE_APP_ID,
};

const firebase = Firebase.initializeApp(config);
const { FieldValue } = Firebase.firestore;
const auth = firebase.auth();

export { firebase, FieldValue, auth };
That's it. That's how we can use Firebase config in our App.
Now, if someone clones your repo, or you are working in a team and you want them to know what environment variables you are using in the project. You can include the variable names in a .env file.
REACT_APP_FIREBASE_API_KEY =
REACT_APP_FIREBASE_AUTH_DOMAIN =
REACT_APP_FIREBASE_PROJECT_ID =
REACT_APP_FIREBASE_STORAGE_BUCKET =
REACT_APP_FIREBASE_MESSAGING_SENDER_ID =
REACT_APP_FIREBASE_APP_ID =
So, when they clone the repo, they can use their own config files in .env.local
On Netlify
Now, the config files are not in the Github repository, so we have to find a way to share them with Netlify. So that our app works the way, we expect it to be.
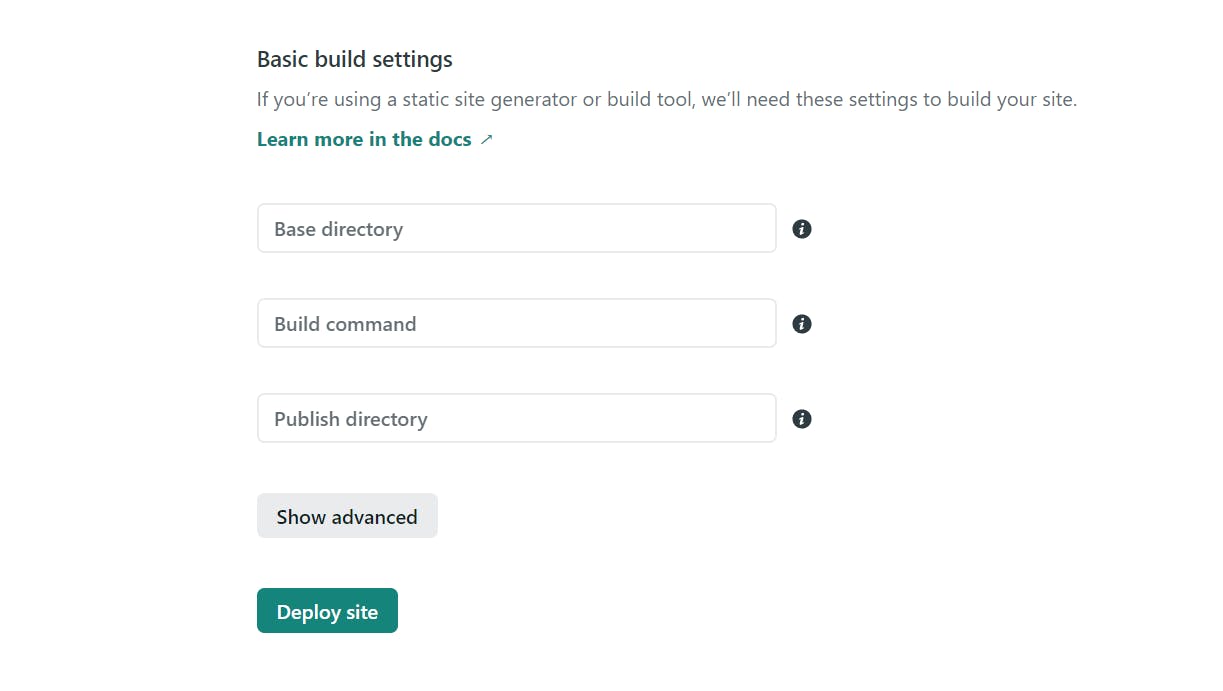
Head over to Netlify, and click on New Site. After selecting your repo, click on Show advanced under Basic build settings
Then click on New variable and fill in the variable names and values.
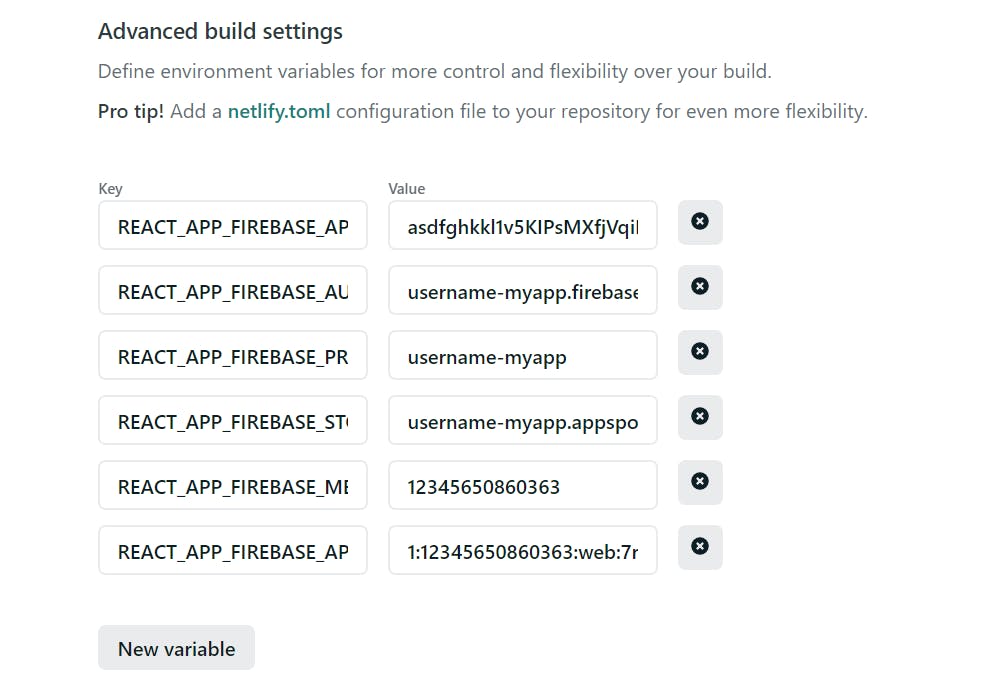
If you have already deployed your site, then go to Site settings > Build & deploy > Environment > Environment variables > Edit variables.
That's it. We are done now. And our deployed app has access to the environment variables in a secure way.