How to use tiles for your dialog box borders in Godot: The NinePatchRect component
How to use tiles for your dialog box borders in Godot: The NinePatchRect component
The other day I was looking for the counterpart of the Unity Panel’s tiled image mode but it didn’t seem an easy thing to find. Lots of tutorials cover how to make your own themes, but it was hard to find how to use tiles for the borders in Godot.
When you build a tile-based game it’s what you usually want for your UI: too look pixel-perfect with that retro look.
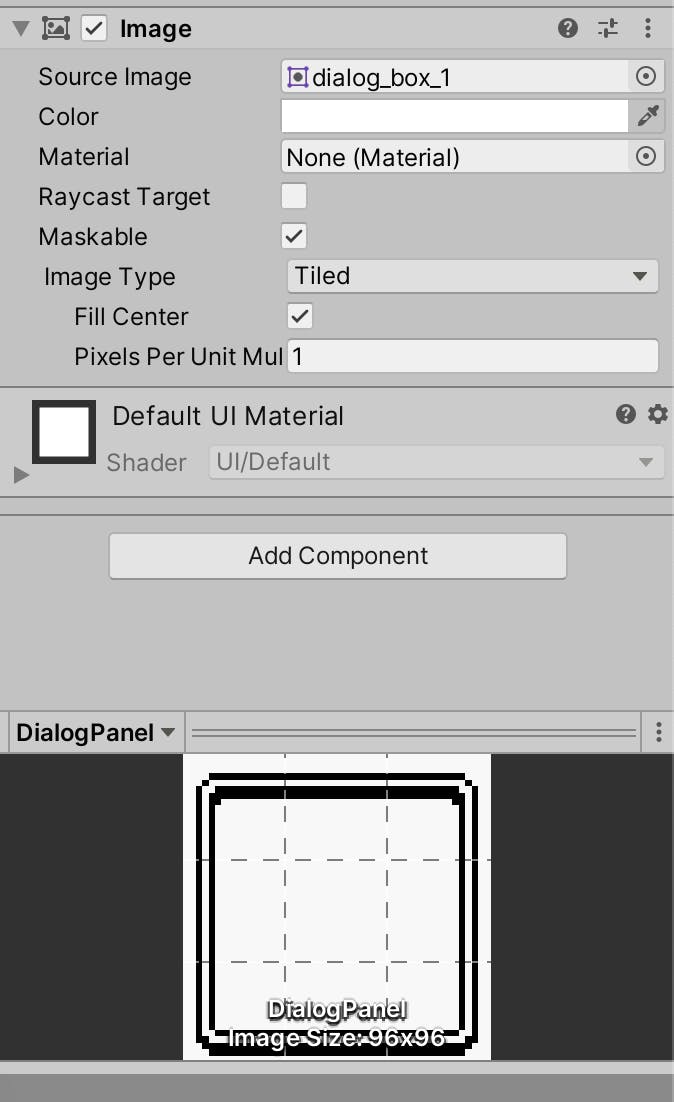
Here is the example in Unity:

In the Panel component in Unity, you have the option of using a “Tiled” image type easily. As you can see, it detects the 9 tiles automatically.
After some more digging, it turns out that in Godot Engine you have a very powerful and customisable component (even more than in Unity) called NinePatchRect. With it, you can use any texture and slice the region you are interested in to use it as the borders of your panels / dialog boxes.
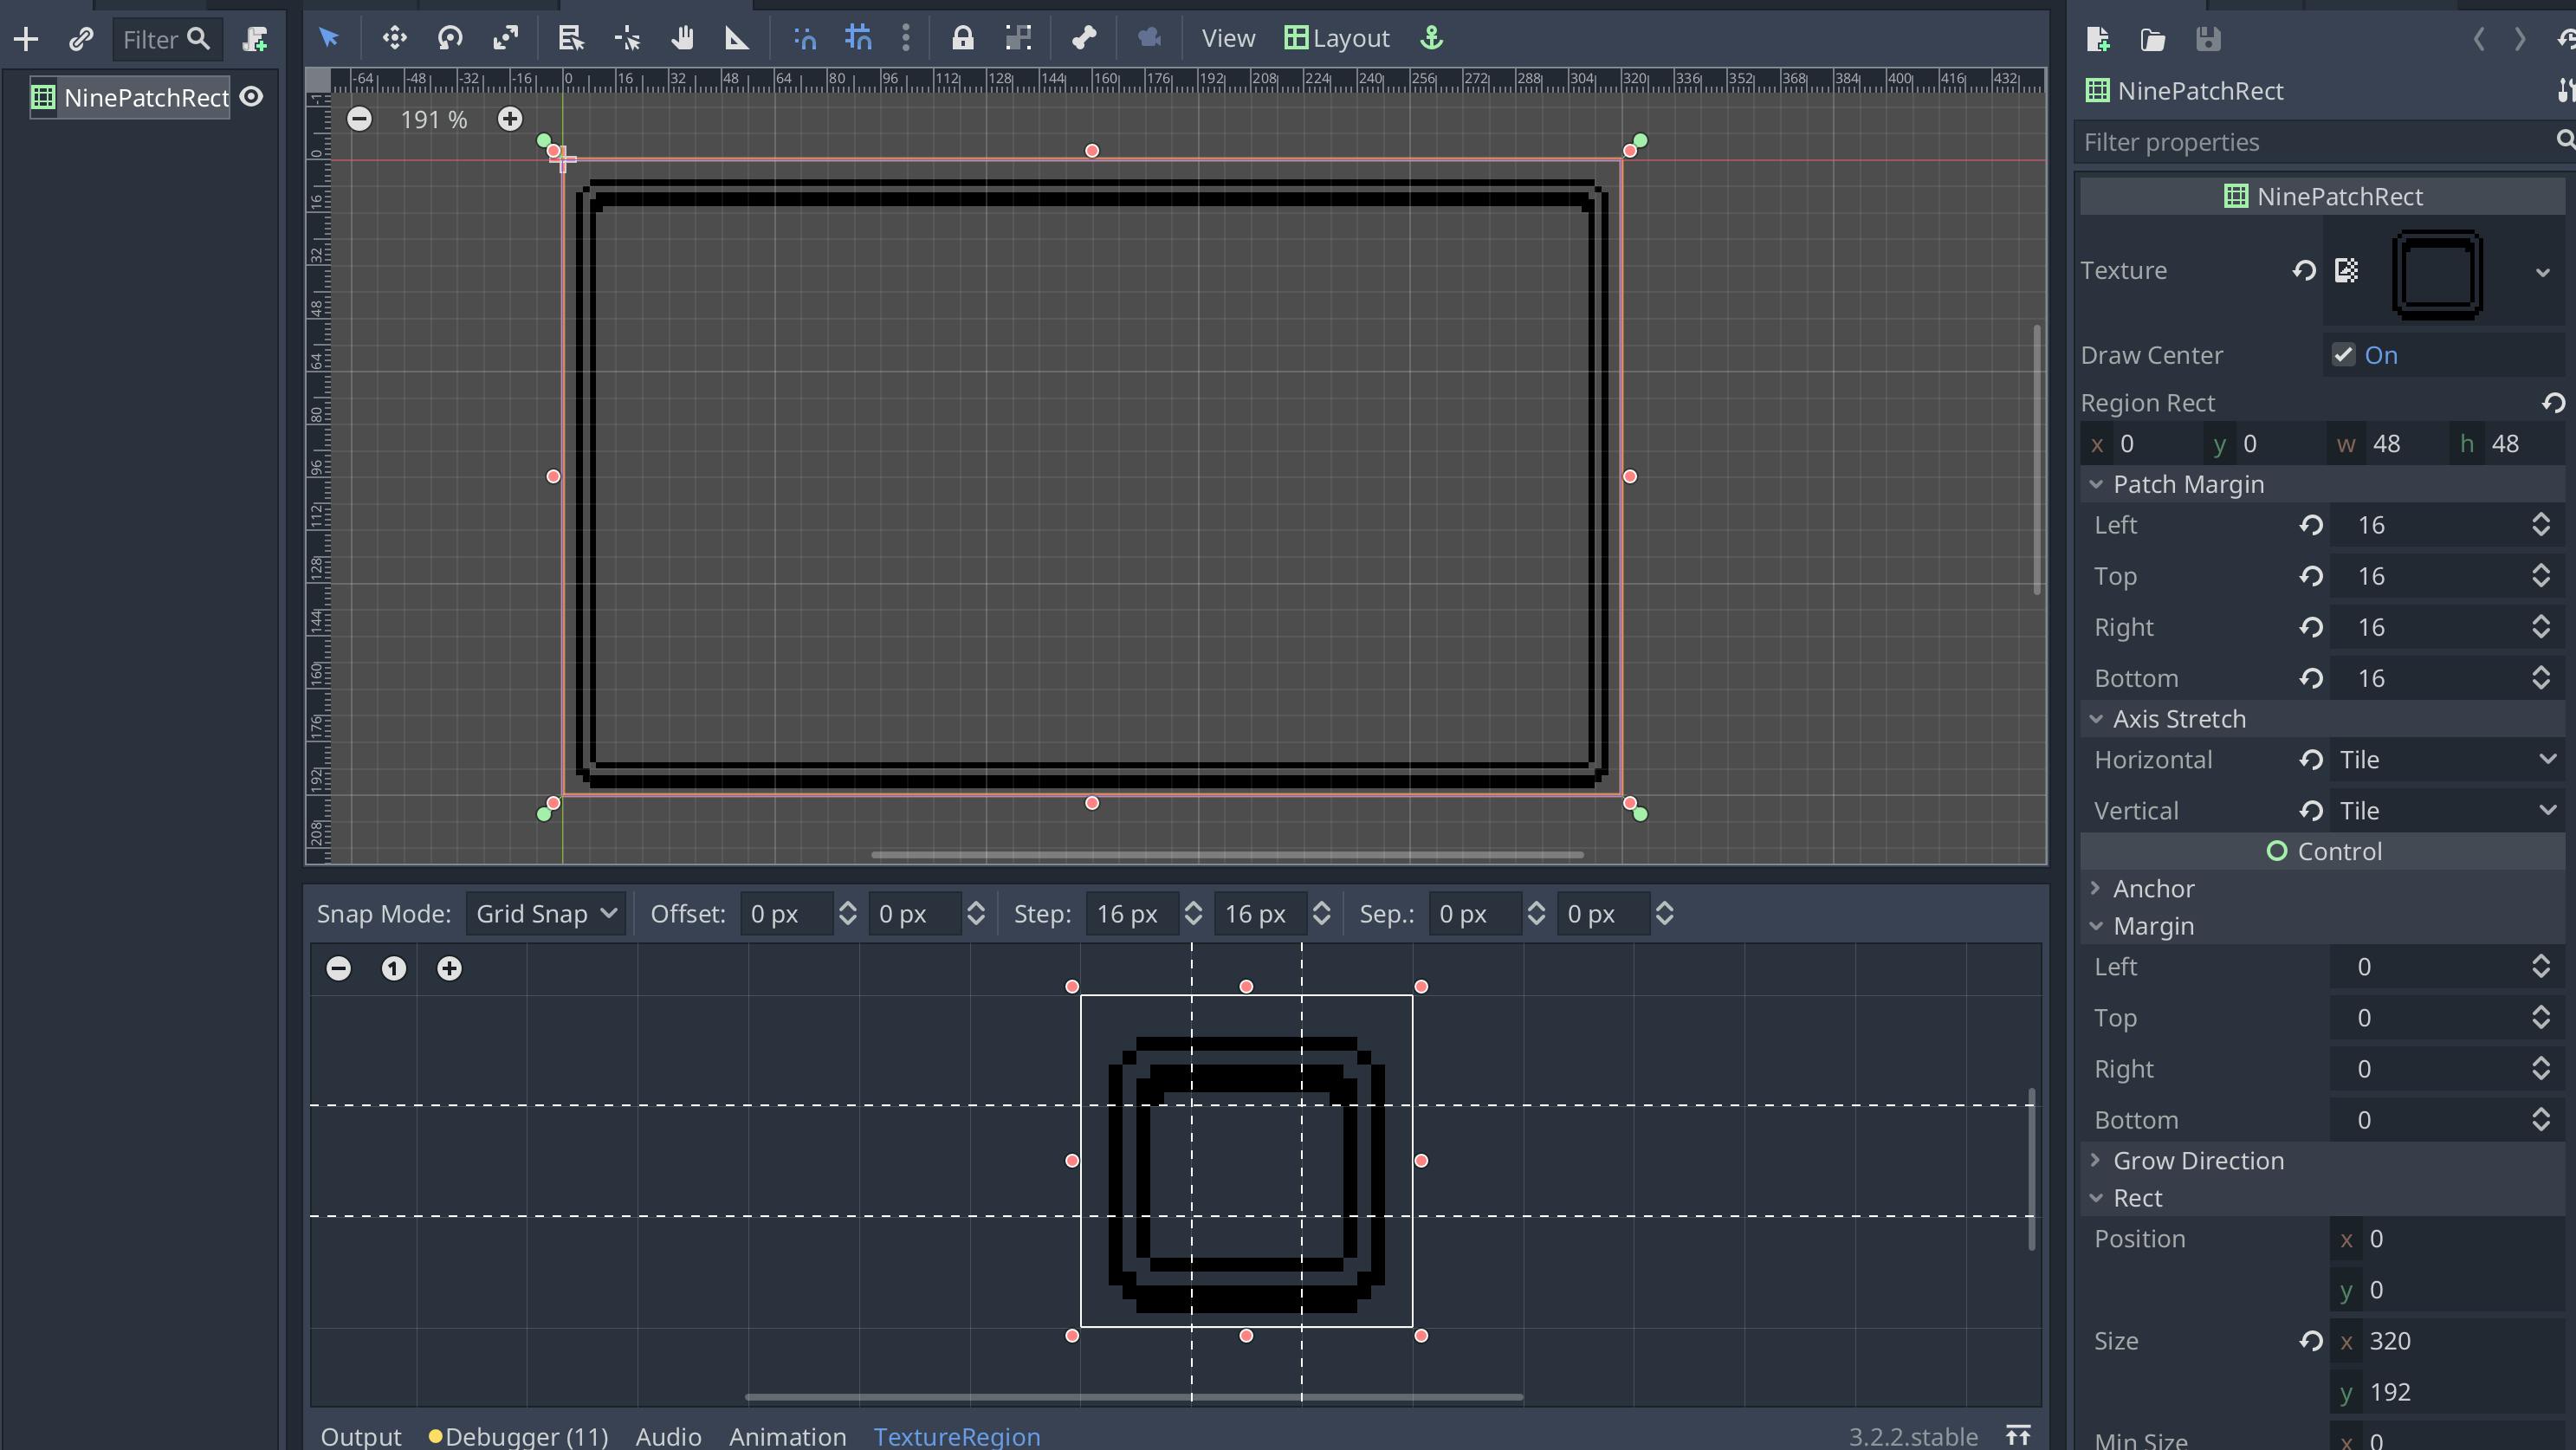
The important inspector settings are:
- Region Rect: Defines the area of the texture to use
- Patch Margin: Defines the margins of the borders, so they keep always the same size/ratio even if your panel is resized.
- Axis Stretch: Defines how to stretch the tiles when resized. Here usually you will want it as “Tiled” in both horizontal and vertical. This way the tiles are not stretched, but auto-tiled one next another when you resize the panel.
Here is an example:

Basic NinePatchRect configuration in Godot for 16x16 px tiles