

More time saved, for free - with Nx Cloud 🎉
New Nx Cloud pricing changes make it a no-brainer to opt-in


One of the greatest challenges of maintaining popular open-source software is finding a way to sustain its long-term development, which is how we came to develop Nx Cloud: a commercial tool that expands upon Nx. Nx Cloud provides additional features for collaboration, scalability, and the various needs of large and enterprise-scale monorepo management.
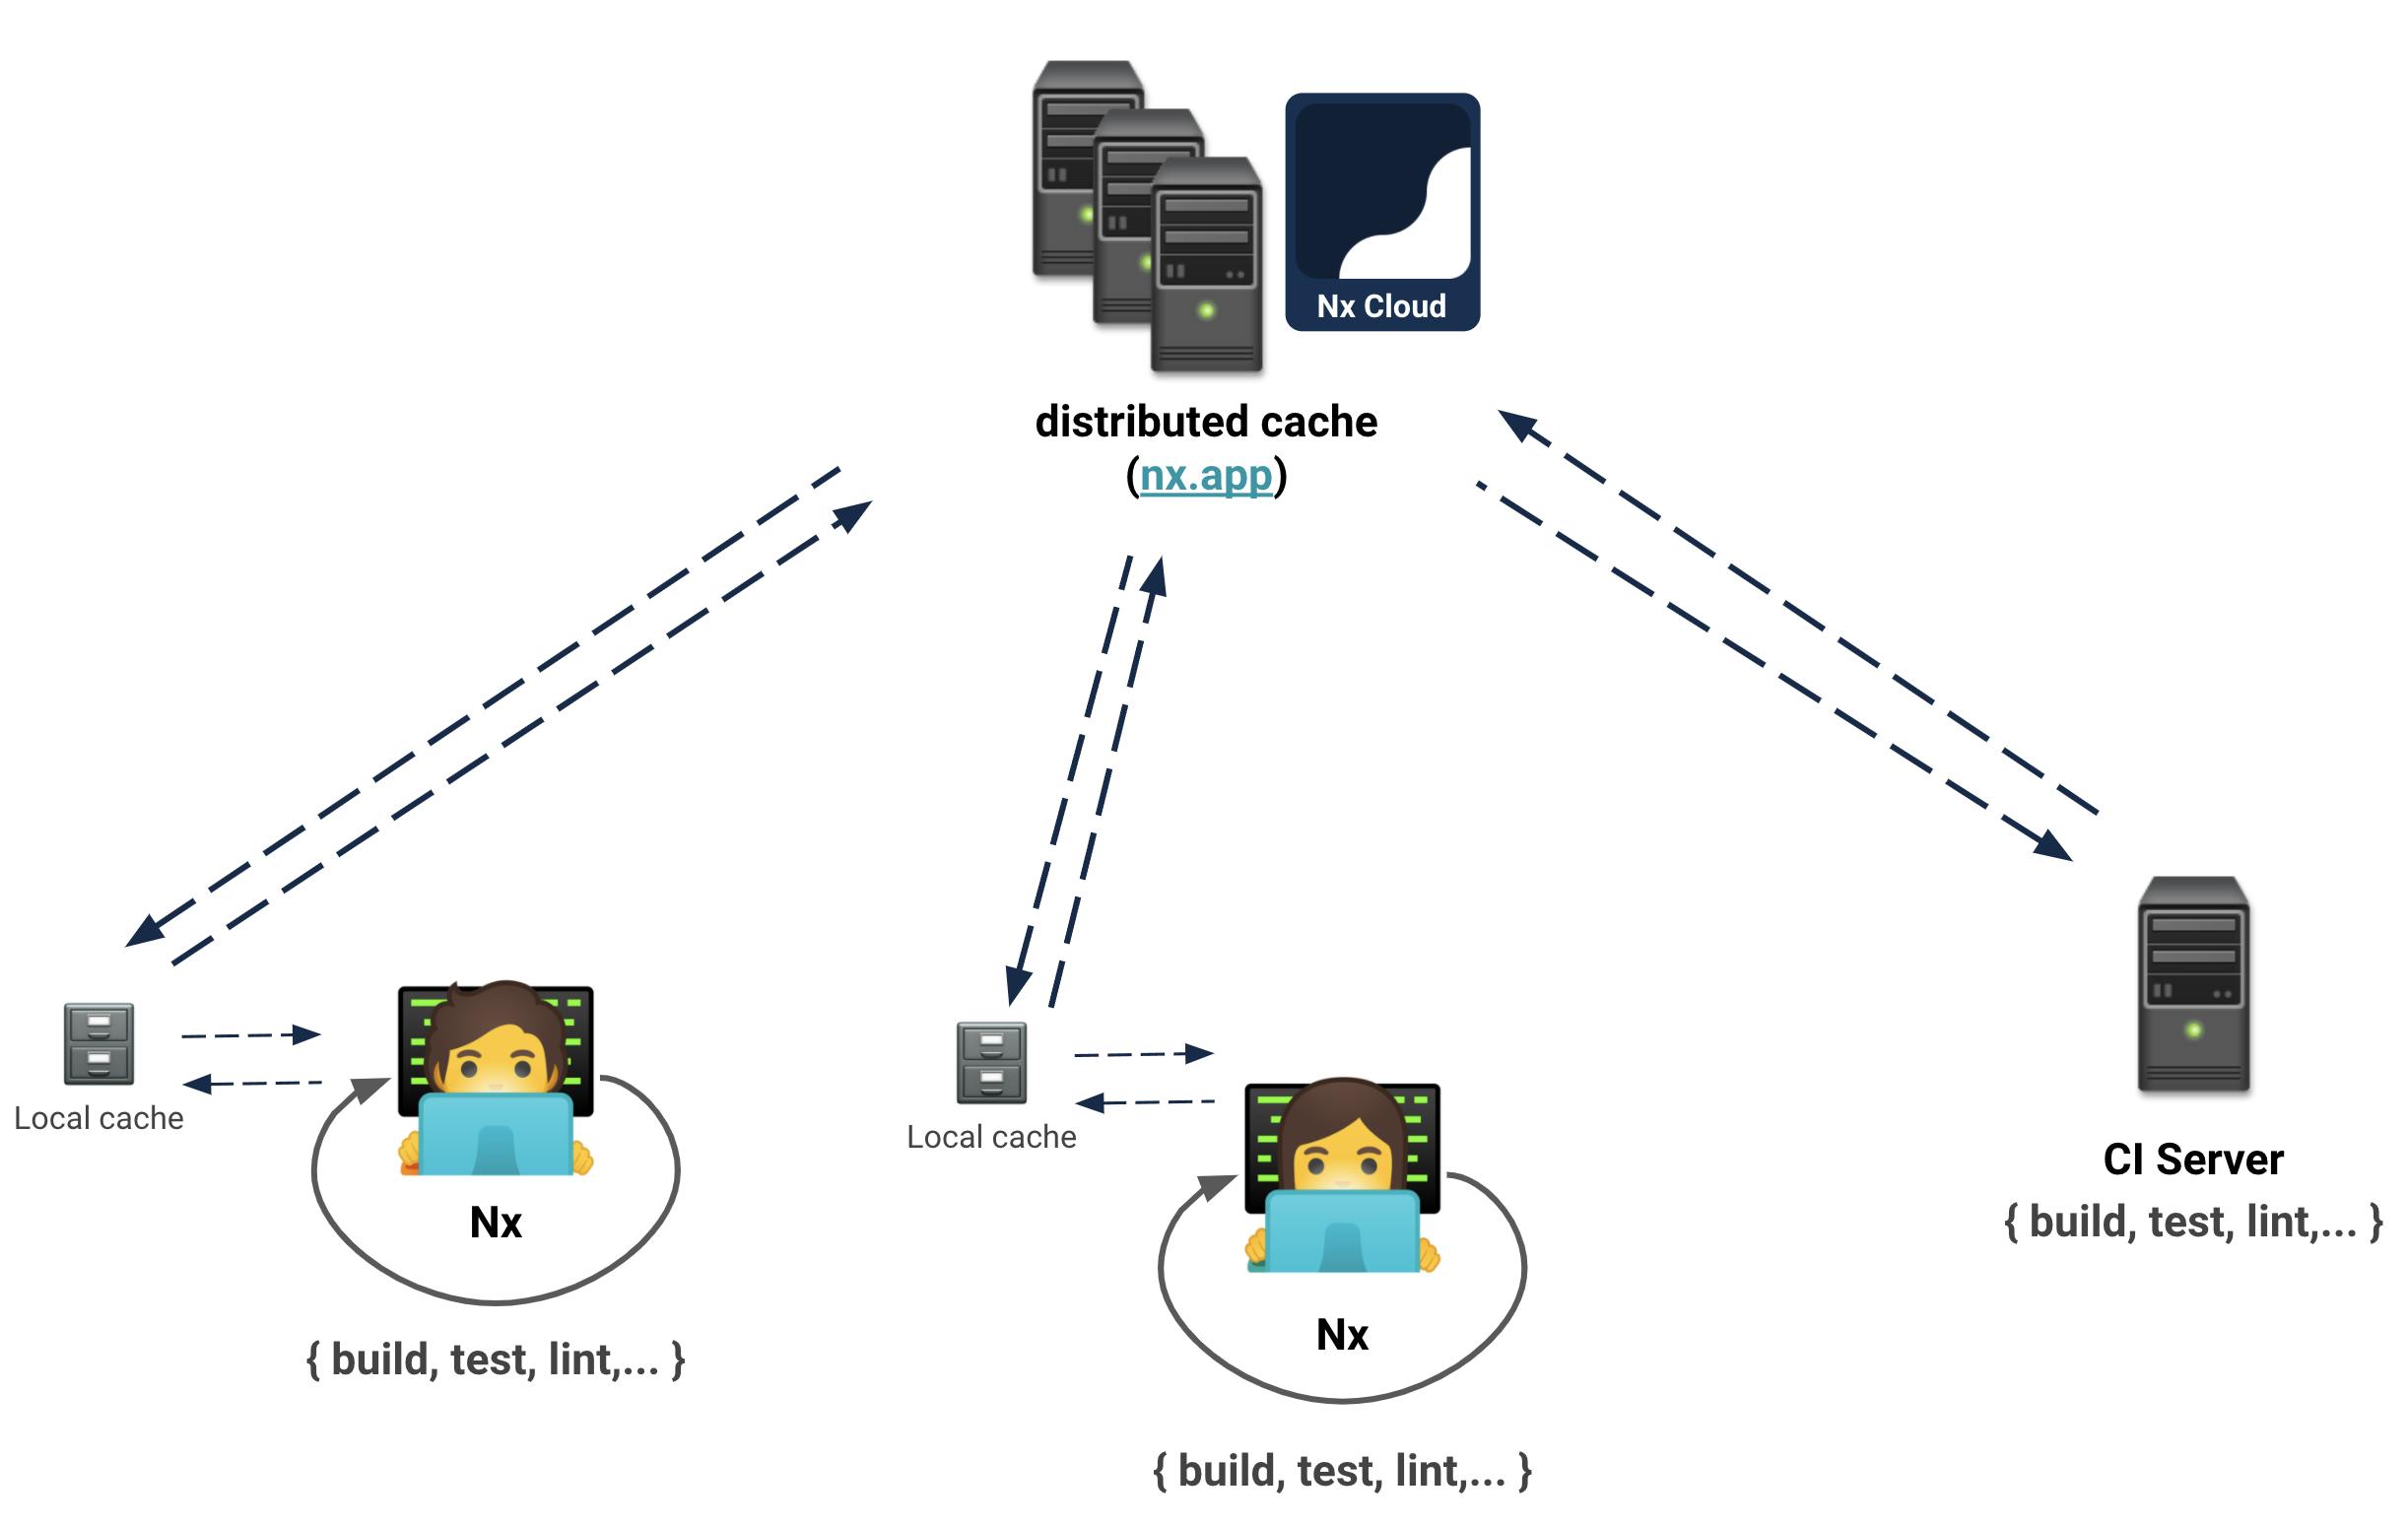
Nx users do not have to use Nx Cloud. By default Nx’s computation cache is local to your developer machine, sitting in the node_modules folder. Nx Cloud sits on top of Nx, taking its computation cache to another level by making it distributed. This allows CI agents, dev team members, and other tools and stakeholders to benefit from it as well.
Powerful Insights
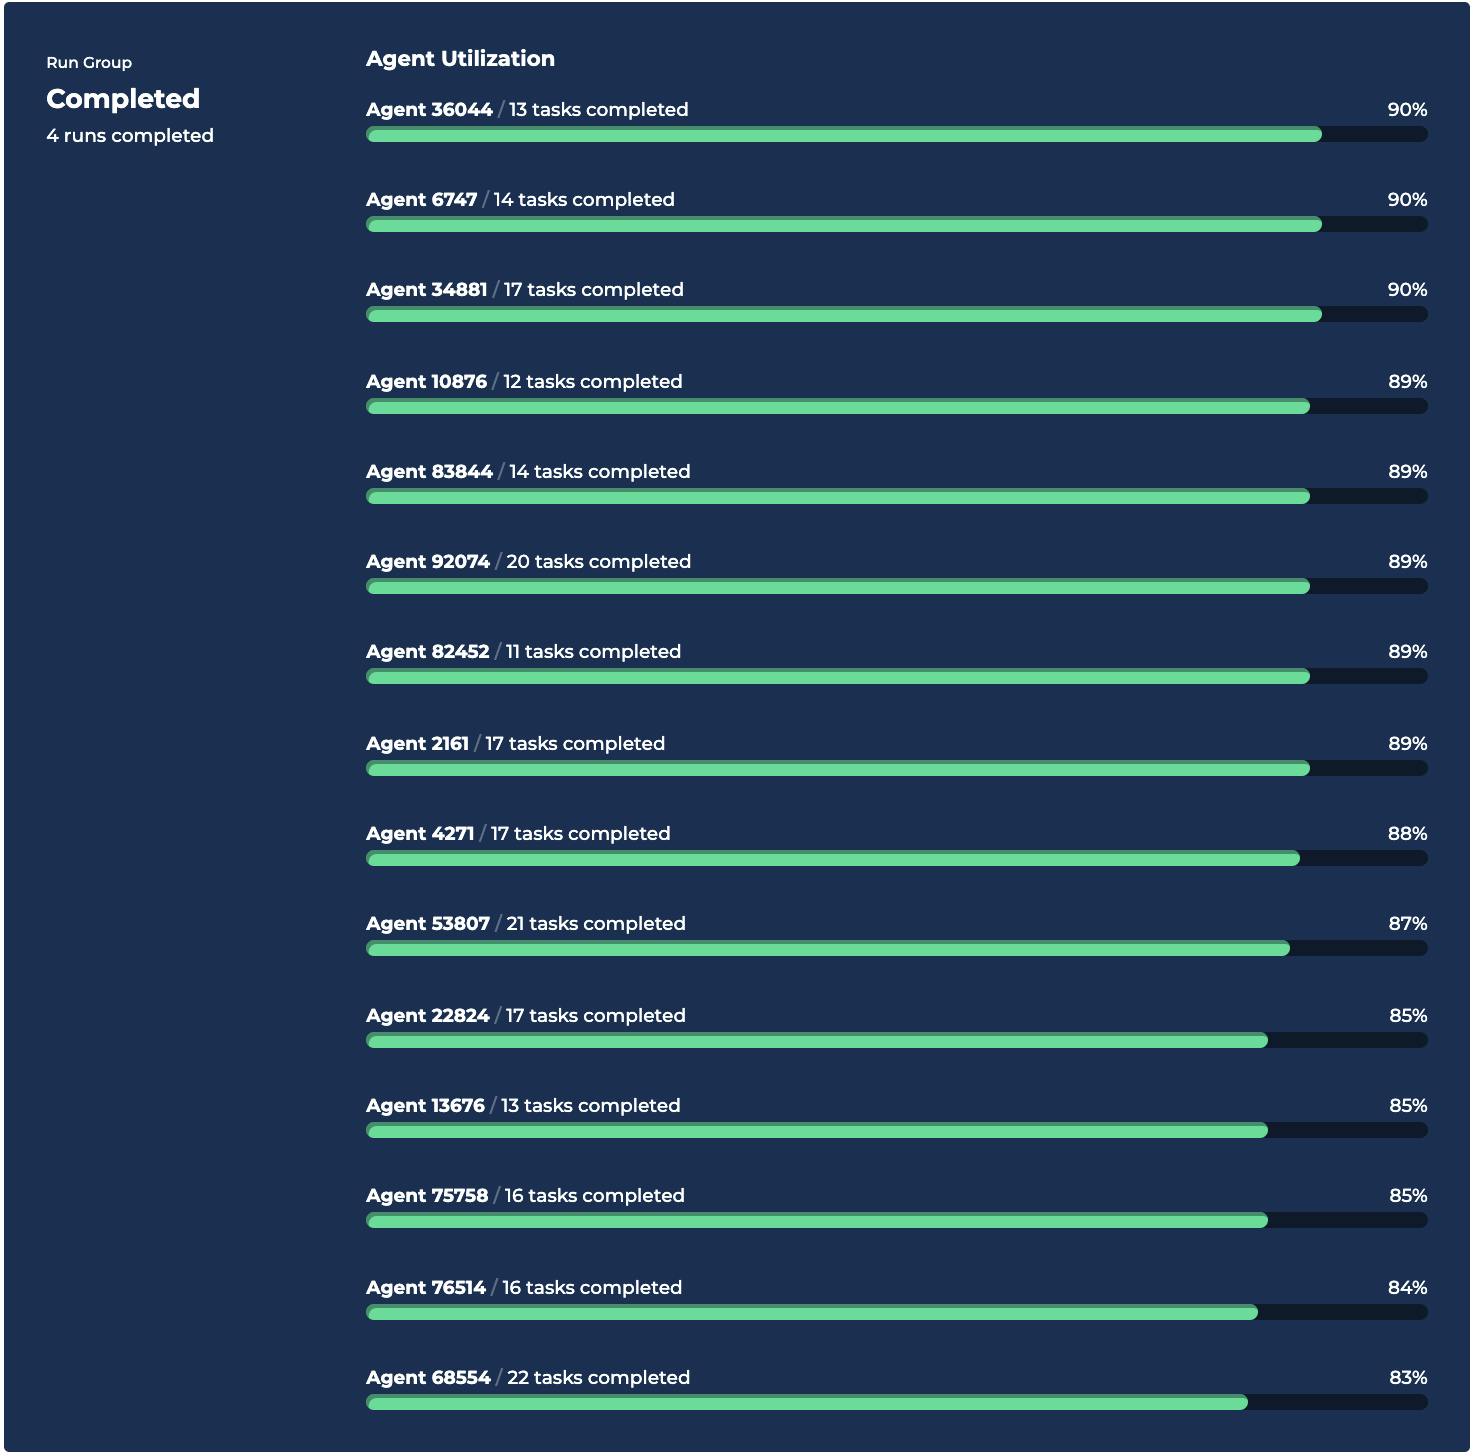
We’ve come a long way since the early days of Nx Cloud. We improved our dashboard to give you insights into your task runs.
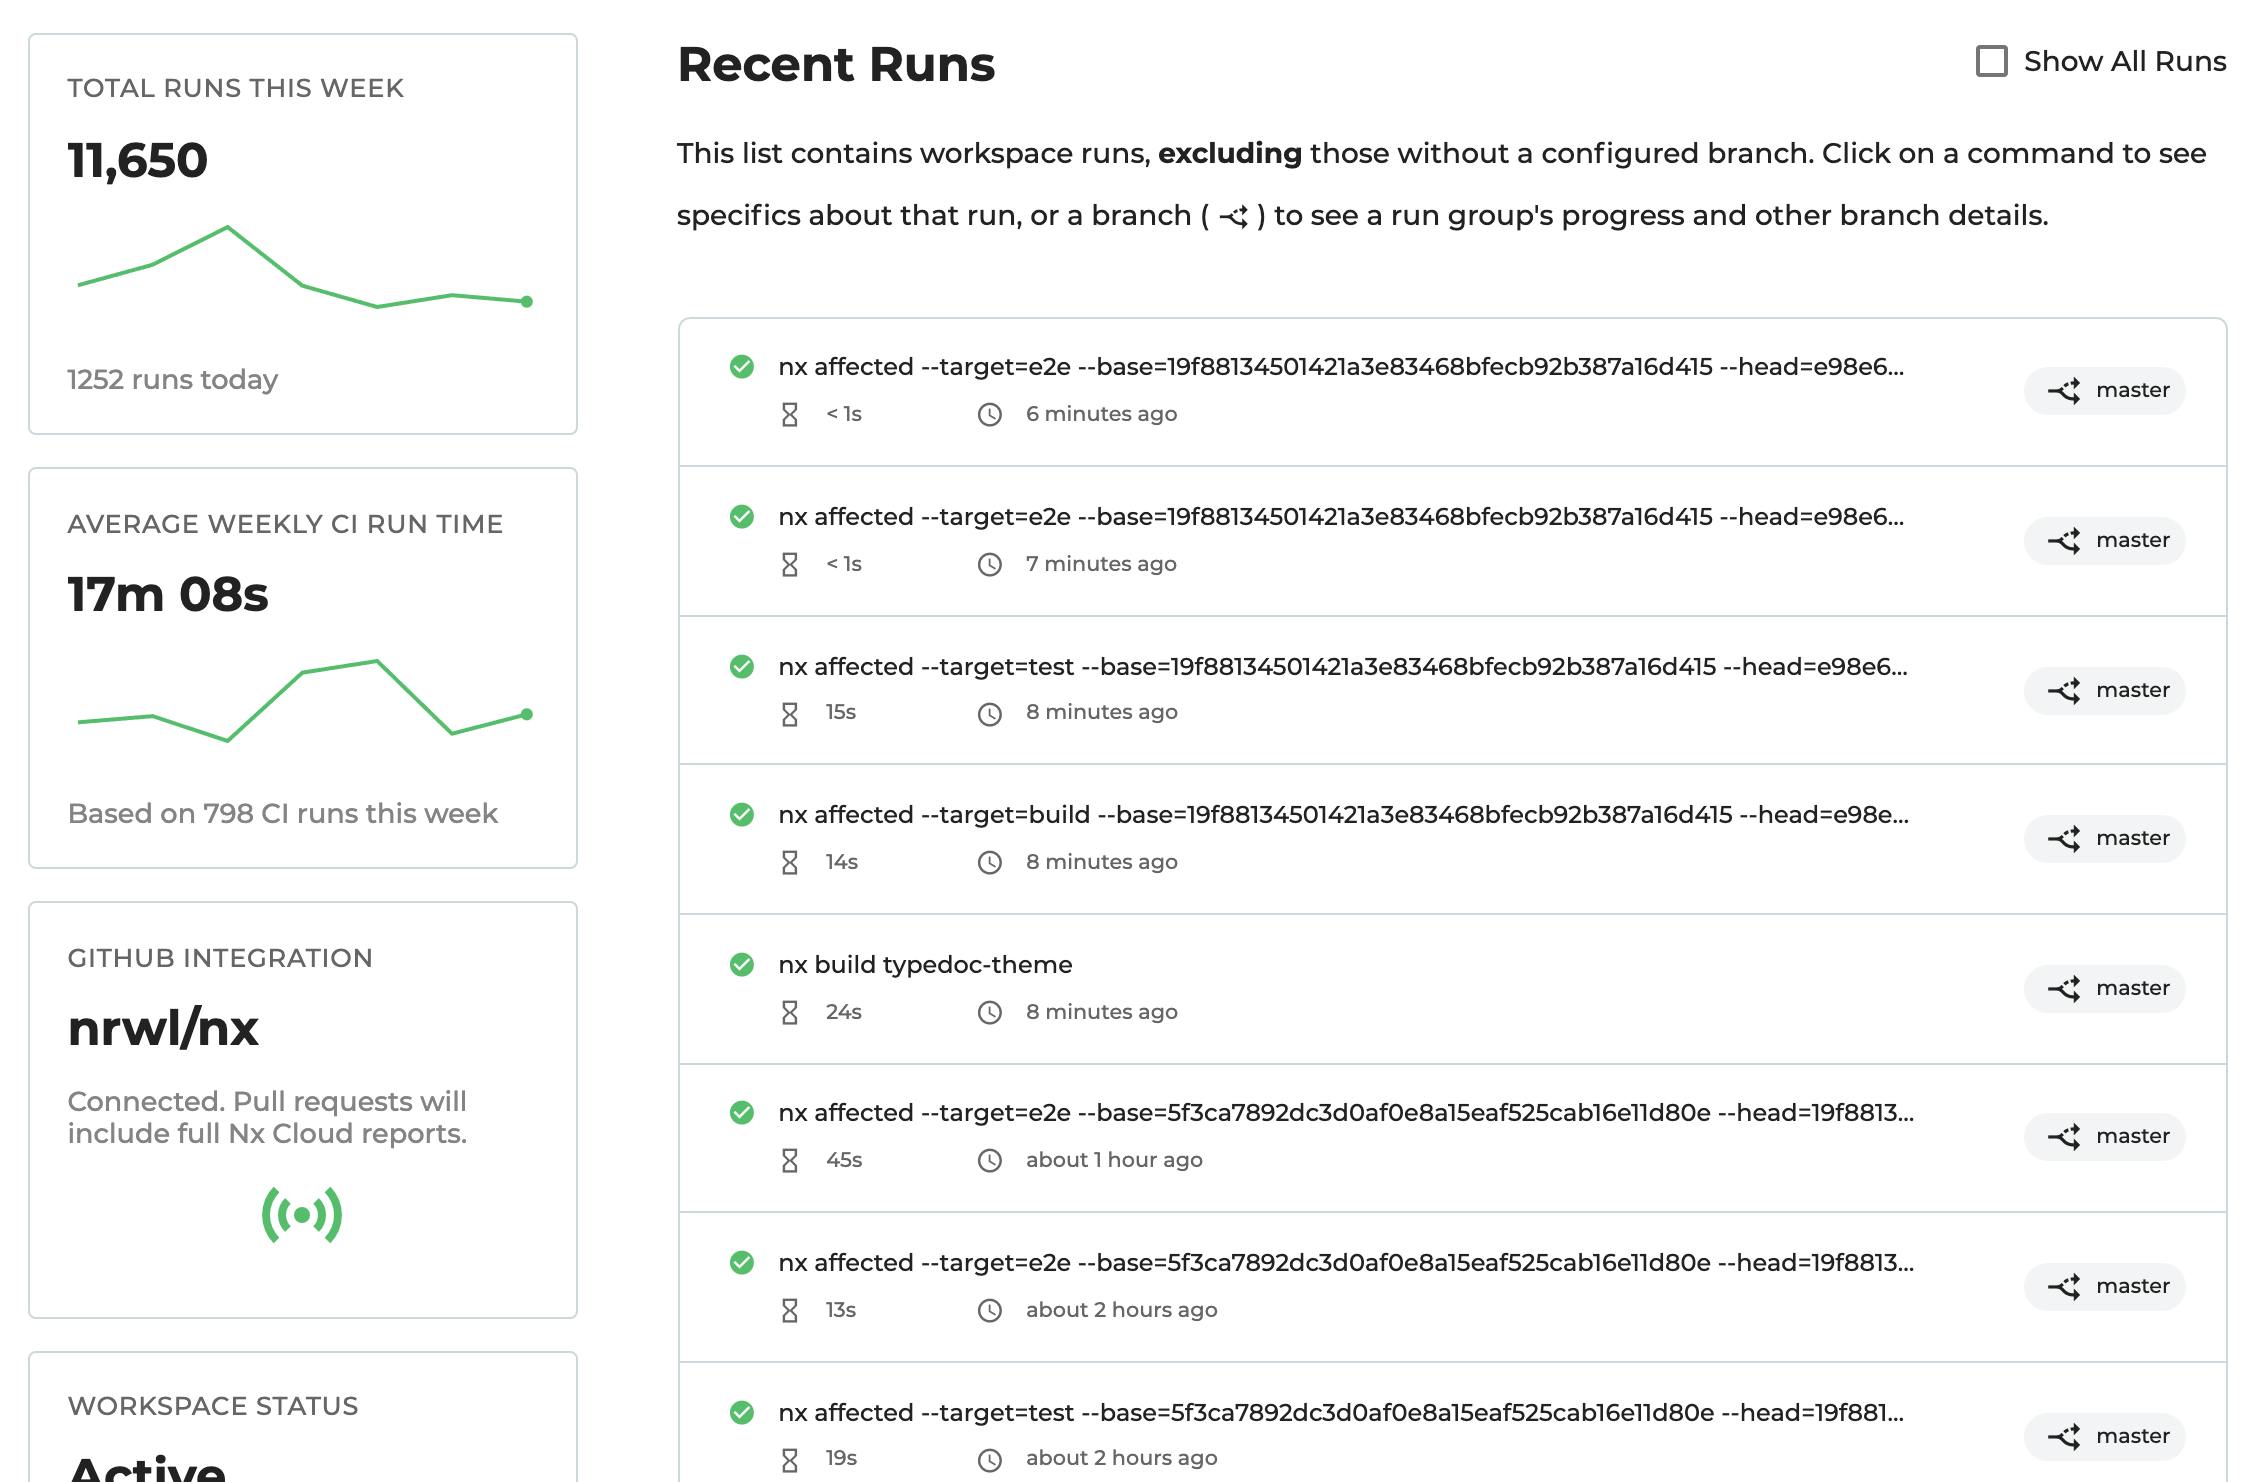
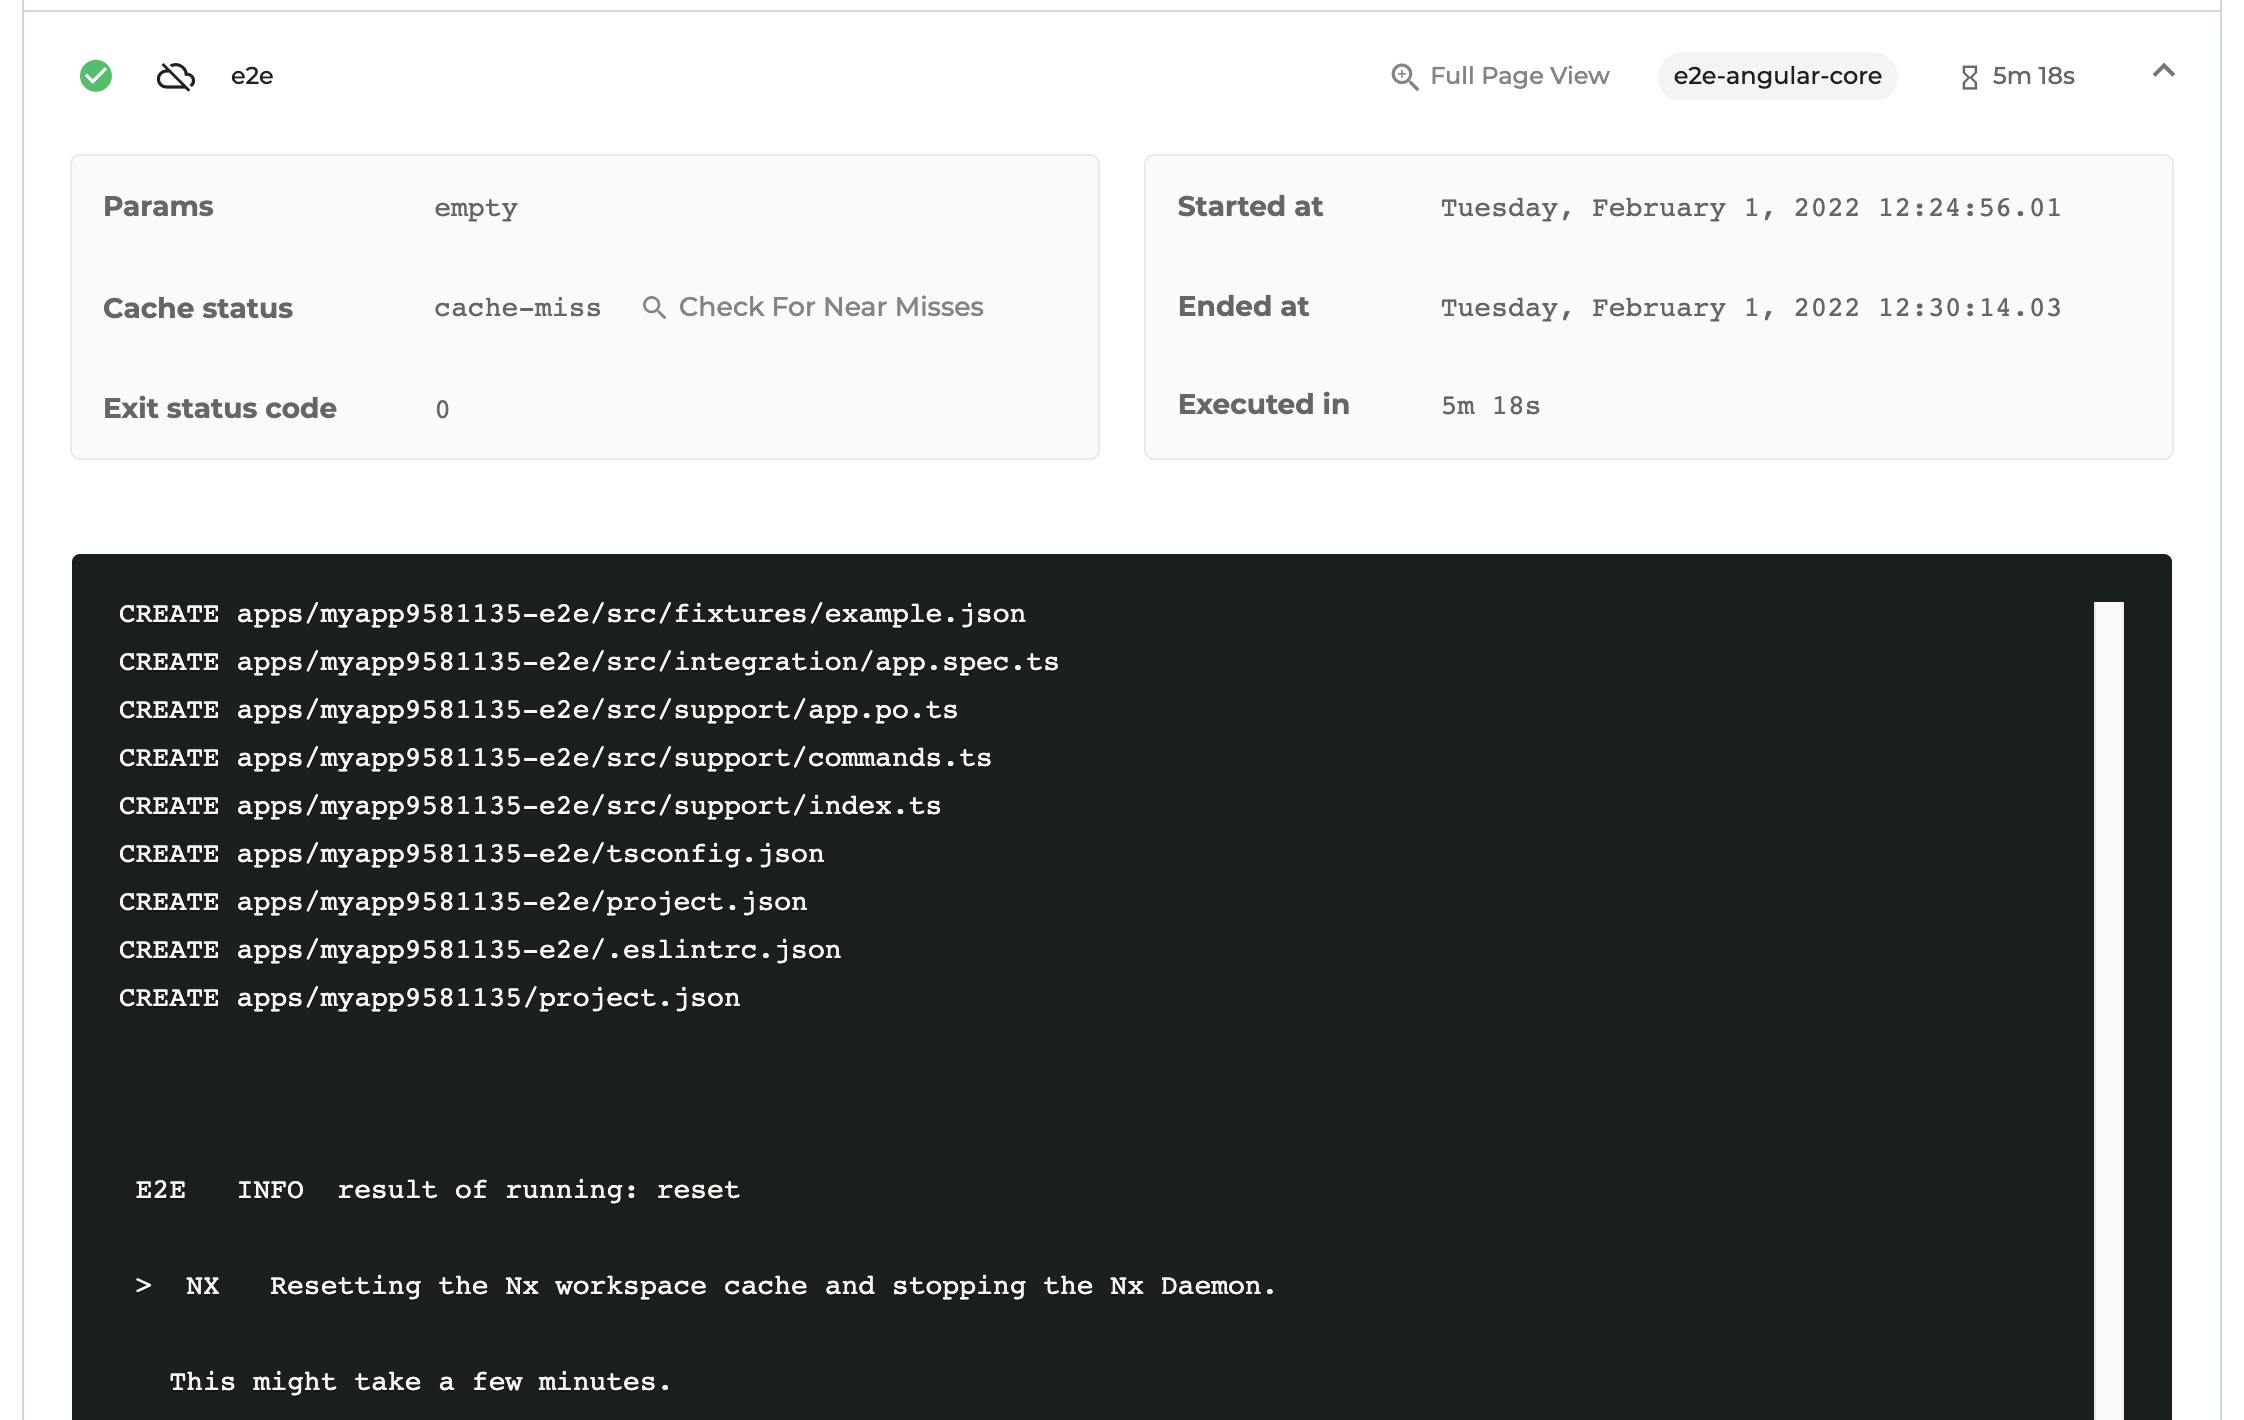
The dashboard provides details for every task run and allows you to inspect whether it was a cache hit or miss, the execution time, and error logs.
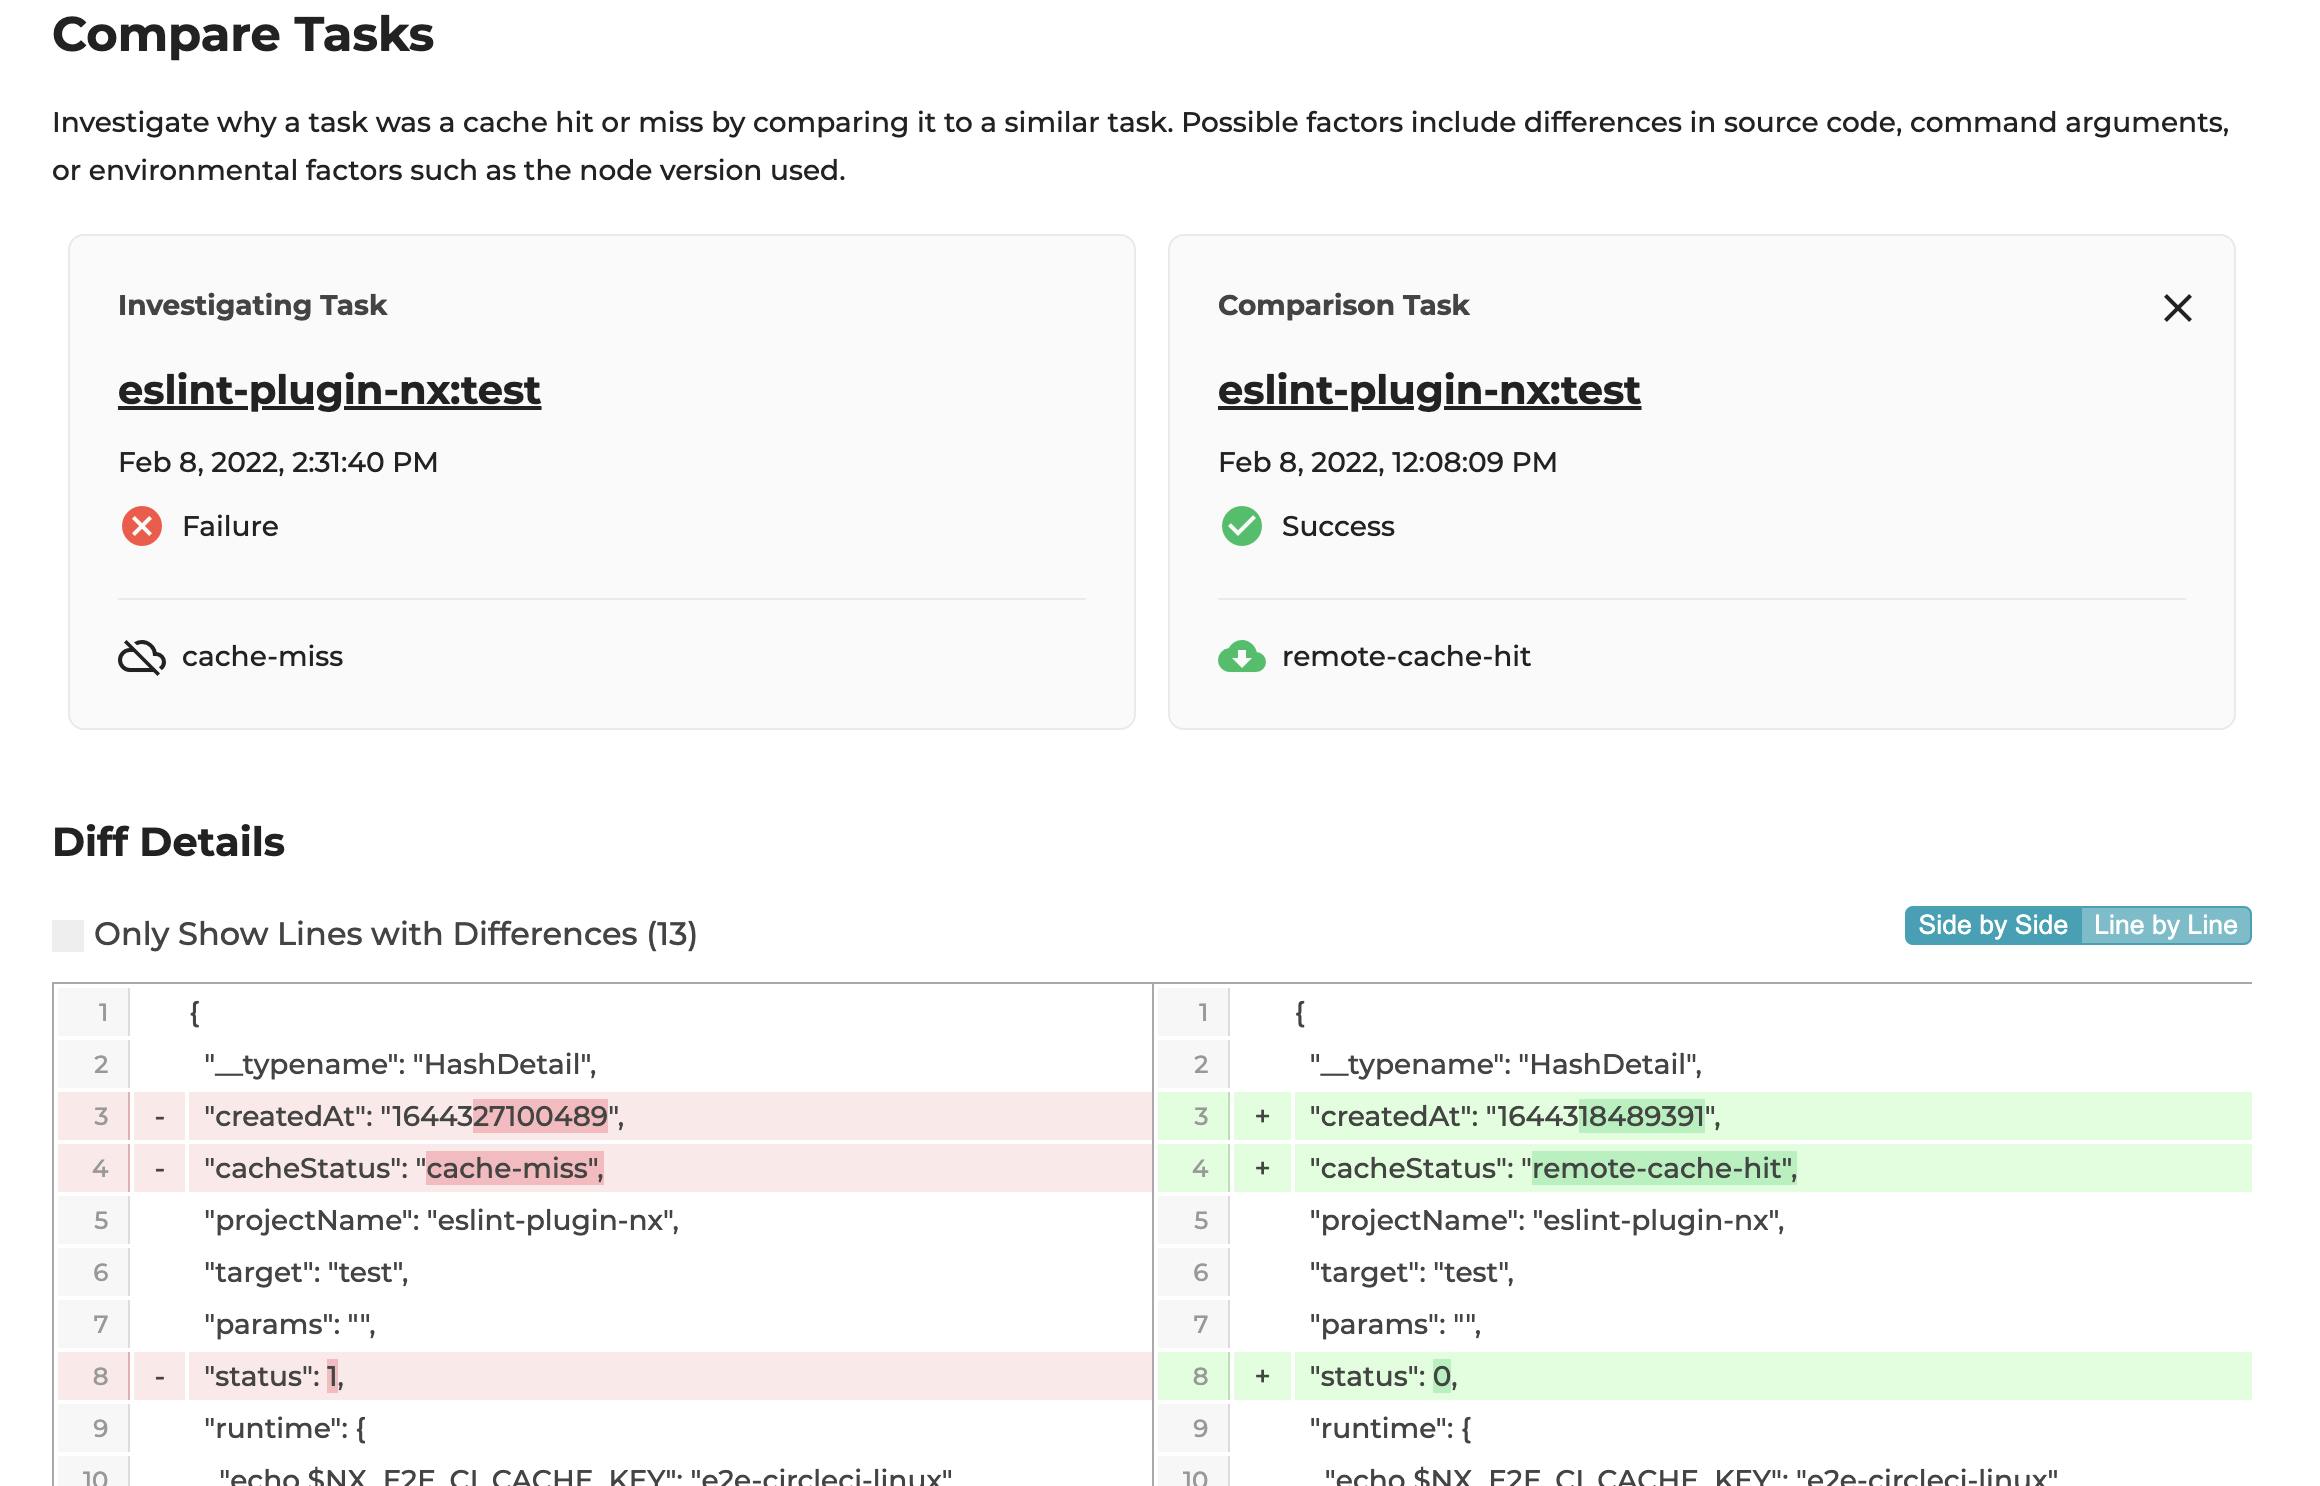
It can also verify whether it was a “near-miss”; i.e. if a task was executed and cached previously, but that cache could not be used in the current run due to some slight non-matching properties (such as source code, deps or runtime environment variables). This is highly useful for debugging and understanding cache misses.
All of this can also be linked directly to your GitHub PRs via a dedicated Nx Cloud GitHub integration that picks up PRs and reports back the status of the task executions.
DTE - Distributed Task Execution
While enabling distributed computation caching helps reduce task execution times, what really makes a difference is distributed task execution (short: DTE). It is probably the Nx Cloud feature we’re most proud of 🙂.
Optimizing a CI setup, especially on more large-scale monorepos, can become quite painful over time. Nx already provides a lot of the tooling out of the box: you can programmatically access affected projects, dynamically allocate agents, and run tasks in parallel. In complex, large-scale monorepos, you ideally want to achieve high parallelism, maximize utilization, and avoid idle times – optimizing clock time (time passed) with computation time (CPU cycles). Getting that right is particularly challenging.
Nx Cloud’s DTE understands which commands your CI is running, how many agents are typically being used, and how long a given task typically takes. It leverages that information along with task dependencies to create an execution plan that prioritizes builds of shared libraries first to unblock upstream builds. This results in a more even utilization of CI agents, optimizing the overall running time of your CI.
Over time, Nx Cloud’s DTE learns about your workspace, keeping metrics about running times to allow the best possible distribution of a given task with the given amount of agents.
You’re probably wondering whether you need a PhD to set this up! We promise it’s more straightforward than you’d think. Read all about enabling DTE on the Nx Cloud docs.
Finally, the exciting news: more hours saved, for free! 🎉
Nx Cloud literally allows you to buy time. When you sign up, you get billed based on how much benefit you get from using the Distributed Computation cache and Distributed Task Execution. To assess the benefit, Nx Cloud calculates “time saved”, by comparing the optimized Nx Cloud running time compared to what it would have taken without Nx Cloud. You can check all the details on how such calculation works in the Billing and Utilization FAQs.
Until now, every Nx Cloud workspace got 5 hrs of time saved for free per month. We’re happy to announce that starting today we’re increasing that free allowance to 500 hours per month! 🎉
Or put differently: most Nx workspaces will never run out of free hours!
Q: I have an active coupon, what do I need to do?
A: You don’t need to change anything. Free hours are always consumed before any coupon. Now, only if you go over the 500 free hrs/month, your coupon will be used. The only thing that might happen is that you will never consume your coupon 🙂.
Q: I’m currently on the “Swim” plan, having billing set up and linked to a credit card. Do I need to do anything?
A: The existing Swim plan ($29/month) remains active for existing users. If you want to keep supporting us, feel free to leave it as such, we’ll appreciate it. If you already know you wouldn’t use more than 500 hrs/month in your workspace, then you can go to your Nx Cloud dashboard and cancel your subscription. As a result, you would transition to the new free plan with 500hrs/month included.
Q: I need way more than 500hrs. What should I do?
A: You can still start with the free plan and pay $1 per additional hour once you’ve consumed the free bucket of 500 hours. But most probably at that point, you would want to talk to us about Nx Enterprise. That gives you even more flexibility and a package tailored to your organization’s needs. Learn more on our Nx Cloud pricing page.
Q: Does this include private cloud?
A: No. For enterprises that want full control over where the data is being stored, we have Nx Private Cloud, which comes with a Docker container that can be installed and set up in your own infrastructure. Private Nx Cloud has a different pricing model. Learn more on the Nx Cloud docs: https://nx.app/private-cloud
Wow, how do I enable Nx Cloud?
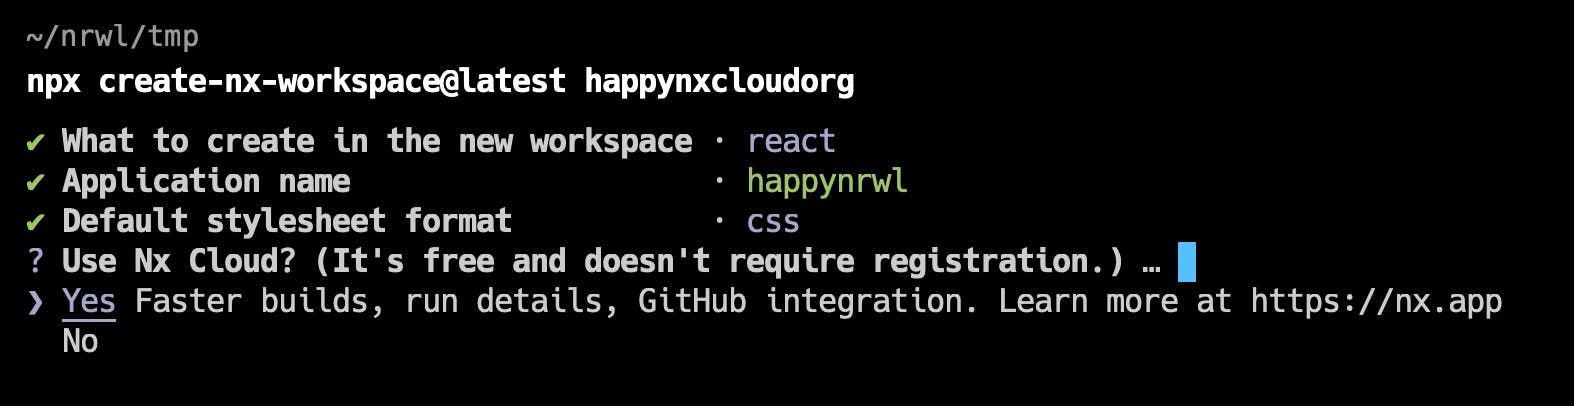
If you create a new workspace, simply answer “Yes” to the question about setting up Nx Cloud. Up until now the predefined answer for that question during the setup phase was set to “No”, explicitly making the user opt-in. Given 500 hours is more than most users will need, we’re going to set the default answer to “Yes”. Obviously, you can still switch to “No” during the setup 🙂.
If you already have an existing workspace simply run
npx nx connect-to-nx-cloud
Both of these operations set up your workspace and connect it with Nx Cloud. Finally, go to nx.app, create a user account and claim your existing workspace 🙂.