


This is the third tutorial in the series about GraphQL, in which we are going to learn more about mutations in GraphQL, how they work, and how we can create or modify data in GraphQL.
In the previous tutorial about queries in GraphQL, we learned more about types in GraphQL and how queries can help us get data in GraphQL. If you didn’t read it, I recommend you to do so before diving into this tutorial because you won't be able to completely catch up with what I'll be doing. So, let’s get started!
Getting Started
Now that we already have our queries working, we can start writing our mutations. To make sure that we have our queries, go to our playground localhost:4000/playground, click on Docs on the right side, and you should open a tab like this:
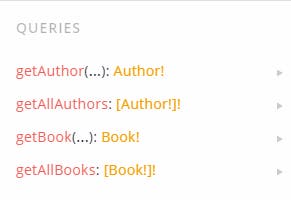
These are all the queries we have, now let’s start learning about how mutations work and create our first mutation!
How Mutations in GraphQL Work
We can get data in GraphQL with queries, and to create, modify or delete data we can use mutations. We can compare mutations in GraphQL to CUD(Create, Update, Delete) operation that we see a lot in the APIs world.
To write our first mutation, we need to write the types for it. So now, go to our Book folder, and inside the typeDefs write a type called Mutation. Inside that type, we’re going to have two specific mutations: createBook and deleteBook. To write a mutation type, you need to define the name of the mutation, the arguments that need to pass, and the output.
In our case, we’re going to write a createBook mutation that’s going to need a title, description, language and an Author as arguments, and the result should be a Book.
createBook(title: String!, description: String!, language: String!, author: ID!): Book!
The ! at the end of each argument means that each argument should be a non-nullable value and that all the arguments are required and should be passed. If we don’t pass one of those arguments the mutation won’t work.
Now, we’re going to create the other Book mutation that’s going to be called deleteBook, and this mutation is going to require only the _id of a specific Book. Then, you should pass two consecutive semi-colons and the value that should be returned, in our case a Book.
deleteBook(_id: ID!): Book!
Now that we have all the Book mutations we need, our final typeDefs file should look like this:
    const typeDefs = `
        type Book {
            _id: ID!
            title: String!
            description: String!
            language: String!
            author: Author!
        }
        type Query {
            getBook(_id: ID!): Book!
            getAllBooks: [Book!]!
        }
        type Mutation {
            createBook(title: String!, description: String!, language: String!, author: ID!): Book!
            deleteBook(_id: ID!): Book!
        }
    `;

    export default typeDefs;
We got all the mutations we needed and we can now create and delete books. Let’s move on and write the Author mutations.
Go to our Author folder, and inside the typeDefs, write a type called Mutation, and inside that type add two specific mutations - createAuthor and deleteAuthor.
For the createAuthor mutation, we’re going to pass a firstName, lastName and age, and all arguments should be non-nullable. Then, you should pass two consecutive semi-colons and the value that should be returned, in our case an Author.
createAuthor(firstName: String!, lastName: String!, age: Int!): Author!
We’re going to create our deleteAuthor mutation, and we’re going to pass only a_id, and this value also should be non-nullable. Then, you should also pass two consecutive semi-colons and the value that should be returned, in our case an Author.
deleteAuthor(_id: ID!): Author!
Now, our typeDefs should look like this:
    const typeDefs = `
        type Author {
            _id: ID!
            firstName: String!
            lastName: String!
            age: Int!
            books: [Book!]!
        }
        type Query {
            getAuthor(_id: ID!): Author!
            getAllAuthors: [Author!]!
        }
        type Mutation {
            createAuthor(firstName: String!, lastName: String!, age: Int!): Author!
            deleteAuthor(_id: ID!): Author!
        }
    `;

    export default typeDefs;
As you can see, the mutation types are written in a similar manner to queries. Firstly, we define a type, and inside that type, we pass the mutations. In this series of tutorials, we’re going to use only two mutations, but you can use as many mutations as you want. We only defined two mutations for Book and also two for Author, and now we’re going to write the code for them.
Writing Mutations in GraphQL
Inside our Author folder, go to our resolvers.js. We’re going to write our first mutation, so inside that file we’re going to create a new object called Mutation, and inside that object put the following code:
    createAuthor: async (parent, { firstName, lastName, age }, context, info) => {
        const newAuthor = await new Author({
            firstName,
            lastName,
            age
        });

        return new Promise((resolve, reject) => {
            newAuthor.save((err, res) => {
                err ? reject(err) : resolve(res);
            });
        });
    },
This code is pretty self-explanatory, we’re going to get the three arguments that we’re going to pass to our mutation, and create a new Author.
Pretty simple, right? Now, we’re going to write a mutation to delete an Author, so inside the mutation object as well, put the following code:
    deleteAuthor: async (parent, { _id }, context, info) => {
        return await Author.findOneAndDelete({ _id });
    }
In this mutation, we’re getting the _id that’s going to be passed and find an Author, if the _id matches we’re going to delete the Author.
Now, our whole resolvers.js should look like this:
    import Author from "../../models/Author";
    import Book from "../../models/Book";

    const resolvers = {
        Query: {
            getAuthor: async (parent, { _id }, context, info) => {
                return await Author.findById(_id)
                    .populate()
                    .then(author => author)
                    .catch(err => err);
            },
            getAllAuthors: async (parent, args, context, info) => {
                return await Author.find()
                    .populate()
                    .then(authors => authors)
                    .catch(err => err);
            }
        },
        Mutation: {
            createAuthor: async (
                parent,
                { firstName, lastName, age },
                context,
                info
            ) => {
                const newAuthor = await new Author({
                    firstName,
                    lastName,
                    age
                });

                return new Promise((resolve, reject) => {
                    newAuthor.save((err, res) => {
                        err ? reject(err) : resolve(res);
                    });
                });
            },
            deleteAuthor: async (parent, { _id }, context, info) => {
                return await Author.findOneAndDelete({ _id });
            }
        },
        Author: {
            books: async ({ _id }, args, context, info) => {
                return await Book.find({ author: _id });
            }
        }
    };

    export default resolvers;
Our mutations and queries and ready to go, and now we can write our Book mutations.
Inside the Book folder, go to resolvers.js and create a new object called Mutation as well, and inside that object put the following code:
    createBook: async (parent, { title, description, language, author }, context, info) => {
        const newBook = await new Book({
            title,
            description,
            language,
            author
        });

        return new Promise((resolve, reject) => {
            newBook.save((err, res) => {
                err ? reject(err) : resolve(res);
        });
    });
This code is pretty self-explanatory as well and similar to the Author mutation, but this time we’re going to get the four arguments that we’re going to pass to our mutation and create a new Book.
Now we’re going to write our mutation to delete a Book, so inside the mutation object, paste the following code:
    deleteBook: async (parent, { _id }, context, info) => {
        return await Book.findOneAndDelete({ _id });
    }
Now, our whole resolvers.js should look like this:
    import Author from "../../models/Author";
    import Book from "../../models/Book";

    const resolvers = {
        Query: {
            getBook: async (parent, { _id }, context, info) => {
                return await Book.findById(_id)
                    .populate()
                    .then(book => book)
                    .catch(err => err);
            },
            getAllBooks: async (parent, args, context, info) => {
                return await Book.find()
                    .populate()
                    .then(books => books)
                    .catch(err => err);
            }
        },
        Mutation: {
            createBook: async (
                parent,
                { title, description, language, author },
                context,
                info
            ) => {
                const newBook = await new Book({
                    title,
                    description,
                    language,
                    author
                });

                return new Promise((resolve, reject) => {
                    newBook.save((err, res) => {
                        err ? reject(err) : resolve(res);
                    });
                });
            },
            deleteBook: async (parent, { _id }, context, info) => {
                return await Book.findOneAndDelete({ _id });
            }
        },
        Book: {
            author: async ({ author }, args, context, info) => {
                return await Author.findById(author);
            }
        }
    };

    export default resolvers;
Now that the code for our mutations is ready, we can start to test them and create and delete data. So, let’s get started!
Testing Mutations in GraphQL
To test our mutations, we need to go to our playground at localhost:4000/playground and write our first mutation. We’re going to start with the createAuthor mutation because if we want to create a book we need an Author first. Here's our first mutation:
    mutation {
      createAuthor(firstName: "Stephen", lastName: "King", age: 71) {
        _id
        firstName
        lastName
        age
      }
    }
This is pretty similar to a query, but we need to specify that this is a mutation, then, we pass the name of the mutation. The createAuthor mutation requires a firstName, lastName and an age.
Now if you write that mutation above, and press the button, we’re going to run the query on our server and get the following result:

Success! We created our first Author, now if we make the getAllAuthors query we should see the Author we created!
Now, we need to delete that author to test if our deleteAuthor mutation is working. We need to write a mutation and pass the _id of the Author that we created, and it should return the information that the Author was indeed deleted.
So now, write this following mutation:
    mutation {
      deleteAuthor(_id: "5c5f0cdeeb1772069c8d12e9") {
        _id
        firstName
        lastName
        age
      }
    }
Remember that you should pass the exact _id of the Author that we created. Now, if you run you’re going to get the Author that we created first, and now it got deleted.

The Author got deleted successfully! If you want to check this, you can run the getAllAuthors query and see that we only have one Author now!
Mutations are pretty similar to queries, the only difference is that with mutations we can create, modify and delete data.
We tested our Author mutations, now, I'll leave to you to test the Book mutations. Doing this is pretty similar to the Author mutations, you just need to change the fields, and when you go to create an Author you need to pass an _id of an Author.
Conclusion
In this tutorial, we learned what mutations in GraphQL are and how they work, and in the next tutorial in this series we’re going to learn more about subscriptions in GraphQL.
Here's the repo containing all the code we've gone through today.
So, stay tuned and see you in the next tutorial!