Setting up a Web Development Environment on Windows 10 + WSL (Windows Subsystem for Linux) for Newbies by a Newbie.


Introduction
I will start by letting you know i am not much of a writer but i want to put this out to help Newbies like me set up their Web development environment from scratch on Windows 10 + WSL. Please note my language ATM is JavaScript with plans to learn Python. While there are many articles out there detailing the processes, i found them so overwhelming as different writers pen down their different opinions. I have been where you are now trying to figure out which author's article to follow and i hope this article help simplify the whole process and skip all the unnecessary write ups by most authors.
First of all, i am running a Windows 10 Enterprise Edition version 1809 build 17763.107. To check your windows 10 version, press the Windows key + R and type in winver. WSL is supported in Windows 10 Fall Creators Update and later, i.e Windows build 16215 or later. If you are on an earlier version, please do upgrade to the latest one.
Enough! Lets start...
Activating WSL (Windows Subsystem for Linux)
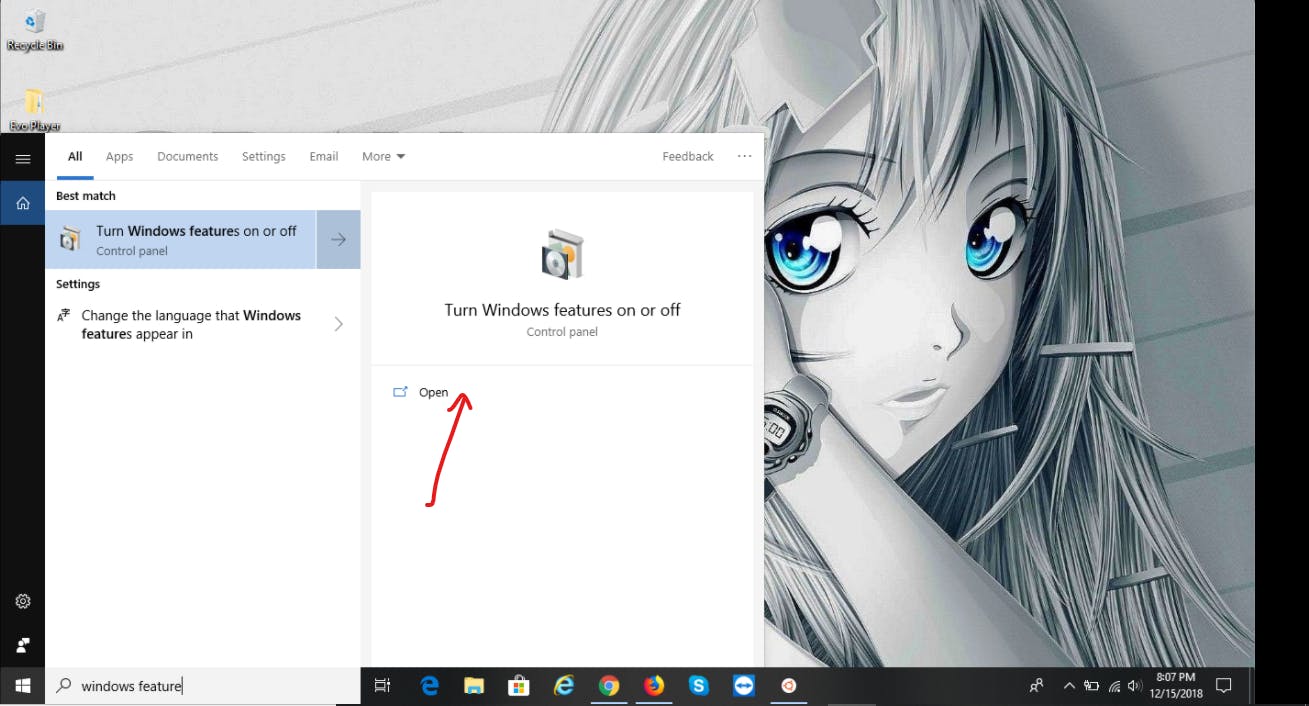
Search Windows feature from your task-bar search menu and click on the open.
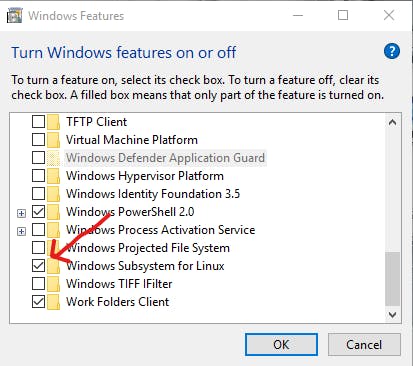
Once the Windows feature dialog box opens, tick/check/select the checkbox besides Windows Subsystem for Linux and select OK. I will prompt you to restart the system after some initial setup, restart and let windows configure the underlying system files. It is very important to restart before proceeding.
Installing your favorite Linux Distro
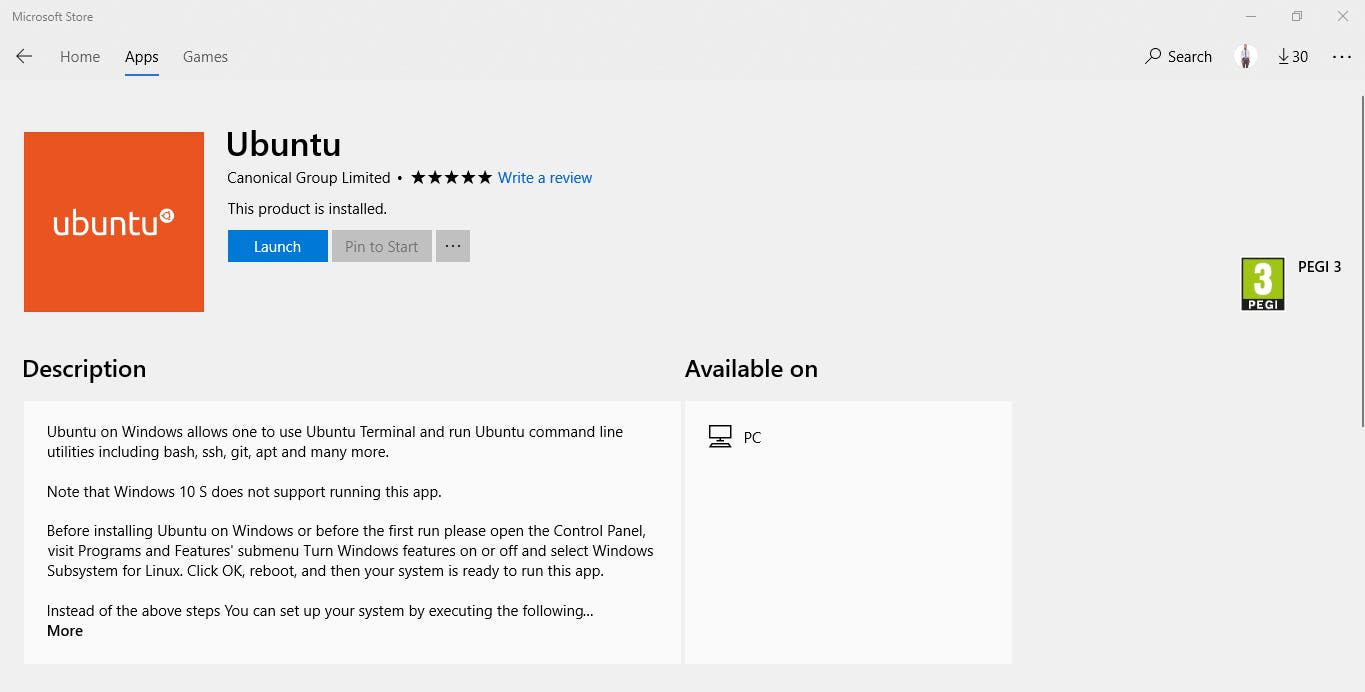
Once your system is done updating the necessary files, we need to install any Linux Distro of choice available in the Microsoft Store. I personally prefer Ubuntu since i have a little knowledge of it. Open the Microsoft Store and search for Ubuntu or any distro of choice and click on get to start the download process.
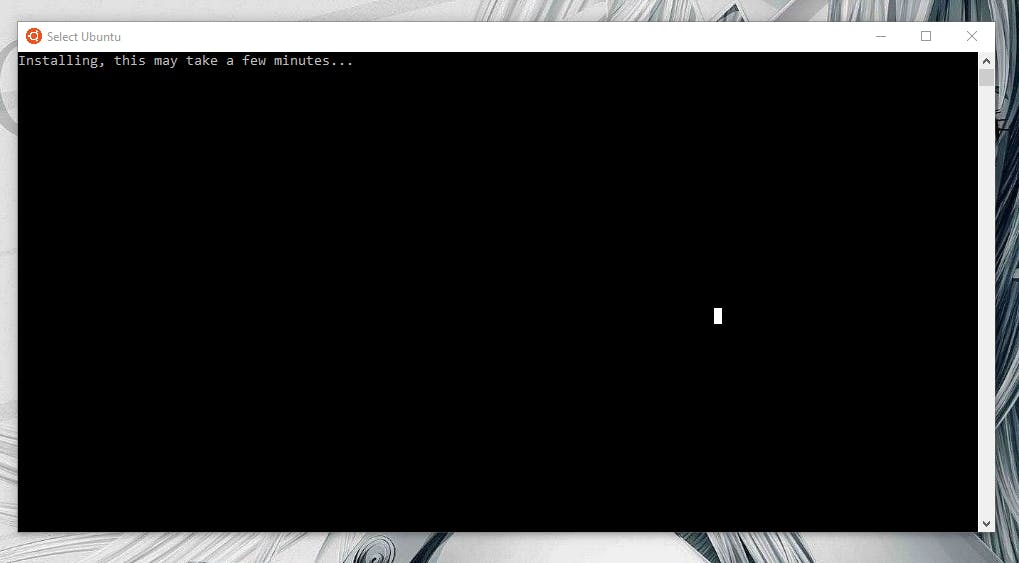
After downloading, click on Launch to start the installation of Ubuntu. Wait while Ubuntu installs.
I will be updating this article as i keep setting my work-space, please bear with me ATM till its complete.