
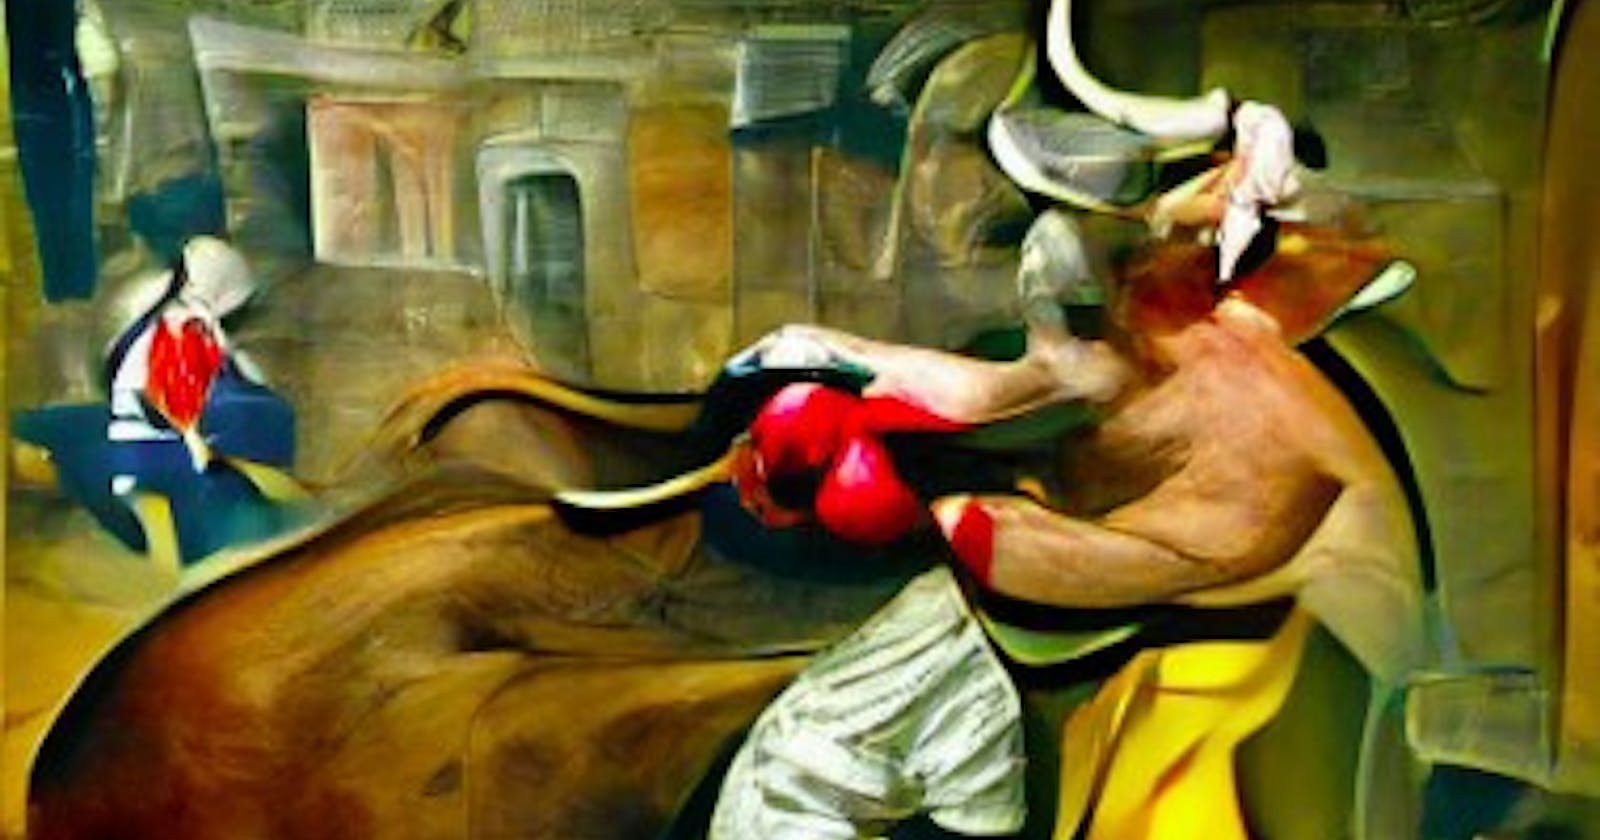
Text to Image Synthesis Using Multimodal (VQGAN + CLIP) Architectures


After synthesis of text input “A man fighting with a bull”
What’s up, guys!!
This is my first story on Medium.
Today, I’m going to do a GAN project with a multi-modal deep learning architecture called clip that is going to link text with visual elements. I’ll be combining it with a generative model, a transformer type of architecture so that I can take a text prompt and generate visuals and images, even make videos of sequences from that text prompt.
You can do it along with me. Let’s get into it:
I’m gonna work with two cutting-edge generative architectures that are going to allow us to do multi-modal generation. The ability to connect different modalities, in this case, text and images. Text and visual elements with a combination of two architectures: CLIP Architecture (by OpenAI) and Taming Transformers
CLIP Architecture:
Learning transferable visual models from natural language supervision and CLIP means Contrastive Language Image Pre-training.
The trained model predicts which encoding of text and what text encoding corresponds with what encoding of what a visual encoding.
[ Sources: CLIP GitHub, CLIP Paper, blog ]
Taming Transformers:
Type of generative architecture that can create and invent text to follow the text prompt with more and more text. This is a different kind of transformer that uses an architecture called VQGAN. It combines elements of convolutional architecture with GAN types of elements. It uses a codebook, works with patches.
Creating the sequence of text elements is not very difficult but images have a very large no. of pixels which leads to the creation of long sequences in transformers.
But we can solve this by using — by working with patches. 16 x 16 patches of pixels so we reduce the dimensionality of the problem.
Codebook trains the network to learn matrices instead of working with pixels directly. It learns kinds of representations of parts of the image that are stored in the codebook, and then when it does generate through the decoder, it works by taking parts of the codebook. (It has different parts, convolutional, decoder, etc.)
Optimization Process:
Take the text phrase and pass it through the CLIP architecture to encode it. And get that encoding in 512 numbers (encoding of the Architecture, understanding of CLIP architecture of that text). Do the same thing with the image, but instead of sending the image as it is, augment it, rotate it, move it or create crops of it (20, 30, 40, 50,….). In this case, I’m gonna create 30 different crops. It is done to help the architecture to understand the image better by giving it multiple versions of it. So, I’m gonna send 30 crops of image clips (with specific rotations, translations) and encode its understanding of those crops. 30 sets of encodings or 512 values.
Now I’m gonna compare those encodings by using the function cosine similarity, a mathematical function that is used to calculate the similarity of mathematical vectors. It will help to calculate loss value, the performance of the network.
If I managed to get the encoding of the text as similar as possible to the encoding of the crops of the image, it would mean that the content of the image matched the content of the text.
Include Prompt:
What we want in the result:
- A monkey in the mt. Everest
- 20 people paragliding in the sky
- Two people playing football
Exclude Prompt:
What we don’t want in the result:
- Don’t want to have a blue color in the image.
- Don’t want to have confusing things in the image.
Extra Prompt:
What we want to apply to all of our includes prompts:
Eg.
Include prompts:
- A lad with a pink jacket.
- A boy playing chess
- An elephant with green legs
Extra prompts:
- Watercolor paper texture
Then watercolor paper texture will be applied to all of the include prompts.
Send them to clip to encode and eventually during the optimization, calculate the loss. Give some weight to the encoding of include texts and exclude ones to penalize so that one that should be excluded should increase value and one that should be included should decrease the loss value.
Also, one can begin the generation from a specific image/picture instead of noise input, and modify, edit that image in the direction specified by the text prompt.
Now, After generating new images, I’m gonna show you the capability of creating interpolations between the latent parameters generated by the process and then produce a video that shows the interpolations from one of the creations to other creations, and then show the video on a screen.
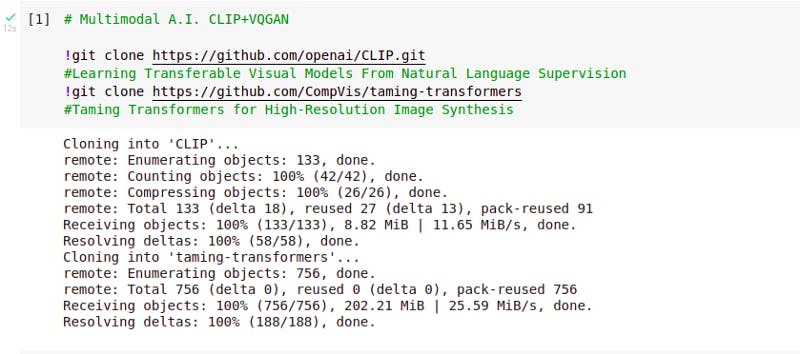
Coding and Execution:
!git clone https://github.com/openai/CLIP.git
!git clone https://github.com/CompVis/taming-transformers
Output:
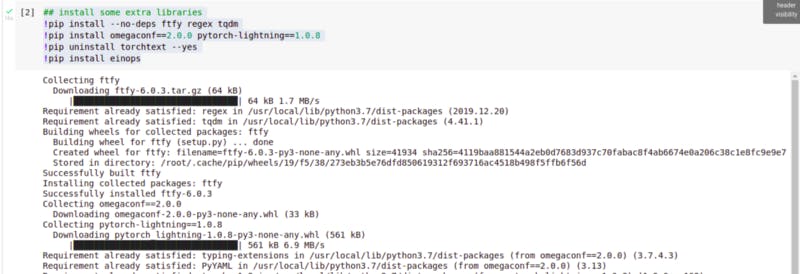
Install some libraries:
!pip install — no-deps ftfy regex tqdm
!pip install omegaconf==2.0.0 pytorch-lightning==1.0.8
!pip uninstall torchtext — yes
!pip install einops
Output:
Import libraries:
# import libraries
import numpy as np
import torch, os, imageio, pdb, math
import torchvision
import torchvision.transforms as T
import torchvision.transforms.functional as TF
import PIL
import matplotlib.pyplot as plt
import yaml
from omegaconf import OmegaConf
from CLIP import clip
#import warnings
#warnings.filterwarnings(‘ignore’)
Helper functions:
def ShowFromTensor(tensor):
img = tensor.clone()
img = img.mul(255).byte()
img = img.cpu().numpy().transpose((1,2,0))
plt.figure(figsize=(10,7))
plt.axis('off')
plt.imshow(img)
plt.show()
def NormData(data):
return (data.clip(-1,1)+1)/2 ### range between 0 and 1 in the result
### Parameters
learning_rate = .5
batch_size = 1
wd = .1 ## weight decay is regularization parameter, help to limit the size of weight and improve generalization capabilities of the architecture
noise_factor = .22 ## .1, .14 ...
total_iter=100 ## use more no. of iterations for more polished result
im_shape = [450, 450, 3] # height, width, channel
size1, size2, channels = im_shape
Now create a CLIP model:
# Create CLIP model
clipmodel, _ = clip.load('ViT-B/32', jit=False)
clipmodel.eval()
print(clip.available_models())
print("Clip model visual input resolution: ", clipmodel.visual.input_resolution)
device=torch.device("cuda:0")
torch.cuda.empty_cache()
Output:

The CLIP downloads a pre-trained model, so we don’t need to train CLIP, we can proceed to use it in inference, eval mode to encode texts and images directly.
[‘RN50’, ‘RN101’, ‘RN50x4’, ‘RN50x16’, ‘ViT-B/32’, ‘ViT-B/16’] are types of architectures that CLIP can use internally. (eg. RN50 — resNet architecture with 50 layers, ViT-B/32 — Visual Transformer)
And clip Model visual input resolution 224 pixels. This means, when we encode images in CLIP, we need to set them to 224 pixels.
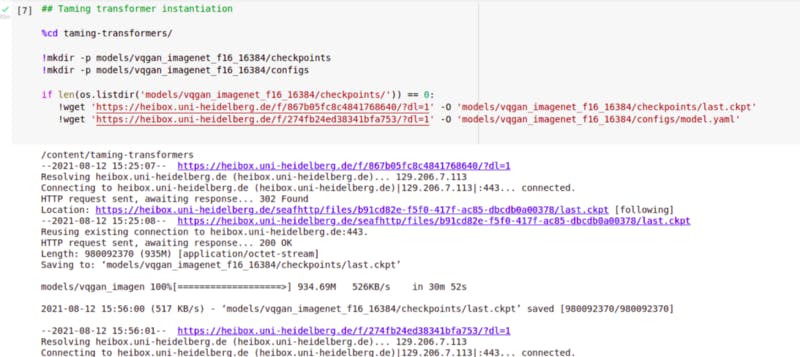
Taming transformer model:
%cd taming-transformers/
!mkdir -p models/vqgan_imagenet_f16_16384/checkpoints
!mkdir -p models/vqgan_imagenet_f16_16384/configs
if len(os.listdir('models/vqgan_imagenet_f16_16384/checkpoints/')) == 0:
!wget 'https://heibox.uni-heidelberg.de/f/867b05fc8c481768640/?dl=1' -O 'models/vqgan_imagenet_f16_16384/checkpoints/last.ckpt'
!wget 'https://heibox.uni-heidelberg.de/f/274fb24ed3831bfa753/?dl=1' -O 'models/vqgan_imagenet_f16_16384/configs/model.yaml'
Here, vqgan_imagenet_f16_16384 means VQGAN image net is trained with images from the image metadata set f-16 because the file is named using downsampling factor f16 for each. And 16384 is codebook dimensionality.
Now create two checkpoints and configs folders if they don’t exist already.
Both links heidelberg.de are working to date in Nepal, but if they don’t work in the future there should be some alternative.
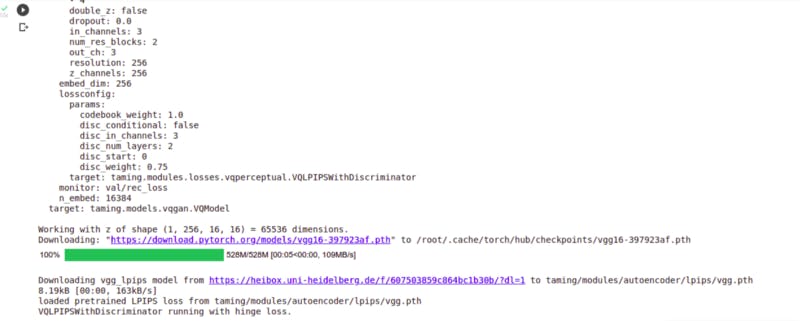
By running this, it downloads Heidelberg’s pre-trained VQGAN model, last checkpoints, and configuration information that will be in model.yaml file.
Output:
Now after downloading the checkpoint, let’s instantiate the Taming transformer VQGAN architecture.
from taming.models.vqgan import VQModel
def LoadConfig(config_path, display=False):
config_data = OmegaConf.load(config_path)
if display:
print(yaml.dump(OmegaConf.to_container(config_data)))
return config_data
def LoadVQGAN(config, chk_path=None):
model = VQModel(**config.model.params)
if chk_path is not None:
state_dict = torch.load(chk_path, map_location="cpu")["state_dict"]
missing, unexpected = model.load_state_dict(state_dict, strict=False)
return model.eval()
def Generator(x):
x = taming_model.post_quant_conv(x)
x = taming_model.decoder(x)
return x
taming_config=LoadConfig("./models/vqgan_imagenet_f16_16384/configs/model.yaml", display=True)
taming_model=LoadVQGAN(taming_config,chk_path="./models/vqgan_imagenet_f16_16384/checkpoints/last.ckpt").to(device)
First, create a function for load configuration using library OmegaConf and dump to YAML file to see the configurations.
Second, create another function to load the VQGAN model. Use the previously imported model with the config file. Load state_dict dictionary that contains all the parameters of the model. And load checkpoint with path, map location to “CPU”. Now load the dictionary into the model.
Here, we’re going to use a model directly, no need to train so put it in evaluation or eval() mode.
The third and last function is Generator. Take input and generate images from it. For this input is passed through the taming model and output is passed to the decoder.
Then load configurations on the model.
(The models folder is within the taming-transformers folder as we did before, so paths are relative to the content of that folder)
Output:
Declare the values (Latent space, parameters) that we are going to optimize:
class Parameters(torch.nn.Module):
def __init__(self):
super(Parameters, self).__init__()
self.data = .5*torch.randn(batch_size, 256, size1//16, size2//16).cuda() # 1x256x28.125x28.125 (450/16, 450/16)
self.data = torch.nn.Parameter(torch.sin(self.data))
def forward(self):
return self.data
def init_params():
params=Parameters().cuda()
optimizer = torch.optim.AdamW([{'params':[params.data], 'lr':learning_rate}], weight_decay=wd)
return params, optimizer
Initialize data with random numbers from a normal distribution with parameters as batch size, channels, and size, where size is divided by 16 because of requirement(16 x 16 patches). For tensor of random value 1, it will be 1x256x28.125x28.125. (450/16 = 28.125, 450/16 = 28.125)
Here, multiplying by .5 is because personally experimentally it is found to be good before taking data from a normal distribution.
Then, in recurrent neural networks, they have clear indications of the positioning of the elements based on architecture itself but in transforming architectures, you just push all the data at once. This means it is the use of periodic mathematical functions to embed positioning information within the data. And we’re using mathematical sine.
Create a forward function which returns data just called.
Finally, create a helper function. In this call that function(Parameters), on-call refresh and reset those parameters then declare optimizer. (Adam optimizer is used for this.)
Encoding of text prompts in CLIP architecture:
# Let’s Encode prompts
normalize = torchvision.transforms.Normalize((0.48145466, 0.4578275, 0.40821073), (0.26862954, 0.26130258, 0.27577711))
def encodeText(text):
t=clip.tokenize(text).cuda()
t=clipmodel.encode_text(t).detach().clone()
return t
def createEncodings(include, exclude, extras):
include_enc=[]
for text in include:
include_enc.append(encodeText(text))
exclude_enc=encodeText(exclude) if exclude != '' else 0
extras_enc=encodeText(extras) if extras !='' else 0
return include_enc, exclude_enc, extras_enc
augTransform = torch.nn.Sequential(
torchvision.transforms.RandomHorizontalFlip(),
torchvision.transforms.RandomAffine(30, (.2, .2), fill=0)
).cuda()
Params, optimizer = init_params()
with torch.no_grad():
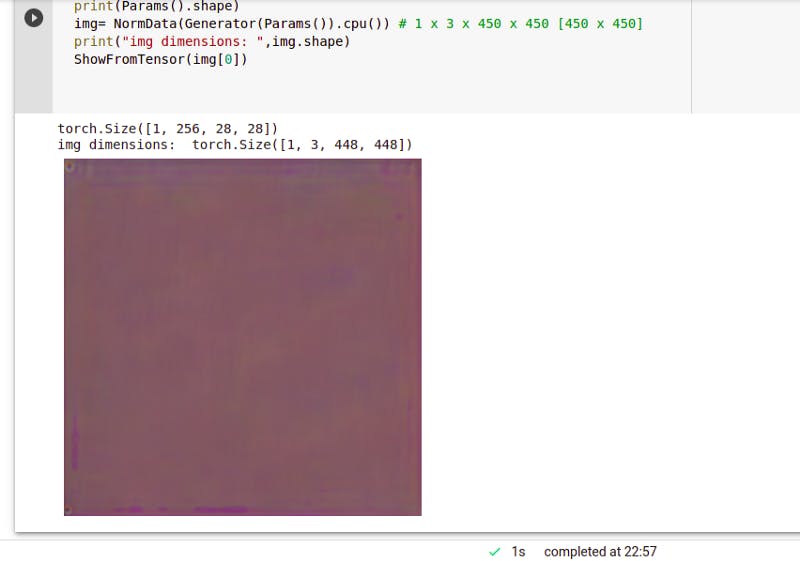
print(Params().shape)
img= NormData(Generator(Params()).cpu()) # 1 x 3 x 450 x 450 [450 x 450]
print("img dimensions: ",img.shape)
ShowFromTensor(img[0])
Here, normalizing is required in this architecture so define a variable and use values for the mean, variance that has been prepared already for us.
Create a function that receives the text then calls the CLIP model to tokenize the text. Pass result through the encode function of the model and detach the result from the computation of gradients and will clone the results so that we can use our own memory space on the variable.
Now define a generic function that will be applied to exclude, include, and extras of our prompts.
When sending the image to encode, we’re not gonna send a single image. We also send a set of crops of the image. To declare a variable for augmentation transformation of the image. After doing some random rotations then some translations and remaining are filled with zeros.
[Note: The augmentations are first applied to the single image produced by the generator and then from that output, the different crops are created.]
Initialize parameters and optimizer and make a simple test to generate an image through a transformer generator with random initial parameters. Call generator function and pass parameters we declared before and put the result back on the CPU. It will return 1 in the first dimension then three channels, 448, 448. (1 x 3 x 448 x 448 [450, 450] but we get 448 due to rounding.)
Output:
Create crops:
def createCrops(img, num_crops=32):
p=size1//2
img = torch.nn.functional.pad(img, (p,p,p,p), mode='constant', value=0) # 1 x 3 x 672 x 672 (adding 112*2 on all sides to 448x448)
img = augTransform(img) #RandomHorizontalFlip and RandomAffine
crop_set = []
for ch in range(num_crops):
gap1= int(torch.normal(1.2, .3, ()).clip(.43, 1.9) * size1)
offsetx = torch.randint(0, int(size1*2-gap1),())
offsety = torch.randint(0, int(size1*2-gap1),())
crop=img[:,:,offsetx:offsetx+gap1, offsety:offsety+gap1]
crop = torch.nn.functional.interpolate(crop,(224,224), mode='bilinear', align_corners=True)
crop_set.append(crop)
img_crops=torch.cat(crop_set,0) ## 30 x 3 x 224 x 224
randnormal = torch.randn_like(img_crops, requires_grad=False)
num_rands=0
randstotal=torch.rand((img_crops.shape[0],1,1,1)).cuda() #32
for ns in range(num_rands):
randstotal*=torch.rand((img_crops.shape[0],1,1,1)).cuda()
img_crops = img_crops + noise_factor*randstotal*randnormal
return img_crops
Create a function called createCrops. And let’s set default value 32 for no. of crops value. Add some padding around the image so that we can rotate, translate and preserve image information.
Let’s set padding as height divided by 2 or 3. Then set padding on all sides as (p,p,p,p). So the dimension will be 1 x 3 x (448+112+112) x (448+112+112) = 1 x 3 x 672 x 672.
Now apply previously declared augmentations transformations (augTransforms). Set crops that are empty initially. Define a couple of variables or no. of pixels or numbers to use for offset and also for the amount of crop, here is gap1, gap2 defined.
Crop image keeping first two dimensions as they are and change last two dimensions as extended with gap1.
Resize crop to 224x224 and accumulate to crops dictionary we defined previously. Resolution will be 30 x 3 x 224 x 224.
Finally, add some noise to the crop. With noise factor and some random values from a normal distribution of the same dimensionality.
Davinci Sfumato texture:-
The lines that are in the above code are actually for the sfumato effect. (You will know at the end.)
randnormal = torch.randn_like(img_crops, requires_grad=False)
num_rands=0
randstotal=torch.rand((img_crops.shape[0],1,1,1)).cuda() #32
for ns in range(num_rands):
randstotal*=torch.rand((img_crops.shape[0],1,1,1)).cuda()
img_crops = img_crops + noise_factor*randstotal*randnormal
[ Note: Davinci Sfumato ]
Let’s create a function to see the generated image at any state:
def showMe(Params, show_crop):
with torch.no_grad():
generated = Generator(Params())
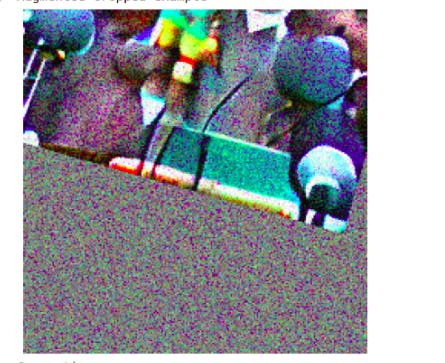
if (show_crop):
print(“Augmented cropped example”)
aug_gen = generated.float() # 1 x 3 x 224 x 400
aug_gen = createCrops(aug_gen, num_crops=1)
aug_gen_norm = NormData(aug_gen[0])
ShowFromTensor(aug_gen_norm)
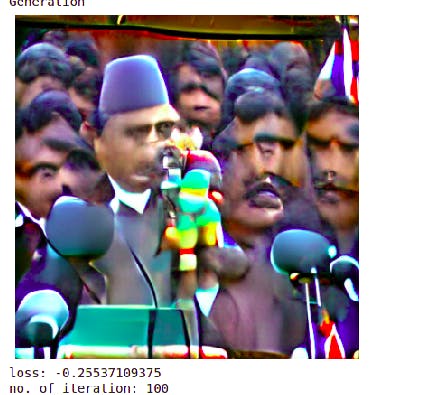
print(“Generation”)
latest_gen=NormData(generated.cpu()) # 1 x 3 x 224 x 400
ShowFromTensor(latest_gen[0])
return (latest_gen[0])
Let’s don’t involve gradient here. Pass parameters that we’re used for the optimization of the generator, to generate an example image at the current state of the parameters. (1 x 3 x 450 x 450)
And now call createCrops function to create crops but only one crop. Normalize the result and show.
Then for generation, the latest generation is going to normalize what we already generated. Finally, show the image.
Optimizing the mode by tweaking the parameters:
# Optimization process
def optimizeResult(Params, prompt):
alpha=1 ## the importance of the include encodings
beta=.5 ## the importance of the exclude encodings
## image encoding
out = Generator(Params())
out = NormData(out)
out = createCrops(out)
out = normalize(out) # 32 x 3 x 448 x 448
image_enc=clipmodel.encode_image(out) ## 32 x 512
## text encoding w1 and w2
final_enc = w1*prompt+w1*extras_enc # prompt and extras_enc:1x512
final_text_include_enc = final_enc / final_enc.norm(dim=-1, keepdim=True) #1x512
final_text_exclude_enc = exclude_enc
## calculate the loss
main_loss = torch.cosine_similarity(final_text_include_enc, image_enc, -1) # 32
penalize_loss = torch.cosine_similarity(final_text_exclude_enc, image_enc, -1) # 32
final_loss = -alpha*main_loss + beta*penalize_loss
return final_loss
def Optimize(Params, optimizer, prompt):
loss = optimizeResult(Params, prompt).mean()
optimizer.zero_grad()
loss.backward()
optimizer.step()
return loss
Let’s create a function called Optimize that will gonna receive the current state of the parameters, optimizer, and text prompt. Calculate current loss calling a function optimzeResult which we gonna declare. After this, calculate the mean we are gonna get the loss for each crop and calculate the average of it. Set optimizer to gradient value zero, do backpropagation, and tweak-update to step with values of parameters. So, this is an optimizing function.
Now, define the optimizeResult function which will find the lost value and lowest value that is gonna drive the optimize function. It’s gonna receive params, and prompt. Declare a couple of variables alpha, beta with values 1 and 0.5 respectively. They will represent the significance or importance of include and exclude encodings resp. (here, since alpha>beta, include will be important than exclude during encodings)
After this generate a new image from parameters and normalize the result.
[Note: To calculate loss, encodings of text prompts and encodings of image crops generated from the current state of latent space parameters should be compared. So we need to pass parameters through a generator to generate a new image so that we can encode it.**]**
And create crops, normalize them with extra normalization (for the images to match CLIP architecture). Then create an image encoding by calling the CLIP model. (32 crops composed of 500 so, encoding dimensionality be 512x512)
W1, W2 are weights for include and extras text encodings. Divide encoding values by their normalization to get them in the correct range.
Now calculate the loss using cosine similarity mathematical function. Main loss(include), penalize loss(exclude). (each of the 32 crops will be compared with the single encoding of include texts and exclude texts respectively)
Then total loss will be the summation of both losses as:
Main loss multiplied by alpha(include factor) AND Penalize loss multiplied by beta(exclude factor).
Now it’s time for training loop coding:
### training loop
def training_loop(Params, optimizer, show_crop=False):
res_img=[]
res_z=[]
for prompt in include_enc:
iteration=0
Params, optimizer = init_params() # 1 x 256 x 14 x 25 (225/16, 400/16)
for it in range(total_iter):
loss = Optimize(Params, optimizer, prompt)
if iteration>=80 and iteration%show_step == 0:
new_img = showMe(Params, show_crop)
res_img.append(new_img)
res_z.append(Params()) # 1 x 256 x 14 x 25
print("loss:", loss.item(), "\nno. of iteration:",iteration)
iteration+=1
torch.cuda.empty_cache()
return res_img, res_z
Create a function that takes parameters, optimizer. Initialize each of the encodings with iteration set to zero. Initialize parameter on every call.
Calculate the loss calling optimize function defined previously. And display the image as you want. Here, I’m gonna show image 1 iteration before the final iteration. So, call showMe function and declare prompts, increase iterations. In the end, you can delete the cache of GPU.
It’s SHOWTIME:
torch.cuda.empty_cache()
include=[‘A primeminister giving a speech in public’]
exclude=’watermark, cropped, confusing, blurry’
extras = “watercolor paper”
w1=1
w2=1
noise_factor= .28
total_iter=1000
show_step=100 # set this to see the result every 100 iterations
include_enc, exclude_enc, extras_enc = createEncodings(include, exclude, extras)
res_img, res_z=training_loop(Params, optimizer, show_crop=True)
Output:
After 100 iterations crop and non-crop image results:
And so on…
If you refresh and re-run from starting, it will show different images on the same step. It is because we’re using stochastic processes not deterministic.
Check resulting images dimensionalities:
print(len(res_img), len(res_z))
print(res_img[0].shape, res_z[0].shape)
print(res_z[0].max(), res_z[0].min())
Output:

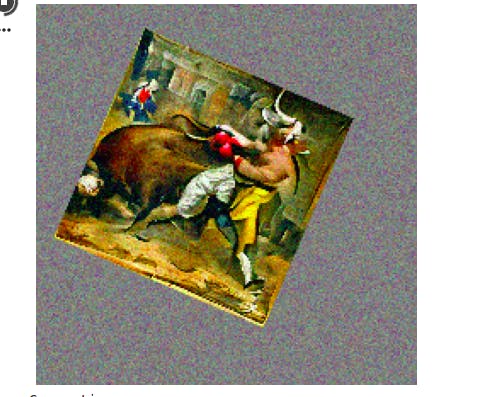
Let’s see another example:
Include: “A man fighting with a bull”
Exclude: “Watermark, blurry, cropped, confusing, cut, incoherent”
Extra: “ ”
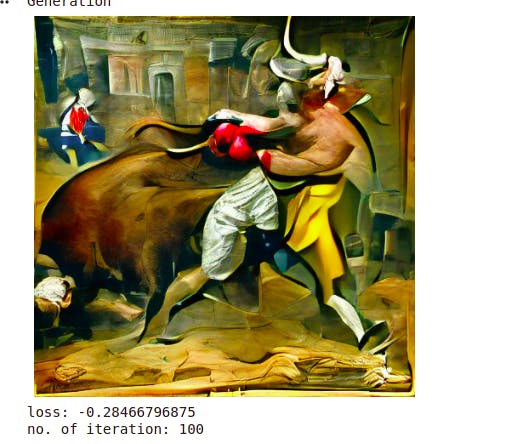
Excellent !!
[The best generation might not be the last one always… It could be one of previous]
At last, Multiple prompts and results:
Include: [ “A man fighting with a bull”, “A dog sleeping in the park”, “People striking in the road”]
Exclude: “Watermark, blurry, cropped, confusing, cut, incoherent”
Extra: “ ”
Thank you!