


Almost all the developers around the globe use GitHub for various kinds of reasons like sharing code with fellow developers, source code management, etc.
Being an iOS developer, I have created few open-source projects and actively post iOS-related content on social media and my personal GitHub. On joining my new workplace, LambdaTest, I was provided with a new Organisation GitHub account. Wanting to keep contributing to open-source, I was curious to find a way to manage two different accounts on a single machine, my personal account as well as my organisation account.I my short-while here at LambdaTest, the culture has taught me the importance of sharing, helping fellow developers and has deepened my belief of giving back to the community.
I did some research and found few articles on how to manage multiple GitHub accounts on a single machine but the details and exact steps were scattered all around. After trying out multiple approaches, finally, I was able to configure it successfully.
I am sure these kinds of situations occurred at some point of time in every developer’s life where we need to manage multiple GitHub accounts on a single machine, So let us start setting up both accounts on a single machine.
Steps required to setup GitHub account
Generate an SSH key for the new account.
Attach this new key to your GitHub account.
Register the new key with SSH agent.
Create an SSH config file.
Generate an SSH key for the new account
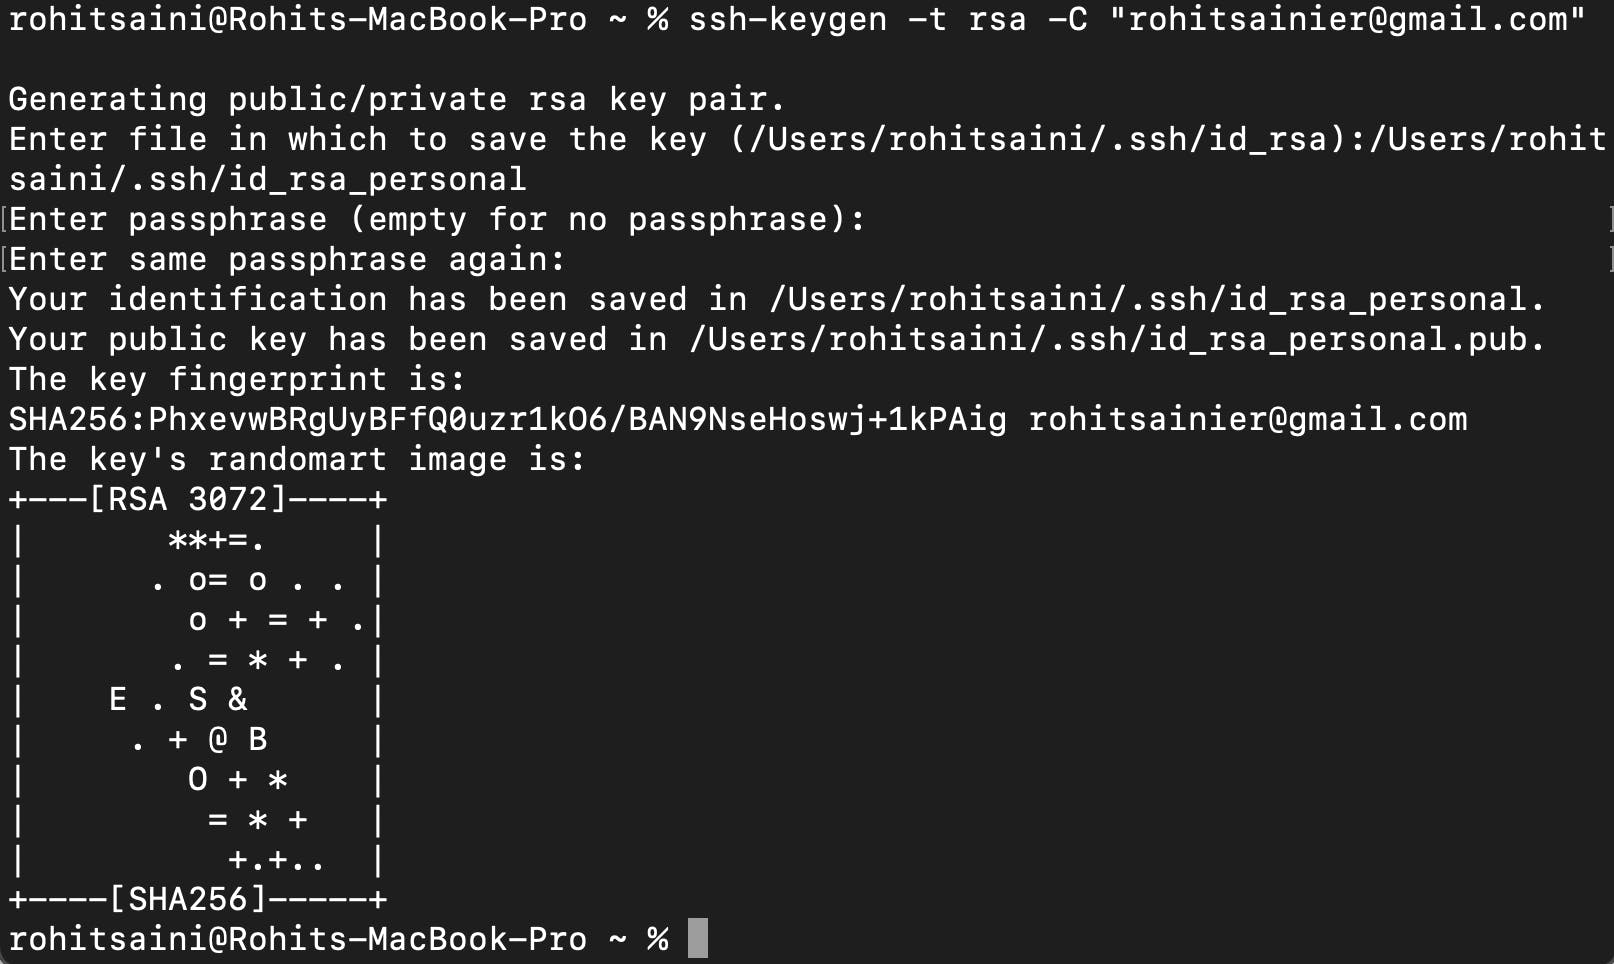
Open your terminal and run the following command:

This will generate a public/private rsa key pair, the private key will store into your keychain access and the public key will require further setup.
Note:-
You need to be careful not to override your existing key pair(if you already have another GitHub account on your machine)
Instead, you can copy the directory and modify the file name to include your account name, as in the screenshot below
I have changed it to /User/rohitsaini/.ssh/id_rsa_personal from /User/rohitsaini/.ssh/id_rsa.
Attach the new key to your GitHub account
After successfully generating the public/private rsa key pair, now we just need to copy the public key and add it to your GitHub account.
Copy the public key via the following command.

Log in to your personal GitHub account:-
Go to Settings.
From the left side navigation, click SSH and GPG keys.
Click on New SSH key, name it(it’s a good idea to name it after the computer you’re using it in), and paste the key you previously copied.
Click Add key.
Register the new key with the SSH agent.
Now we will add the keys for our work account and personal account(we just created) by using the following commands:
 For work account
 For personal account
Create an SSH config file.
This is the last step in setting up the multiple GitHub account, the SSH config allows us to set configuration rules that will specify when we want to push to our work account versus our account.
If the file has already been created, it should be at ~/.ssh/config , but by default , it will not exist, so we will need to create it by running the command touch ~/.ssh/config
You can use any Text Editor to modify the config file.
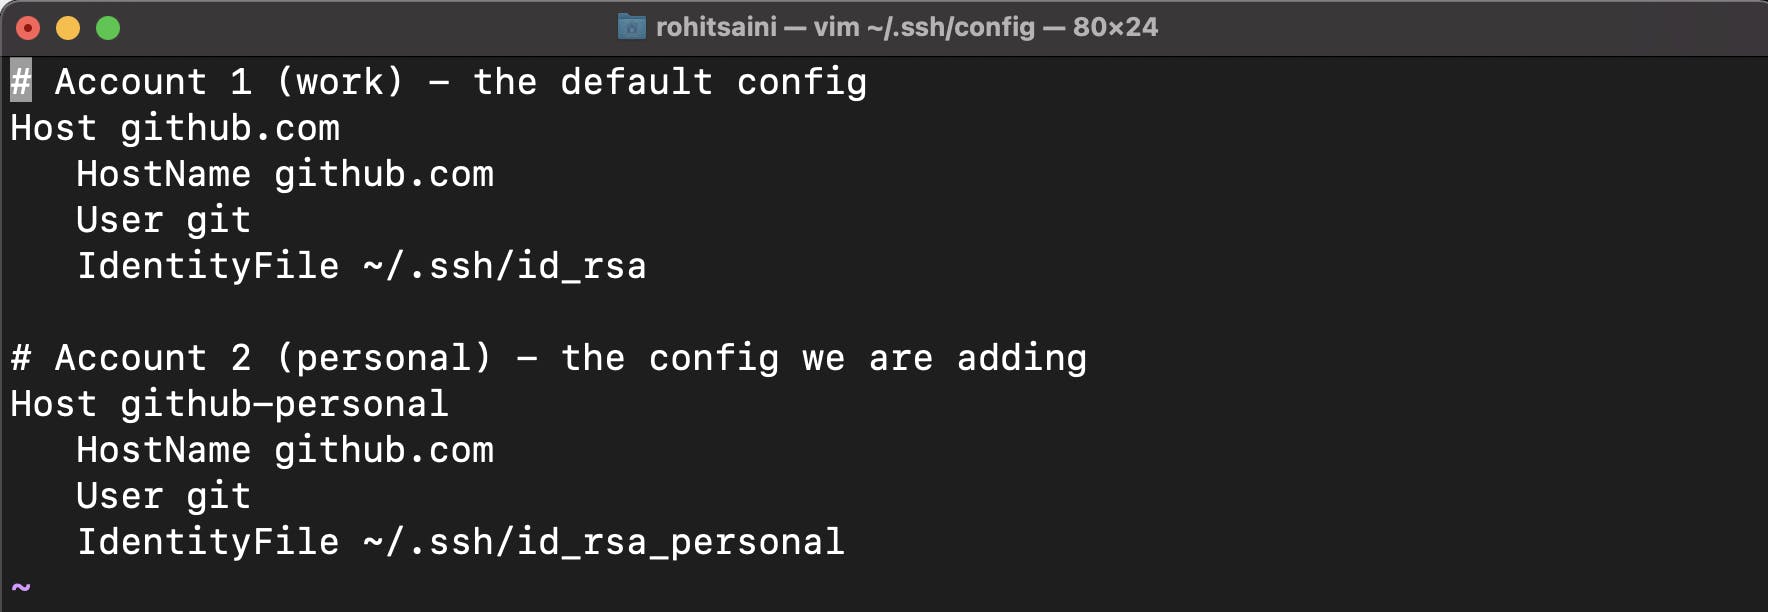
Save the file and close it, that’s it we are done with the setup, it’s time to test it out.
Create a new repository for testing purposes
After creating the repo just copy and paste all the commands from GitHub to your terminal except one, we need to replace github.com with the host we set up in our config file earlier, so instead of the default host git@github.com, we use git@github-personal.

Note:- You can change your username and email locally via following commands
git config user.name “yourusername”
git config user.email “yourmail@gmail.com”