
How to Add Chatbot in Vue.js Apps


In this post, we will be learning how to add chatbot in Vue.js apps. Vue.js is an open-source JavaScript framework for building user interfaces and single-page applications.
Pre-requisites To get started, you would need a Dialogflow chatbot or working knowledge of Dialogflow and Vue JS. To integrate the chatbots with Vue.js, you will need a Kommunicate account. All the aforementioned tools are free to try out.
If you do not have a Dialogflow chatbot, we have got you covered. Download a free sample from here .
Steps to add Dialogflow chatbot in Vue.Js Apps Here the instructions are given to explain how Dialogflow and Vue js are integrated with the help of Kommunicate.
Note: To keep it very simple and straight this tutorial explains with really basic and plain code development. This project is also available on the Github . To get an in-depth tutorial on how to integrate the bot into a website you can check here.
1. Create your Dialogflow chatbot
You can easily create a chatbot in Dialogflow or edit one of their sample chatbot templates, or download our sample bot. To go further, you can create your own Intents & Entities.
In case you want to know more about Dialogflow chatbot development, see the beginner’s guide to Dialogflow here.
2. Integrate Dialogflow chatbot with Kommunicate
Login to your Kommunicate dashboard and open the Bot section. If you do not have an account, you can create one here. Locate the Dialogflow section and click on Settings.
3. Integrate chatbot – add chatbot in vue.js apps
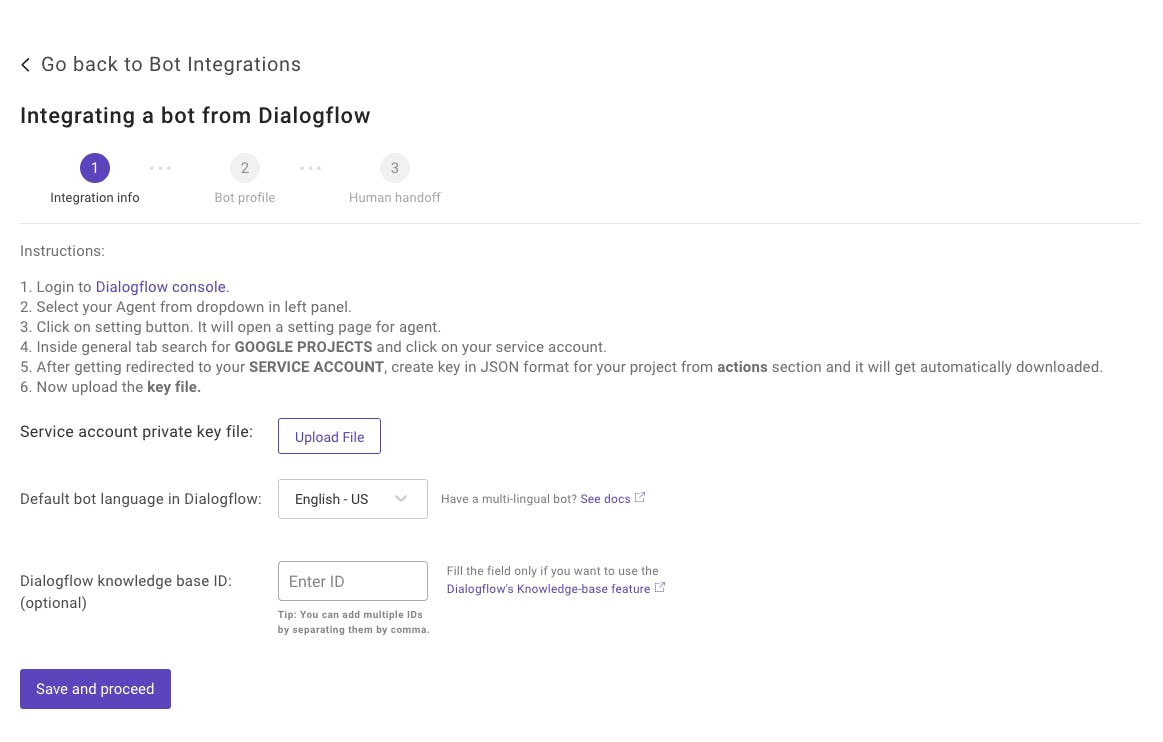
Now, navigate to your Dialogflow console and download the service account key file. You can find the steps to download the service key file in the above image/modal.
Setup your bot’s name and profile picture and choose whether to allow the bot to human handoff. Click Finish bot integration setup to complete the integration. Your bot is now integrated.
You can create a new workspace and initialize the Vue.js app project or directly run your existing project by launching the server using the CLI command:
npm run serve
Installing chatbot in the vue.js component To install the chat widget in the Vue.js component, you can either create a new component file or add the Kommunicate install code in your existing component file. A simple and effective way to solve this, it’s by adding your external script into the ‘Vue mounted()’ section of your component.
Run any code editor and open your workspace folder to further navigate to the component file.
Note: Vue Components are one of the important features of Vue.js that create custom elements, which can be reused in HTML.
To install the chatbot, open Kommunicate and navigate to Dashboard →Settings. Click on Install under the Configuration section. Copy the code and add it to your website or application.
Paste the javascript code into the component file inside the <script> tag. The code of the component should look like this:
<script>
export default {
    methods: {
    },
    mounted (){
      (function(d, m){
        var kommunicateSettings = {"appId":"YOUR_APP_ID","popupWidget":true,"automaticChatOpenOnNavigation":true};
        var s = document.createElement("script"); s.type = "text/javascript"; s.async = true;
        s.src = "widget.kommunicate.io/v2/kommunicate.app";
        var h = document.getElementsByTagName("head")[0]; h.appendChild(s);
        window.kommunicate = m; m._globals = kommunicateSettings;
      })(document, window.kommunicate || {});
    },
    data: function(){
    }
}
</script>
Note: Make sure you replace “YOUR_APP_ID” with your APP Id provided in the install section.
The npm run serve command launches the server watches your files and rebuilds the app as you make changes to those files. And app gets hosted on your localhost.
If you run the browser, you should see a chat widget screen pop up and that means your chatbot is ready. This is how you add chatbot in Vue.js apps.

