


Hi, I am Wachira Nduati, an android Dev and today we'll be exploring Android Studio's Git integration and possibly answer this question that's been bugging me for sometime.
So here goes, I'm pretty good using Git on a terminal, but does Android Studio present a better option for me? Before I proceed, I must add that this is my very first blog post on hashnode but with enough reason, I already write on medium under @wachiranduati content poised at beginners getting started in android development. I will henceforth be using hashnode to write about topics slightly out of a beginner's scope into android development. But first, a little background into the real reason I'm writing this. I like most other 10x programmers *kidding enjoy using the terminal with Git as my VCS of choice. Now here's my predicament, a couple of months back, I got into android and later on realized that android studio had an inbuilt git tool(I guess I can call it that). I tried using it via the android studio terminal, but failed terribly. Should you be interested in making it work check out this link https://stackoverflow.com/questions/54935935/can-i-input-git-commands-in-android-studio-ide/55016133#55016133 but first let me indulge you into what Android Studio might have in-store for you.
Prior to this, I would have a terminal open alongside Android Studio on my PC.
 With this setup I'd be repetitively switching between one and the other, talk of messing with my efficiency. As a part time Linux user, I am aware of how awesome tab switching and work space switching is but on my windows machine,Windows 7, to say the least can be bothering. This emptiness always left me feeling like a solution to this must really exist, so again here we are. This write-up is a summary of me experimenting to finally figure out what Android Studio can do on the Git side of things and I must say things are looking pretty good.
By now, I've made the assumption that you have Git installed, you are conversant with Git and its lingo and you have some git experience on your belt. See, I will not be teaching about git but instead look at this more like an exploratory blog to get a view of what exactly one can do over the other and hopefully add a plus to your efficiency with this. Without further a do, lets get started...
IMPORTING REMOTE REPOSITORIES ON GITHUB
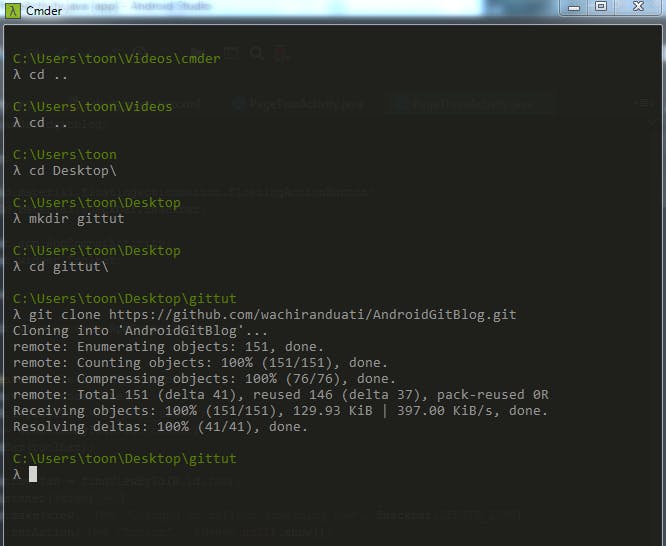
On a terminal open to the side, I can easily clone the remote project , go a step further to launch Android Studio. From here, I can then navigate to File -> Open then navigate to the location where my cloned repository was saved. About 3 steps but we now have our project ready.
With this setup I'd be repetitively switching between one and the other, talk of messing with my efficiency. As a part time Linux user, I am aware of how awesome tab switching and work space switching is but on my windows machine,Windows 7, to say the least can be bothering. This emptiness always left me feeling like a solution to this must really exist, so again here we are. This write-up is a summary of me experimenting to finally figure out what Android Studio can do on the Git side of things and I must say things are looking pretty good.
By now, I've made the assumption that you have Git installed, you are conversant with Git and its lingo and you have some git experience on your belt. See, I will not be teaching about git but instead look at this more like an exploratory blog to get a view of what exactly one can do over the other and hopefully add a plus to your efficiency with this. Without further a do, lets get started...
IMPORTING REMOTE REPOSITORIES ON GITHUB
On a terminal open to the side, I can easily clone the remote project , go a step further to launch Android Studio. From here, I can then navigate to File -> Open then navigate to the location where my cloned repository was saved. About 3 steps but we now have our project ready.
 With Android Studio, the process is ..interesting to say but the least..all we have to do is launch Android Studio navigate to
File->New->Project from VersionControl -> Git(this applies to a case where your android studio was already open in a project)
With Android Studio, the process is ..interesting to say but the least..all we have to do is launch Android Studio navigate to
File->New->Project from VersionControl -> Git(this applies to a case where your android studio was already open in a project)
 or
checkout project from VersionControl -> Git(this applies to a case where your android studio was not open and instead launches in the project picker dialog)
or
checkout project from VersionControl -> Git(this applies to a case where your android studio was not open and instead launches in the project picker dialog)
 Paste the remote repository's github link and bam! a few seconds later (much less than it took you to get done with the terminal) we have the project downloaded and launched in Android Studio. Neat! Note that we have a test button to the right of the input box, where you post your GitHub link. The test button will only go a step further to validate that the project actually does exist on the provided link.
BUILDING A PROJECT FROM SCRATCH
On a terminal in hand, I'd first Launch Android Studio and create a new project. Switch to my terminal then proceed to cd into the Android Studio project folder. In the parent folder, I'd then do a
$git init
and bam all done. My project is now being watched. Now comes the situation where we need to push it to our remote repository(that currently doesn't exist). Launch my browser and navigate to my GitHub homepage create a new repository, name it exactly as my project was named passing in all the necessary details i.e. the project visibility, the readme and the license to provide if any. By now we're a couple of steps in, all in a bid to retrieve that much needed repository url. Move back to the terminal after copying the project url and now simply add the remote origin to the git project. Stage the project files, commit them and simply push to master ;). Remember to hit Cntrl + Alt + Y to sync files with system. Before doing this you might notice that your files are highlighted in red.You'll just need to sync files and that's that. The button looks like a refresh button at the top of android studio.Sorry for having to read it out loud to you, but I had to emphasize exactly how much we had to do to get here.
 And now, we do the same but on Android Studio, this time it's different , the Force is with us;) Launch Android Studio, create your new project, navigate to the primary menu on Android Studio, between the Tool and Window menu option is a distinct VCS menu option. Click on it navigate down to the import into version control option, from here we can take two paths:
Path 1: create git repository
Create git repository will be like a typical terminal workflow except with a GUI, from here you select the android studio project folder. Note that this will quickly and silently initialize the folder ready for you to start development on creating the distinct .git folder for you. Of importance to note is that if we want to initialize the project we're currently in, it will be hidden and as such won't be available to initialize. It would be awesome if we could start off with a local repository made when creating the project. A half fail but nothing we can't correct. Again note that this will run silently as I for once tried to run the command twice and only on the second try that Android Studio notified me that a .git root file already existed prompting me on whether I wanted to add yet another one to my CVS.
And now, we do the same but on Android Studio, this time it's different , the Force is with us;) Launch Android Studio, create your new project, navigate to the primary menu on Android Studio, between the Tool and Window menu option is a distinct VCS menu option. Click on it navigate down to the import into version control option, from here we can take two paths:
Path 1: create git repository
Create git repository will be like a typical terminal workflow except with a GUI, from here you select the android studio project folder. Note that this will quickly and silently initialize the folder ready for you to start development on creating the distinct .git folder for you. Of importance to note is that if we want to initialize the project we're currently in, it will be hidden and as such won't be available to initialize. It would be awesome if we could start off with a local repository made when creating the project. A half fail but nothing we can't correct. Again note that this will run silently as I for once tried to run the command twice and only on the second try that Android Studio notified me that a .git root file already existed prompting me on whether I wanted to add yet another one to my CVS.
 Path 2: share project on github
This will definitely wow you! If you decide to go this way, this will prompt you to login to your GitHub account, a dialog will then display the proposed repository name, a checkbox to decide on your project's visibility, a remote field with origin already filled in and a description field left out for you to fill. This should look pretty familiar to you by now, if it still aint, Android Studio is guiding you as you build your remote repository. Hit the share button and the magic begins.
At the bottom Android Studio will show you the progress as it sets up your remote repository. Once done, a message box pops up with the message "successfully shared project on Github" with a link for you to follow. You must admit, Android Studio must be growing on you by now. I can't help but admit exactly how surprised I was with that one click setup by Android Studio, heck I never had to use my browser at any one time.
~ Now that I have your undivided attention, lets see just how good Android Studio really is.
Path 2: share project on github
This will definitely wow you! If you decide to go this way, this will prompt you to login to your GitHub account, a dialog will then display the proposed repository name, a checkbox to decide on your project's visibility, a remote field with origin already filled in and a description field left out for you to fill. This should look pretty familiar to you by now, if it still aint, Android Studio is guiding you as you build your remote repository. Hit the share button and the magic begins.
At the bottom Android Studio will show you the progress as it sets up your remote repository. Once done, a message box pops up with the message "successfully shared project on Github" with a link for you to follow. You must admit, Android Studio must be growing on you by now. I can't help but admit exactly how surprised I was with that one click setup by Android Studio, heck I never had to use my browser at any one time.
~ Now that I have your undivided attention, lets see just how good Android Studio really is.
 I didn't plan on this happening but before we proceed, here's a disclaimer I should leave here. Turns out the share I made the first time on GitHub was for another totally different project that I already had on GitHub bearing the same exact name and for some weird reason I never got a clash neither did I get an error thrown. On the repository itself everything looked unchanged. Sadly I can't replicate this, all I can say is make sure your project has a unique name. I ended up recreating the project from scratch to continue on with the blog and everything worked flawlessly, even viewed it on my browser.
In redoing it, I follow the exact same steps outlined earlier and did as before VCS -> import into version control -> share project on GitHub. On this occasion, unlike before, I'm presented with all my files to commit after which the share button does all the work initializing the project, staging the checked files, committing and pushing it successfully to the remote repository. Oh yeah, it created the repository all on its own too.
On a different note all together, if you're like me and you're relying on a phone to tether your computer to the internet, then it's likely someone will call your phone when your in the process of pushing your code. And a huge push error will be displayed at the bottom. Not to worry, Android Studio has you, simply navigate to VCS -> Git -> Push project.
I didn't plan on this happening but before we proceed, here's a disclaimer I should leave here. Turns out the share I made the first time on GitHub was for another totally different project that I already had on GitHub bearing the same exact name and for some weird reason I never got a clash neither did I get an error thrown. On the repository itself everything looked unchanged. Sadly I can't replicate this, all I can say is make sure your project has a unique name. I ended up recreating the project from scratch to continue on with the blog and everything worked flawlessly, even viewed it on my browser.
In redoing it, I follow the exact same steps outlined earlier and did as before VCS -> import into version control -> share project on GitHub. On this occasion, unlike before, I'm presented with all my files to commit after which the share button does all the work initializing the project, staging the checked files, committing and pushing it successfully to the remote repository. Oh yeah, it created the repository all on its own too.
On a different note all together, if you're like me and you're relying on a phone to tether your computer to the internet, then it's likely someone will call your phone when your in the process of pushing your code. And a huge push error will be displayed at the bottom. Not to worry, Android Studio has you, simply navigate to VCS -> Git -> Push project.

 In case you never checked any files on the commit files prompt, then an empty repository is created after which the next part would be to commit files, add a message and simply commit.
THE COMMIT DIALOG Just a minute before we actually commit, looking back at this dialog and I can't help but appreciate the effort put into Android Studio, see from the commit changes dialog, we can see all the unversioned files and easily check the ones we wish to commit and possibly snoop around looking surprised ;) See just below the commit message input box is the diff space. For those who do not know, diff is a "special command" in git that is used to compare files in two different "commit stages" to view how different the files are or were. Highlight one of the files to commit at the top of the commit dialog and you can see an amazing setup showing all the new additions to your code.
 Recall how doing
git add .
is lazy, smart and all the more wrong? Good cause Android Studio being a GUI based tool sort of enforces against this but also on the other hand makes it easy enough for you to check and view items visually helping you make sound decisions when making an upload. It may come as a shock, but I'm avoiding a lot of the extra features provided on the GUI cause I'm doing a comparison of sorts and if features were the thing, then Android Studio has by now already won. Heck it notifies you of your TODOS, enables you to update your copyright if any and does a whole lot more stuff.
Recall how doing
git add .
is lazy, smart and all the more wrong? Good cause Android Studio being a GUI based tool sort of enforces against this but also on the other hand makes it easy enough for you to check and view items visually helping you make sound decisions when making an upload. It may come as a shock, but I'm avoiding a lot of the extra features provided on the GUI cause I'm doing a comparison of sorts and if features were the thing, then Android Studio has by now already won. Heck it notifies you of your TODOS, enables you to update your copyright if any and does a whole lot more stuff.
 Here's another neat feature for you, code analysis Android Studio will check your code for errors and potential problems heck it literally just found 4 of them in my case, the most important being notifications to update my gradle dependencies on my test libraries since newer releases had been made. Heck of a feature to have I must say.

Now onto pushing our new changes to our branch and we only have to navigate to the VCS menu option then down to the Git option and then push. Remember to first commit your file changes. Before hitting push turns out we're given the chance to choose the branch of our choice and again we are done in almost no time with a push successful popup appearing on our screen. Browser VCS repository becomes my second best feature of all this. This is equivalent to what you'd do on a typical terminal appearing as git log --oneline at least that's what I prefer doing, but with Android Studio the log data is presented so neatly and informatively I might as well quit using the terminal right now. To show the logs navigate to VCS -> Browser VCS Repository -> Show Git Repository Log Next select the path to our current project

 More on what the VCS can do on Android Studio.
turns out you can easily commit the current file you're on by simply navigating to the commit file option under vcs -> git -> commit file and it commits the current file your on. Awesome thing this does, like we'd seen before is we still see the diff that's the changes made on our code compared to how your code looked like before the current commit we're about to make.
More on what the VCS can do on Android Studio.
turns out you can easily commit the current file you're on by simply navigating to the commit file option under vcs -> git -> commit file and it commits the current file your on. Awesome thing this does, like we'd seen before is we still see the diff that's the changes made on our code compared to how your code looked like before the current commit we're about to make.
Using Android Studio inbuilt git does take some learning to master, in this particular example I decided to explore around without a harness and see what the fancy VCS buttons really did. To this I needed a longer git log unto which I had to make a couple of changes to files here and there and my muse happened to be the manifest file, Tweaking the manifest file to add a permission and later going on to commit it and alas, I just can't find my manifest file in the drop down check menu on the commit changes dialog. In the diff box at the bottom, I ended up clicking the next file button until I landed on the manifest file and boy was I relieved. Made a commit and went back to Android Studio to try and add a new file now and see just how different it would appear with a new file.
 Side note when performing a commit Android Studio actually checks your TODOs and notifies you about them before finalizing that commit. A really neat feature, for those of you who are yet to use it, here's the jist, just like in other IDEs you can add TODOs in your code obviously commented out and AS starts to track them all. It'll also be highlighted in a bright yellow colour which lights up even if you're using a dark theme as I am. Later on when making a commit Android Studio makes a shout out to your TODOs to remind you that you might potentially have some unfinished business. TODOs are highly regarded in Android Studio and as such just to the bottom next to the logcat button, you can view all your todos in a bottom pane that scans all your files and retrieves all those todos hidden all over.
 To the left of the logcat button is the Version Control button click on it and a bottom panel appears.
Adding new files to a git supported project and you are now always asked to add files to git. Viewing the project commit history is even easier from the version control button at the bottom click on it to open up the bottom panel and navigate to log and bam, an amazing display of your git commit log files, NEAT!. turns out you can also make a commit rather easily from here, in the local changes tab to the right is a green check mark that is characteristic as being the commit button. It can also be found on the secondary menu right next to the name Git at the top.
To the left of the logcat button is the Version Control button click on it and a bottom panel appears.
Adding new files to a git supported project and you are now always asked to add files to git. Viewing the project commit history is even easier from the version control button at the bottom click on it to open up the bottom panel and navigate to log and bam, an amazing display of your git commit log files, NEAT!. turns out you can also make a commit rather easily from here, in the local changes tab to the right is a green check mark that is characteristic as being the commit button. It can also be found on the secondary menu right next to the name Git at the top.
 Then comes this..changelist..what the heck is a Changelist? To be honest this took me some time to getting around to as most answers sounded very vague. So a change list is just as simple as that...see how you'd do $git status on a terminal to view modified files from those staged and none staged yet to be committed, well this is just that. Make changes to your code and the changelist will showcase all the files that have changes made to them and typically these are the files you'd then commit. To the version control's bottom panel to the left menu you can commit, revert these changes, do a diff create, delete and edit changelists.
 Under the default changelist click on the dropdown arrow to view all files in your changelist. right click on any file to see all the various actions you can perform on the individual items. Note that you can move changes to another changelist by simply highlighting on a change right click and click on move to another changelist. This will prompt you to create a new changelist. Alternatively you can create a new changelist from the left side menu of the version control's bottom panel. After this simply click on a change on the default changelist and drag into the new changelist. You can go further on to make the changelist active and now AS will place changes to this changelist and this is primarily what will be committed. Note that having multiple changelists means that you can selectively commit different files separately.
 Under the VCS -> Git Menu you'll find most of the functions you'll ever need to use git and GitHub.
Bottom right of the AS right under the event log button to the left of the smiley icons is another amazing git feature..currently it should showcase the branch you are currently working on by default that would be the Master branch. Click on it and explore, from here you can rename branches, merge branches, create branches even go further to checkout to other branches, pretty neat if you ask me. Something I really like about this, it separates and categorizes your branches into local and remote branches.
Under the VCS -> Git Menu you'll find most of the functions you'll ever need to use git and GitHub.
Bottom right of the AS right under the event log button to the left of the smiley icons is another amazing git feature..currently it should showcase the branch you are currently working on by default that would be the Master branch. Click on it and explore, from here you can rename branches, merge branches, create branches even go further to checkout to other branches, pretty neat if you ask me. Something I really like about this, it separates and categorizes your branches into local and remote branches.

To add to all this magic, you can view pull requests both open and closed go even further to view the pr message and files changed. Though from testing this ;0 comments just won't show? maybe that can make it to be a feature request? just maybe. To view pull requests navigate to VCS -> Git ->View Pull Requests
 Rightclicking on one of the pull-requests and you are presented with multiple options one of them: open pull request on GitHub. Also note that you can view closed pull requests by editing the search box from state:open to state:closed. Remember to also refresh your list should changes be made to your pr.
from the same bottom right Git button you can easily switch back to the main branch after having merged the PR to the main branch. Switch back to master branch and do a pull request from the VCS->Git menu a pop up menu shows up with some fancy stuff and a few minutes later your local branch is all uptodate with the remote main branch.
Rightclicking on one of the pull-requests and you are presented with multiple options one of them: open pull request on GitHub. Also note that you can view closed pull requests by editing the search box from state:open to state:closed. Remember to also refresh your list should changes be made to your pr.
from the same bottom right Git button you can easily switch back to the main branch after having merged the PR to the main branch. Switch back to master branch and do a pull request from the VCS->Git menu a pop up menu shows up with some fancy stuff and a few minutes later your local branch is all uptodate with the remote main branch.
 A bottom sheet pops open and well placed is the updated folder and the created one showcasing the new entries made into our local repos main branch. Sweet.
 With that I believe you've weirdly gotten updated with Android Studio's Git thingy and can make a sound decision on whether to stick to the terminal. This is the part where, I sign off. See you next time as we get to tinker and learn something new.