Ansible
Ansible is an open-source automation tool, or platform, used for IT tasks such as configuration management, application deployment, intraservice orchestration, and provisioning. It delivers simple IT automation that ends repetitive tasks and frees up DevOps teams for more strategic work.
Ansible doesn't depend on agent software and, most importantly, no additional custom security infrastructure, so this makes it easy to deploy. The following implementations describe the work of Ansible in Hadoop Automation.
Hadoop
Apache Hadoop is a collection of open-source software utilities that facilitates using a network of many computers to solve problems involving massive amounts of data and computation. It provides a software framework for distributed storage and processing of big data using the MapReduce programming model.
For creating a Hadoop cluster, we need to do some configurations manually. But to save time and effort, Ansible can be used for automating the entire process.
This Article will be the step by step guide to configure the Hadoop cluster from Ansible.
Pre-requisites:
Ansible software
Java Development Kit (JDK 8) in the Controller
Hadoop (latest version) in the Controller
We have to start three Operating Systems, VMs in our case - One being the controller and the other two being the Master and Slave nodes for the Cluster. For automating the configuration, we will have to write two playbooks for master and slave node configuration respectively. Before writing the playbook, we have to edit the Ansible inventory as well as the Hosts file where we mention the IP addresses of the other Virtual Machines.
Step-1 Create a Host file where you can store all the IP of Data Node and Name Node
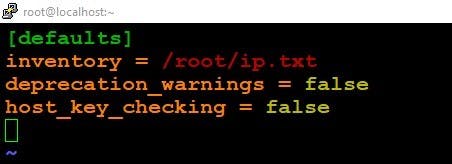
Step-2 Create an Inventory file
![10.jpg](cdn.hashnode.com/res/hashnode
Step-3 Create a Playbook
- Playbook for Configure NameNode
- name: namenode-setup using ansible
hosts: namenode
gather_facts: no
vars_prompt:
- name: namenode_dir
prompt: "Enter namenode directory name you want to create"
private: no
- name: namenode_ip
prompt: "Enter namenode ip eg 1.2.3.4"
private: no
- name: hadoop_port
prompt: "Enter hadoop port"
private: no
tasks:
- name: copying hadoop software
copy:
src: "/root/hadoop-1.2.1-1.x86_64.rpm"
dest: "/root"
- name: copying java software
copy:
src: "/root/jdk-8u171-linux-x64.rpm"
dest: "/root"
- name: installing java packages
shell: "rpm -i /root/jdk-8u171-linux-x64.rpm"
register: java_installed
- name: java success code
debug:
var: java_installed.stdout
- name: installing hadoop packages
shell: "rpm -i /root/hadoop-1.2.1-1.x86_64.rpm --force"
register: hadoop_installed
- name: hadoop success code
debug:
var: hadoop_installed.stderr_lines
- name: creating datanode directory
file:
path: "{{ namenode_dir }}"
state: directory
mode: "0777"
- name: copying hdfs-site
template:
src: "/root/hadoop_ansible/name-hdfs-site.xml"
dest: "/etc/hadoop/hdfs-site.xml"
- name: copying core-site file
template:
src: "/root/hadoop_ansible/name-core-site.xml"
dest: "/etc/hadoop/core-site.xml"
- name: formatting hadoop namenode directory
shell: "echo Y | hadoop namenode -format"
register: format
- name: format success
debug:
var: format.stderr_lines
- name: starting service
shell: "hadoop-daemon.sh start namenode"
- name: success code
shell: "jps"
register: success
- debug:
var: success.stdout_lines
- Playbook for DataNode
- name: configure Datanode using Ansible
hosts: data node
gather_facts: no
vars_prompt:
- name: datanode_dir
prompt: "Enter datanode directory name you want to create"
private: no
- name: namenode_ip
prompt: "Enter namenode ip eg 1.2.3.4"
private: no
- name: hadoop_port
prompt: "Enter hadoop port"
private: no
tasks:
- name: copying hadoop software
copy:
src: "/root/hadoop-1.2.1-1.x86_64.rpm"
dest: "/root"
- name: copying java software
copy:
src: "/root/jdk-8u171-linux-x64.rpm"
dest: "/root"
- name: installing java packages
shell: "rpm -i /root/jdk-8u171-linux-x64.rpm"
- name: installing hadoop packages
shell: "rpm -i /root/hadoop-1.2.1-1.x86_64.rpm --force"
- name: creating datanode directory
file:
path: "{{ datanode_dir }}"
state: directory
- name: copying hdfs-site file
template:
src: "/root/hadoop_ansible/hdfs-site.xml"
dest: "/etc/hadoop/hdfs-site.xml"
- name: copying core-site file
template:
src: "/root/hadoop_ansible/core-site.xml"
dest: "/etc/hadoop/core-site.xml"
- name: starting service
shell: "hadoop-daemon.sh start datanode"
- name: success code
shell: "jps"
register: success
- debug:
var: success.stdout_lines
- name: dfsadmin report
shell: "hadoop dfsadmin -report"
register: report
- debug:
var: report.stdout_lines
Step-4 Configure the hdfs-site and core-site file for Namenode and Datanode
- hdfs-site for NameNode
<?xml version="1.0"?>
<?xml-stylesheet type="text/xsl" href="configuration.xsl"?>
<!-- Put site-specific property overrides in this file. -->
<configuration>
<property>
<name>dfs.name.dir</name>
<value>{{ namenode_dir }}</value>
</property>
</configuration>
- hdfs-site for DataNode
<?xml version="1.0"?>
<?xml-stylesheet type="text/xsl" href="configuration.xsl"?>
<!-- Put site-specific property overrides in this file. -->
<configuration>
<property>
<name>dfs.data.dir</name>
<value>{{ datanode_dir }}</value>
</property>
</configuration>
- core-site for NameNode and DataNode
<?xml version="1.0"?>
<?xml-stylesheet type="text/xsl" href="configuration.xsl"?>
<!-- Put site-specific property overrides in this file. -->
<configuration>
<property>
<name>fs.default.name</name>
<value>hdfs://{{ namenode_ip }}:{{ hadoop_port }}</value>
</property>
</configuration>
Step-5 Run the Playbook
ansible-playbook namenode.yml
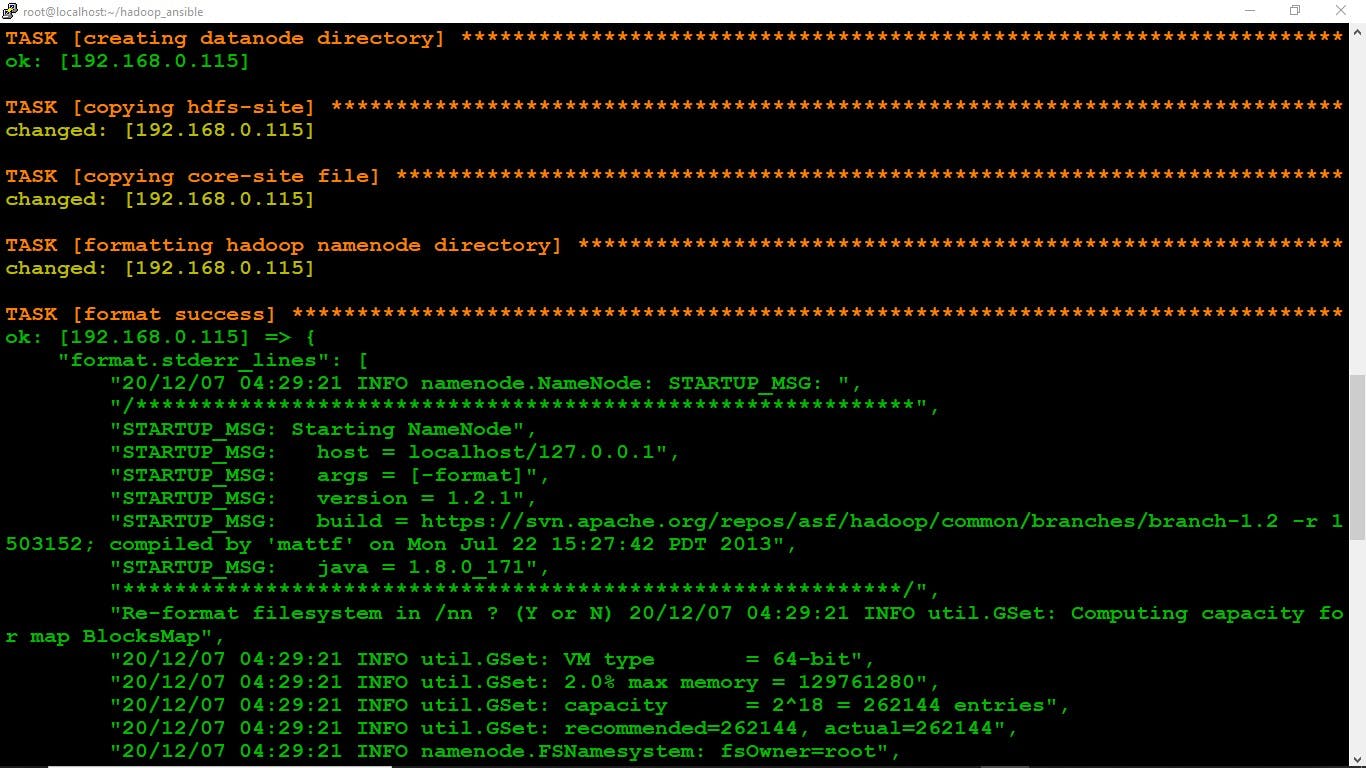
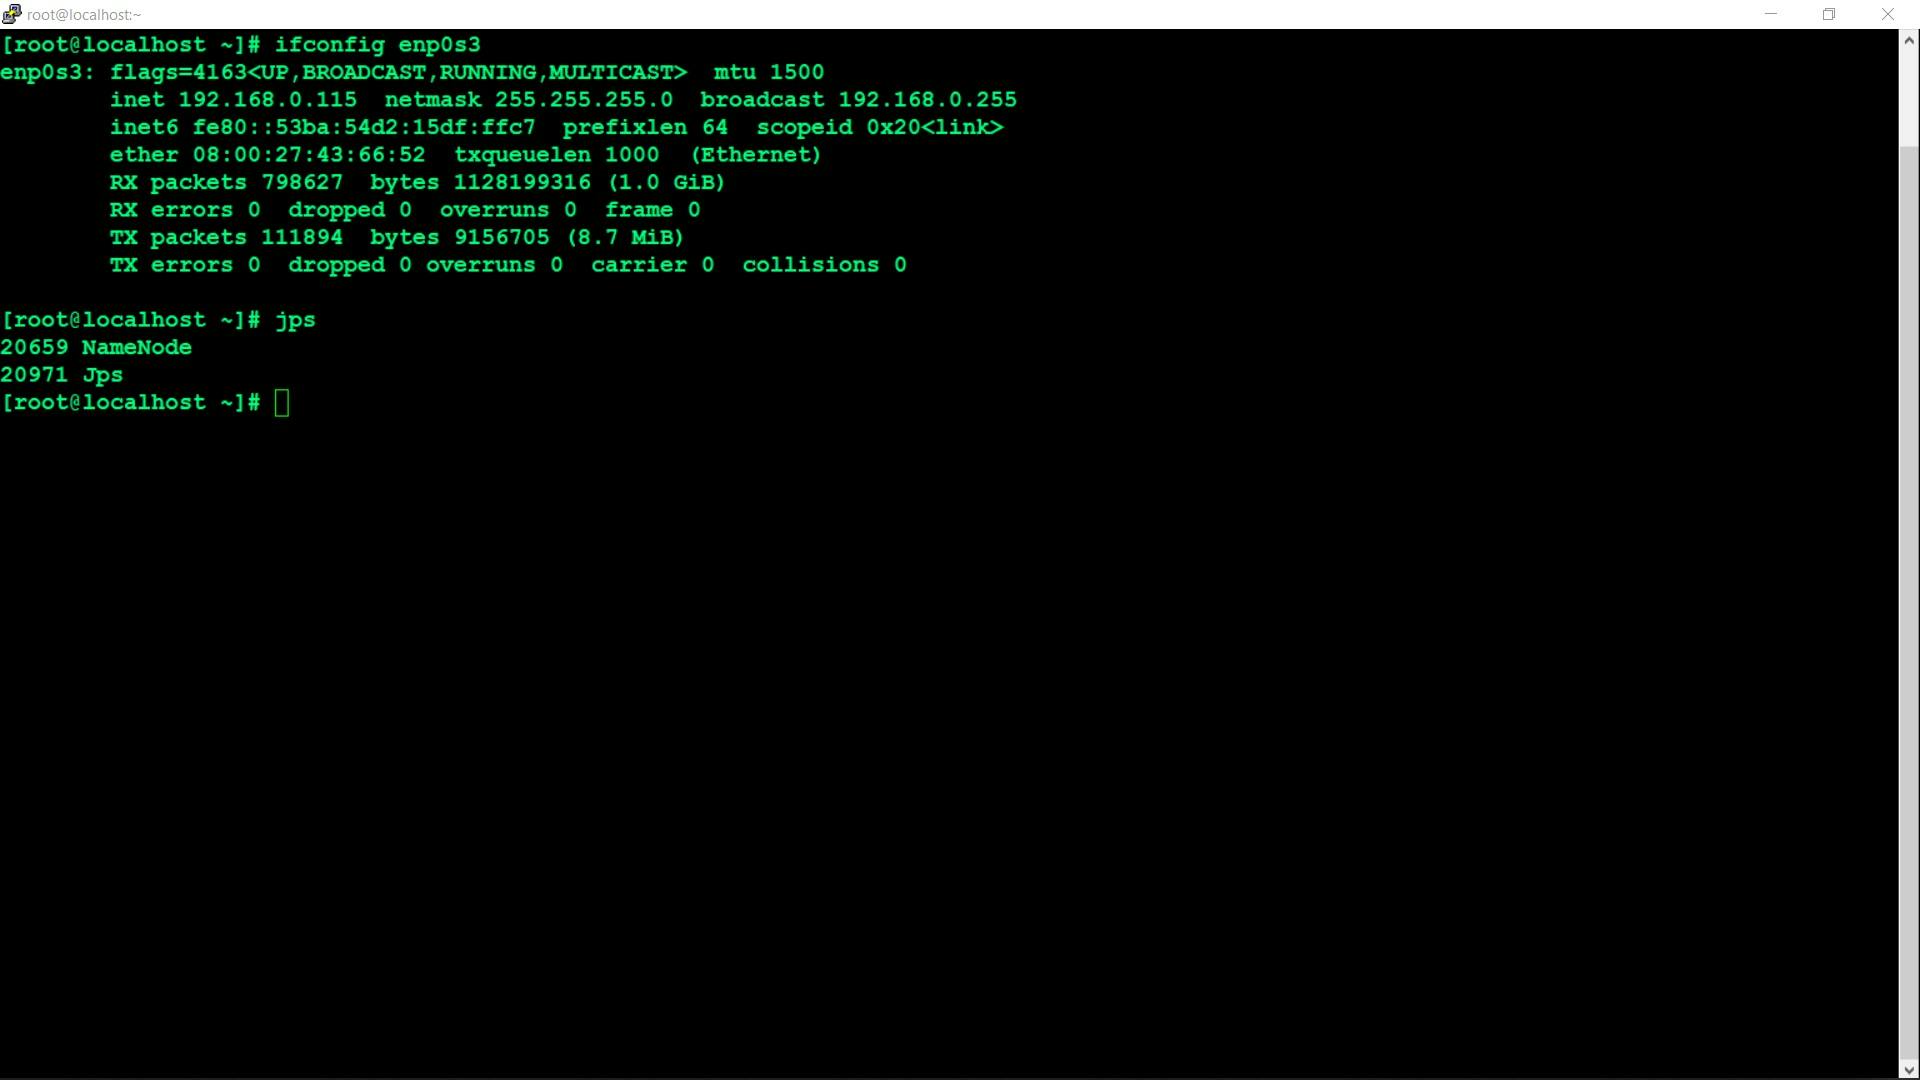
- The Namenode is successfully configured
ansible-playbook datanode.yml
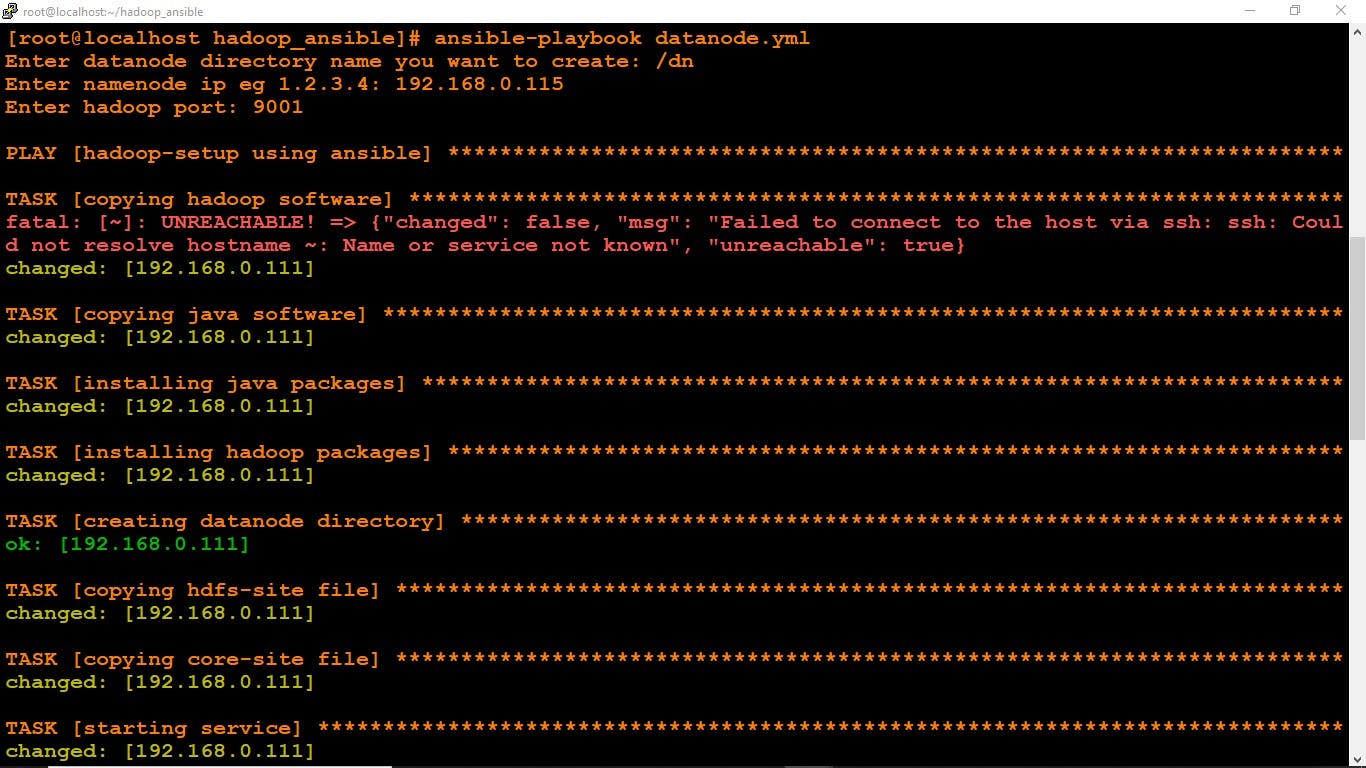
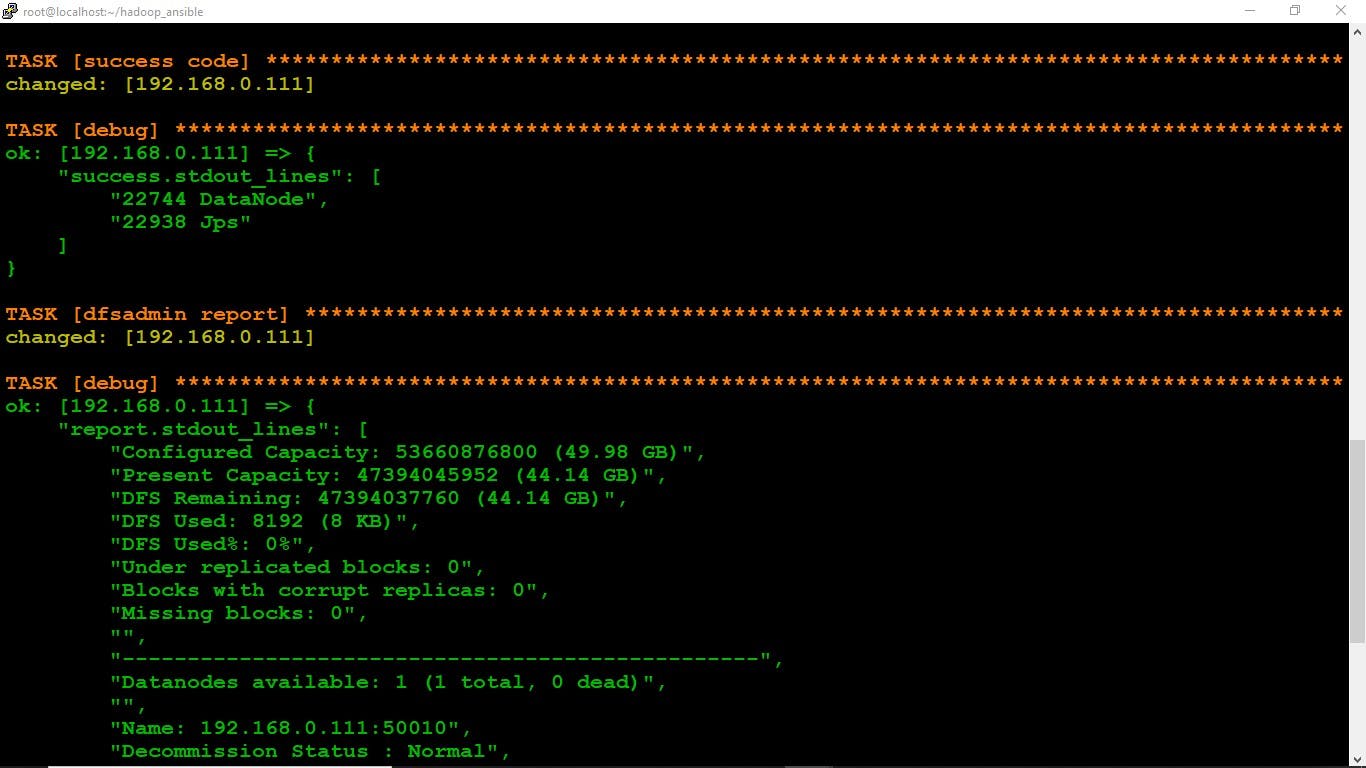
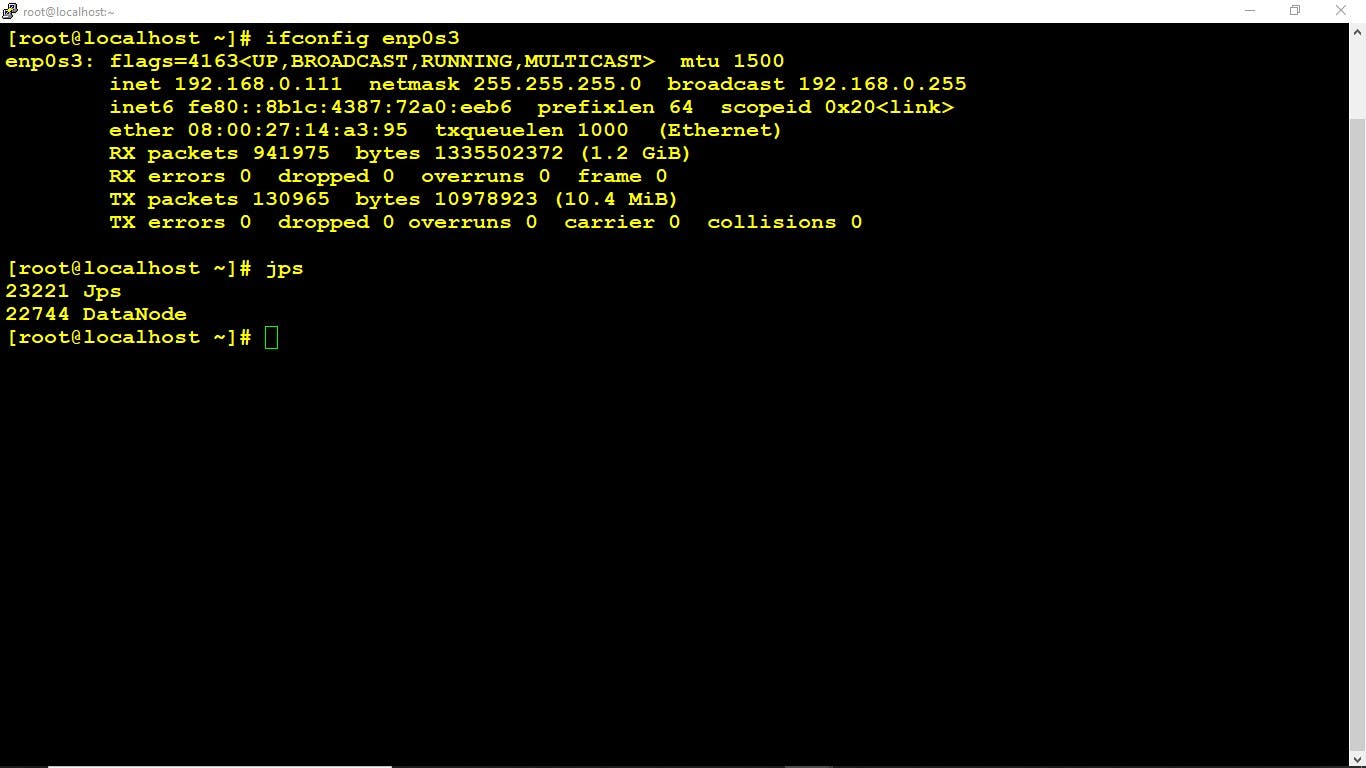
The Datanode is successfully configured
Conclusion:- The Hadoop is Configure automatically by Ansible, If you want to Configure Docker from Ansible then please refer to my Previous Article