
Build an iTunes Search App with SwiftUI and The Composable Architecture [Part 1]


Version: Swift 5, iOS 13, Xcode 11, The Composable Architecture 0.3.0
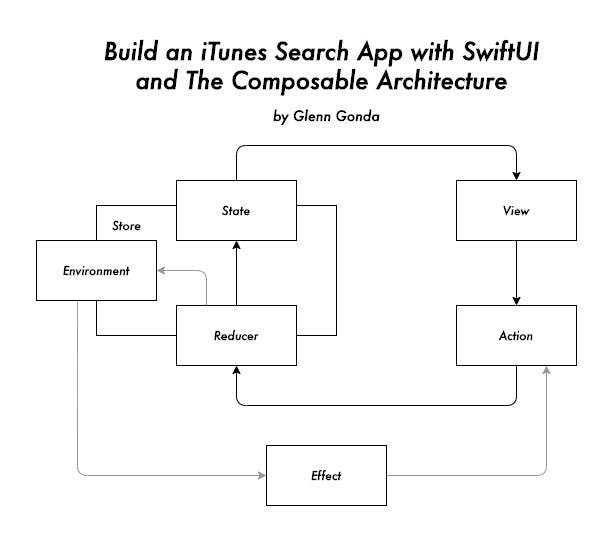
The Composable Architecture (TCA) by Point-Free is a Swift library for application state management that draws inspiration from libraries like Elm and Redux. It pairs very well with SwiftUI's declarative nature.
What We're Building
In this tutorial, we'll explore the concepts of TCA and use that them to build an application that will take in user input, call the iTunes API with that query, and return a list of artist results. We'll render that list and users will be able to click on an artist in that list to go to their Apple Music page inside of a custom web view.

The focus on this tutorial is to cover TCA, so we won't cover basic SwiftUI concepts here. There are already a lot of great resources cover SwiftUI including Apple's SwiftUI tutorial.
Getting Started with Swift Package Manager
Let's start off by creating a new Single View App SwiftUI project in Xcode.
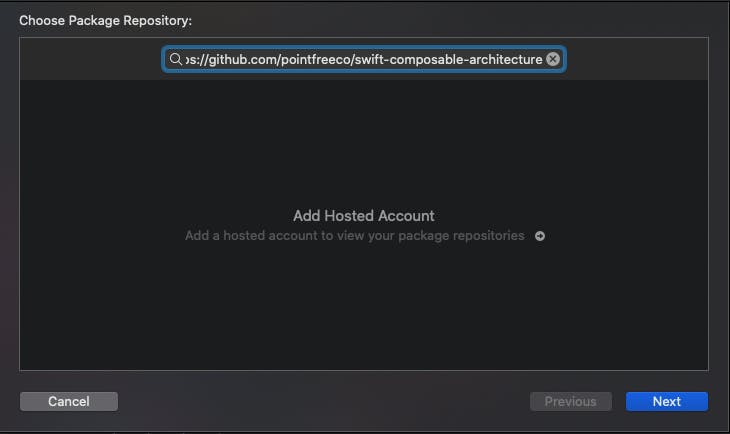
To add TCA as a Swift Package, go to File > Swift Packages > Add Package Dependency and paste in the GitHub url for TCA when prompted.
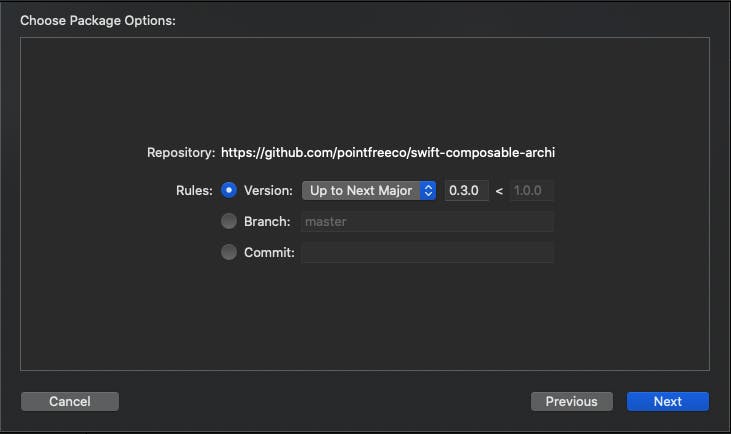
Select your preferred rules, or just press Next to lock in any package updates up until the next major release.
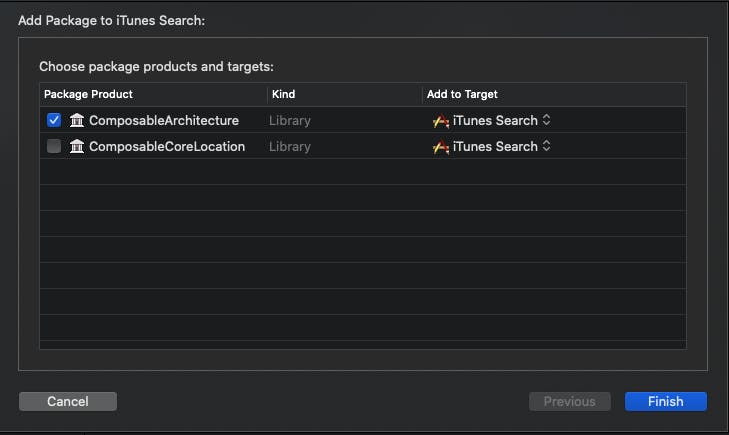
For this project, we'll only need TCA's core library. We won't be using Core Location.
Creating the Root State, Action, Environment, and Reducer
State
The root state holds the entire state of our application. It lives inside of the store and can be expressed as a tree structure. Any data that we want to observe should live as a property in state.
It's good practice to break down the root-level state into smaller pieces of state based on views, screens, or features.
Passing the entire application state to each view is an anti-pattern and goes against the principles of this architecture. We want to make sure that the components of this application don't have too much knowledge of what lives outside itself.
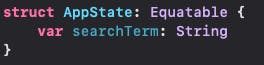
State in TCA is implemented as a struct. It must conform to Equatable so that TCA knows how to deduplicate state updates under the hood.
The first property we'll track in our state is our current search query. For now, it will live in the root state of the application, but we will eventually pull it out into one of our child states.
Action
An action describes an event that is going to happen inside of an application.
TCA enforces the concept of immutable state by requiring an action to be dispatched to a reducer in order to update state. State can't be written to directly by design.
It should be noted that all state changes need to be expressed with actions, but not all actions need to trigger state changes. Actions can also be used to trigger side effects including dispatching another action or making a network request.
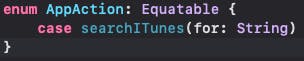
Similar to state, actions must conform to Equatable. We can optionally send an associated value with our action. This is necessary if the reducer needs that value in order to update state or pass along to an environment.
In this tutorial, our first action will describe how we're updating our iTunes artist search query.
Environment
An environment is an object that holds all of the dependencies needed to produce side effects in our application.
We will start with an empty environment for now, but we will eventually encapsulate the networking logic needed to talk to the iTunes API along with our main queue scheduler. The latter will ensure that we're receiving effect values on the main thread.

Reducer
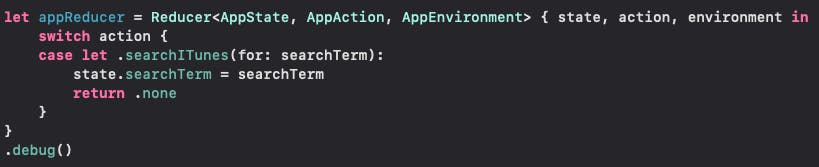
A reducer is a pure function that takes in state, actions, and an environment, changes state, and returns any effects to be executed by the store at a later time.
It contains the logic of how the current state should change to the next state and what effects should be executed by the store, if any.
We'll start with a single reducer, but It's good practice to split out a large reducer into smaller, composable reducers that work on local state. We'll cover how to split up reducers as our application grows.
Inside of our reducer, we'll be updating our state. Our reducer expects us to return an effect, but we can return .none for now to get our application compiling. We'll set up the effect to call the iTunes API later.

Initializing the Store
The store contains the state, reducer, and environment for a SwiftUI view. It receives actions that are sent by the view store in order to run the reducers and any effects.
It's good practice to initialize the entire global store at the root-level, but slice more local state into a child view using the scope method. We will cover this later, but essentially this helps us keep child views from knowing too much about what's happening outside of itself.
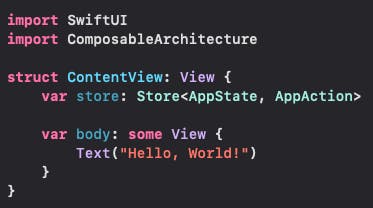
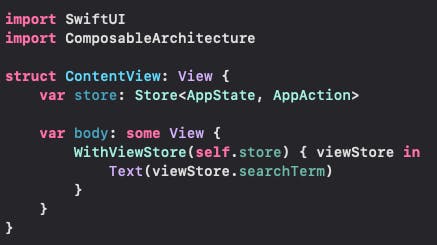
Let's navigate to our root view (by default it's ContentView) and pull in the TCA library by typing import ComposableArchitecture.
Above the view's body property, we'll add the store. It will be of type Store that is provided by TCA and be generic on our root level state and action.
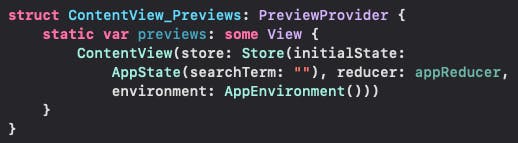
Now, we need to initialize our store along in our preview struct. We'll start with an empty string as our searchTerm.
In the SceneDelegate file, add import ComposableArchitecture at the top. Then look for where the contentView gets assigned. This is where we will initialize our store.

Now, our application will build and the entry point to our application is the ContentView.
All of the initial TCA boilerplate has been set up and we can start woking on our application logic.
Implementing the ViewStore
If any SwiftUI view needs access to the store in TCA, it must go through the viewStore - an object that observes state and sends actions.
It's used along with WithViewStore which is a custom SwiftUI view provided by TCA that takes in a store and returns a view.
Going through another object to get access to state and actions instead of just referencing the store inside of a view may seem unusual, but this was done to maximize performance.
When state changes inside of the store, the store will publish its changes to all views who are subscribed to it and SwiftUI will re-invoke the body inside of that view.
Even if the parent is just passing a property down to a child view, the parent will re-render if it's subscribed to that change. Unnecessary re-renders are bad for performance, and the view store allows us to avoid that by focusing on only the state we need to.
In the root view, let's wrap our Text view with WithViewStore. We can then replace the boilerplate content with the searchTerm we have in our AppState.
Now, if we change our searchTerm in the preview, we'll see our canvas update with the new state in real time.
Triggering State Changes with Actions
As previously mentioned, state in TCA is read-only by design. This means that we can't write directly to state, but we can express our intent to change state by dispatching an action. The reducer that handles that action then responds by transforming state.
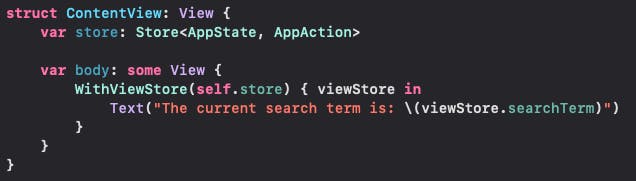
We won't need the Text view for our search feature, but we can keep it here for some visual debugging so we can track the state of our current searchTerm. We can add prepend the state with a string so we can see it on screen even if the state property is empty.
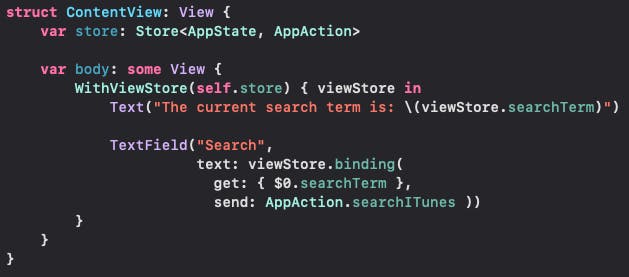
In order to get the user's text input for our search, we'll add a TextField view inside of our WithViewStore.
In a regular SwiftUI app, we'd update the state of the query with a two-way binding via the @Binding property wrapper, but with TCA we want to prevent direct writes to state. For this scenario, TCA has a helper on the view store called a binding.
Instead of a direct state write, we will only read state and declare an action to be sent through TCA when a state change should happen.
Run the app and we should see state updating in the Text and TextField views in real time.

Debugging the Reducer
We covered a way to use the Text view to visually debug our state changes, but this is not a scalable solution for tracking state changes in our application. There's a better way to track them in TCA without print-bombing and interrupting our application with breakpoints.
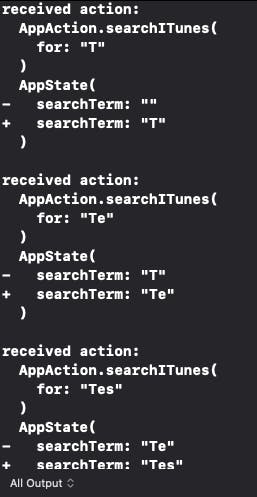
TCA ships with a debug method we can chain to our reducer. We just simply have to add .debug() to our reducer.
Now, when any state changes happen, we can look at our console and TCA will tell us when it's received an action and give us a diff of what state property has changed.
Up Next
We covered a lot of concepts in this post, but they're all essential to understanding the benefits of how well this architecture does its job.
One of the pain points I had when first learning Redux in the React.js ecosystem was how much boilerplate code I had to write before writing business logic for my application. I think that's a valid concern here for TCA, but, in my opinion, it's a small tradeoff for a huge benefit.
In the next post, we will set up the environment and API client so we can call the iTunes API with our search query. Then, we will set up a SwiftUI NavigationView and parse the response so we can render the list of artist results.