


Ensuring you are regularly backing your project database and assets up can be a dreadful task. At the same time it is a perfect task to automate. The following five minute tutorial provides you with all steps needed to back up your project to Backblaze's B2 storage. B2 is a service similar to the Amazon product AWS S3. The main difference is the price: B2 offers unlimited storage for a few dollars a month.
Requirements
As usual you will need a few things before getting started:
- An account with Backblaze or a credit card to register an account.
- A Laravel project with access to the code base as well as the environment configuration
Once you have these can get started with the seven steps below.
Steps
First step is to install the dependencies:
composer require spatie/laravel-backup bringyourownideas/laravel-backblazeand add the BackblazeServiceProvider to your "config/app.php" file:
\bringyourownideas\Backblaze\BackblazeServiceProvider::class,Publish the spatie default backup configuration:
php artisan vendor:publish --provider="Spatie\Backup\BackupServiceProvider"It pays to check the config/backup.php file for more detailed configuration of the backup.
Head over to Backblaze, log in and create a private bucket:
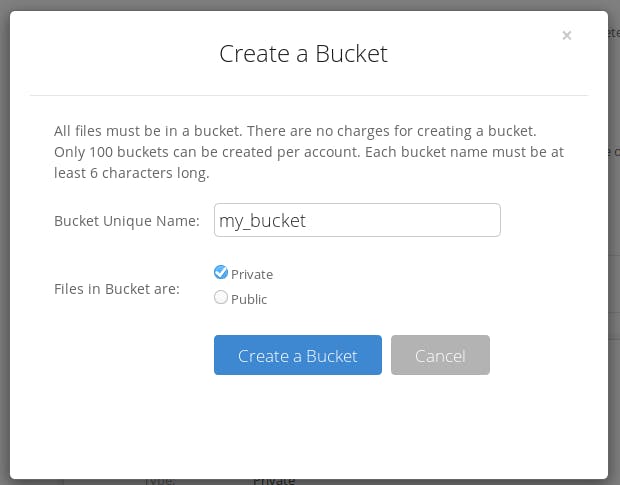
Please note: the bucket name needs to globally unique in the B2 systems. You might need to get a little creative to find one.
Get the Backblaze API keys:

and click the "Create New Master Application Key" button:

Add the bucket name as well as account id and application key to your .env file:
# B2 Bucket configuration for backups
B2_BUCKET='my_backups'
B2_ACCOUNTID='abcdefghijk'
B2_APPLICATIONKEY='1234abcd1234abcd1234abcd1234abcd'
Add the filesystem to the "config/filesystem.php":
'b2' => [
    'driver'         => 'b2',
    'bucketName'     => env('B2_BUCKET'),
    'accountId'      => env('B2_ACCOUNTID'),
    'applicationKey' => env('B2_APPLICATIONKEY'),
],
Make sure to also set your "cloud"-key to be "b2":
'cloud' => 'b2',This ensures that your default cloud file-system will be the b2 one.
Define your schedule in the "app/Console/Kernel.php" file:
     /**
      * Define the application's command schedule.
      *
      * @param \Illuminate\Console\Scheduling\Schedule $schedule
      * @return void
      */
     protected function schedule(Schedule $schedule)
     {
         $schedule->command('backup:clean')->daily()->at('02:00');
         $schedule->command('backup:run')->daily()->at('02:30');
     }
If you are running a number of applications it is recommended to offset the times to avoid high load on the server.
That's it.
Congratulations, now your project should be configured to be backups every night at 2:30 am.
You can test the backups by running this command:
php artisan backup:run
After the backup you should be able list all backups:
php artisan backup:list
If you are testing this locally you will need to configure your local environment similar to the production environment of course.
You might also be interested in Using Laravel Forge to host SilverStripe 4.
Acknowledgements
Special thanks to Paul Olthof, who has written the first version of the adapter. We have fixed some issues to ensure it's working correctly. If there are any questions please reach out via this contact form.
Photo by Patrick Lindenberg on Unsplash.