Post hidden from Hashnode
Posts can be hidden from Hashnode network for various reasons. Contact the moderators for more details.
How to Create and Publish API Documentation on Postman


Often times beginners have always asked the question
how can I publish an API on Postman?
Today I will be writing about a quick guide to help you through this process. But, first I will like to talk a little about Postman.
Postman is an application for testing and documenting your API endpoints.
In postman, you can group your requests or endpoints into something called a COLLECTION to help keep your workspace organized, collaborate with teammates, generate API documentation, and automate request runs (i.e you don't have to always write requests each time you want to run them or return a response).
As a backend developer, when you create an API or an endpoint, you most likely won't be the one to consume or use it. Your endpoint(s) is most likely to be used by other developers thus there is a need to create documentation for the endpoints you have created. After creating a collection and testing that your endpoints work, you then have to PUBLISH that collection. This makes the collection accessible to other people via a URL. This URL holds your written documentation. It usually starts with documenter.postman...
Now, let's proceed to why we are here. Below are certain things you need to do
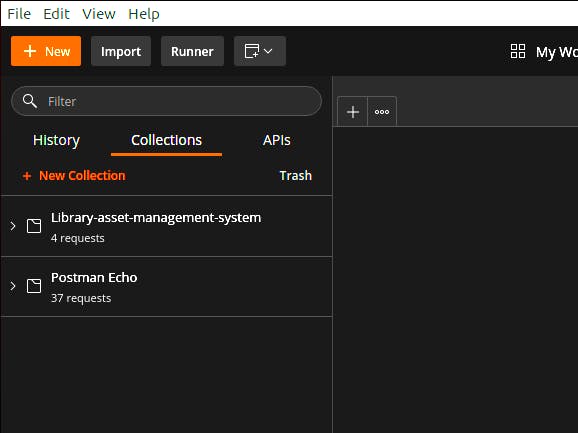
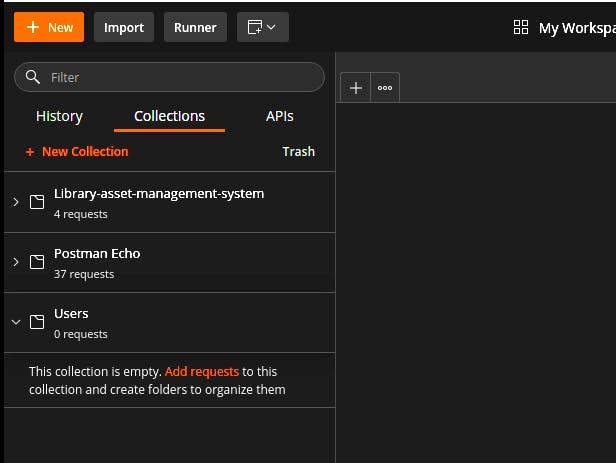
1. Create a Collection
- Click on the Collections tab
- Click the + New Collection
- Enter the Name of the collection E.g Users
- You can write a short description of the collection (optional)
- You can as well add things like authorization by clicking on the Authorization tab
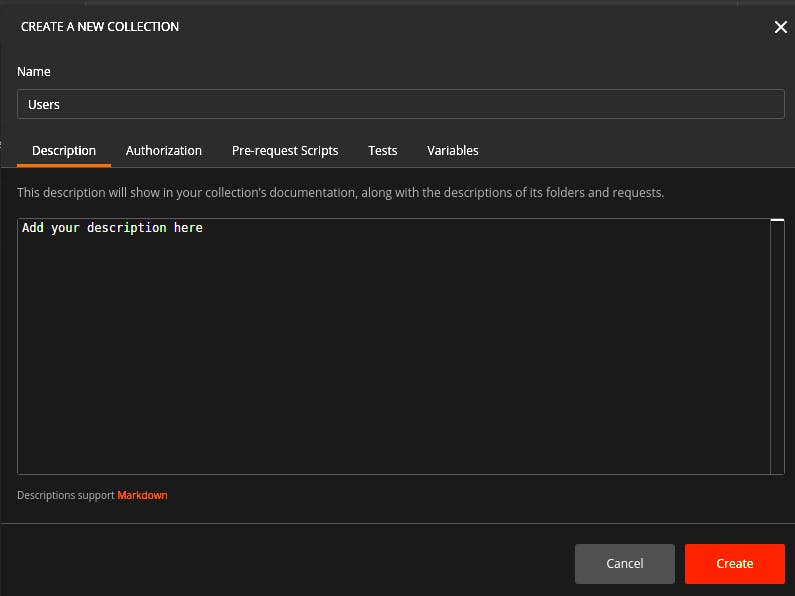
- Click the Create button
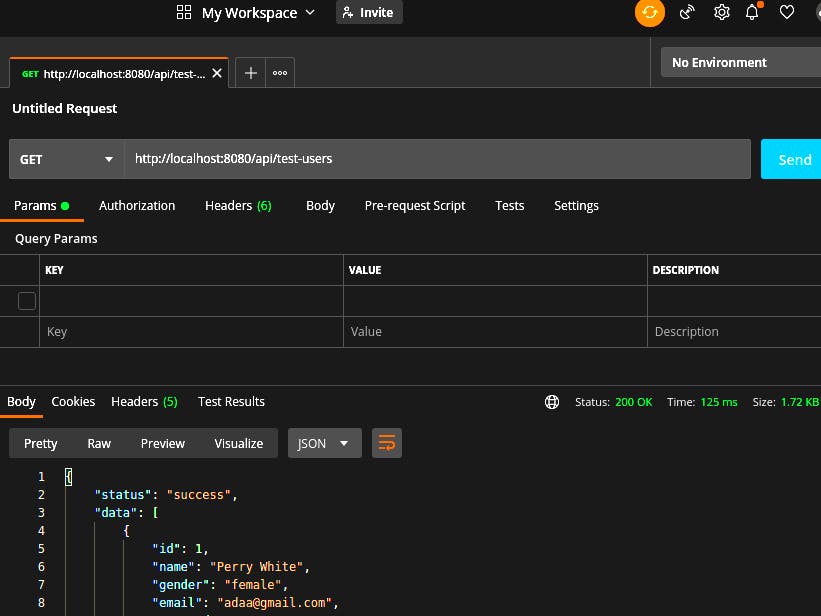
2. Create an Endpoint and Save it Into the Collection You Have Created.
- Create an endpoint. E.g. localhost:8080/api/test-users
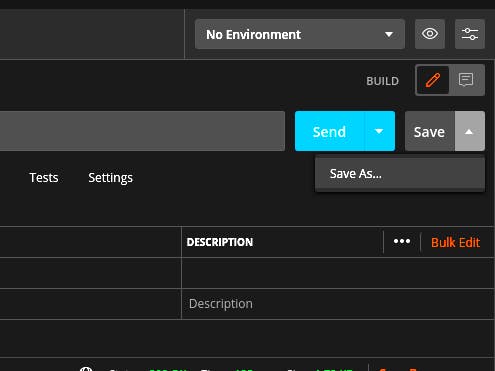
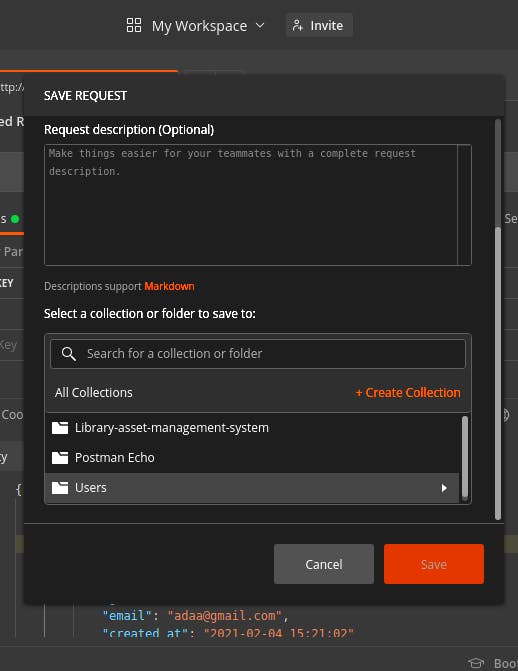
- Click on the Save dropdown button
- Click on Save As
- You can rename the Endpoint if you want to. E.g. Get Users
- Adding of Request Description is optional
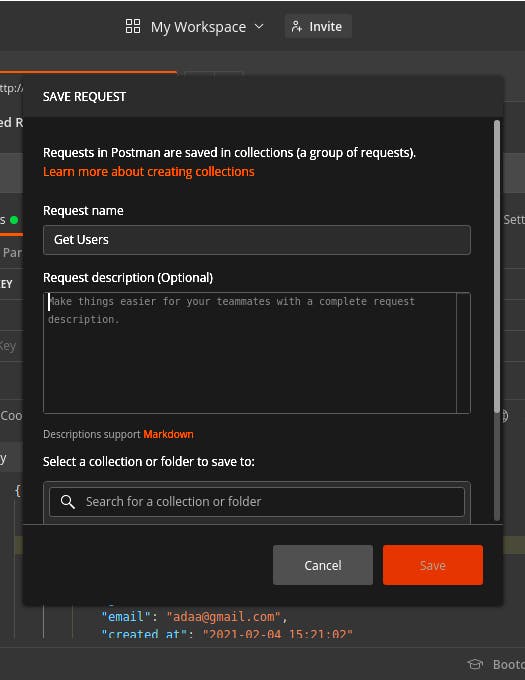
- Scroll down, select the collection you want to save the endpoint into
- Click on the Save button
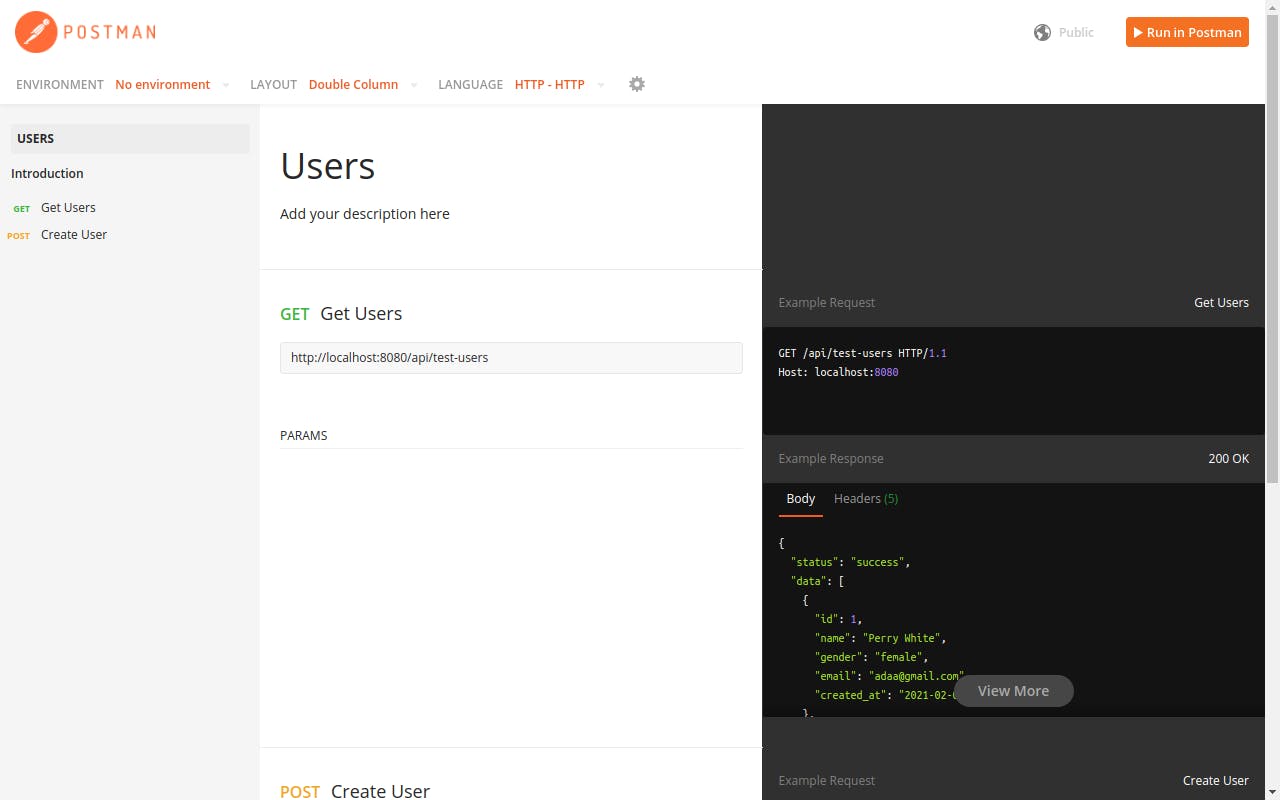
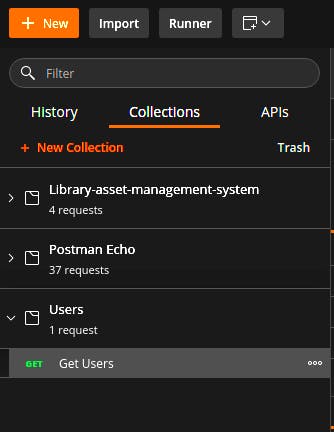
- You should be able to see the saved endpoint inside the collection as seen below
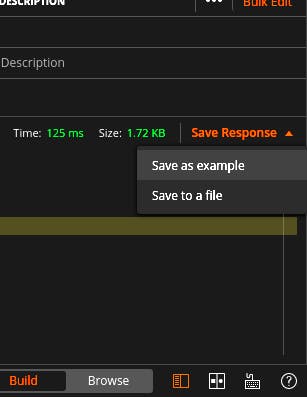
- Let’s save the Response we got after making the GET request
- Click on Save Response dropdown
- Click on Save as example
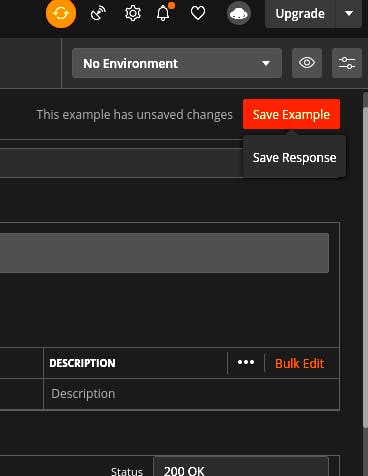
- Finally, click on the Save Example button
- Repeat step 2 for all other requests or endpoints
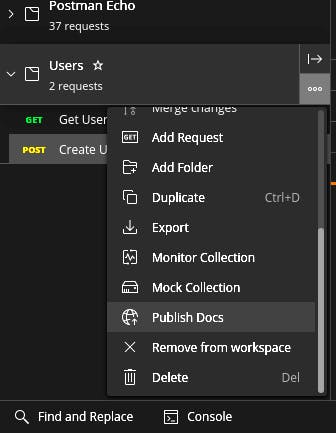
3. Publish the Collection
- Click on the icon on the collection that you created
- Click on Publish Docs. This will open a page on your browser
- You can choose to change the default color provided by the postman
- Scroll down to the button on the page
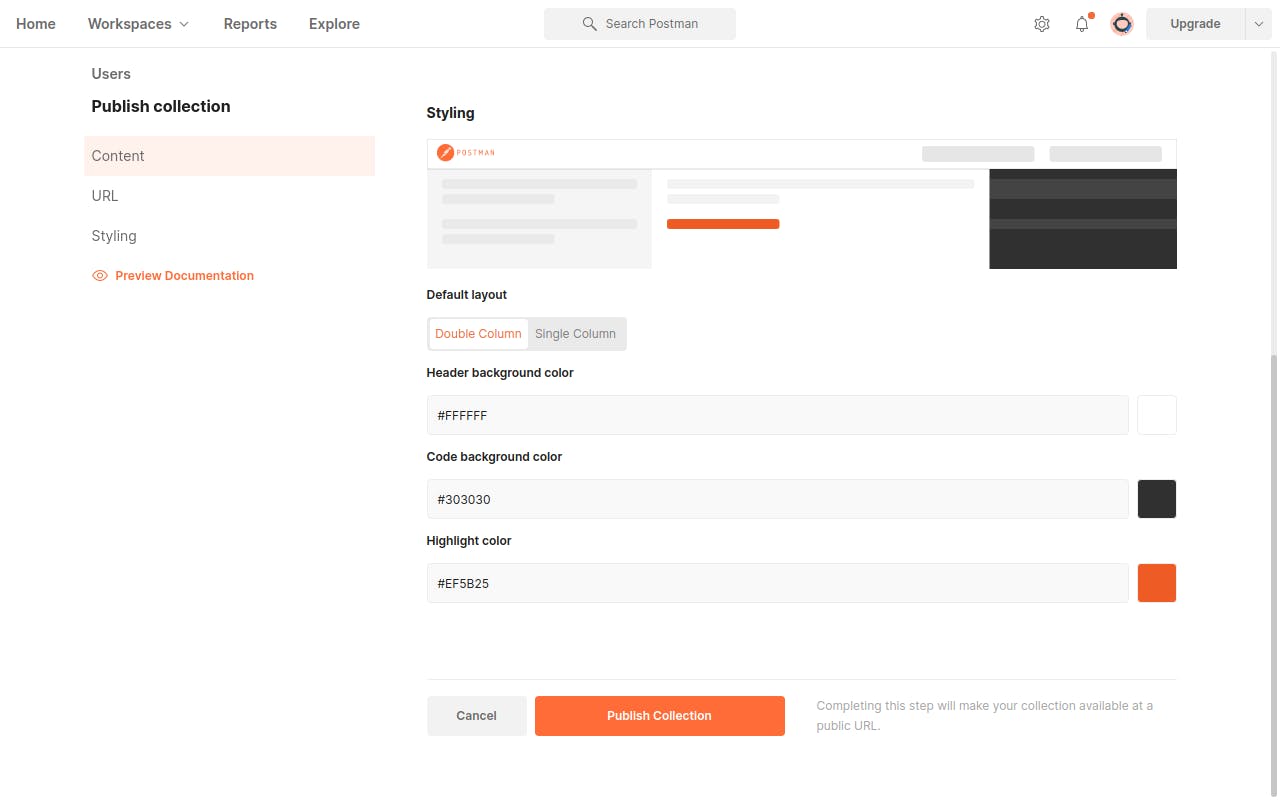
- Click on the Publish Collection button
- You will be redirected to a page where you can see the URL generated for the API documentation
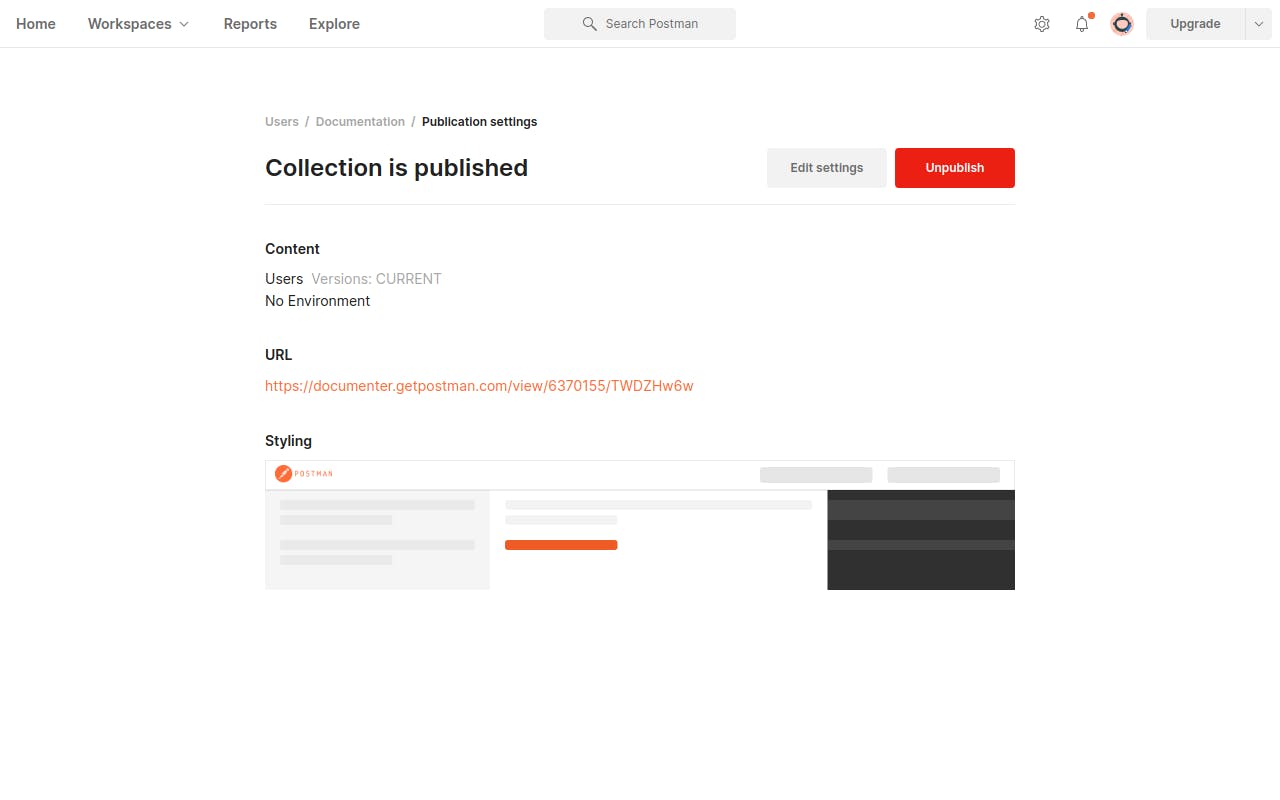
- Here is the URL it generated for me