


Your company has settled on Plivo to handle its voice and messaging communications, and now it’s your job to start integrating Plivo into your company’s applications. Don’t worry — Plivo has an SDK to help you out. Let’s see how to send and receive MMS through Plivo in a Node.js application.
Install the Plivo SDK and Express.js Framework
We’ll presume you already have your Node.js environment set up. Change to the directory into which you want to install the Plivo Node.js SDK and run
$ npm i -S plivo express body-parser
Find your Auth ID and Auth Token
You have to have proper credentials before you can use the Plivo API. We provide an Auth ID and Auth Token in the Account section at the top of the overview page of the Plivo console.

Choose a phone number
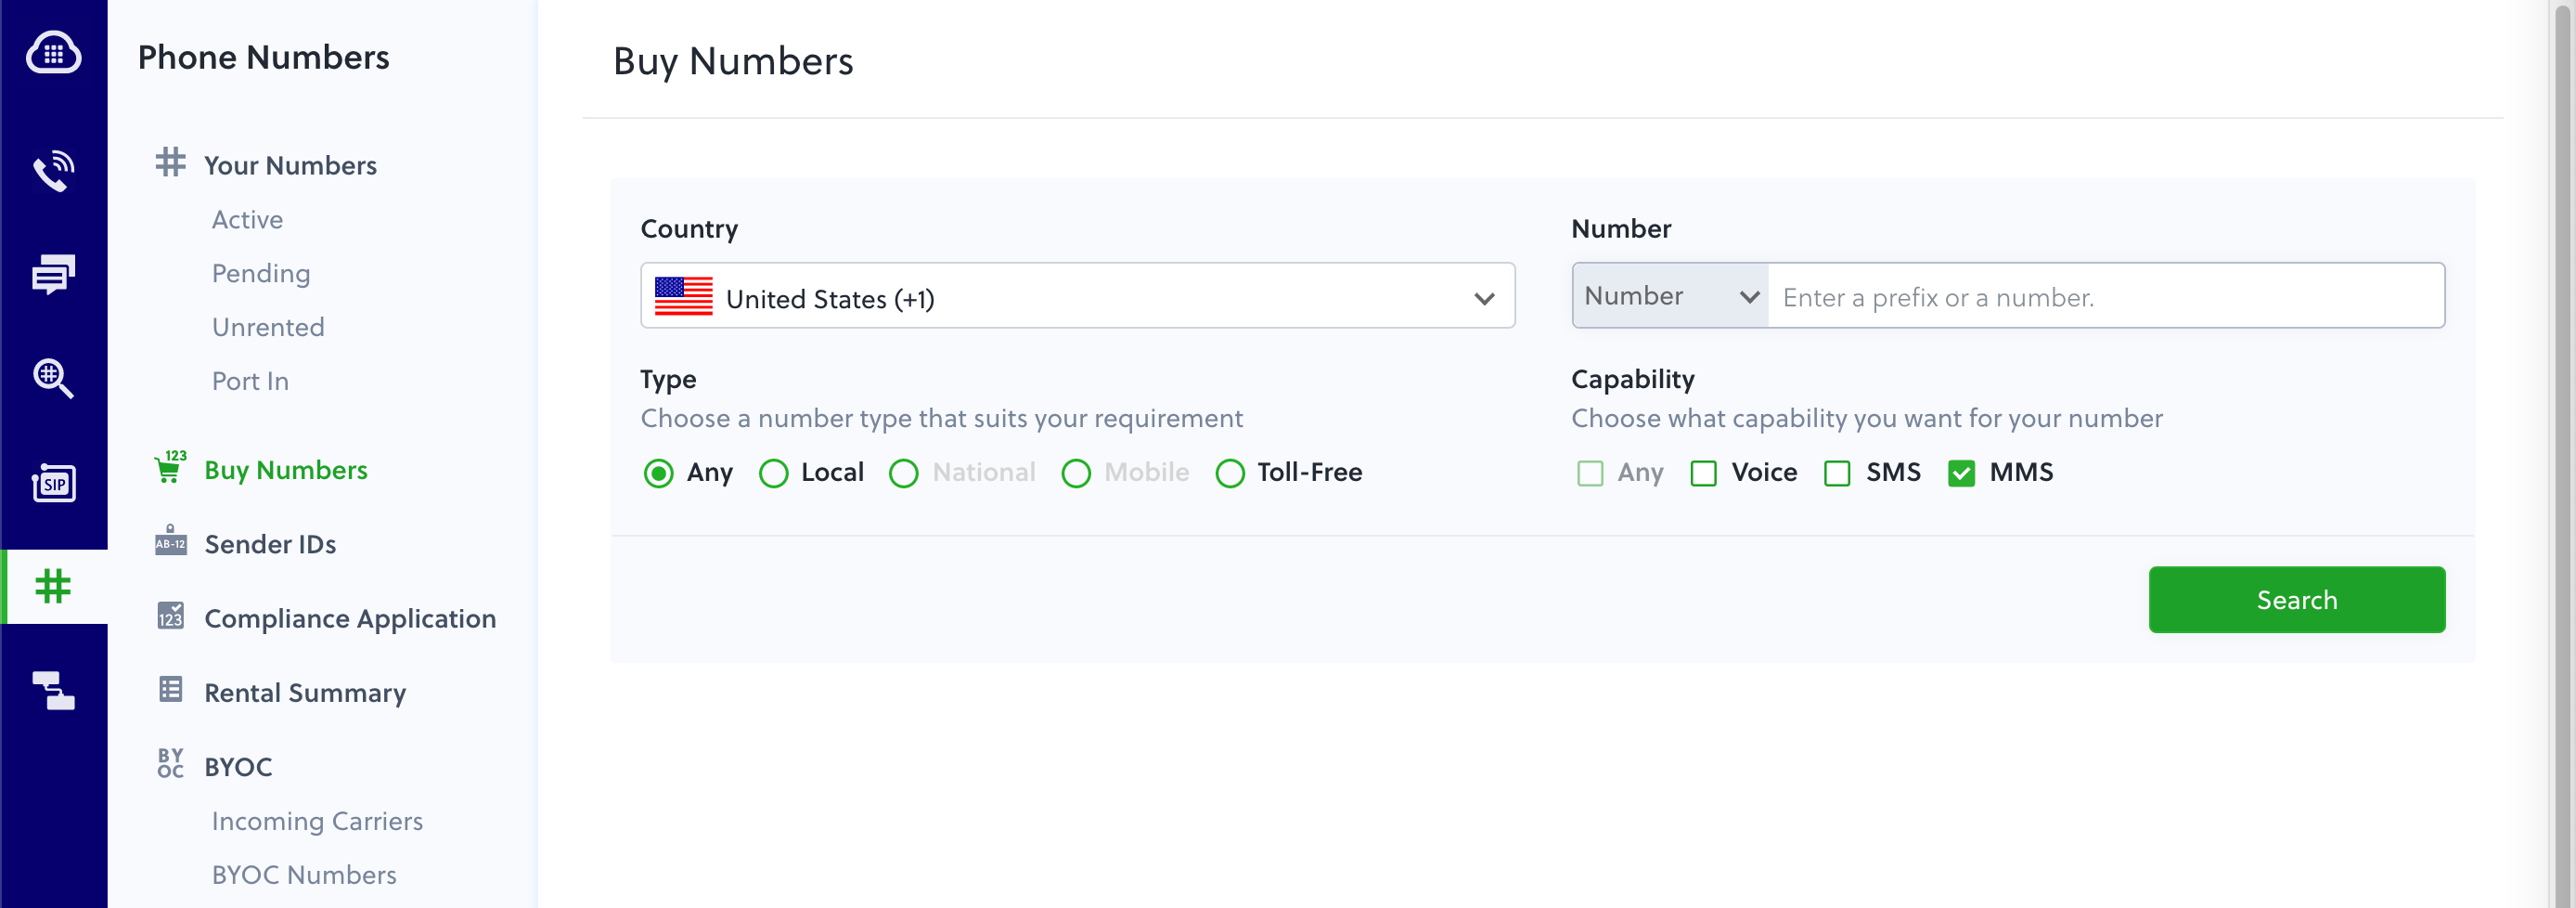
You need an MMS-enabled Plivo phone number to send MMS to the US and Canada, the two countries where Plivo supports sending MMS. Check the Phone Numbers screen of your Plivo console to see what numbers you have available and which of them support MMS capabilities. You can also buy numbers from this screen.
Send an MMS message
Now you’re ready to start. Create a file called SendMMS.js and paste in this code:
let plivo = require('plivo');
let client = new plivo.Client('<auth_id>', '<auth_token>');
client.messages.create({
    src: "+14151234567", //from
    dst: "+14157654321", // to
    text: "Hello, from Nodejs", // text
    type: "mms",
    media_urls: ["https://media.giphy.com/media/26gscSULUcfKU7dHq/source.gif"],
    media_ids: ["801c2056-33ab-499c-80ef-58b574a462a2"]
}).then(function(message_created) {
    console.log(message_created)
}).catch(function(error) {
    console.log(error);
});
Replace the placeholders auth_id and auth_token with actual values from the Plivo console. Save the file and run it with the command
$ node SendMMS.js
Note: If you’re using a Plivo trial account, you can send messages only to phone numbers that have been verified with Plivo. You can verify a phone number using the Sandbox Numbers page of the console. Also, if you want to upload your media files to Plivo and use them, you can upload the file on the Messaging > MMS Media Upload page of the console.
Receive an MMS message
Of course, sending messages is only half of the equation. When someone sends an MMS message to your US or Canada Plivo phone number, you can receive it on your server by setting a Message URL in your Plivo application. Plivo will send the message along with other parameters, including the Media_URL(s), to your Message URL.
Use this code to start a local server:
const express = require('express');
const bodyParser = require('body-parser');
const app = express();

app.use(bodyParser.urlencoded({
    extended: true
}));
app.use(function (req, response, next) {
    response.contentType('application/xml');
    next();
});
app.set('port', (process.env.PORT || 3000));
app.all('/receive_mms/', function (request, response) {
    let from_number = request.body.From || request.query.From;
    let to_number = request.body.To || request.query.To;
    let text = request.body.Text || request.query.Text;
    let media_url = request.body.Media0 || request.query.Media0;
    console.log('Message received - From: ' + from_number + ', To: ' + to_number + ', Text: ' + text+ ', Media: ' + media_url);
});
app.listen(app.get('port'), function () {
    console.log('Node app is running on port', app.get('port'));
});
Save this code in any file — we’ll call ours receive_mms.js. To run this file on the server, go to the folder where this file resides and issue the command
$ node receive_mms.js
You should see your basic server app in action on localhost:3000/receive_mms.
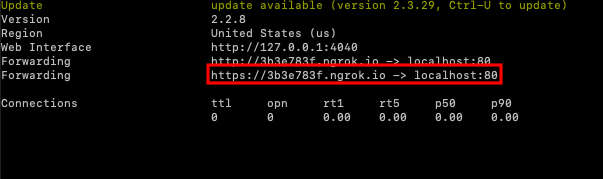
That’s fine for testing, but it’s not much good if you can’t connect to the internet to receive incoming messages and handle callbacks. For that, we recommend using ngrok, which exposes local servers behind NATs and firewalls to the public internet over secure tunnels. Install it and run ngrok on the command line, specifying the port that hosts the application on which you want to receive messages:
$ ./ngrok http [portnum]
Ngrok will display a forwarding link that you can use as a webhook to access your local server using the public network.
Now you can create an application to receive MMS messages (follow our Quickstart guide for details).
Conclusion
And that’s all there is to sending and receiving MMS messages using Plivo’s Node.js SDK. Don’t use Node.js? Don’t worry — we have SDKs for Java, Python, PHP, Ruby, .NET Core, .NET Framework, and Go.
Haven’t tried Plivo yet? Getting started is easy and only takes five minutes. Sign up today.